
For the longest time resin 3D printers have either been too expensive or have cut corners in a way where 3D printing miniatures on them was not the best experience. This has completely changed in the last year, where 4k entry-level machines have become the norm. The Mars 3 has been my go-to recommendation for our best beginner 3D printer for miniatures, but that was mainly down to have aggressively it was priced.
Now Anycubic is here with an answer in the form of their Anycubic Photon Mono 2, and upgrade on their fan-favorite Photono Mono 4k.
This is my Anycubic Photon Mono 2 Review. First I will give you a quick overview of the machine, followed by a section for each relevant feature.
Later I will go through how it was to set up, calibrate and print miniatures on the Photono Mono 2
In the end, I will look at some alternatives to the Anycubic Photon Mono 2 and see how it compares as well as give you a list of other products you need if you intend to buy a resin 3D printer for miniatures.
Anycubic Photon Mono 2 at a Glance
| Spec | Detail |
|---|---|
| Typ | MSLA resin 3D printer |
| Screen | 6.6″ monochrome LCD — 4096 × 2560 (4K) |
| XY Resolution | 34 µm (732 PPI) |
| Build Volume | 143 × 89 × 165 mm (LWH) |
| Plate Capacity | Comfortably 10–13 supported 32 mm miniatures per print |
| Released | Mid 2023 — current generation entry-level printer |
| Best for | First-time resin printers and hobbyists testing the waters |
| Preis | ~$200 — Check current price → |
Anycubic Photon Mono 2: Pros and Cons
| ✓ Pros | ✗ Cons |
|---|---|
|
|
Bottom line: The Anycubic Photon Mono 2 is the printer to recommend if you are new to resin 3D printing and want to try the hobby without risking much money. For around $200 you get genuine 4K detail, decent build volume, and prints that rival store-bought miniatures. If you already own a Photon Mono 4K (or any modern resin printer), there is little reason to upgrade. Full review and test prints below.
Offenlegung von Rezensionsexemplaren
Anycubic sent me this printer for review. I have agreed to review this printer, but I have promised Anycubic nothing more than that. No money has changed hands and Anycubic does not get to approve this article before it is published.
Hier können Sie mehr über unsere Richtlinien für Rezensionsexemplare lesen (TLDR: Ich nehme diese Dinge sehr ernst)

Offenlegung von Partnerlinks
Age of Miniatures ist leserunterstützt. Wenn Sie über Links auf unserer Website einkaufen, erhalten wir möglicherweise eine Partnerprovision. Mehr darüber erfahren Sie hier.
Worauf Sie bei einem guten 3D-Drucker für Miniaturen achten sollten
Druckqualität
Die Qualität der Miniatur, die Sie drucken, ist sehr wichtig. Die Auflösung ist zwar wichtig (2k, 4k und 8k), aber noch wichtiger sind die Pixel pro Zoll (PPI) und die Größe der einzelnen Pixel (XY-Auflösung).
Lebensdauer und Qualität der Komponenten
Die Qualität der Komponenten ist sehr wichtig. Sie sorgt dafür, dass Sie weniger fehlerhafte Drucke haben, seltener Verbrauchsmaterialien austauschen müssen und weniger Anrufe beim Support und RMA-Fälle haben.
Geschwindigkeit des Druckers
Geschwindigkeit ist zwar nicht alles, aber es ist schön, wenn man Funktionen und einen Rahmen hat, die dafür sorgen, dass man schneller drucken kann.
Zusätzliche Merkmale
Zusätzliche Funktionen bzw. deren Fehlen können entscheidend dafür sein, wie sich der 3D-Drucker anfühlt und funktioniert. Im Moment konkurrieren Harzdrucker vor allem bei den Rohdaten und sind sehr ähnlich, aber das macht die Spezialdrucker nur noch interessanter.
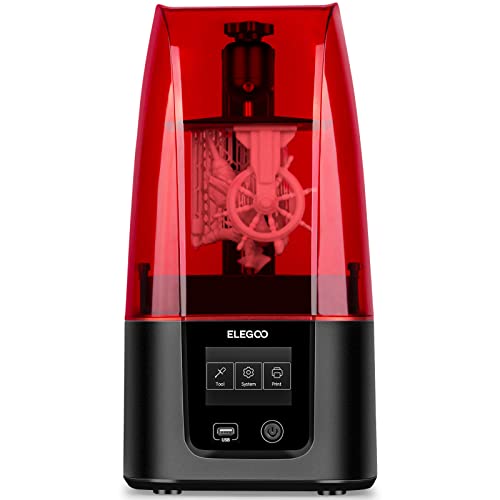
A quick overview of the Anycubic Photon Mono 2
The Photon Mono 2 is Anycubic’s latest attempt at making the best Beginner Resin 3D printer. It has a very standard size and what is now considered a standard resolution of 4096 x 2560 on a 6.6 screen. This gives you a PPI of 732 and an XY resolution of 34 microns. The XY resolution of 34 will be plenty to print miniatures at a quality comparable to what you can buy in a store. While an 8k printer with the same screen size (like the Phrozen Mini 8k S with an XY resolution of 22 microns) would net you a bit more detail, it is unlikely that you will be able to spot the difference (and you might not even be using the resin or the fine-tuned settings for it to actually matter at all).
The build volume is “20% larger” than the last Photon Mono, which really does not mean much. If you own a Photon Mono 4k, there will be very little reason to upgrade. The volume of the Photon mono 2 is 165 x 89 x 143, which is on par with competitors.
There is really nothing flashy or fancy going on here. It is a very standard resin 3D printer, much like all of the printers the manufacturers are currently spewing it. But if this is your first foray into resin 3D printing, it will create stunning miniatures and will be very easy to setup, use and print on.
What makes this printer exciting is the price tag combined with the bare-bones feature set. This little fella is currently selling for $200 directly from Anycubic, making it comparable in price with the standard Elegoo Mars 3. I reviewed the Mars 3 series and have held that it has been the Best Entry Level 3D printer for miniatures. Let us see if the Anycubic Photon Mono 2 can do anything about that.
This printer review is based on using the Photon Mono 2 for about 3 weeks of printing. I am not new to resin3D printing, but realize that people looking for an entry-level 3D printer are very likely to know very little.
So in this review I will mainly look at this printer from the perspective of a 3D printing beginner, without other 3D printers or much prior knowledge about the field.

My quick take on the Anycubic Photon Mono 2 is this:
There is a ton of competition and a lot of printers that are very similar in size and specs to Anycubic Photon Mono 2. For entry-level 3D printers I have earlier recommended the Mars 3 (no-pro), because of its combination of specs and affordable price. The Photon 2 feels very similar to the Mars 3 (non pro), so a lot of what I like about that machine will count for the Photon 2 as well.
Anycubic Photon 2 and the Elegoo Mars 3 have the same resolution, the same PPI, and almost identical built space (Mars 3 is slightly taller). The price is basically the same right now (you can get them for around $200 at the manufacturer’s website).
So does the Photon 2 have an edge on the Mars 3?
The Photon 2 comes with a screen protector (albeit a weird one) and the Mars 3 does not (Mars 3 Pro has a built-in screen protector via tempered glass).
The Photon 2 has a USB port on the side and a power button on the back. Both design mistakes that Mars 3 does not make, which have the USB and power button on the front. The Photon 2’s cover is bendy in a weird way (and I swear it seems to be letting some UV light through at times).
The Mars 3 has some issues with the way the bed plate locks in place. This means minor issues with leveling (which can be major issues for new people entering 3D printing).
If you came in a situation where you had to deal with customer support, the Mars 3 would likely be better. While neither have a reputation for stellar customer support, Elegoo takes the edge here. I have only had pleasant experiences with both costumer support, but have heard the worst stories about Anycubic. You can take a look at trustpilot for Anycubic und Elegoo (as well as other places) to compare.
At the end of the day, I would be happy with either the Anycubi Photon 2 oder die Elegoo Mars 3 for my first resin 3D printer for miniatures.
My suggestion is to pick whichever you could get the cheapest on sale in a bundle you like (including shipping and other fees). They are that close in specs and performance.
If I was forced to pick a tiebreaker that was not price or what bundle you could get, I would likely get the Photon 2. For me, the Mars 3 leveling/build plate screws have cost me too much time and it was a relief to use the Anycubic Photon 2 instead. For beginners, this will likely be even more pronounced of an issue so getting rid of that is a huge deal.
There are no two ways about it, the Anycubic Photon Mono 2 is great. It is bare bones in terms of features if you are comparing it to newer prosumer machines (no auto leveling, no heated bed, etc). But for the price you pay you get an amazing printer that will get you into 3D printing miniatures in a great way.
Be aware that this is very much a consumer 3D printer. It is reflected in the price and the build quality. Where possible, plastic has been used making it less rigid in construction. If you are after something to put on your 3D ranking rack as a business, get a more expensive machine.

- Affordable value printer
- Easy to use for Beginner's
- Higher end specs unlikely to matter
- Corners have been cut on construction
- Build space is limited
Offenlegung von Partnerlinks
Age of Miniatures ist leserunterstützt. Wenn Sie über Links auf unserer Website einkaufen, erhalten wir möglicherweise eine Partnerprovision. Mehr darüber erfahren Sie hier.

Quality of prints: Screen of the Anycubic Photon Mono 2
One of the most important features of the Photon Mono 2, or any resin 3D printer, is the screen. The screen on the Mono 2 with the following specs:
- 6.6-inch
- 4096 x 2560 pixels
- PPI (pixels per inch) of 732
- XY resolution of 34 microns
The PPI and XY resolution are the important parts and it is competitive with other small form factor 4k printers.
The LCD screen is also monochrome, which means that it only displays black and white pixels, unlike the traditional RGB screens that use three subpixels for each color. This makes the screen more transparent to UV light, it allows it to cure the resin faster, and makes the screen last longer. But monochrome is standard these days, so would not expect any less.
You get a weird oversized screen protector you have to install yourself, which I am not a huge fan of. This can cause issues for never people into the hobby, so not a big fan of this.
I will reference other similar printers and their specs, especially the Mars 3 line as they are so similar, so you might as well get a table upfront so you can compare along.

|

|

|

|

|

|

|
|
Bildschirmauflösung (px):
4096 x 2560
|
Bildschirmauflösung (px):
4098 x 2560
|
Bildschirmauflösung (px):
3840 x 2400
|
Bildschirmauflösung (px):
4098 x 2560
|
Bildschirmauflösung (px):
3840 x 2160
|
Bildschirmauflösung (px):
4096 x 2560
|
Bildschirmauflösung (px):
1620 x 2560
|
|
Bildschirmgröße (Zoll):
6.6
|
Bildschirmgröße (Zoll):
6.6
|
Bildschirmgröße (Zoll):
6.23
|
Bildschirmgröße (Zoll):
6.6
|
Bildschirmgröße (Zoll):
6.1
|
Bildschirmgröße (Zoll):
7.6
|
Bildschirmgröße (Zoll):
4
|
|
PPI (Pixel pro Zoll):
732
|
PPI (Pixel pro Zoll):
732
|
PPI (Pixel pro Zoll):
727
|
PPI (Pixel pro Zoll):
732
|
PPI (Pixel pro Zoll):
724
|
PPI (Pixel pro Zoll):
635
|
PPI (Pixel pro Zoll):
498
|
|
XY-Auflösung (μm):
34
|
XY-Auflösung (μm):
35
|
XY-Auflösung (μm):
35
|
XY-Auflösung (μm):
35
|
XY-Auflösung (μm):
35
|
XY-Auflösung (μm):
40
|
XY-Auflösung (μm):
49
|
|
Bauvolumen (LWH):
143 x 89 x 165
|
Bauvolumen (LWH):
143 x 89 x 175
|
Bauvolumen (LWH):
132 x 80 x 165
|
Bauvolumen (LWH):
143 x 89 x 175
|
Bauvolumen (LWH):
135 x 75 x 130
|
Bauvolumen (LWH):
164 x 102 x 180
|
Bauvolumen (LWH):
129 x 80 x 160
|
|
K.A.
|
$231.99
|
K.A.
|
$231.99
|
$449.98
|
K.A.
|
K.A.
|
|
Best Price Seen ($):
198
|
Best Price Seen ($):
209
|
Best Price Seen ($):
159
|
Best Price Seen ($):
285
|
Best Price Seen ($):
280
|
Best Price Seen ($):
240
|
Best Price Seen ($):
134
|
|
Release Year:
2023
|
Release Year:
2022
|
Release Year:
2021
|
Release Year:
2022
|
Release Year:
2020
|
Release Year:
2022
|
Release Year:
2020
|
As you can see, the screen specs are on par or the exact same as the competition here.
An XY resolution 34 microns means that each pixel is the size of 34 microns. So even though you could technically set your printer to print smaller than that, it would not make a difference in the print. A pixel on a 3D printer is either on or off. If it is on it will shine light and in this case it will shine a 34 micron sized light. So while you could set it to 20 microns layer height, it would still make a 34 micron sized layer height (and your print would take longer and likely be less precise overall).
So an XY resolution of 35 microns means that you comfortable print at a layer height of 35 microns or 0.035mm. That layer height will give you plenty of detail but will be a bit slow. Printing at 35 microns is sorta the level I think you should go, as there are a lot of diminishing returns when you go lower and the print really becomes slower (not to mention that your resin might not be able to print at such low layers).
So I think at this screen size, a 4k resolution on the printer will be plenty for a normal use case of just 3D printing miniatures for your own use.
A bit about the light on the Anycubic Photon 2
It can be hard to determine this, as new printers will always say they have “improved lenses and light”. In the case of the Photon 2, Anycubic is saying that it has an “Upgraded Light Turbo Matrix”.
Was das sollte mean is that the printer is more precise, and the light will have less “bleed” to adjacent pixels and make the details sharper. It will, in essence, be more precise. It is likely better than the previous Photon Mono 4k, but is it better than other 3D printers? How to test that? Maybe I will be able to test this in the future, but for now I will not comment on this.
Langlebigkeit und Preis des Ersatzbildschirms
If you are new to 3D printing you should know this:
The screen on your resin 3D printer will over time degrade and start to fail. It happens a lot less frequently nowadays (as the modern mono screens last longer), but it is still considered a “consumable”. As of writing, I cannot see the price for the Photon 2 screen replacement, but it will likely be about $100. The screen in these machines can last up to 2000 print hours, so there is some way printing to do before it happens.

Build volume of the Anycubic Photon Mono 2
The build volume of the Anycubic Photon 2 is not huge, but it is okay for just printing miniatures. If you want to print big pieces in one go, you might find it lacking. But as soon as you need to get more build volume, you will need a bigger screen making it much more expensive. So this kind of entry-level size is great for keeping costs down.

Filling up the plate you can comfortably get about 10-13 supported miniatures onto the plate.
As you can see from the list here, the build volume is pretty even if compared to competitors (LWH):
- Anycubic Photon Mono 2: 143 x 89 x 165
- Elegoo Mars 3: 143 x 89 x 175
- Anycubic Mono 4k: 132 x 80 x 165
- Phrozen Sonic Mini 4k: 135 x 75 x 130
- Anycubic M3: 164 x 102 x 180
- Elegoo Mars 2: 129 x 80 x 160
Something that is becoming standard is to put a “Max Lin” on the vat, which comes very handy to not make the mistake of putting too much resin in the vat.
The Photon 2 goes beyond that in a clever way, where you can see how much resin in ml you roughly have in the vat. This is great for beginners, as you can see in your slicer how much resin you roughly need for a print, and make sure that you have enough in the vat.

Stability of Anycubic Photon Mono 2
Having a stable resin 3D printer is insanely important. The parts that ensure that are the rail, the motor and the construction of the printer. The Photon 2 runs on a single rail with two lines, which is fine for this size of printer. I have seen no issues with wobbling high up on the rail.
An issue that did come up is how light the printer is. It moves around way too easily for my taste and the feet are not doing anything to keep it more secure. Just when trying to put the USB plug in I can accidentally move it. This might cause resin spillage which is a big issue. The weight is so low because of the small size of the printer but also because Anycubic has used plastic on parts of the printers where they could. Only the bare minimum is metal, but that is par for the course to keep costs down (and this is a very cheap machine).

Build Plate of the Anycubic Photon Mono 2 and leveling
The Photon Mono 2 comes with a laser-engraved build plate that ensures strong adhesion and easy removal of prints. The build plate has a textured surface that grips the resin well and prevents warping or curling.
Elegoo uses a design for their Mars and Saturn line where you have two screws that hold the plate to a ball joint. That method causes a few issues, and this is one of these issues where Anycubic just straight up has a better design. Instead of a ball joint, you attach the build plate via 4 screws.

This design really helps make leveling an easy process and makes sure that the build plate does not misalign when fumbling around getting the prints off the plate.

I like the Anycubic leveling paper, mainly just to make it super easy for new 3D printer buyers. Leveling was easy and should not cause big problems for beginner’s.
The build plate is this laser engraved build plate. It is fine. I have never really cared about that. I print in a way where I make sure I print slowly and avoid any print fails, so have never seen a big difference between printers in this.
Only thing I am missing here: auto leveling. But this is not really a prosumer machine with that kind of features and none of the competition at this price level has it.
The noise of the Anycubic Photon Mono 2
Seien Sie sich bewusst: Ich bin extrem geräuschempfindlich, so dass mich schon die kleinste komische Tonlage irritieren kann.
Elegoo has this weird thing, that I have gotten quite used to. As soon as you turn on most Elegoo machines, the fan starts blaring.
And the Photon Mono 2 does not have that! That blissful silence when you turn it on is so great. It is weird that this is a feature to be happy for, but here we are.
The fans kicks in when printing and they certainly not silent and are quite noisy in my ears. There is also noise when the printer moves up and down. This is mitigated somewhat at slow speeds, but still very present.
Die Geräusche der Ventilatoren können leicht durch gute Kopfhörer mit Geräuschunterdrückung. If you have music on it will also cover the motor noise easily.
Aber ich schlage vor, den Drucker an einem Ort aufzustellen, an dem man ihn ohnehin nicht hören kann. Sowohl aus akustischer Sicht als auch im Hinblick auf die Toxizität.

Testing and dialing in the Anycubic Photon Mono 2
Now that we have talked about the most important parts of the printers, let us talk about testing and dialing in the printer.
The Photon 2 comes with the standard pretty crap USB drive. Not as crap as the white ones, but still not something I would trust in the long run.
On the USB drive, we have:
- Anycubic Workshop (slicer)
- A basic test model
- A calibration test file
- The manual in different languages
The Anycubic test model is almost as dumb as the Elegoo Rock. It tests nothing really, but I printed it just to see how it would look like in real life.
The model uses quite a bit of resin and does not really test anything other than bed adhesion and “will it print”. There are no details on it or anything. The base of it says 35 microns, but I am pretty sure the file is sliced at a 50-micron layer height…

I decided to skip the Anycubics exposure test or whatever it was. That thing wastes way too much resin to figure something out we could do in a much easier way.

Nivellieren und Schneiden für den ersten Druck
One of my go-to resins are Siraya Tech Fast Marinegrau mixed with 10% Siraya Tech Tenacious. This makes for an okay fast resin, with great detail but also with some durability from the Tenacious part.
The printer was easy to level. The manual was okay. It did explain fairly well exactly the steps I had to take to get it to level. I think beginner’s would be okay with this, but it was not blown away with the details of the manual.

One of the issues with getting 3D printers early is that they are likely not incorporated in your favorite slicer and this was also the case with the Photon 2. Instead of manually trying to enter stuff into Lychee (my go-to slicer), I decided to give Anycubics slicer a fair go. It was…. okay. For beginners, it is likely fine to use for the first few prints and it was easy to use. But I missed a lot of features.
I decided not to fiddle around with settings other than just changing the layer height to the 35 microns that the XY resolution of the pixels will handle. The added Tenacius resin makes the resin a bit slower to cure, but the lower layer height should even that out a bit. 2.5 exposure time would likely be what I needed.

Kalibrierungsboxen von J3D Tech come out pretty good. Not exactly printing dimensionally accurately at 2.5 exposure, but pretty close. Setting it to 2.4 gave results that I was pretty happy with (not perfect exposure, but close).

The Cones of Calibration from Tableflip Foundry showed that the resin might not be strong enough to print all support times at 2.4 (and the Cubes also indicated this), so I bumped it up to 2.45 exposure.

The Puck test print from TableFlip Foundry came out super well, so time for some real prints!

Note: I do not think the Anycubic stock settings are great and I would adjust them and use another slicer if you buy this printer.
Quality of the Elegoo Anycubic Photon Mono 2 (images of 3D printed miniatures)
Below you can find an assortment of miniatures I have printed with Photon 2. I am happy to say that I could print 1 liter of resin here without any fails whatsoever. Sadly, I did not have a great deal of time to print a load of different types of miniatures nor try and tune the printer for speed printing.
The prints came out well. I can see no quality difference between this and other similar printers.
NOTE: Images of more miniatures to come.


Design of the Anycubic Photon Mono 2
The Photon Mono 2 has a sleek and compact design that makes it easy to fit on any desk or workspace. The printer has a black base that is largely plastic and a blue plastic hood that covers the resin vat.

I am not sure, but it seems like the cover might let in a tiny tiny bit of UV light when sun rays hit it. I keep having a bit of cured resin on top of the build plate and I have never seen that on other resin printers before. Also, the blue cover is this wobbly plastic that I am not a fan of (other covers are hard non-bendy plastic). The blue colour is what it is. I think it looks fine.
The printer has a 2.8-inch color touch screen on the front that allows you to control the printer settings and preview the models. The touch screen is responsive and intuitive, and the menus are easy to navigate. The UI is pretty decent and better than Elegoo’s version. But the printer is using a Chitu board, like most other consumer 3D printers. So it will pretty much be the same UI type as all other printers.


The printer also has a USB port on the side that lets you connect a USB drive with your sliced models. There is no wifi or cloud integration here. Side USB-port I can live with, but the power button is on the back. Resin 3D printing process is a big thing and this can be disruptive for you. I personally hate it with a passion.


The Photon Mono 2 has a simple and user-friendly design that makes it ideal for beginners who want to start resin 3D printing with minimal hassle.
You have the max fill line as well as a way of seeing how much resin is left in ml. This a great design choice, something I hope becomes standard.
Whenever possible the Photon 2 uses plastic as a material. This is not great, but something to be expected for this low a price.
Using the Anycubic Photon Mono 2 and ease of use features
Resin printers are, in essence, quite easy to operate. You can print great looking models and miniatures with stock settings out of the box in no time with the Photon 2. While the stock settings are conservative on some parameters, they are not conservative enough in other areas. I suggest dialing your printer and reading one of the bessere Anleitungen für die Einstellungen von 3D-Harzdruckern.
The manual was sorta okay. They forgot to mention that you have to loosen the bolt on top, before you can insert the build plate but that was about it for mistakes. After leveling the build plate moved up by itself, which was a neat way of doing it for beginners.

They have the “Anycubic tip” about making a vat cleaning.
I would: check the vat after each print with a silicone spatula. Only if there is anything would I do a vat clean but I would try and avoid draining the vat. Moving the vat in and out of the printer opens you up to mistakes that could damage your screen.
Their manual and instruction on the screen protector seem pretty bad. Why is it oversized like that? I decided to just skip it. My process is finely honed, so mistakes are not likely to happen now.
This printer is very bare bones in ease of use features. It has the “clean tank” feature, which is great to have, but other than that nothing to really help you out. To be fair Anycubic are trying to help you out with their calibration print, but it kinda ends up being a disservice, to be honest.

Shipping and the package of the Anycubic Photon Mono 2
As is par for the course, the Photon 2 came packaged very well. Other than having to put on the build plate and the vat, you have to install the screen protector. But that is it.
While I find the amount of foam and wrap to be slightly wasteful, I respect that I got my machine without anything being broken or knocked loose.

Touchscreen Anycubic Photon Mono 2
The touchscreen is what it is really. You will be pressing it so little that it does not really matter that it is one of those touch screens that feels awful to touch. The UI is actually okay, better than what the completion currently has to offer.
Speed of the Anycubic Photon Mono 2
Der Drucker druckt genau so schnell wie die Konkurrenz in diesem Bereich. Während wir bei den FDM-Druckern eine Menge Innovationen in Bezug auf die Geschwindigkeit sehen, ist es bei Kunstharz schwieriger.
The resin is liquid and when the bed moves up and down the resin goes in motion. The liquid resin needs to fully settle before a new layer is exposed. This takes time! If the resin is not settled before exposure begins, you will start to see various artifacts on your print and you will lose details (or even get a failed print because there was no resin between the FEP and build plate). Because this is a quite small build plate, this is not as big of a problem.
This is not a printer built for speed. While the speed compares to other 3D printers of the same size, the printer is not rigid enough nor built with the material you need for speed. At some point I would like to tune this printer for speed, but before I want to do that it needs to be added to other slicers.
Here is the speed of my prints at 0.035 layer height (could be quite a lot faster with 0.05 layer height):


Odour and toxicity of the Anycubic Photon Mono 2
Das ist zwar ein kleines Ärgernis von mir, aber ich denke, es ist einfach so wichtig. Es fällt mir schwer zu verstehen, wie Hersteller von 3D-Druckern Harzdrucker und Harz verkaufen können, ohne bessere Richtlinien für den Umgang mit diesem supergiftigen Zeug.
The Anycubic manual for the Mono 2 mentions nothing about toxicity of resin, how to handle it or handle post-processing. This is a glaring issue and something that I do not find acceptable. In the box they provide one-time use gloves and a mask that is in no way suitable for 3D printing. The resin says to wear “mask and gloves”, but nothing about which type – leading newcomers to think that the mask in the box is good enough.
Anyway, the resin you use in this machine will be toxic. It will smell. The Photon 2 does not have an active carbon filter, which is a shame. But the entry-level printers rarely do (sadly). But even if it had it is still toxic stuff and as soon as you open the printer for the resin post-process, it will release smell and VOC’s.
If you are just starting out: read up a lot on this topic, as it is very likely you do not have a suitable environment for printing resin miniatures. Be sure you do before you buy a printer! I think companies should be better at giving good guidelines for how to set up a ventilated printing area, the process of handling resin, and the process of getting rid of the waste.

Zusätzliches Material in der Box
The Photon 2 comes with a very standard and boring array of supplies and utilities. This is what you get in the box:
Neben dem Drucker enthält der Karton noch weitere Komponenten:
- Netzkabel
- USB dongle (Likely low quality, but have not tested this type extensively)
- Allen keys
- 2 Masken (Sie sollten etwas Besseres verwenden)
- Einige Nitrilhandschuhe
- Plastikspachtel (ziemlich schlecht, Sie sollten etwas Besseres verwenden)
- Metallabstreifer (ziemlich schlecht, aber ich benutze sowieso nie Metallabstreifer)
- Trichter aus Papier
- Screws for the vat
- Screen protector
- A wipe for installing the screen protector
This is what was not in the box with I expected to be there:
Nippers, extra FEP film and extra screws.
Nach der Ankunft legte ich beide Schaber, die Maske und den USB-Stick in eine Schublade und vergaß sie.
Die Masken sind nicht annähernd genug Schutz, und indem Elegoo sie zur Verfügung stellt, behauptet sie sozusagen, dass sie es sind. Der Plastikschaber ist nicht gut genug, um ihn auf der Bauplatte zu verwenden, und ich würde das Ding nie in die Nähe des FEP bringen. Manche mögen die Metallabstreifer, aber ich möchte meine Bauplatte nicht abschätzen.
Release date of the Anycubic Photon Mono 2 and when will the Anycubic Photon Mono 2 be outdated?
The Anycubic Photon 2 was released in the middle of 2023. It takes the place of the original Photon Mono 4k.
There are a lot of resin printers being released all the time now. If you do not want to feel like your printer is outdated, it is best to buy something that is just released.
At the current rate I would not be surprised to see a new Photon printer come out in about 1-1.5 year. But I also expect that printer to have very few and mild upgrades. Feel sure that 4k resolution on this size of a screen will be plenty for quite some time.
So unless you are looking for a heated vat, auto leveling or some other “nice to have”, the Photon 2 looks like a super safe buy right now (mid-2023).
Is the Anycubic Photon Mono 2 the right printer for you?
Die Anycubic Photon Mono 2 is a great resin printer for anyone who wants to start their journey in resin 3D printing. The printer offers a 4K LCD screen, an okay build volume, a user-friendly design in a printer that is very competitively priced. The printer also delivers excellent print quality and accuracy, with smooth and detailed prints.
The Photon Mono 2 is especially suitable for hobbyists who want to try and print miniatures, but are unsure if this is a hobby for them. For $200 plus accessories, you are printing miniatures that rival what you can buy in a store. That is pretty wild to think about, but here we are.
If you want into 3D printing miniatures on the cheap, the Anycubic Photon 2 is a great entry way.
If you already have a 3D printer, this is very unlikely to be worth an upgrade to. The original Mono 4k and this have very comparable specs. If you have another printer it is likely you would want to upgrade to something with a bigger build plate or more ease of use features.
The Photon Mono 2 is a worthy successor to the Photon Mono 4K, and a fantastic entry-level resin printer. It offers a great balance between performance and affordability, making it one of the best resin 3D printers on the market for beginners.
What I really like about the Anycubic Photon 2:
The resolution is more than enough to get started
Es ist einfach zu benutzen
The price is very attractive
Things I do not like about the Anycubic Photon 2:
Nicht viele zusätzliche Funktionen
Corners have been cut to keep costs down
Build space can feel limited over time
I dig the Photon 2. Not because it does anything new, but because it does everything well enough while keeping the cost down. This is an easy recommend for beginner’s in resin 3D printing miniatures at take a slight edge on the Mars 3.
- Affordable value printer
- Easy to use for Beginner's
- Higher end specs unlikely to matter
- Corners have been cut on construction
- Build space is limited
Alternatives to the Anycubic Photon Mono 2
|
|
|
|
|
|
|
|
|
Bildschirmauflösung (px):
4096 x 2560
|
Bildschirmauflösung (px):
4098 x 2560
|
Bildschirmauflösung (px):
3840 x 2400
|
Bildschirmauflösung (px):
4098 x 2560
|
Bildschirmauflösung (px):
3840 x 2160
|
Bildschirmauflösung (px):
4096 x 2560
|
Bildschirmauflösung (px):
1620 x 2560
|
|
Bildschirmgröße (Zoll):
6.6
|
Bildschirmgröße (Zoll):
6.6
|
Bildschirmgröße (Zoll):
6.23
|
Bildschirmgröße (Zoll):
6.6
|
Bildschirmgröße (Zoll):
6.1
|
Bildschirmgröße (Zoll):
7.6
|
Bildschirmgröße (Zoll):
4
|
|
PPI (Pixel pro Zoll):
732
|
PPI (Pixel pro Zoll):
732
|
PPI (Pixel pro Zoll):
727
|
PPI (Pixel pro Zoll):
732
|
PPI (Pixel pro Zoll):
724
|
PPI (Pixel pro Zoll):
635
|
PPI (Pixel pro Zoll):
498
|
|
XY-Auflösung (μm):
34
|
XY-Auflösung (μm):
35
|
XY-Auflösung (μm):
35
|
XY-Auflösung (μm):
35
|
XY-Auflösung (μm):
35
|
XY-Auflösung (μm):
40
|
XY-Auflösung (μm):
49
|
|
Bauvolumen (LWH):
143 x 89 x 165
|
Bauvolumen (LWH):
143 x 89 x 175
|
Bauvolumen (LWH):
132 x 80 x 165
|
Bauvolumen (LWH):
143 x 89 x 175
|
Bauvolumen (LWH):
135 x 75 x 130
|
Bauvolumen (LWH):
164 x 102 x 180
|
Bauvolumen (LWH):
129 x 80 x 160
|
|
K.A.
|
$231.99
|
K.A.
|
$231.99
|
$449.98
|
K.A.
|
K.A.
|
|
Best Price Seen ($):
198
|
Best Price Seen ($):
209
|
Best Price Seen ($):
159
|
Best Price Seen ($):
285
|
Best Price Seen ($):
280
|
Best Price Seen ($):
240
|
Best Price Seen ($):
134
|
|
Release Year:
2023
|
Release Year:
2022
|
Release Year:
2021
|
Release Year:
2022
|
Release Year:
2020
|
Release Year:
2022
|
Release Year:
2020
|
As you can see from the table above, there is quite a lot of competition at this particular size of printer. Besides the specs of the screen and the volume of the print, very small details set these printer apart from each other. This is why going with price is often the best way of doing making a final decision.
Elegoo Mars 3 and Mars 3 Pro

The most direct competition is the Mars 3 line. They are so close in specs it is crazy. As stated earlier, I like the build plate mounting mechanism better on the Photon 2.
If you wanted a few extra features (carbon filter and a anti-scratch screen), you could the Mars 3 Pro (but I do not think the extra cost is worth it).
After having used a Mars 3 and the Photon 2: there is so little difference that I would actually just go for the cheapest option.
Anycubic Photon Mono 4k

How does the Photon 2 compete with the original Photon 1? Okay.
The Photon 2 has a slightly upgraded resolution, size, and build space. But other than that, nothing new. So the biggest difference here is the price:
The cheapest I have seen the Photon 1 is for about $160. The Photon 2 can be had for $200. I would likely go with the updated version if that was the difference. But the original Photon will likely drop in price as it is being phased out of production. If you can pick it up super cheap, there really is not that much difference.
Andere Dinge, die Sie brauchen, wenn Sie einen 3D-Drucker kaufen

Beim 3D-Drucken von Harz benötigen Sie eine Menge Handschuhe. Besorgen Sie sich eine Schachtel mit mindestens 100 Paar Nitrilhandschuhen (kein Latex) und achten Sie darauf, dass sie passen (kleine Handschuhe sind das Schlimmste).

Eine Maske ist ein Muss. Sie müssen eine haben, bei der Sie die Patrone wechseln können, und sie sollte vor Dämpfen schützen.
Sie sollten Ihr IPA oder Harz nicht riechen können, während Sie es verwenden.

Für den 3D-Druck benötigen Sie IPA und zwar jede Menge davon. Kaufen Sie in großen Mengen!

Wenn Sie nicht über eine Wasch- und Aushärtungsstation verfügen, ist es am besten, verschiedene Behälter mit Harz zu haben, in die man die Miniatur einfach eintauchen kann.

Ich benutze sie, um Modelle von der Bauplatte zu bekommen und um Harz abzukratzen, wenn es irgendwo komisch wird.
Sie eignen sich hervorragend als Unterlage für Ihren 3D-Drucker und als Arbeitsfläche für die Reinigung von Resin-Modellen.

Sie dienen zum Umrühren des Harzes in der Wanne und zum Berühren des FEP-Balgs, um ihn vor dem Druck auf Verunreinigungen oder Beschädigungen zu überprüfen.

Ein Wasch- und Aushärtungsgerät ist eine nette Sache, aber kein Muss. Es hilft, das Modell in der IPA zu reinigen, und Sie können es anschließend in der anderen Maschine aushärten. Wenn Sie nicht über eine Aushärtekammer verfügen, müssen Sie sich auf das Sonnenlicht verlassen.
Best Resin for the Anycubic Photon Mono 2
Once you have your Photon Mono 2 set up, choosing the right resin is the next big decision. I use two resins almost exclusively: a cheap standard grey for bulk printing, and a mid-range ABS-like resin for anything I want to paint carefully. You can read my full guide to the best resin for 3D printing miniatures — but here are my top picks for the Photon Mono 2:


Andere Ressourcen für den 3D-Druck aus Harz
- Leitfaden für 3D-Druck-Miniaturen
- Bester 3D-Drucker für Miniaturen
- Alle unsere 3D-Druck-Artikel
- Miniatur-3D-Druckdateien erhalten
Frequently Asked Questions
Is the Anycubic Photon Mono 2 good for printing miniatures?
Yes — the 4K mono LCD screen produces sharp, detailed prints well suited to 28–32mm miniatures. The 143 x 89 x 165mm build volume fits most infantry and cavalry models, and mono screen exposure speeds make printing batches practical.
What resin works best with the Anycubic Photon Mono 2?
Siraya Tech Fast Navy Grey and Sunlu Standard Grey are both well-tested with the Photon Mono 2 and give excellent miniature results. See our best resin for miniatures guide for tested settings and full recommendations.
How does the Photon Mono 2 compare to the Elegoo Saturn 2?
The Saturn 2 has a larger build plate (218 x 123mm vs 143 x 89mm) and higher-resolution 12K screen, making it better for printing full squads or large terrain in one go. The Photon Mono 2 is smaller, cheaper, and more compact — the better choice if you print one or two models at a time and have limited desk space.
Is the Anycubic Photon Mono 2 suitable for beginners?
It is manageable for beginners willing to learn the resin workflow — levelling, exposure calibration, IPA washing, and UV curing. It is not significantly harder to set up than other entry-level MSLA printers. The main barrier is resin safety: gloves, ventilation, and a wash and cure station are non-optional.
What wash and cure station works with the Photon Mono 2?
Any MSLA-compatible wash and cure station works. The Elegoo Mercury XS and Anycubic Wash and Cure Plus are both popular choices. The Photon Mono 2 build plate (143 x 89mm) fits inside most standard stations without issue.