
Vous êtes un amateur en herbe et vous commencez à peindre des figurines ? Vous cherchez des conseils pour peindre votre toute première figurine ?
Well look no further friends. Hi, my name is Niall and I’m a miniature painter. I’ve been painting little metal and plastic monsters for more years than I care to count.
While I’ve touched on this topic before, I would like to dedicate this article solely to new painters or potential painters eyeing up the hobby or starting to dip their toes in this weird and wonderful world of ours without too much overlap on previous writings.
Peindre sa première figurine peut être intimidant au début. Vous la sortez de la grappe, vous la collez et elle semble si intacte, si pleine de possibilités.
Pourtant, pour cette raison et pour bien d'autres facteurs, beaucoup de gens ont peur de "rater" leur première miniature ou de faire des erreurs, mais comme pour beaucoup de choses, c'est en faisant des erreurs que l'on s'améliore.
J'essaie de voir les choses de la manière suivante : soit on gagne, soit on apprend.
Bien que la peinture miniature dans son ensemble soit un sujet très dense, mon intention dans cet article est de faire en sorte qu'il ne soit pas très dense.
I will give you a detailed guide on how to paint your first miniature that hopefully you find straightforward and easy to put into practice. I’ll cover the steps and try to guide you around and sometimes through any and all mistakes or pitfalls that one might come across.
Sans plus attendre, voici un aperçu concis mais complet, étape par étape, de mes recommandations pour peindre votre première figurine.

Divulgation des liens d'affiliation
Age of Miniatures est soutenu par ses lecteurs. Lorsque vous achetez par l'intermédiaire de liens sur notre site, nous pouvons percevoir une commission d'affiliation. Pour en savoir plus, cliquez ici.
How to Paint Your First Miniature: 10 Steps at a Glance
| Step | What to do | Why it matters |
|---|---|---|
| 1 | Choose your first miniature | Pick something simple — you will mess up, and that is fine |
| 2 | Snip from the sprue | Hobby snips remove parts cleanly without breaking them |
| 3 | Glue the model together | Plastic glue welds plastic; super glue works on resin and metal |
| 4 | Clean mould lines | Removes the seams left by manufacturing — primer reveals them later |
| 5 | Undercoat / prime | Gives the paint a surface to grip — without it, paint chips off |
| 6 | Choose paints & brushes | Cheap brushes are fine to start — do not blow your budget on Series 7s |
| 7 | Apply base layers | Block in your main colours — thinned paint, multiple thin coats |
| 8 | Shade with washes | Adds instant depth and definition to recessed areas |
| 9 | Drybrush highlights | Brings raised edges back into focus — the easiest highlighting technique |
| 10 | Base the miniature | Finish the look — a painted base sells the entire model |
Tools You Need to Paint Your First Miniature
| Tool | Why you need it | Link |
|---|---|---|
| Couteaux de bricolage | Removing parts from the plastic sprue cleanly | Check price → |
| Couteau artisanal | Cleaning mould lines and trimming flash off the model | Check price → |
| Super glue | Bonding resin and metal parts (plastic glue is preferred for plastic) | Check price → |
| Black primer (spray) | Citadel Chaos Black — the safe default first primer | Check price → |
| Starter brush set | Cheap brushes are fine to learn with — replace as you improve | Check price → |
| Shade / wash | Adds instant depth in step 8 — a Nuln Oil-style shade is the most versatile | Check price → |
Bottom line: Painting your first miniature is intimidating but the process is short: snip, glue, clean, prime, base coat, shade, drybrush, and base. With cheap tools and a bit of patience, you can produce a tabletop-ready model in an afternoon. The detailed walk-through of every step is below.
1. Choisir sa première figurine
Tout d'abord, il faut construire le modèle.
Games Workshop fournit ses figurines dans des kits où les pièces des figurines sont placées dans une petite grille en plastique gris communément appelée "Sprue".
However, Forgeworld and many other miniature companies can come in pieces that aren’t attached to a sprue or are instead mounted on small blocks of resin. It’s important to know the difference between plastic and resin when painting miniatures as resin requires some extra work to prep before assembly and painting as does metal.
However for the intents and purposes of this article and your own first experience I would recommend choosing a plastic kit from the wide range of Games Workshop miniatures for your first miniature. Some hobbyists recommend different miniatures for first-time painters for ease of painting however in my opinion I think what’s far more important is that it’s a miniature you’re enthusiastic about.
Pick something that excites you from a lore or visual perspective that you can’t wait to open and get to work on.
In my experience, if you run into any issues when painting or find any particular part of the process I describe frustrating or difficult, it’s that excitement that will help you push through and make it to the finish line.
2. Explication des cisailles et des carottes
Once you have your miniature picked it’s time to start building and for that we will need some tools. I will cover each one, what it is and its purpose in detail in the coming steps, however the tools I would recommend are as follows:
La première étape consiste à libérer les pièces de notre figurine de la carotte. La meilleure méthode pour retirer les pièces d'une carotte est d'utiliser une pince à découper.

Il s'agit d'un outil qui ressemble à une petite pince avec des mâchoires tranchantes. De nombreuses entreprises de loisirs créatifs demandent souvent un prix assez élevé pour l'une de leurs cisailles de marque. Cependant, d'après mon expérience, il y a rarement une grande différence de qualité entre les cisailles bon marché et les cisailles chères, en tout cas pas assez pour justifier le prix.
Placez soigneusement le côté plat des mâchoires de la cisaille le long du segment de plastique qui relie la grappe à la pièce de votre figurine. Effectuez cette coupe aussi près de la figurine que vous pensez pouvoir le faire confortablement sans l'endommager.
Note complémentaire : Je recommande de découper et de coller les pièces une par une plutôt que de les découper toutes en même temps avant l'assemblage, car cela peut parfois être un peu déroutant et il est alors beaucoup plus facile de perdre le fil de certaines pièces fines et délicates. Bien que de nombreux modèles Games Workshop soient relativement simples à assembler, ils sont accompagnés d'instructions qui rendent le processus d'assemblage encore plus facile.
3. Superglue et colle plastique comparées
En ce qui concerne la colle, je connais de nombreuses personnes qui sont de très bons amateurs et qui ne jurent que par la colle plastique, mais j'ai toujours préféré la simple superglue. S'il est vrai que la colle plastique forme un lien plus solide, je trouve que la superglue est beaucoup plus facile à utiliser. Je trouve que la superglue est beaucoup plus facile à travailler parce qu'elle colle plus rapidement et qu'elle est beaucoup plus tolérante.
Par exemple, si en assemblant votre première figurine vous vous apercevez que vous avez collé une pièce au mauvais endroit, il peut être très difficile de séparer à nouveau les pièces si elles ont été collées avec de la colle plastique. En revanche, si vous les avez collées avec de la superglue, il est relativement facile de les séparer.
While never an ideal situation, if you find that you have made such a mistake it’s often best to act sooner rather than later as the more bonding time the glue has the harder this will be. Though even if the super glue has fully bonded in many cases you can encourage the glue to break by applying some pressure.
Note complémentaire : Always be careful when trying this as it can run the risk of damaging your miniature but sometimes we make a mistake, it happens and we need to work to rectify it. If you are applying pressure to break a glue bond I would recommend doing so with your thumb as close to the glued area as possible. If you apply pressure a distance from the glued area it’s more likely that the plastic might snap. Another big plus in my opinion for using superglue is to protect your model if it were to fall.
Lorsque le moment redouté arrive et que le modèle sur lequel vous avez consacré tant de temps et d'efforts tombe, il se casse généralement à son point le plus faible et c'est là que la super colle fait merveille.
Because the bond that super glue makes isn’t that strong, more than likely the miniature will break across one of these joins and it might not sound like it but that is a good thing. If your miniature is going to break this is the best place for it to do so as it will be quite simple to apply a little more glue and to put the piece back where it was.
The alternative is that with plastic glue in my experience will be far too strong and won’t break across these lines. You might get lucky and the miniature might not break at all however if there are any imperfections in the plastic it can cause your miniature to truly break. Meaning that something has snapped that was never intended to be apart and that is much harder to fix.
In simple terms my opinion is to use superglue because for one it’s faster and it also builds in these makeshift “fault lines” in your miniature that it can use to break safely.
Note de l'éditeur : J'ai essayé la méthode consistant à utiliser de la superglue sur des figurines en plastique. Je préfère de loin utiliser de la colle pour plastique. Je la trouve tout simplement beaucoup plus facile à travailler.
4. Cleaning, what it means and why it’s important
With the miniature assembled it’s now time to clean it. Cleaning plastic miniatures refers to the process of removing any marks or excess plastic left on the miniature from the molding process or from removing them from the sprue.
Si elles restent intactes, ces marques peuvent souvent nuire à l'aspect général du modèle et rendre la peinture de certaines zones beaucoup plus difficile. À ce stade, vous remarquerez peut-être de petites lignes en relief qui traversent la surface de la figurine. Ces lignes sont appelées lignes de moulage et sont des marques laissées par le moule dans lequel la pièce en plastique a été coulée.
Je recommande d'enlever toutes les lignes de moulage ainsi que tout autre gros morceau de plastique de la figurine avant de la peindre.
D'après mon expérience, le meilleur outil pour ce travail est l'humble couteau d'artisan. Un couteau artisanalLe couteau de bricolage, parfois appelé scalpel, est une petite lame tranchante au bout d'un manche dont les proportions sont plus proches de celles d'un pinceau que de celles d'un couteau ordinaire. Il s'agit d'un outil très courant pour de nombreux passe-temps. On trouve généralement des couteaux de bricolage dans presque tous les magasins qui vendent des articles de bricolage de toutes sortes.

Note complémentaire : Don’t be confused with a “snap blade” knife that’s used in other hobbies. They usually consist of a handle like a plastic track where a blade is slid down through an opening at the end. In my experience the blades of these knives are not suitable for us as they are designed with purely vertical cutting in mind resulting in them being brittle and could potentially be quite dangerous for us due to snapping.
Le type de couteau de bricolage dont nous avons besoin est doté d'un manche solide et d'une lame unique fixe qui est fixée ou parfois vissée à l'extrémité.
A Lot of companies will try to sell you often over priced “specialist” tools for removing mold lines however in my opinion all of these fall short of the humble craft knife. It removes mold lines exceptionally well, it’s cheap, easily acquired and very useful in a lot of other circumstances.
N'oubliez pas cependant que si c'est la première fois que vous utilisez un couteau de bricolage, soyez très prudent car ils sont très tranchants et, s'ils sont mal manipulés, ils peuvent provoquer des coupures assez graves, alors procédez avec prudence. Toutefois, si vous possédez déjà l'un de ces outils spécialisés ou si vous préférez réduire les risques, il n'y a rien de mal à les utiliser, mais ce n'est pas l'outil le plus optimal selon mon expérience.
Note de l'éditeur : J'utilise une combinaison d'un couteau artisanal et du citadel mold line remover. Cela rend le travail d'élimination des lignes plus facile, libérant une partie de mon attention pour regarder ou écouter quelque chose.
Une fois que vous avez l'outil de votre choix, vous pouvez commencer à enlever les lignes de moulage. Placez soigneusement le bord de votre outil ou de votre couteau perpendiculairement à la ligne de moulage et faites-le glisser doucement sur la longueur de la ligne de moulage pour l'enlever. Si c'est la première fois que vous essayez, il vous faudra peut-être quelques tentatives pour enlever la ligne, mais je vous conseille d'effectuer cette opération doucement et lentement pendant que vous prenez le coup de main, afin de ne pas endommager le modèle.
Si vous constatez qu'il reste de gros morceaux de carotte attachés à votre modèle, je vous conseille d'en couper le plus possible avec vos ciseaux avant d'utiliser un couteau artisanal pour enlever soigneusement le dernier morceau. S'il reste une marque, répétez le processus décrit précédemment pour enlever les lignes de moulage jusqu'à ce que la marque soit complètement enlevée et ne soit plus visible.
Note complémentaire : Nous reviendrons plus en détail sur le soclage dans la suite de l'article, mais vous trouverez peut-être plus facile de coller votre modèle sur le socle circulaire noir fourni dans le kit à ce stade.
Vous pouvez également utiliser un bouchon de bouteille de vin et un peu de mastic adhésif comme le blue-tack pour maintenir votre figurine en place pendant que vous peignez.
5. La sous-couche, une base solide pour votre miniature
Once you have removed all of the mold lines and secured your miniature to either a base or alternative it’s time to start painting and the first step in painting your miniature is an undercoat.
Une sous-couche est la première couche de peinture appliquée sur l'ensemble de votre figurine, c'est ce qu'on appelle aussi l'apprêt. La couleur de cette sous-couche affectera les peintures que vous appliquerez par-dessus et permettra à ces couches supplémentaires d'adhérer correctement à la figurine. Si vous peignez directement sur le plastique gris sans appliquer de sous-couche au préalable, vous risquez de voir la peinture s'écailler. Il est très difficile d'obtenir une base nette.
Je recommande d'appliquer une sous-couche sur votre première miniature à l'aide de Games Workshop’s Chaos Black spray primer.
It’s simple to use and as long as you’re not too heavy handed it’s very difficult for things to go wrong. One thing to consider though is that you want to make sure that you use it in a well ventilated space. I would recommend either a very well-ventilated shed or to just spray outside. However if you are priming outside be careful of the weather.
La moindre pluie brumeuse peut laisser une texture indésirable sur votre couche de base, alors que vous souhaitez à ce stade qu'elle soit aussi lisse que possible.
Méfiez-vous également du vent, car si vous ne faites pas attention, il peut attraper les embruns et vous les renvoyer en pleine figure.
6. Choisir les bonnes couleurs, les bonnes peintures et les bons pinceaux pour votre figurine
Once you have a solid coat of black primer on it’s time to start choosing colors. Depending on the model you have chosen you may want to paint it in any number of different ways.
Si vous avez choisi un Space Marine par exemple, vous pouvez le peindre aux couleurs de votre chapitre ou de votre légion préférée, ou vous pouvez faire quelque chose de tout à fait unique.
Je vous recommande d'y réfléchir, mais je vous conseille de ne pas le faire trop longtemps.

Le fait de trop réfléchir lorsqu'il s'agit de peindre peut parfois conduire à une sorte de paralysie où l'on craint de faire le "mauvais" choix et où la ou les figurines ne sont jamais peintes.
Mon conseil est donc le suivant : si vous avez déjà une idée ou quelque chose qui vous inspire pour peindre votre figurine d'une certaine façon, alors c'est fantastique, mais si ce n'est pas le cas, je vous recommande de prendre une minute ou deux pour réfléchir à vos options, puis d'aller de l'avant avec ce qui vous semble le mieux.
Une fois que vous avez décidé des couleurs que vous voulez peindre, je voudrais aborder brièvement certains des types de peinture que vous pouvez rencontrer ou dont vous pouvez entendre parler et essayer de dissiper une partie du mystère qui les entoure.
Games Workshop’s citadel paints in particular are broken down into the following different uses.
- Peintures de base donnent des couleurs solides et sont souvent utilisées comme premières peintures appliquées sur une couche d'apprêt.
- Peintures en couches sont conçus pour être légèrement plus translucides et sont destinés à être appliqués sur les peintures de base.
- Peintures métalliques comme leur nom l'indique, donnent l'apparence du métal.
- Teintes ou lavis sont des peintures très fines, semblables à de l'eau, qui s'infiltrent dans les recoins d'une miniature et créent des contrastes.
- Peintures sèches sont assez épais et sont destinés à une technique appelée brossage à sec que j'aborderai plus loin dans cet article.
- Peintures contrastées sont un outil très souple, doté de propriétés uniques, qui peut être utilisé à des fins très diverses.
- Peintures techniques sont utilisés pour créer des effets spécifiques, par exemple certains sont conçus pour être utilisés comme de la boue sur les bases tandis que d'autres sont utilisés pour créer un aspect de rouille ou de métal oxydé.
- Peintures à l'air are thinned down versions of base and layer paints that are designed to be run through an airbrush rather than applied with a brush.
When it comes to choosing brushes there are two general schools of thought on the matter. Those two being cheap brushes and expensive brushes.
D'une part, les peintres achètent continuellement des pinceaux bon marché qui sont bons pour quelques semaines ou quelques mois, puis s'usent et sont remplacés à peu de frais.
D'un autre côté, il y a des peintres qui investissent dans des pinceaux assez coûteux, qui en prennent grand soin et qui les font durer assez longtemps.

Pour un peintre débutant, je suggérerais certainement de s'en tenir à des pinceaux bon marché. On peut obtenir d'excellents résultats avec des pinceaux bon marché et il n'est absolument pas nécessaire d'acheter des pinceaux coûteux.
J'ai toujours préféré acheter des brosses bon marché plutôt que des brosses coûteuses. Je recommanderais un paquet de brosses synthétiques bon marché Vous pouvez les trouver dans un magasin de loisirs créatifs local qui propose une variété de brosses allant des petites brosses à pointe fine aux brosses plus larges.
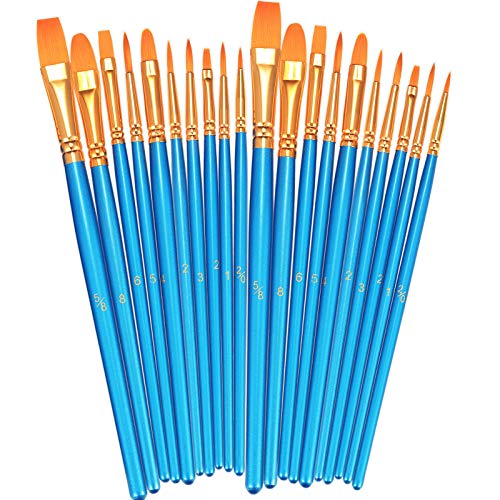
Cheap Synthetic Brush set
When painting a miniature I will use a cheap synthetic brush for about 60-80 % of the work, and then good detail brush for the rest. A lot of painting techniques will naturally damage the brush, so having a lot of cheap expendable brushes is a must.
![]()
Considering the huge number of models that are available to choose from it can be difficult to describe a single process that will fit any model as often different models require different things in order to make them work.
However, I will do my best to put forward as close to a universal system as I can that is quite simple and approachable from the perspective of a first time painter yet provides a solid tabletop ready result.
7. La stratification et l'importance de la perspective
The first technique that we come to that I feel is very important for a new painter to learn is layering.
Layering is the process of applying the base colors to your model.
For example this could be the red of a space marines armor or the blue of a chaos warriors cloak. The trick to getting a good solid base color in this step is to make sure that you apply thin coats of paint to your primed miniature.
If you try to rush things and apply too much paint to your miniature you may find that many of the details have become clogged and less sharp.
It might take you some time to get a feel for what the right consistency is for painting layers. Using your brush you want to mix a little water into your chosen paint until you have a consistency that is somewhat like milk, meaning that it is a little thicker than water yet still quite easy to apply.
The famous saying from legendary painter Duncan Rhoads is to always apply “Two thin coats” however in my experience as an often cautious painter it can sometimes take more than two coats to achieve a really solid color.
Though I would recommend you use your best judgment on this as what’s most important when you’re painting your first miniature is that you have fun. It’s important to remember that we were not painting the sistine chapel here, we’re painting little plastic monsters for fun.
When it comes to your first miniature, remember that as long as you are pleased with how it looks and you’re having a good time you’re golden.
Once you have your base colors layered down take a moment and see if there are any other details on the miniature you would like to add. Does your space marine have a leather pouch you would like to paint brown? Does your ork have large tusks that you would like to paint a bone color?
Have a look at your model and see are there any small details such as these that you might like to add a little extra too. Though don’t feel any pressure to do so, the goal here is to get a model up to a simple solid tabletop standard that can easily be recognised and have a good time doing it.
8. Ajouter de la définition avec l'ombrage et le lavage
Once those steps have been completed and the paint is dry it’s time to move on to the next step. Next up is to apply a wash or shade to your miniature.
As mentioned previously a shade is a thin, quite watery type of paint that we apply to a miniature in order to darken the recesses and gain a level of contrast. Considering this is a guide on how to paint your first miniature I would recommend finding a shade that you quite like or that compliments your chosen base paints and applying it all over the miniature.
If you’re unsure of what shade to use I would recommend games workshops Agrax Earthshade.

It’s a dark brown shade that is in my opinion very flexible and will compliment the vast majority of models. Whether there is a lot of armor, fur or skin it will work well.
When it comes to actually applying the wash I would recommend using something other than a fine tipped brush and to be quite generous with the application. Apply the wash all over the miniature working it into every crevice and surface. However, do be careful that it doesn’t pool too much in undesirable areas as this can create large globs of wash that will work against the effect that we are trying to achieve.
Once it has been applied you should allow a couple of hours to ensure that the wash has properly dried before you handle or work on the miniature again. What you should have now is a model with its recesses shaded providing a nice bit of contrast however the shade will more than likely have dulled your base colors somewhat. This often provides a nice blend between the darks of the recesses and the base colors but now it’s time to bring back some highlights with a great technique called dry brushing.
9. Raviver les reflets avec le brossage à sec
Dry brushing is a hugely flexible technique that can be used to achieve many different effects depending on how you use it.
In my opinion it’s a particularly great skill for new painters to develop as it is relatively quick and easy to get started with and there’s little to no chance of it causing any large headaches. Another great thing about this technique is that it’s often been quite useful to people who find it difficult to hold a brush steady or struggle with hand eye coordination.
When it comes to choosing what color to dry brush with I recommend using a lighter version of a color you have already used.
So if you have already painted and washed a red miniature I would recommend dry brushing it with a lighter red or even an orange. If you have painted a green miniature you could use a light green or even a yellow. You can even use white if your miniature has a lot of different colors.
But as a general rule dry brushing often works best when using a brighter color as we want it to catch on the edges of our miniature and highlight them in a quick and easy manner.
The technique itself involves getting a very small amount of paint on a relatively wide brush. The best way to do this is to either put some paint out on your palette or take a little bit straight from the pot with your brush. Whichever option you choose, remember that less is definitely more.
Once you have the paint on your brush get some tissue paper and dab your brush gently on it. The goal here is to get the paint almost entirely off the brush leaving only the smallest amount left on the end. You can always add a little back on if you take too much off.
So if this is a technique you are using for the first time my advice would be to err on the side of taking too much off rather than leaving too much on. With that done the next step is to apply the paint to the miniature. Gently run the brush over the miniature with a mild level of pressure.
What I always think of when I’m dry brushing is that it reminds me of a similar motion to dusting.
As you do this you will slowly see the paint begin to catch on the raised areas of the model. The goal here is to hit all of the raised edges on the miniature.
This can work whether it is the armor panels of a space marine, the fur of a chaos warriors cloak or the bark of a fallen tree. If you find that you still have too much paint on your brush after your first try you can always dab it again on the tissue paper to remove any excess paint
10. Base et conclusion
With that done your miniature is very near completion! The next step to discuss is the base. The base is the round black plastic disk like object that comes with most miniatures. The base provides a stable place for your miniature to stand along with giving you an opportunity to set your miniature in a fitting environment.
I advise considering this from both a narrative and color perspective. Do you think your ork army would spend a lot of time in muddy swamps? Or maybe they occupy a desert like sand strewn wasteland? Might your space marine army be from an icy frozen deathworld? Or assaulting a hazardous volcanic fortress?

Ask yourself similar questions to these and then consider how the colors of these environments might work with the model that you have painted. While it can often be interesting from a narrative perspective to consider an army as being camouflaged in their environment it can be quite difficult to pull it off on the tabletop.
Generally, we want our models to pop on the tabletop and be easily readable from a distance and the best way to create that is with contrast.
While I do not wish to get into the complexity of colour theory here it might be of use to look up contrasting colors (we have a chunky article about colour theory here).
For instance a green ork will stand out nicely on a red or orange desert base and a bright yellow space marine will stand out nicely on an icy snow base. But whatever environment you decide to go with I would recommend that you choose one of Games Workshops technical paints to bring it to life.

They have a huge selection of paints to choose from that are quite easy to use and very effective. When it comes to applying these technical paints to your miniature it might be easier to cover the base all over if you haven’t glued your miniature to the base yet.
However, if you have then do not fear as you can still add it around the feet of the miniature and even if you get some on the miniatures legs or feet don’t worry too much as its quite conceivable that the character would have gotten some mud,snow,sand etc on them while traversing their environment.
Depending on what technical paint you have decided on for your base you might wish to wash and dry brush it to give it an extra bit of contrast though with many this is not a hard requirement by any means.
Once your technical paint is dry and you are finished applying any tweaks you can now glue your miniature down and congratulations you have finished your first miniature!
As an entirely optional side note if you want to add any additional character to your miniature you can once again lean on the Games Workshop technical paint range.
You could add some blood to the sword or claws of your model, you could add some rust or chalky oxidized patches to some of the metallic areas if there are any. I find these little extra details are a lot of fun to play around with but it is perfectly valid for you to just leave it as it is.
What matters most at this stage is that you find a process that you enjoy and that gets you a result you are pleased with in the end.
Another recommendation that I always find adds something special to a building or painting session is to listen to some lore videos or battle reports while you work. It can pull you in just that little bit more and immerse you in the process. I hope you found something useful in this article and good luck on painting your first miniature!