
I have been printing in resin for few years now, but mostly with smaller beginner printers (Elegoo Mars 2 Pro, Anycubic Photon Ultra), so I was pretty excited to have a chance to try the Elegoo Jupiter SE 6K.
This machine is the second edition of the Elegoo Jupiter launched at the very end of 2023 that brings this machine to higher standards by optimising many aspects.
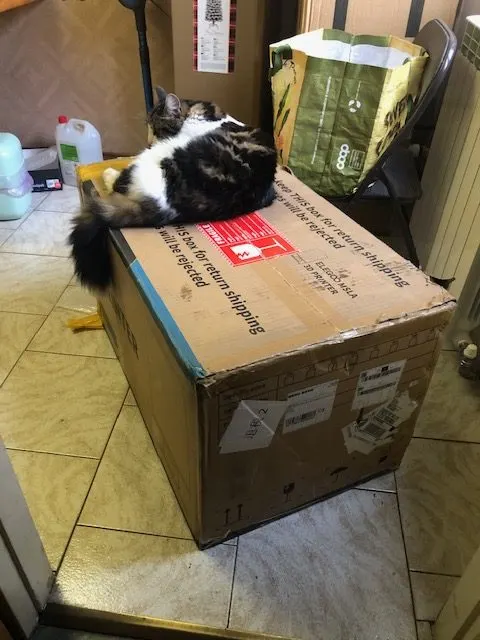
The main factors for my enthusiasm were a bigger printing space, added speed and better resolution. And, as you can see from the picture below, I was not the only one excited to receive this huge box!
In this Elegoo Jupiter SE Review will be taking in consideration the perspective of someone transitioning from smaller printers to bigger size (and price) 3D resin printers.
Review Copy Disclosure
Elegoo sent me this printer for review. I have agreed to review this printer, but I have promised Elegoo nothing more than that. No money has changed hands and Elegoo does not get to approve this article before it is published.
You can read more about our Review Copy Policy Here (TLDR: I take this stuff very seriously)

Jupiter Elegoo SE 6K VS Elegoo Jupiter 6K
The Elegoo Jupiter SE 6K is the latest Jupiter released by Elegoo. It’s definitely on the big size for a 3D resin printer with a huge tank with a build volume of 278 x 156 x 300 mm. As we will see later in the review, this a lot more than your traditional small Mars printers.
What is the main difference between the second edition Jupiter and the original Jupiter? Here is the table comparison directly from Elegoo:

In summary, the key aspects to consider is that they improved the light source adding a refractive component that should reduce light dispersion and improve the details printed.
They have also reduced the touch screen size that contributed in reducing the overall size of the printer without modifying the resin tank dimensions and most importantly almost halved the weight. The printer is also more ergonomic, although the two handles on the side of the cover are not centred making a bit awkward when lifting it.
Finally, the automatic resin feeding process has been improved adding a recycling functionality, the PFA release liner uses FEP 2.0 that has 50% longer lifespan and a non-stick surface that prevents resin from adhering to the film.
All is well, but what does this really mean?
The printer has been optimised, it is a better version, and you should consider to purchase the Second Edition over the first one, unless you find it heavily discounted on third party stores (the original Jupiter is unavailable from Elegoo store). But if you have the old version, it is not worth to buy a new one just for the upgrades.


- Big build volume!
- More compact than earler editions
- Okay XY resolution, when looking at build volume
- Resin feeder is designed poorly
- Handles could be better placed
- Cumbersome for beginner's
Quality of the Elegoo Jupiter SE 6K prints
The juicy part of each 3D printer is the quality of what they produce. First thing to consider is the 6K in the title of the printer itself. This basically means that the XY resolution is 51µm. This comes from the 5448 x 3064 pixels on a 12.8″ monochrome LCD.
To compare, a Mars 2 Pro has a resolution of 50µm on a 6″ LCD (2560 x 1440 pixels), so while the screen is smaller, the actual horizontal resolution does not change much. What makes the difference is the layer height that can go all the way to 0.01mm in the Jupiter. The lower this value the better the definition of the model, although consider it will drastically increase the printing time. And, while you could print at 0.01mm layer height, it makes little sense when your XY resolution is only 0.05mm.
Most people find acceptable a layer height of 0.05mm that is enough for the naked eye to not see any difference. Anything below that is the cherry on top. You may want to have 2 settings, one for a 0.05mm for your standard prints, and one at 0.03mm with decreased speed for really popping out the details for special prints.
To give you an idea the following images contain miniatures printed with a layer height of 0.05mm on the left and 0.03mm with reduced speed on the right. They are not extremely detailed miniatures, proving that decreasing your printing time to achieve higher quality may not be that relevant for you.


To understand better the difference in printing time, the scorpion on the left took around 4h, the one on the right took almost 6h. Both tests used the same Elegoo Jupiter machine and resin.
With the resolution out of the way, let us consider the screen longevity because the speed of a printing job would also affect how long the LCD itself will last. Elegoo Jupiter SE 6K screens are advertised to last 2000 hours. That is 250 consecutive working days of 8 hours or roughly 500 jobs of an average 4 hours each.
That is more or less the duration of any Elegoo LCD screen, including the Mars 2 Pro. The difference is how much would it cost you to replace the screen. On a Jupiter the full price is 183.99€, by comparison a Mars 2 Pro was only around 45€. Of course, you can print much more in that period of time, but you also need to be conscious to not print with an empty build tray because in proportion every hour of print on a bigger screen is more expensive than on a smaller screen. So for low count model jobs a smaller printer is cheaper in the long run.
The other component that affects a print quality and time is the speed the machine can reach. The advertised speed of the Elegoo Jupiter SE 6K is 30-70 mm/h. Note that to ensure best results you should anyway not exaggerate with the speed as it can lead to failed prints or lower quality.
Of course, higher the speed, the quicker the job will be done. While in a smaller machine like the Elegoo Mars 2 pro that reaches only 50 mm/h, you may want to push the higher boundary to be able to do a second print immediately after, with such a big build volume, a bit more patience will guarantee better results, so a speed of 60/70 mm/h is more than enough.
Build volume of the Elegoo Jupiter SE 6K
Now that we understood better the quality component of this machine, is time to address the quantity portion. Here are some of the most common resin printers build volume in mm:
- Saturn 2: 219 x 123 x 250
- Anycubic M3 Plus: 194 x 122 x 245
- Anycubic M3 Premium: 219 x 123 x 250
- Anycubic Photon M3 Max: 300 x 298 x 164
- Saturn 1: 192 x 120 x 200
- Mars 3: 143 x 89 x 175
- Elegoo Jupiter SE 6K: 278 x 156 x 300
As you can see the Elegoo Jupiter SE has the same build volume as the previous machine and is comparable with the Anycubic Photon M3 Max, two of the biggest consumer printers on the market.
The quantity of miniatures that you can produce at the same time is incredible. I recently tried some alternative sculpts from One Page Rules for Tomb Kings models to test out The Old World, and after 2 print jobs I already had printed more than 1000 points… Even better, I could print everything already assembled without having to print the various sub-components and assemble them later with the pain that comes when the junctures are not perfect and you need to fiddle with the interlocks.
In my small Elegoo Mars 2 pro (whose volume build is dwarfed in comparison) I needed to cram everything in that little space I had available, meaning that optimizing the space would require a good amount of time in rotating models and playing Tetris.
As you can see from the image below, with the space available in the Jupiter, the problem is actually how to justify the print by including as much as possible:

In here you can see a Tomb King Colossus (77mm high), a Khemrian Warsphynx, a Screaming Skull Catapult and its crew, 3 Scarab Swarms, a Tomb King on horse and even a HeroForge custom made miniature because there was plenty of space!
Or to provide another example, here there are 28 Skeleton Warriors from OnePageRules and there’s still space left to add a few more:

If you want to create an army from scratch, or an entire D&D campaign, the Elegoo Jupiter SE provides you the build volume to do it as quickly and as painless as possible. It may not be your first option for a quick print although.
Finally, another advantage of such space, is the ability to do terrain in resin. Something where you would normally use a plastic printer for economic reasons, but should you want to try it with the Jupiter could you? And how would it look?
Well let’s have a look at this Egyptian looking lighthouse/tower: 112mm high and 130mm long. It fits perfectly within the build volume and there’s even space left for more scatter terrain.

And here are the results:


The result is pretty good. It is a single piece and sturdy (it was holed to avoid wasting too much resin, but the hole is at the bottom and not noticeable) and no assembly is required (the brazier on top being the exception).
It did use 150ml of resin (as calculated by Chitubox), that is not excessive, but depending on the cost of the resin you buy it could be around 5€, plus electricity (it took 7 hours to print at a 0.05mm layer) and cleaning products. Sure, resin printers use very little power, but it still adds up over many prints. With an FDM printer certain details don’t come as good, but for a terrain piece of this type it should be more than enough. Time-wise, comparing with an FDM printer, is in between an extremely low-quality and high speed print (200mm/s 0.24mm of layer) and one more accurate but slower (105 mm/s and 0.12mm of layer).
Active Carbon filter and hole for ventilation
What really differentiates a resin printer for another of the same category is the quantity and quality of extras available. For example the Elegoo Jupiter SE comes with an active carbon filter that is good to reduce some of the smell of the resin and some of the toxic gas (but not enough to not use protective gear).
It’s a USB dongle that is placed on the appropriate port and is quite common in more recent printers. It is also placed next to a hole for ventilation that becomes extremely useful if you are able to create your own ventilation system, considering in particular the size of this machine and the quantity of resin cured in one go. However, there is one issue: while you can buy replacement air purifiers from Elegoo, you cannot buy just the carbon. Instead, you have to buy the whole unit contributing to unnecessary e-waste.
Automatic resin feeding and recycling of the Jupiter SE
The other nice optional available is the automatic resin feeder able to pour the resin while you print and recycle at the end of the print. On paper this allows to maintain most of the resin on the bottle and add only the necessary quantity when required, and to recycle most of the resin when finished.
The way it works is that you have another USB dongle that you attach to the relevant port, then you connect two tubes (one for the air and one for the resin) to a cap that you place on top of your resin bottle, ensuring that you never shake that bottle to avoid resin clogging the air tube.
But here comes a long list of issues with this method:
First of all, resin will unavoidably remain within the feeder and the tubes, and while they provide you two caps with tubes so that you can swap between two resin bottles at a time, the resin within the feeder block will be extremely hard to remove and if you want to use different colours or even different types, some of it would unavoidably mix (mixing can be fine, but mostly it is something you want to do on purpose).
You could feed Isopropyl alcohol in the system to completely clean the resin inside, but that would require some extra work and attention.
As the build volume is huge, so is the tank. To fill the tank you need at least half litre of resin, so for this system to work perfectly you will most likely need the 2 litres bottle. With the one litre after a couple of prints you may encounter the error that the resin in the bottle is finished (even though there is more in it). Two litres bottles are much less common than one litres.
You will also need bottles compatible with the cap that is used for the feeder, meaning at least one Elegoo bottle that you will need to clean and refill (if you don’t use exclusively their resin).
And then we get to the recycling part.
I personally had to forcedly lower the suction tube, but I didn’t have enough resin in the bottle according to the system so I had to force start the printer (the resin was enough to print whatever I needed, but the sensor requires much more). Once it is lowered, it will naturally suck as much as it can. You will then have to tilt the tank by removing both screws and placing one below the tank at the opposite corner from the sucking pipe. You can see the image below from the instruction manual:

The tank is huge, the quantity that remains in the corner without being recycled is more than you would expect. I found myself having to pour the remaining resin in the bottle manually anyway. Sure, it’s much less quantity as most has already been removed, but if you do it carefully, it’s much quicker to do it manually. Without considering that if you use this system, you would need to remove the lid with the tubes inserted in the resin so either you waste that resin in the tubes or that remaining in the tank.
Can you use the tank cleaning functionality to finish the work? This is an amazing feature that prints for few seconds the entire surface of the LCD so that you can then remove a single film of cured resin that traps all left-overs from failed prints and generally helps to remove the last bits of resin.
Well… The LCD is much smaller than the tank itself, and while this is natural, it is not that noticeable in smaller printers like the Mars 2 Pro. But here you see a considerable amount of tank (roughly a couple of cm per side) uncured that do not help much in removing the left-over resin.
Bottom line? After few tries and initial excitement by this feature, I removed it and relied on the good old manual pouring of resin, without considering that I can now give a bottle a good shake before using it.
I basically thing the auto resin feeding is a trap.
Content of the Elegoo Jupiter SE 6K box
What to expect in the box when you receive an Elegoo Jupiter SE 6K?
Of course the printer itself, with the USB air purifier and the auto resin feeding module mentioned above. It comes with a build platform to install and level before starting to use and the appropriate resin tank.
There are 2 bottle cap modules if you plan to use the auto feeder, 2 handles to install on the cover, an adapter, a usb drive, backup screws, a tool kit, a plastic scraper, mask, gloves and paper funnels, plus extra screws which are pretty good in case you need to tinker with the machine at later stages.
Most of the accessories are ok for beginners, and they will be familiar to a user of a Mars 2 Pro. From this machine, aiming at more experienced users, I would have expected better tools.
What is missing however?
A replacement FEP (the film that covers the bottom of the tank). That was included in my Mars 2 Pro and it’s the first consumable you will unavoidably have to replace. Elegoo itself sells two types, one for the first edition that is slightly bigger and thicker and one for the new edition that is an improved version, sold at 73.99€ for 5 pieces. I suspect either would work just fine, but once you are committed with the Second Edition, better use the same quality components as the originals. Plus they claim the new edition sticks less to the bottom of the tank.
Conclusion on the Jupiter SE Review: is this printer for you?
As we mentioned in the intro, the final summary here is from the point of view of someone who went from a smaller printer, like the Mars 2 Pro, to a bigger one, like the Jupiter SE 6K.
The first thing everyone looks at is the resolution. The 6K advertised in the Jupiter does sound 3 times better than a Mars 2, but, as we have seen above, it is more of a marketing buzzword than actual 3 times better resolution.
With that out of the way, the second interesting thing is the speed. But remember: the higher the speed the more chances of print failures! The Jupiter SE can easily reach a comfortable speed zone and even go a little bit higher on certain low detail prints. Something you should also consider is that you need more force to pull the minis from the big FEP you have on a Jupiter printer. So while it might be able to go faster, it will likely require some more mm of retraction to pull the minis safely from the FEP.
And the most evident thing for which you would consider this printer is the build volume: gosh! Don’t even know where to start. If you are a patreon of any of the many content creators, you could print their entire monthly production in 1 or 2 runs. At the beginning you will go crazy, putting everything that you can in the huge space you have available. And that is extremely satisfactory.
After a while, however, you will naturally run out of things to print. Terrain pieces (as shown above) are a good alternative if you don’t mind the increased costs (don’t forget to add also the longevity of the LCD screen). Textured bases or toppers are also another good alternative if you prefer those to basing yourself. A single run can include around 25 30x30mm square bases and almost 40 25x25mm. Printing big bases in resin can be satisfactory but also expensive.
And this leaves us with the economic factor. The printer itself has a considerable cost, especially if you are printing occasionally and for fun. Cleaning it after every print also takes time and much more resin than I was used to from a Mars 2. Fair enough, in the case of the Mars, I also had an Elegoo Mercury that is a wash and cure station extremely helpful. If you don’t have it and you are used to clean everything manually, then nothing new for you. But how much I miss my Mercury cleaning the build plate for me!
Any residual resin on the plate would cause a printing failure. And how much resin is left on top of the plate!
This brings usto an incredible miss. Why is there no way for the plate to hang vertically so that the resin would flow out by the shortest side, instead of accumulating on top and getting stuck on the surface itself? It could have been as easy as creating a different handle and would have helped in the cleaning process (and in saving some resin). Sure, you could print a handle to do it but it would be much better to have these problems solved in the design process of building a machine like this.
My personal opinion is that this printer is good if you have a big project and you can take advantage of the greater printing volume. You set it up, go crazy for few days, and then store back the printer. And for the touch ups, extra small pieces and occasional print jobs, you keep a smaller printer. I would not recommend a Jupiter SE to a beginner or as your only printer unless you constantly need huge quantities of printed resin. If used correctly, this is an excellent printer!
The final notes go on the accessories: the carbon filter is good, nice to have a way to add custom-made ventilation. The auto-recycle module is not yet where I would want. It requires more resin than is needed, it’s extremely slow in sucking the resin out and it does not prevent the manual pouring of the left-overs. I would not recommend to install it.
- Big build volume!
- More compact than earler editions
- Okay XY resolution, when looking at build volume
- Resin feeder is designed poorly
- Handles could be better placed
- Cumbersome for beginner's
Experience with Elegoo support with the Jupiter SE
But what if something goes wrong and you need help? Well actually somehow after a few prints the levelling needed to be adjusted and in doing so something went wrong and the plate was convinced it had to go lower than the actual screen. It would simply keep grinding into the screen! Re-levelling was not registering the new height at all, so I contacted Elegoo support team.
Their support team replies via email only Monday to Friday between 09:00-12:00 and 13:00-18:00 (GMT +8) that means that depending on where you are in the world it can take a full day between your question and their reply.
The team was pretty good in understanding the issue and provided few solutions and after a bit of back and forth I was able to resolve it and resume printing, discovering I made a mistake while re-levelling the second time. The support process is lengthy however, because of the time difference and the contact method used, so in the meanwhile you can look at Elegoo Support centre that has already many standard questions answered.
The Elegoo Jupiter SE section of the site is still in development, so don’t confuse it with the Elegoo Jupiter first edition.
Sadly, after fixing the issue I ran into another problem with the printer: suddenly it had print fails upon print fails. I troubleshooted a ton with the Elegoo Support Team (temperature, settings, resin, slicer, firmware etc.). In the end they sent me a new printer.
It sould be noted that the support team did not know that this printer was for a review, so we did not get any special care or treatment with them.