
This article collects information about all the different Kill Team factions.
New to the hobby? Once you have chosen a team, here is how to paint your first miniature, plus a full guide to painting your first army.
The first and main section of the article gives you a brief, easy to understand overview of each of the bespoke kill teams designed for this edition of the game. These are the main factions most people play, and also the factions that are regularly provided with balance updates to their rules by Games Workshop.
The second section of the article is an archive of our coverage of the “launch” factions from Kill Team Compendium, most of which have been replaced by bespoke factions or mostly forgotten as viable teams in the game, but you can still collect and play them.
Be sure to check our Kill Team Beginner’s guide if you are looking to get started.
List of all Kill Team Factions
The following list shows all the factions currently playable in Kill Team:
- Space Marines
- Grey Knights
- Imperial Guard
- Veteran Guardsmen
- Hunter Clade
- Ecclesiarchy
- Talons of the Emperor
- Death Guard
- Thousand Sons
- Chaos Daemons
- Craftworlds
- Greenskins
- Ork Kommandos
- Hunter Cadre
- Cadre Mercenary Kill Team
- Hive Fleets
- Brood Coven
- Exaction Squad
- Hand of the Archon
- Warpcoven
- Phobos Strike Team
- Novitiate
- Pathfinder
- Wyrmblade
- Corsair Voidscarred
- Legionary
- Void-Dancer Troupe
- Blooded
- Gellerpox Infected
- Elucidian Starstrider
- Imperial Navy Breacher
- Kroot Farstalker Kinband
- Intercession Squad
- Kasrkin
- Necron Hierotek
- Hearthkyn Salvager
- Fellgor Ravager
- Inquisitorial Agent
- Scout Squad
- Blades of Khaine
- Nemesis Claw
- Mandrake
Affiliate Link Disclosure
Age of Miniatures is reader-supported. When you buy through links on our site, we may earn an affiliate commission. Learn more about that here.
Exaction Squad
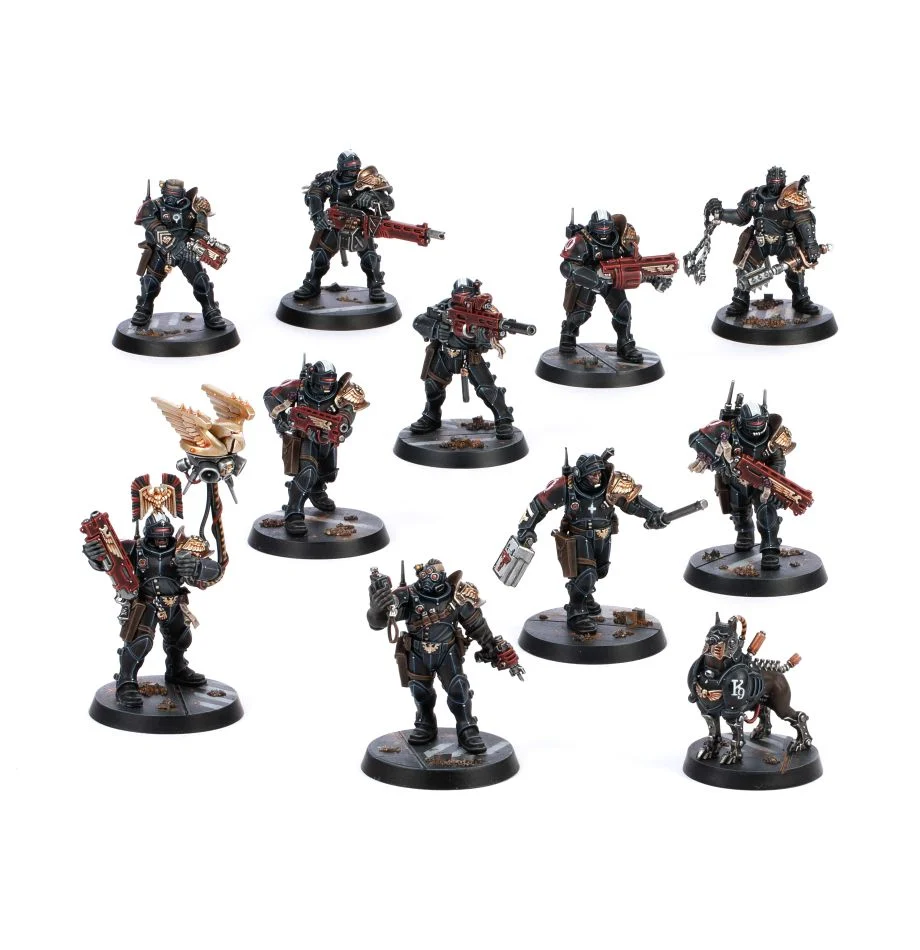
The Exaction Squad are officers of the Adeptus Arbites, which is essentially the military police/riot troops of the Imperium, acting as judge, jury and executioner all in one when someone steps outside of Imperial Law.
In Kill Team, the Exaction Squad employ a mix of short-range firepower and close combat durability as they’re armed with either combat shotguns or a shield and a shock baton, and they’re even able to shoot enemies who are in close combat with other Exaction Squad operatives, so they’re great at pinning down enemies and ganging up on them. They also have a semi-mechanical mastiff guard dog with them, as well as a slew of other specialists.
In general, the Exaction Squad is a pretty durable mid-range medium-sized kill team who can be great in Into the Dark games and other situations where you need to control where your opponent can move.
The Exaction Squad is a bespoke kill team with its own model kit, and you can read our Exaction Squad Kill Team Guide here if you want more information.
Play Exaction Squad if you like: Judge Dredd, dystopian police states
Hand of the Archon
The Hand of the Archon kill team are a raiding party from the dark Aeldari culture of the Drukhari.
In Kill Team, the Hand of the Archon team gets stronger the more enemies its operatives incapacitate, as each kill grants the killer a Pain Token, which can be used to buff your operative’s Action Point Limit, reroll dice or make a free Dash Action. This means this team is all about dealing decisive damage its targets, and with lots of specialists and great weapon options, the team also excels at it.
In general, the Hand of the Archon is a mid-sized kill team that’s great at doing damage but not very durable (it is and Aeldari team, after all), and they especially struggle against elite teams (which don’t have many operatives for you to gain Pain Tokens from).
The Hand of the Archon kill team is a bespoke kill team with its own model kit. You can read our Hand of the Archon Kill Team Guide if you want more information.
Play the Hand of the Archon Kill Team if you like: Edward Scissorhands, the song Hurt by Nine Inch Nails/Johnny Cash

Warpcoven
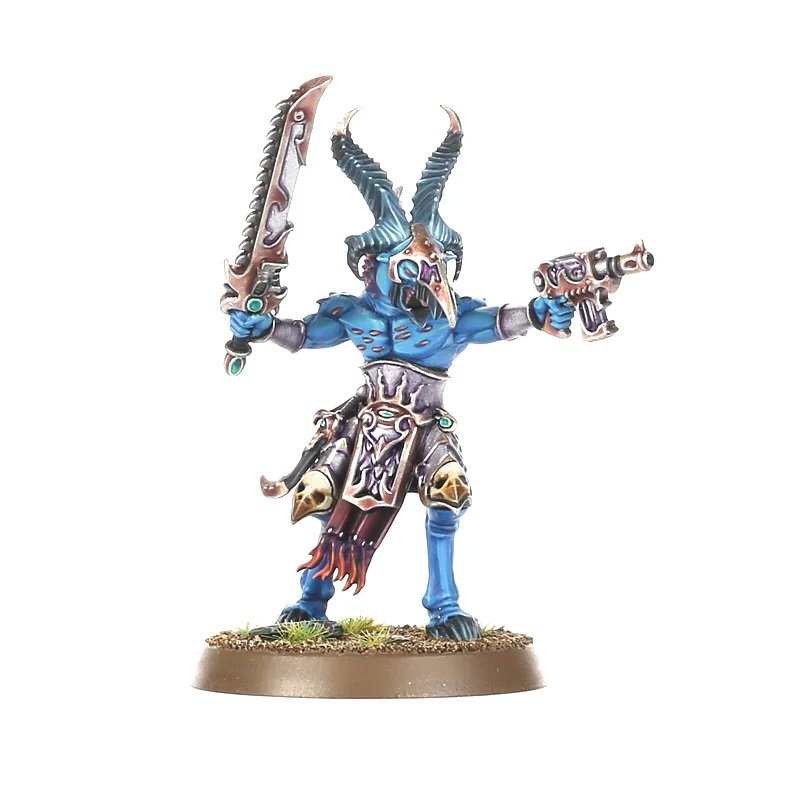
The Warpcoven kill team hails from the Thousand Sons legion of Chaos Space Marines, who are all dedicated to Tzeentch, the Chaos god of Magic and Change.
In Kill Team, the operatives of the Warpcoven are lead by powerful Sorcerers, which in turn are supported by Rubric Marines (slow but powerful Space Marines with armour-penetrating boltguns) or Tzaangor (mutated beastmen who excel in close combat). The operatives of the Warpcoven can all either perform Psychic Actions or benefit from them, so if you want a team that’s all about magic, Warpcoven is the team for you.
In general, the Warpcoven kill team is a very versatile “hero” kill team that can be either elite (Rubric Marines) or more of a horde team (Tzaangor). The Warpcoven’s real weakness for beginners is that it’s been updated a lot over the years, so you need to figure out what an entire page of updates and FAQ’s mean for your team before you start playing, and when you do, another set of updates are probably just around the corner.
The Warpcoven kill team are a White Dwarf/Kill Team Annual 2022 kill team, built from the Rubric Marines box, the Exalted Sorcerers box, and the Tzaangors box (with an optional Tzaangor weapons upgrade pack). You can read our Warpcoven Kill Team Guide if you want more information.
Play the Warpcoven Kill Team if you like: playing a Sorcerer in Dungeons and Dragons, Birdman.

Phobos Strike Team
The Phobos Strike Team are augmented superhuman Space Marines of the Imperium specializing in covert ops.
In Kill Team, the Phobos Strike Team excel at messing with the head of your opponent: You can delay their activations, place mines they’ll trip over, lower their Action Point Limit near objectives, and so on. On top of that, they have a wide selection of specialist operatives available.
In general, the Phobos Strike Team are an advanced elite team with the survivability of a Space Marine team like the Intercession Squad, but with a playstyle that leans more into board control and debuffing the enemy.
The Phobos Strike Team is a bespoke kill team with its own model kit, with the ability to add in operatives from the Space Marine Reiver kit. You can read our Phobos Strike Team Kill Team Guide if you want more information.
Play the Phobos Strike Team if you like: Rainbow Six games, blue decks in Magic: The Gathering

Veteran Guardsmen
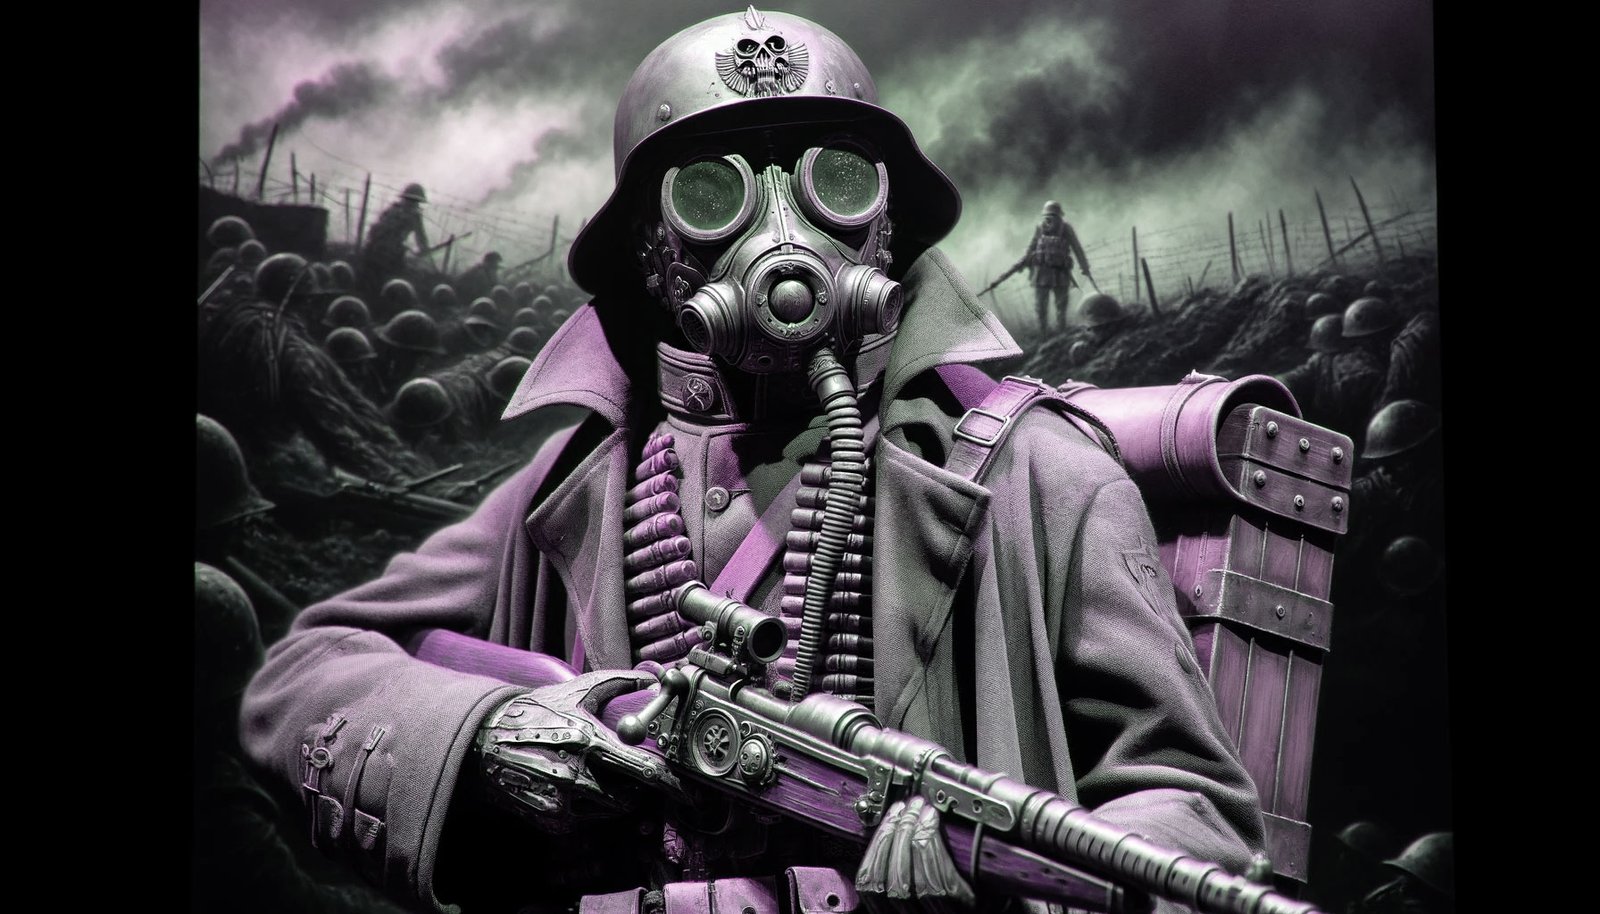
The Veteran Guardsmen are battle-hardened specialist infantry of the Astra Militarum, the regular human army of the Imperium.
In Kill Team, the Veteran Guardsmen are a “horde” Kill Team where you can have up to 14 operatives in the killzone at a time thanks to their Ancillary Support ability, many of which can activate 2 operatives at a time. Alternatively, you can play them with a bit more of a specialist playstyle with 10 operatives with bespoke roles as well as the second Ancillary Support ability: being able to call in devastating airstrikes, Helldivers 2 style!
In general, the Veteran Guardsmen are good shooters with access to excellent special weapons, but they’re not strong in close combat and go down easily to incoming enemy fire if caught out of cover.
The Veteran Guardsmen are a bespoke kill team with their own model kit available, and you can read our Veteran Guardsmen Kill Team Guide if you want more information.
Play Veteran Guardsmen if you like: All Quiet on the Western Front, Helldivers 2

Hunter Clade
The Hunter Clade are mechanically augmented soldiers of the Adeptus Mechanicus, a cult of religious cyborg engineer priests in charge of most of the technology in the Imperium.
In Kill Team, the Hunter Clade can field a mix of Skitarii, which are excellent shooters able to make enemies act as if they’re Injured if they get too close to them (they’re radioactive), and Sicarians, which are even more heavily augmented elite melee infantry who stalk the enemy on their mechanical mantis legs that make them eerily fast. Since all Adeptus Mechanicus soldiers are neuro-linked to their Tech-Priests, you can issue team-wide Edicts to your soldiers in each Turning Point to make them excel in specific situations at the cost of their abilities in other areas.
In general, the Hunter Clade are a highly adaptable and versatile kill team for players who don’t mind having a lot of stuff to manage, and the ability to tweak their playstyle on the fly.
Hunter Clade is a White Dwarf kill team made from the Skitarii Rangers and Sicarian Ruststalkers boxes, and you can read our Hunter Clade Kill Team Guide if you want more information.
Play Hunter Clade if you like: The Mechanicus video game, the Iron Harvest/ 1920+ universe based on Jakub Ruzalski’s artwork

Novitiate
The Novitiate kill team are applicants for the Adepta Sororitas, the women-only military branch of the church of the Imperium.
In Kill Team, the Novitiate are a kind of “glass cannon” team with lots of opportunities to dish out damage in melee and at medium range with flamers and melee weapons, but without much armour or Wounds to soak up incoming damage. To mitigate this and improve the overall output of the team, the Novitiate have the Acts of Faith ability, which gives you a number of chances to simply change the result of single dice rolls throughout the game, as a representation of the miraculous effect of the faith these warrior nuns have in their God-Emperor.
In general, the Novitiate are an aggressive kill team without much survivability, but with lots of access to flamer damage and some game-altering abilities.
The Novitiate are a bespoke kill team with their own model kit. You can read our Novitiate Kill Team Guide if you want more information.
Play the Novitiate kill team if you like: Warrior Nun, Sister Act, monasticism

Pathfinder
The Pathfinder kill team are footsoldiers of the T’au Empire, a multi-species civilization of highly advanced aliens united in the fight for the Greater Good.
In Kill Team, they’re ranged combat experts able to single out targets with their Markerlight ability and then shower them with terrifying firepower. They’re also aided by a selection of specialist drones that add shielding, recon options and even more firepower to the team.
In general, the Pathfinder kill team are excellent shooters with an advanced playstyle that strategist gamers will love, but they’re not very durable and require some micromanaging to function well.
The Pathfinder kill team is a White Dwarf/Kill Team Annual 2022 team built from the Pathfinders model kit. You can read our Pathfinder Kill Team Guide if you want more information.
Play the Pathfinder Kill Team if you like: High-Tech Drone Sci-Fi (The Creator, Oblivion), suspect political utopias

Wyrmblade
The Wyrmblade are a kill team from the Genestealer Cults, a human-hybrid revolutionary movement of insurrectionists undermining the population and industrial centres of the Imperium as the Vanguard of the Tyranid alien invasion fleets.
In Kill Team, the Wyrmblade employ lots of expendable Neophytes with autoguns or shotguns as support troops for a bunch of really strong (and cool-looking!) specialist operatives such as the four-revolver-slinging Kelermorph or the sneaky Sanctus Talon. Being the infiltration specialists they are, the Wyrmblade can also ambush enemies by changing their Order from between Conceal and Engage in activations where enemies can’t see them.
In general, the Wyrmblade are like a team of heroes with a very mobile supporting crew, and are excellent in the hands of players who love and advanced tactical challenge.
The Wyrmblade Kill Team is a White Dwarf/Kill Team Annual 2022 team based around the Genestealer Cults Neophyte model kit as well as the Locus, Sanctus and Kelermorph character kits. You can read our Wyrmblade Kill Team Guide for more information.
Play The Wyrmblade Kill Team if you like: Star Wars: Andor, the last two Hunger Games films, revolutionary politics

Corsair Voidscarred
The Corsair Voidscarred are a motley crew of piratical elf-like Aeldari, hailing from Asuryani and Drukhari cultures.
In Kill Team, they represent what Aeldari do best: They’re lightning fast (everyone can perform a free Dash in their activation), excellent in close combat with their power weapons, and everyone in the team is an expert at what they do.
In general, the Corsair Voidscarred are a mid-sized versatile kill team focusing on mobility and hit-and-run tactics, but they’re also very vulnerable to enemy attacks, which makes them mostly suitable for advanced players.
The Corsair Voidscarred are a bespoke kill team with their own model kit. You can read our Corsair Voidscarred Kill Team Guide if you want more information.
Play the Corsair Voidscarred if you like: Pirates of the Caribbean, Guardians of the Galaxy

Legionary
The Legionary kill team are Chaos Space Marines, former Imperial superhumans who rebelled 10,000 years ago to serve the gods of Chaos.
In Kill Team, the Legionary kill team are an elite kill team of tough, durable warriors. Even though you can only field 6 operatives, the team still offers lots of variety due to its Chaos Blessing ability, which allows your warriors to dedicate themselves to one of four Chaos Gods: Khorne, who turns them into melee powerhouses; Nurgle, who makes his disciples much more resistant to incoming ranged attacks; Slaanesh, who makes his acolytes faster, and Tzeentch, who makes followers of his ways better at shooting.
In general, the Legionary kill team is a highly customizable elite kill team that has the tools for any situation, even though it might take an expert player to fully take advantage of them.
The Legionary kill team is a bespoke kill team with its own model kit. You can read our Legionary Kill Team Guide if you want more information.
Play The Legionary kill team if you like: Iron Maiden t-shirts, the Horus Heresy book series, playing chaotic evil characters in Dungeons & Dragons

Void-Dancer Troupe
The Void-Dancer Troupe kill team are an Aeldari team from the Harlequin faction.
In Kill Team, the Void-Dancer Troupe is like the lethal players of a murderous theatre production: They gain bonuses from performing their individual parts perfectly, so that for example, an operative performing a Fall Back action adds a point to a Performance Tally, and when that reaches 4, your entire team can now Fall Back for 1 less action point!
In general, the Void-Dancer Troupe is a highly mobile mid-sized team with a very small selection of operative types (4), but they’re all excellent fighters. The Void-Dancer Troupe is definitely a team for advanced players.
The Void-Dancer Troupe is a White Dwarf/Kill Team Annual 2022 team built from the Harlequin Troupe kit, and the character kits for the Death Jester and Shadowseer. You can read our Void-Dancer Troupe Kill Team Guide if you want more information.
Play the Void-Dancer Troupe if you like: Shakespeare, ballet, the elves of The Hobbit rather than the elves of The Lord of The Rings

Blooded
The Blooded kill team are a team of human deserters from the Astra Militarum who has scorned the Emperor to seek the favour of the Chaos Gods.
In Kill Team, the Blooded play like a melee berserker version of the Veteran Guardsmen: They have lasguns and Imperial special weapons such as plasma guns, but they also have lots of melee weapons (and a big, hulking Chaos Ogryn), and they get stronger the more enemies they incapacitate as well as stronger the more of your own operatives die in close combat!
In general, the Blooded kill team is a synergy-focused “horde” kill team with two strong “hero” characters, but they’re also vulnerable to enemy damage (which is fine as long as your operatives are in close combat when they die).
The Blooded kill team is a bespoke kill team with their own model kit. You can read our Blooded Kill Team Guide if you want more information.
Play the Blooded Kill Team if you like: Gangs of New York, Darktide, punk rock and/or hooliganism

Gellerpox Infected
The Gellerpox Infected kill team are a team of Chaos Daemons who have infected the crew and machinery of an Imperial ship travelling the Warp.
In Kill Team, the Gellerpox Infected debuff enemy operatives with their Techno-Curse and soak up enemy damage as if nothing happened, and they can add so many little bugs and critters to their already horde-sized team that you can completely swarm the board with operatives.
In general, the Gellerpox are an almost exclusively melee horde kill team with a bunch of really big, durable operatives supported by a swarm of smaller expendable operatives. There’s a lot to keep track of, so they’re not a beginner-friendly team.
The Gellerpox Infected are a bespoke kill team with their own model kit. You can read our Gellerpox Infected Kill Team Guide if your want more information.
Play the Gellerpox Infected Kill Team if you like: Gremlins, zombie films, Davy Jones’ crew in Pirates of the Carribbean 2

Elucidian Starstrider
The Elucidian Starstrider kill team are a Rogue Trader and her crew, travelling the Galaxy, exploring and trading for the Imperium.
In Kill Team, the Elucidian Starstrider team is a highly unusual team made up of all sorts of specialists, but with faction rules that mostly take place outside of the killzone itself: Their Warrants of Trade ability can change who is the attacker or defender in the game, how much equipment you can take, your Scouting Options before the game, and so on. You can also call down airstrikes just like the Veteran Guardsmen.
In general, the Elucidian Starstrider team is a kind of mid-sized “hero” team with a group of elite characters supported by more standard Voidsmen (and one excellent good boy of a dog). The team is a real hobbyist’s dream with some very distinct models, but not a team with a lot of listbuilding versatility.
The Elucidian Starstrider kill team is a bespoke kill team with its own model kit. You can read our Elucidian Starstrider Kill Team Guide if you want more information.
Play the Elucidian Starstrider Kill Team if you like: The Rogue Trader RPG (as a tabletop game or video game), Dune.

Imperial Navy Breacher
The Imperial Navy Breacher kill team is a team of ordinary humans specialized in boarding enemy space ships.
In Kill Team, the Imperial Navy Breacher team excels in close quarters such as the Into the Dark space hulk corridor terrain: They have great short range firepower and melee weapons, they take less damage from area attacks, and once per Turning Point, you can activate two operatives in a row if they’re close to each other, so you can go for a real “breach and clear” playstyle.
In general, the Imperial Navy Breacher team is a kind of horde team with decent survivability (for a horde team) and good weapons, but with a lack of reliable long range firepower.
The Imperial Navy Breacher kill team is a bespoke kill team with its own model kit. You can read our Imperial Navy Breacher Kill Team Guide if you want more information.
Play The Imperial Navy Breacher Kill Team if you like: Void Bastards, Rainbow Six: Siege, The Expanse

Kroot Farstalker Kinband
The Farstalker Kinband kill team are a team of alien auxiliaries for the T’au Empire.
In Kill Team, the Farstalker are the kill team to take if you want to play as a hunter who stalks his prey. Their rules interact well with being in cover, and they use hunting companions such as a Kroot bird and Kroot hounds (life forms on their Kroot homeworld are almost all different genetic variations of Kroot, but that’s a long story) to track down and coordinate attacks on their prey.
In general, the Farstalker Kinband are a “focus fire” medium-sized kill team that excels at taking down key targets together. They’re very vulnerable in the open, but if they can get to Cover, they have some of the best defenses against sniper fire available to any kill team.
The Farstalker Kinband are a bespoke kill team with their own model kit. You can read our Kroot Farstalker Kinband Kill Team Guide if you want more information.
Play the Kroot Farstalker Kinband if you like: Prey (the new good Predator movie), slightly dated representations of indigenous peoples in popular culture.

Intercession Squad
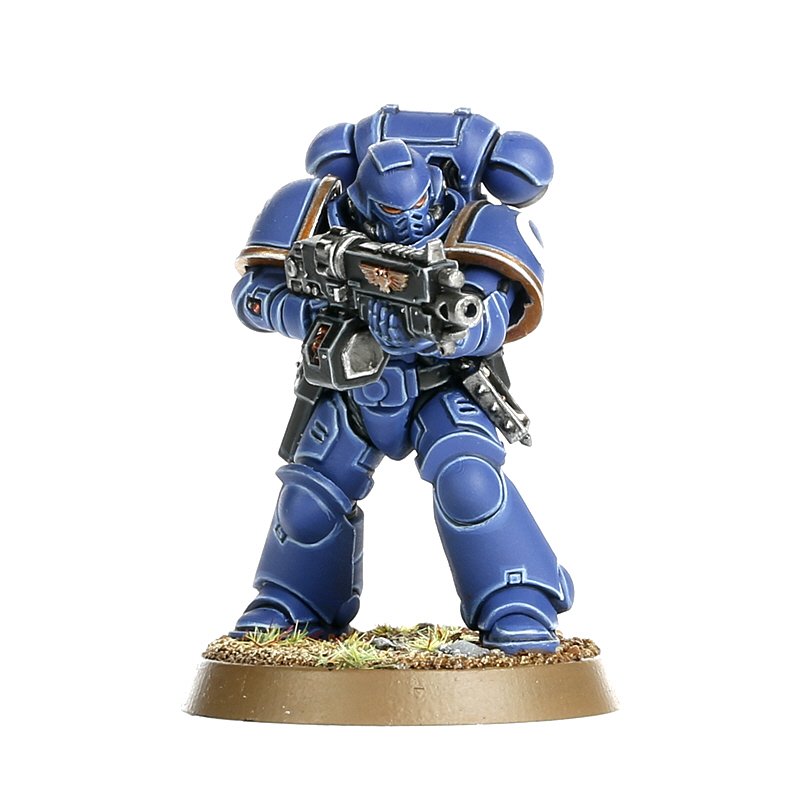
The Intercession Squad are Space Marines, augmented super-soldiers of the Imperium, and the poster faction of Warhammer 40,000.
In Kill Team, the Intercession Squad are an elite team whose operatives are either good at close combat or melee: they can either Shoot or Fight twice in their activations! The Intercession Squad have very few specialists, but their standard operatives are power houses with good weapons, heavy armour and tons of wounds.
In general, the Intercession Squad is an excellent starter faction without too many moving parts or micromanagement tactics, where each operative can hold his own in the killzone.
The Intercession Squad is a kill team whose rules are freely available from the Warhammer Community Website, and it’s built from the Intercessor and Assault Intercessor model kits. You can read our Intercession Squad Kill Team Guide if you want more information.
Play Intercession Squad if you like: Space Marines, The Brotherhood of Steel in the Fallout Universe.

Kasrkin
The Kasrkin are the supreme elite infantry of the Astra Militarum, the ordinary human military of the Imperium.
In Kill Team, the Kasrkin are expert gunners, and almost all of them have some sort of special weapon that blows stuff up or puts holes in it. To make their shooting even more reliable, they generate Elite Points that can be used to alter their dice rolls.
In general, the Kasrkin are a medium-sized shooting kill team with decent survivability and a pretty straightforward playstyle.
The Kasrkin kill team is a bespoke kill team with its own model kit. You can read our Kasrkin Kill Team Guide if you want more information.
Play the Kasrkin Kill Team if you like: Call of Duty, Darktide, Band of Brothers

Necron Hierotek
The Hierotek kill team are an elite team of Necrons, an immortal species who has left their physical bodies behind to inhabit metallic constructs and rid the Galaxy of all life.
In Kill Team, the Hierotek team is led by one of a selection of extremely powerful Cryptek leaders, who all break the rules of the game in different ways, such as reducing enemy movement, making enemies act as if they’re injured, or even pick targets for shooting through the line of sight of another operative. The Cryptek is accompanied by Necron operatives mostly suited for ranged combat, and they all heal between activations and have a chance to be resurrected when they are incapacitated.
In general, the Hierotek kill team is a “hero” kill team centered around one powerful character and his minions, with lots of different playstyles and extreme survivability due to its regenerative abilities.
The Hierotek kill team is a bespoke kill team with its own model kit, but can also be augmented with a number of Necron character kits, such as the Psychomancer or Chronomancer. You can read our Hierotek Kill Team Guide if you want more information.
Play the Hierotek Kill Team if you like: Playing the Necromancer in Diablo 2/3/4, Stargate, Ancient Egypt

Ork Kommandos
The Ork Kommandos are a specialist team of operatives from the Orks faction in Warhammer 40,000. Normally, Orks are all about raging and charging at the enemy, but the Kommandos are the sneaky kind.
In Kill Team, the Ork Kommandos are a stealth team with the ability to do all sorts of stuff while staying concealed and safe from enemy shooting. They can Charge while concealed, and have some pretty nasty melee weapons for that purpose, but, being Orks, they also have a good selection of scary but unreliable special guns such as a Rokkit launcher (Orks can’t spell good) and a sniper machine gun (!?). Finally, the Kommandos field the iconic duo of the Grot Kommando (a tiny goblin in scuba gear!) and the Bomb Squig, a self-detonating little monster strapped with land mines and dynamite, so it’s not all sneaky business.
In general, the Ork Kommandos are a powerful kill team with lots of Wounds, 11 operatives and an array of abilities that help them dictate the terms of engagement in many different situations.
The Ork Kommandos are a bespoke kill team with their own model kit, and you can read our Ork Kommandos Kill Team Guide if you want more information.
Play Ork Kommandos if you like: Where Eagles Dare, The Expendables, The Commandos video games

Hearthkyn Salvager
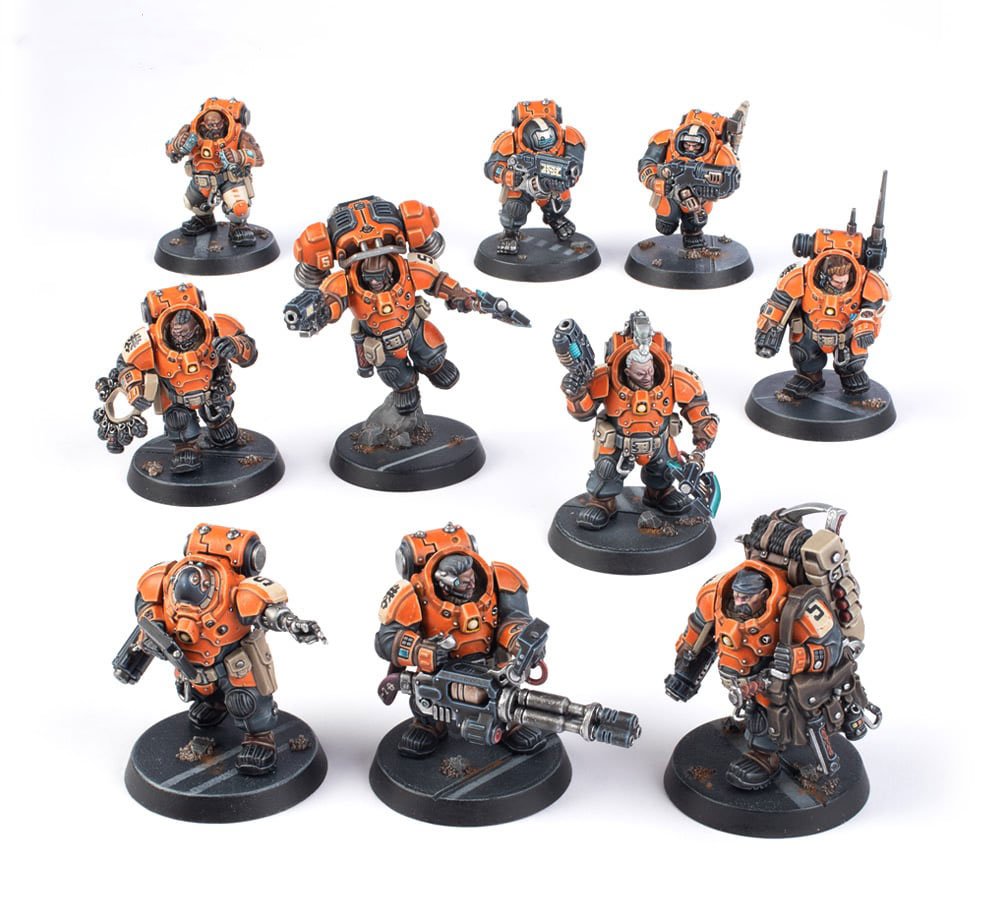
The Hearthkyn Salvagers are recon troops of the Leagues of Votann, a dwarf-like species of demi-human clones living near the Galactic Core in Warhammer 40,000.
In Kill Team, they’re a team of specialist gunners who carry grudges against their enemies, which means they score more and more critical hits against an enemy the more Hearthkyn operatives it has incapacitated in a game. They’re also expert defenders, able to upgrade Barricades to Heavy cover and equip even their Gunners with excellent Plasma Knives for close combat.
In general, the Hearthkyn Salvagers are a tough medium-sized kill team that have strong options in both ranged and close combat, but they’re one of the slowest-moving teams in the game, so they can struggle with getting to the objectives they need to take if they can’t play defense.
The Hearthkyn Salvagers are a bespoke kill team with their own model kit, and you can read our Hearthkyn Salvagers Kill Team Guide if you want more information.
Play the Hearthkyn Salvagers if you like: Fantasy dwarves (Gimli in Lord of the Rings. Etc) , Deep Rock Galactic/Survivor, Torbjörn from Overwatch
Fellgor Ravager
The Fellgor Ravagers are mutated humans who have taken on the appearance of monstrous goats and have fallen to the influence of the forces of Chaos.
In Kill Team, the Fellgor Ravagers are a team of melee berserkers, who are infamous across the Kill Team community for being almost impossible to stop: When a Fellgor operative is incapacitated, it doesn’t die, but instead gets to keep moving and attacking (although it becomes Injured) until the end of its next activation or it is hit by a critical hit in a shooting attack, so the Fellgors just keep coming at you!
In general, the Fellgor Ravagers are an excellent melee team of medium size with terrible Saves but excellent survivability. Their only real drawback is the lack of effective long range shooting.
The Fellgor Ravager kill team is a bespoke kill team with its own model kit. You can read our Fellgor Ravager Kill Team Guide if you want more information.
Play the Fellgor Ravager kill team if you like: Fast zombies (28 Days Later, etc.), Black Metal, the Khazra in Diablo games

Inquisitorial Agent
The Inquisitorial Agent kill team are the henchmen of an Inquisitor, a powerful special agent of the Imperium.
In Kill Team, the Inquisitorial Agent kill team are an extremely diverse kill team that you can play in two ways: Either as a team of 12 unique operatives ranging from an Astra Militarum operative, a Mystic, a lobotomized Servitor and a dual-wielding gunslinger, or as 7 of those operatives and 6 taken from one of almost any other non-Space Marine Imperial kill team in the game! The combinations feel almost endless.
In general, the Inquisitorial Agent kill team has some very good melee specialists and access to many great shooting operatives from the other kill teams, but figuring out the optimal way to assemble the team can be a bit of a chore. That being said, if you like a kill team with a unique feel and an interesting narrative, you can’t go wrong with this band of misfits.
The Inquisitorial Agent kill team is a bespoke kill team with its own model kit, of which you’ll need to buy two to field a full team, or you can buy one Agent kit and one from the Imperium faction you want to add to the team. You can read our Inquisitorial Agent Kill Team Guide if you want more information.
Play the Inquisitorial Agent Kill Team if you like: The Eisenhorn novels, Solomon Kane, that Monty Python sketch where no one expects them

Scout Squad
The Scout Squad are a team of Space Marine prospects, serving the Imperium without having become fully superhuman yet.
In Kill Team, the Scout Squad are pretty easy to use in-game with durable fighters and abilities and weapons that are simple to understand and use, but in the setup of each game, their scouting abilities really shine, letting them prepare the battlefield with trip wires, mines and sensors.
In general, the Scout Squad is a mid-sized kill team with good survivability and a versatile toolbox of weapons and skills.
The Scout Squad is a bespoke kill team with its own model kit. You can read our Scout Squad Kill Team Guide if you want more information.
Play the Scout Squad Kill Team if you like: The humans in the old Predator films, XCOM

Blades of Khaine
The Blades of Khaine are a specialist kill team of the Asuryani Aeldari.
In Kill Team, the Blades of Khaine is made up of either the sneaky Striking Scorpions, the ranged Dire Avengers or the melee berserkers of the Howling Banshees (or a combination of the three). Each operative type has access to a list of Aspect Techniques which basically makes them act like a bunch of different operatives, so while you have very few operative types at your disposal (3 plus 3 Leader variants), your opponent will still have a hard time figuring out what your team can do.
In general, the Blades of Khaine is a strong mid-sized kill team with access to excellent close combat damage and good mobility, but with the signature vulnerability of Aeldari kill teams.
The Blades of Khaine is a bespoke kill team built from either the Striking Scorpions box, the Dire Avengers box or the Howling Banshees box. You can read our Blades of Khaine Kill Team Guide if you want more information.
Play The Blades of Khaine if you like: Old samurai films, obsessing about just one hobby until your friends can’t stand hearing about it anymore

Compendium Teams
The following is an overview of the factions presented in the Kill Team: Compendium book. These were initial, “index” kill teams for all 40K factions made for the debut of this edition of Kill Team, and while some of them are still fun to play for experienced Kill Team players, we’d recommend you mostly stick to the bespoke kill teams in the first half of this article.
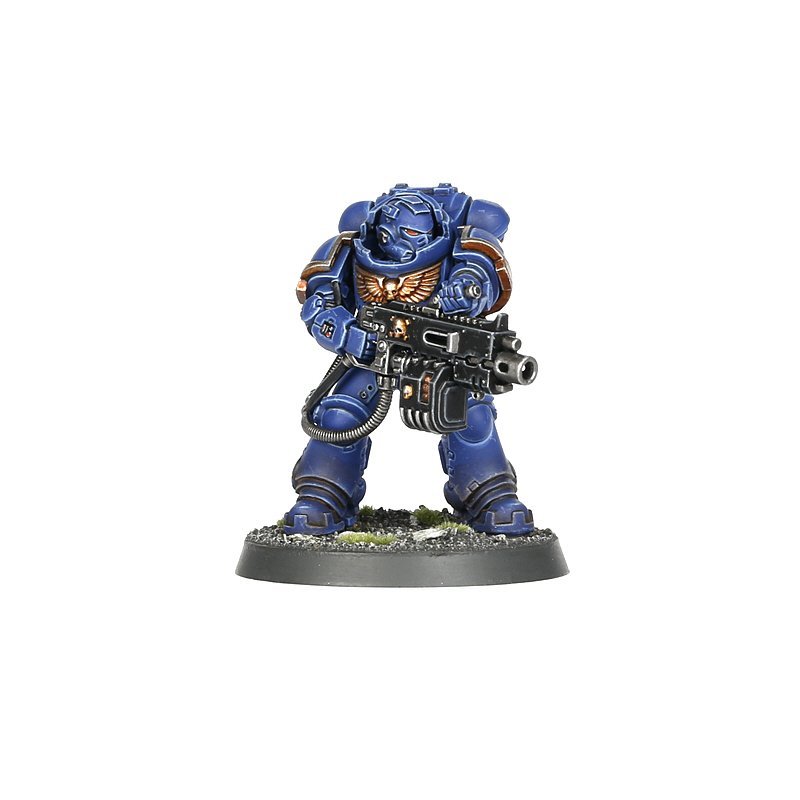
Space Marines
The great protagonists of much of Warhammer 40,000 lore, the Space Marines are the superhuman protectors of humanity. Clad in ceramte power armour and wielding some of the most powerful equipment the Imperium has to offer, these towering warriors make for versatile, but very elite Kill Teams.
Special Features
The Space Marines don’t have access to any special faction rules – yet. Most of their operative types do have a selectable <CHAPTER> keyword, however, so they’re probably getting chapter-specific special rules in the near future.
Fire Teams
For a Space Marine Kill Team, you must choose 1 of the following Fire Teams.
Intercessor (C) (Seek and Destroy/Security)
Like all Primaris operatives, the Intercessors have an Action Point Limit of 3, which means two things: they can carry out 3 actions per turn, and they count for 3 rather than the average 2 when counting APL for controlling objectives. You can take 4 of them in a Kill Team plus an Intercessor Sergeant as a Leader, who has access to all sorts of special melee and ranged weapons. The Intercessors themselves can choose between Auto Bolt Rifles, Bolt Rifles and Stalker Bolt Rifles for their main weapon. Apart from that, the Intercessors are pretty basic, with no special actions or abilities – but that doesn’t mean they’re bad! Their good Save, diverse choice of weapons and versatile Sergeants make them a fine choice, especially for a starter Kill Team, since the models are cheaply available everywhere.
Assault Intercessor (C) (Seek and Destroy/Security)

Assault Intercessors are the close combat version of Intercessors, with a 5 attack chainsword for melee, as well as a Heavy Bolt Pistol, which is basically a Bolt gun with shorter range, but a chance to gain Armor Piercing on a critical hit. Otherwise, they’re exactly like Intercessors. You can take 4 of them in a Kill Team, as well as an Assault Intercessor Sergeant, which is just an Intercessor Sergeant without long range weapon options. Assault Intercessors are really easy to find in Starter Sets and the like, but in a game as focused on shooting as Kill Team, you might want to go for the versatility of one of the other Fire Teams instead.
Incursor (C) (Seek and Destroy/Infiltration/Recon)

Incursors have slightly less wounds than the non-Phobos Primaris Marines, but their Occulus Bolt Carbine removes the bonus to defence rolls from cover from your target, and their Combat Blades have a higher critical damage than the standard Intercessor Fists attack. You can field 4 of these and an Incursor Sergeant in a Kill Team. The Sergeant is a bit of a downside to picking this Fire Team, as he has access to precisely none of the cool special weapons Intercessor Sergeants can take.
Infiltrator (C) (Seek and Destroy/Infiltration/Recon)

Infiltrators are like Incursors, but with Fists instead of Combat Blades, and their Marksman Bolt Carbines score critical hits on a 5+ rather than the usual 6+. This does increase their overall damage output, but with their Sergeants suffering from the same limitations as Incursor Sergeants, the lacking versatility of the Infiltrators makes them difficult to recommend over the other Primaris Fire Teams. You can take 4 of these and an Infiltrator Sergeant in a Kill Team.
Reiver (C) (Seek and Destroy/Infiltration/Recon)

The Reivers wear Phobos armour, so they only have 12 wounds, but their weapons loadout is one of the best among the Primaris Fire Teams: You can bring 4 of them and a Reiver Sergeant in a Kill Team, and each can choose between three loadouts. Each loadout has the special issue bolt pistol, which has an Armour Piercing value of 1, and then you can choose either a Bolt carbine (a Bolt rifle without the extra armour piercing on critical hits), a bolt carbine and a combat knife, or simply a combat knife. At the moment, there are no bonuses to forgoing the bolt carbine to only take a combat knife, but since the Reiver Sergeant has a rule that makes him do critical hits on a 5+ if he only has the combat knife, this is probably an oversight that will be FAQed in the future.
None of the Reiver weapons are the best the Space Marines have to offer, but since you can mix and match loadouts within your fire team, the Reiver fire team is the only Primaris kill team to let you freely mix long range and close combat loadouts, which is a very valuable feature.
Heavy Intercessor (C) (Seek and Destroy/Security)
The Heavy Intercessors are, well, heavy. They have more Wounds than other Primaris operatives, “only” 2 Action Points, but instead they have weapons capable of doing serious critical damage. You can take 3 of them and a Heavy Intercessor Sergeant in your Kill Team, and one of them can be a Heavy Gunner with access to even more devastating weaponry such as the Hellstorm heavy bolter which can re-roll attack rolls of 1 and distribute its attacks among all enemy targets within 1 circle of the main target. If you want a Space Marine kill team that is more elite than the rest and which can outgun almost anyone, pick these guys.
Tactical Marine (C) (Seek and Destroy/Security)

The Tactical Marines are Firstborn marines, which means they’re not Primaris (they’re older sculpts and look pretty tiny compared to the new ones), but they still have 3 Action Points and a good Save from their power armour. You can take 5 of them as well as a Tactical Marine Sergeant in your Kill Team, and you can choose 1 of the 5 to be a Gunner, and another to be a Heavy Gunner. The Tactical Marine standard loadout isn’t that impressive, but they have access to a vast array of special weapons. Gunners can take Flamers, Grav-guns, Meltaguns and Plasma guns, and Heavy Gunners can take Heavy Bolters or Missile Launchers. The Tactical Marine Sergeant can choose between 14 different weapons (some of them paired in specific loadouts, but still)! This makes a Tactical Marine Kill Team the perfect choice for the gun nut – you can really specialize with your loadouts.
Scout (C) (Seek and Destroy/Infiltration/Recon)

Scouts are Space Marines in training, and playing them is very different from the other Space Marine Fire Teams: You can field 9 of them, as well as a Scout Sergeant/Scout Sniper Sergeant. Among the 9, 2 can be Heavy Gunners, and 3 can be Scout Snipers. Regular Scouts have worse stats than other Space Marines all around (except for their Move and Defence), but there’s strength in numbers, and they have access to Astartes Shotguns which hit on a 2+ and do the same damage on normal and critical hits. Heavy Gunners get Heavy Bolters and Missile Launchers like the Tactical Marine Heavy Gunners, and the Snipers’ Scout Sniper Rifles can be fired by operatives with the Conceal order and do mortal wounds. The Scout Sniper Sergeant can even re-roll dice for his rifle.
Deathwatch Veteran (C) (Seek and Destroy/Security)

The Deathwatch Veteran Fire Team is even more specialized than the Tactical Marine team. You can field 4 of them, as well as a Deathwatch Veteran Watch Sergeant in your Kill Team. 1 of the 4 can be a Fighter, 1 a Gunner, and 1 a Heavy Gunner, and each of these have access to many special weapons, some of which even have quite a few different ammo types with various effects. There are just too many options to list here, but if you want to craft a Kill Team with an answer to any challenge or threat, look no further than the Deathwatch. The rules for Space Marines in Kill Team seem to suggest that you will be able to also include other Space Marine operatives as Deathwatch operatives in a Deathwatch Veteran Kill Team via <CHAPTER> keywords, but it doesn’t seem to be the case yet.
Ploys
Two of the most “Space Marine-esque” Strategic Ploys available to Space Marines are Bolter Discipline, which lets your operatives (excluding Scouts) make two Shoot actions in a Turning Point if they don’t also Fight, and Shock Assault which does the same, but with two Fight actions and no Shoot actions.
Equipment
Space Marines have access to a selection of grenades, as well as many others, such as specific gear for Reivers focused on mobility, Haywire Mines for Incursors and Grenade Launchers for Intercessors.
Grey Knights
These secretive, holy warriors are psychic Space Marines tasked with eradicating the Daemons of Chaos wherever they find them.
Special Features
All Grey Knight operatives have the Special Action Manifest Psychic Power, which lets them either improve their Save characteristic, inflict more damage when making a Fight Action or ignoring Cover while shooting for one Turning Point.
Fire Teams
Grey Knight (C) (Seek and Destroy/Security)

Grey Knights are basically Tactical Marines with better guns (their Storm Bolters can re-roll any or all attack dice) and much better close combat weapons. You can take 4 of them and a Grey Knight Justicar in your Kill Team. 1 of the 4 can be a Gunner, with access to Incinerators, Psilencers and Psycannons. The basic Grey Knights are pretty great, with their Action Points Limit of 3 and access to weapons with re-rolls or the powerful Stun special rule that subtracts from your opponent’s Action Points and subtract from their normal hits in combat. Combined with their Psychic powers, this makes Grey Knights very versatile Kill Team operatives.
Ploys
Grey Knights have access to many of the same Ploys as Space Marines, such as Bolter Discipline and Shock Assault.
Equipment
Among the holy equipment of the Grey Knights, the Truesilver Armour stands out because it turns an operative’s Save characteristic into a 2+, but they also have access to the Psyk-Out Grenade which can do extra damage to Psykers and Daemons.
Imperial Guard
The backbone of the Imperial military, the Imperial Guard is made up of ordinary men and women defending Humanity from the terrors of the Galaxy.
Special Features
The Imperial Guard Kill Team don’t have any special faction rules, but its operatives do have the <REGIMENT> selectable Keyword, so they will probably get subfaction rules down the line.
Fire Teams
When building a Kill Team, you can choose two Fire Teams from the ones listed below:
Guardsman (C) (Security)
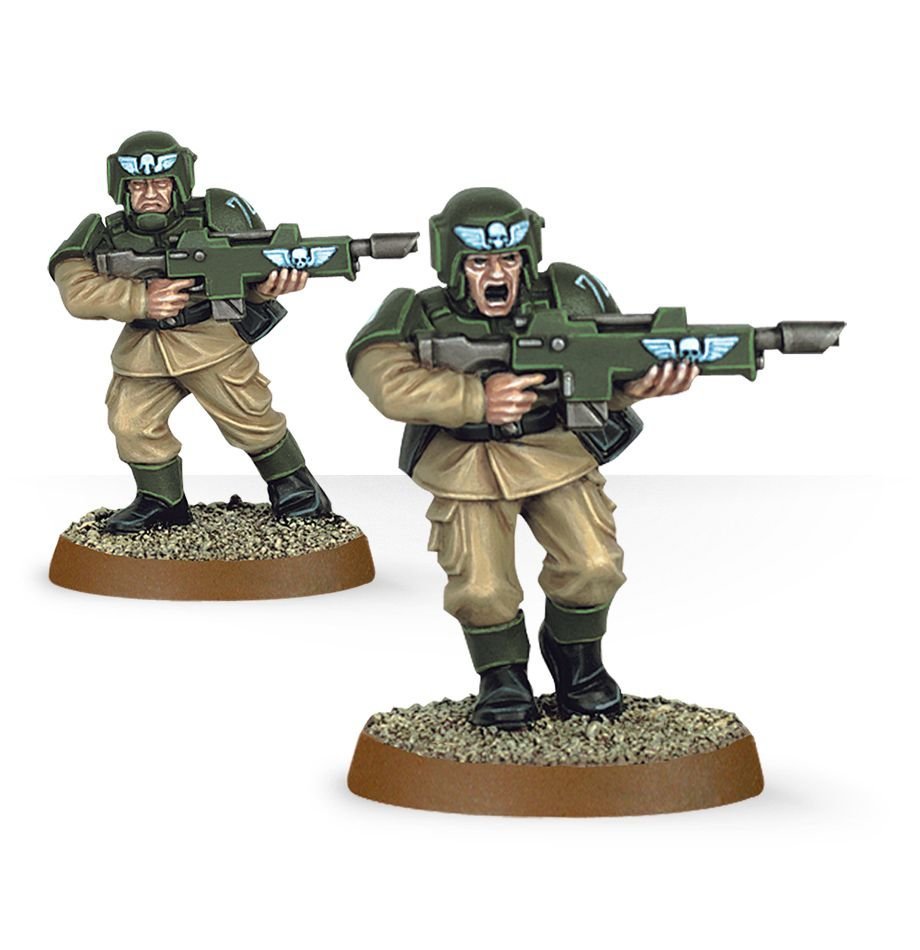
Guardsmen are pretty weak, with few Wounds, a bad Save and some below-average standard weapons, but they have a couple of really good things going for them. Their standard troopers have a Group Activation of 2, which means you can activate two of them each time its your turn to activate an operative, and their specialists can really improve your Kill Team’s tactical versatility. You can include 7 of them in your Kill Team – up to three of those can be Gunners with loadouts such as grenade launchers, meltaguns (meltaguns are crazy and can do 4 mortal wounds!) or flamers, one can be a Comms specialist, and if you don’t have another Leader in your Kill Team, one can a Guardsman Sergeant.
This means you’ll end up with a Fire Team that can perform many different roles, and your Comms specialist can be a catalyst for this as well, since it can make one of your Guardsman Orders (see the Ploys section) effect all your operatives in a killzone once per battle. If you field two Guardsman fire teams, that’s 14 operatives receiving the same bonus (if they’re not dead).
One final thing: That 3+ Save on Guardsmen Gunners in the Compendium is a mistake and was FAQ’ed to a 5+ in the FAQ on October 8, 2021)
Tempestus Scion (C) (Security/Seek and Destroy/Infiltration/Recon)

Basic Tempestus Scion Troopers are only a bit better than Guardsmen, but the special weapons of their Gunners and Sergeant are pretty great, and a 4+ Save is a lot better than a 5+. You can bring 5 Scions in a Fire Team – 2 of them can be Gunners, 1 can be a Comms specialist, and 1 can be a Tempestor Leader if you don’t already have a Leader. The Tempestor is particularly great, since he has an ability that lets you use a Strategic Ploy without spending any Command Points in each Strategic Phase – an essential ability for making the most of your Guardsman Orders.
Ploys
Imperial Guard Ploys are few, but very thematic: In the Strategic Phase, you can issue Guardsman Orders, which give you small but significant one-time bonuses to all friendly operatives close to a Guardsman Sergeant, as well as to all your Scions. The Tactical Ploy Bring it Down! lets you reroll attack dice used by all your operatives against one target that one of your operatives has already shot at in that Turning Point.
Equipment
Imperial Guard equipment is a pretty standard selection of grenades, a medikit, some armour and a Standard you can plant to improve your control over an objective.
Forge World
The machine-worshipping and highly religious cyborgs of the Adeptus Mechanicus travel the Galaxy to procure new technology and serve as a beacon of logic and reason (by 40k standards) throughout the Imperium. Be aware that this section has the rules for using this faction found in the Kill Team Compendium – these have since been more or less replaced by the Hunter Clade Kill Team described below this entry, but are apparently still legal to play.
Special Features
The Forge World Kill Team doesn’t have any special faction rules, but its operatives do have a <FORGE WORLD> selectable keyword, so they might get subfaction rules before long.
Fire Teams
A Forge World Kill Team can take two fire teams from ones listed below.
Skitarii Ranger (C) (Recon/Security)

Skitarii Rangers have Save of 4+ and the really good basic Galvanic Rifles, so even though they don’t have many Wounds, they’re a good core troop for your Kill Team. You can include 5 of them in a Fire Team. 2 of those can be Gunners, which give them access to an Arc Rifle with Stun, the mortal wound-dealing Transuranic Arquebus or a Plasma Caliver. If you don’t already have a Leader, one of them can be a Skitarii Ranger Alpha, which has access to some very good close combat weapons and a pistol with Stun, among others.
Skitarii Vanguard (C) (Security)

Skitarii Vanguard are mostly like Rangers, with the same special weapons, the same amount of operatives you can take in a Fire Team, and the same stats. The only thing separating them is their standard ranged weapon, the Radium Carbine, which has less damage than a Galvanic Rifle, but it’s not Heavy (so you can move before shooting with it), and it has the Rending rule which gives it an extra critical hit instead of a normal hit in a shooting attack if you’ve already rolled one critical hit. It’s not a big difference, and which of the two Fire teams you prefer will depend on what other Fire Team you’re taking alongside it.
Sicarian (C) (Seek and Destroy/Infiltration/Recon)

The Sicarian Fire Team can be built from two different operative types: The Ruststalkers are strong close combat fighters that can either wield a Chordclaw and transonic razor with 5 attacks, one of those being rerollable, or Transonic Blades which have Rending so they can get extra critical hits. Infiltrators are more versatile, wielding both a ranged Flechette Blaster/Stubcarbine and a close combat Power Weapon/Taser Goad. Both operative types are consistent damage dealers, and you can mix and match between them in a Fire Team, which can consist of four Sicarians in total. If you don’t already have a Leader, you can pick one as one of the four, and there’s both a Ruststalker and an Infiltrator Leader to choose from.
Ploys
The Forge World Kill Team uses Imperatives as Strategic Ploys. Imperatives gives you a buff and a debuff in one sweet package. For example, the Protector Imperative lets you reroll 1 of your attack dice for each shooting attack any of your friendly operatives does in a Turning Point – but you have to reroll 1 of your succesful hits for each attack in the fight phase as well. Their Tactical Ploys are also pretty strong, such as the Control Edict lets you activate an additional operative when you activate your Leader.
Equipment
The Forge World equipment is, as expected, a bunch of tech add-ons for you monastic cyborgs. A good – and very useful – example of this is the Data-Tether, which lets you spend one Action Point to gain a Command Point.
Ecclesiarchy
The Ecclesiarchy Kill Team represents the military branch of the religious authorities in the Imperium. In Kill Team, they’re represented by the Adepta Sororitas, an all-female army of monastic fighters fueled by the fires of faith.
Special Features
The Ecclesiarchy Kill Team doesn’t have any faction-specific rules, but they have an <ORDER> selectable keyword, so they’re bound to get subfaction rules in the future.
Fire Teams
You build an Ecclesiarchy Kill Team with two Fire Teams chosen from the following three:
Battle Sister (C) (Security)
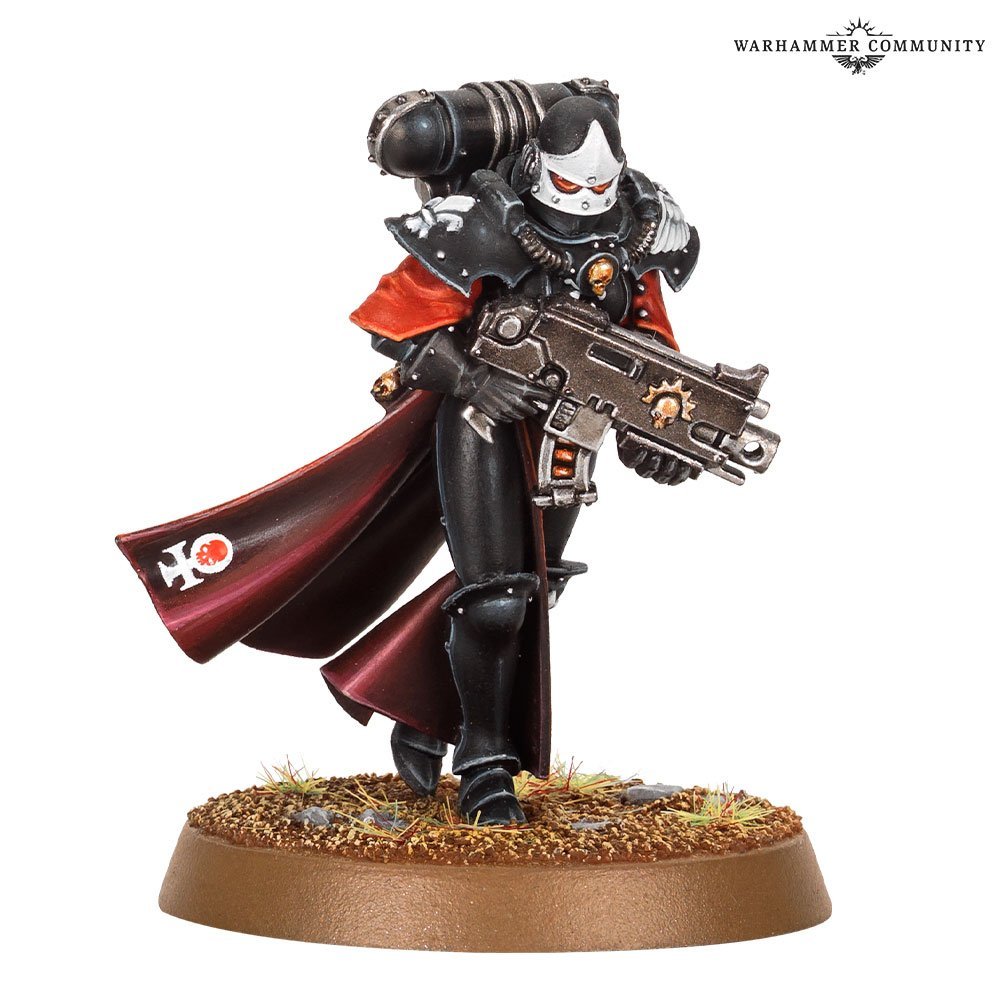
Standard Battle Sisters have a good Save of 3+ and carry Boltguns. They’re good average operatives without any special rules. You can field 5 of them in a Fire Team, of which one can be an Icon Bearer, one a Gunner, one a Heavy Gunner, and if you don’t have a Leader, one can also be a Battle Sister Superior.
The Icon Bearer adds a lot of value to the team: It can add 1 to its Action Points Limit for the purpose of figuring out who controls an objective only, and its unique action Icon of Purity lets all friendly operatives visible and within Square range of the Icon Bearer turn one roll of 5 into a critical hit whenever it shoots or fights in that same Turning Point.
The Gunner has access to the ever awesome Meltagun, a flamer and a Storm Bolter, adding a lot of firepower to the team, and the Heavy Gunner can take a Heavy Bolter or a Heavy Flamer, both of which are good for fighting crowds of hostiles.
The Battle Sister Superior is one of the few operatives who can compete with Space Marine Sergeants when it comes to weapon options: it can choose between 13 weapons, some of which are combi-weapons, meaning they’re also a boltgun in addition to whatever else they can do.
The regular Battle Sisters might not be anything special, but since you only have to take one of those in your fire team, and everyone else will be a pretty badass specialist, Battle Sister fire teams pack a lot of firepower, and the Icon Bearer really improves their usefulness.
Repentia (C) (Seek and Destroy)
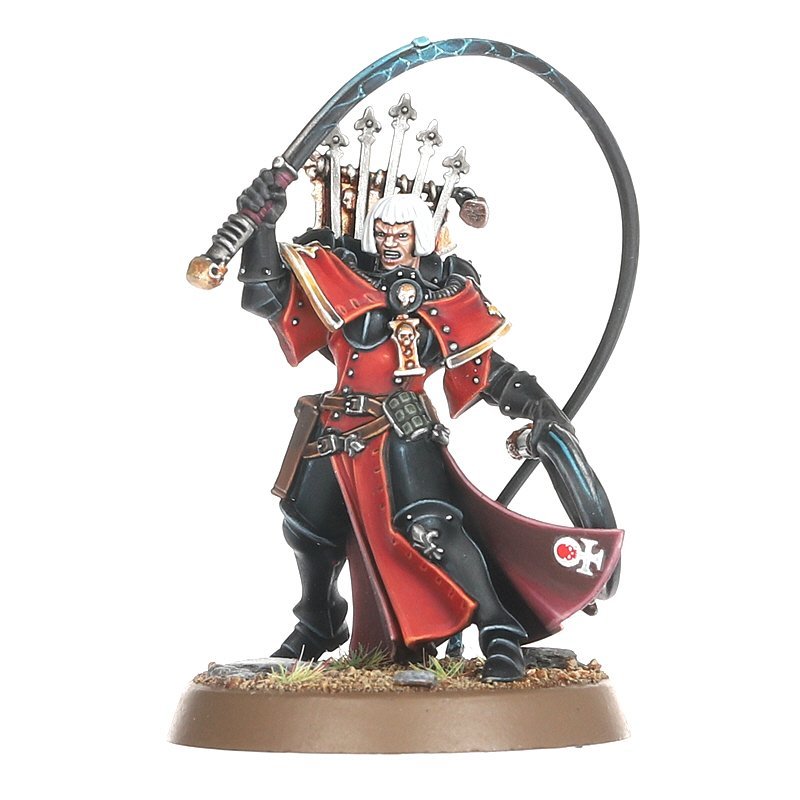
The Repentia are easy to kill with their 7 Wounds and a Save of 6+, but their giant chainswords called Penitent Eviscerators are really scary: They do 5 normal damage and 6 critical damage, can only be parried with critical successes and have the Reap ability which allows it to do Mortal Wounds to every enemy operative within 1 inch of it when it strikes with a critical hit! They’re the human fire-and-forget weapons of the Ecclesiarchy. Their Leader operative, the Repentia Superior, is entirely different with its Neural whips, good Save and a unique action called Whip into Fury which can add Movement and an Action Point to a nearby Sister Repentia. You can include 5 Repentias in a fire team, with one of them being a Repentia Superior if you don’t already have a Leader. Note that the Repentia, but not the Superior (this might be an error in the book) can also ignore wounds on a roll of 5+.
Arco-Flagellant (C) (Seek and Destroy)

Arco-Flagellants don’t have a Leader operative, and can’t perform mission or Pick-up actions. Their sole purpose is just to destroy stuff, and they’re pretty good at that with 5 attacks, the Ceaseless special rule for a re-roll and Reap for mortal wounds to all hostiles around them when they score a critical hit. They can also ignore wounds on a 5+.
A combination of a Battle Sister Fire Team for ranged attacks and either a Repentia or Arco-Flagellant fire team for close combat really makes for a versatile, damage-dealing Kill Team
Ploys
The Ecclesiarchy have some really cool thematic Ploys, such as the Strategic Ploy Divine Shield that lets you reroll a failed save when being shot at, or the Tactical Ploy Penance Through Death that lets a Repentia or Arco-Flagellant make one last melee attack when they are incapacitated.
Equipment
The Ecclesiarchy Kill Team has some standard Imperial equipment such as grenades and Purity Seal, but also the cool Rosarius, which lets a Leader ignore wounds on a roll of 4+ (we’re not getting into the math of it here, but that’s a significant increase in survivability).
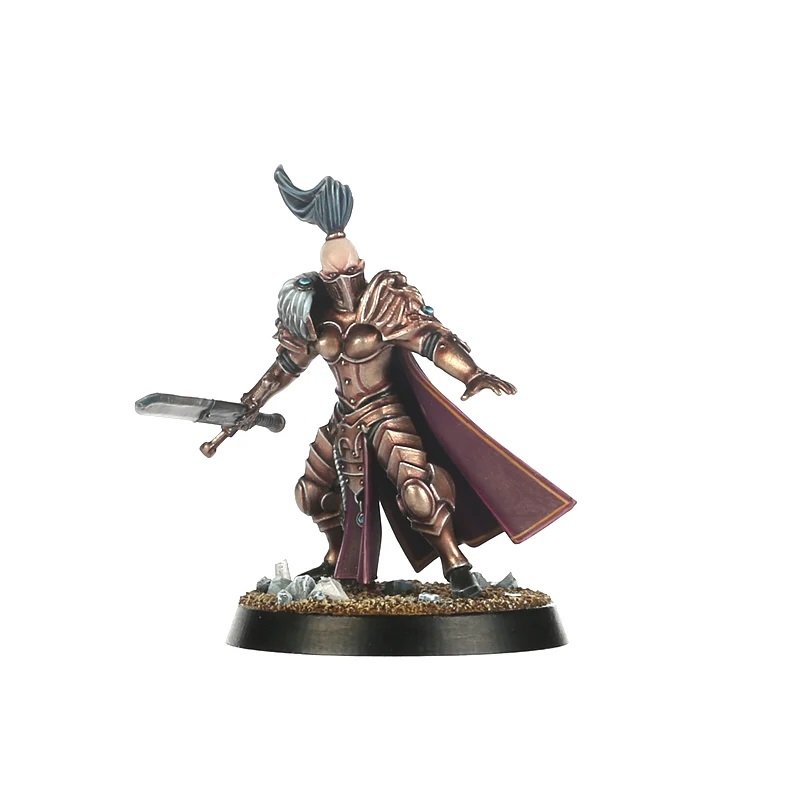
Talons of the Emperor
The most elite of the elite, The Talons of the Emperor Kill Team is made from two legendary branches of Imperial military: The Adeptus Custodes, guardians of the Emperor’s Palace on Holy Terra, and the Sisters of Silence, specialized psyker-hunters.
Special Features
The Talons of the Emperor don’t have any special faction rules, but the Custodian Guard have a <SHIELD HOST> selectable keyword, so they might gain subfaction rules in the future.
Fire Teams
A Talons of the Emperor Kill Team has two fire teams, chosen from the following two available:
Custodian Guard (C) (Seek and Destroy/Security)

You might only be able to take two of these in a Fire Team, but each of the Custodian Guard are absolute powerhouses. With 18 Wounds, a Save of 2+ and 3 Action Points (the Compendium says 4 but that was FAQ’ed on October 8, 2021), they can handle anything that comes at them, and their weapons such as the Guardian Spear are pretty great in both ranged and close combat. They also can’t be injured outside of narrative play, and if they carry Storm Shields they can also ignore wounds on a 4+. If you don’t have a Leader, one of the Custodian Guard can be your Leader, which only gives him an extra Wound (and that’s pretty ok since he was already so powerful). If you choose two fire teams to be Custodian Guard, you’ll end up with a Kill Team of only 4 models! Their high Action Points Limit means they can still take objectives, and they have great survivability, but you miss out on a lot of the diversity and tactical abilities of more numerous Kill Teams.
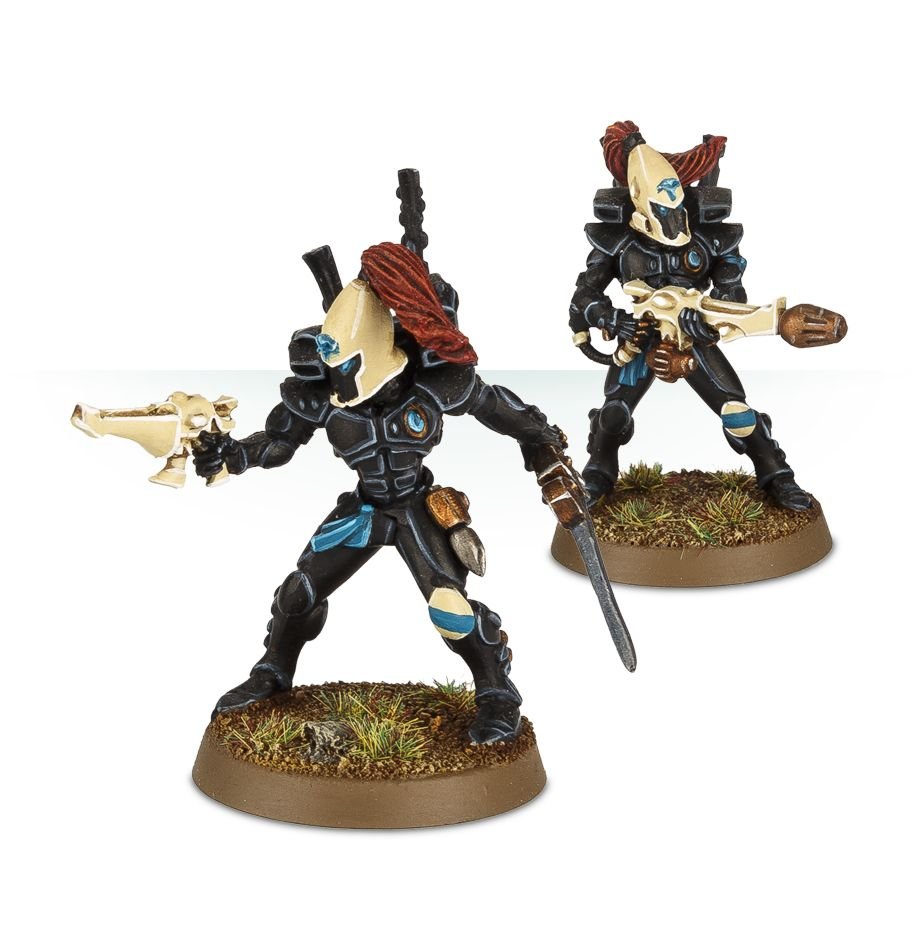
Sister of Silence (C) (Seek and Destroy/Security/Recon)
The Sisters of Silence come in three versions: The Prosecutor, which has a Boltgun, the Witchseeker with a Flamer, and the Vigilator with an Executioner Greatblade that lands criticals on a roll of 5+. Their survivability is pretty average, with a good 3+ Save, but they prevent psychic actions around them and can’t be affected or targeted by psychic powers. That’s a very conditional skill to have in a game with only a few psykers, but as the game develops, we’re sure more psykers will show up.
You can field 5 Sisters of Silence in a Fire Team, and if you don’t have a Leader, one of them can be a Sister of Silence Superior, who can wield any of the Sister of Silence weapons.
Ploys
The Ploys of the Talons of the Emperor are just as powerful as the Custodian Guard themselves: For example, the Strategic Ploy Aegis of the Emperor makes the Kill Team take critical hits made against them as normal hits, and the Tactical Ploy Talons lets you activate a Custodian Guard and a Sister of Silence at the same time.
Equipment
Among the Talons of the Emperor equipment is a Tanglefoot Grenade that subtracts an Action Point from an enemy, and the Vratine Faceplate which gives a Sister of Silence a one-time damage reduction for an attack made against her.
Traitor Space Marines
The Traitor Space Marines are the dark mirror of the Imperiums superhuman protectors: They were once Space Marines themselves, but have since switched sides to the forces of Chaos. In Kill Team, they fight alongside Chaos Cultists, ordinary humans who have also heeded the call of the Chaos Gods.
Special Features
The Traitor Space Marines don’t have any faction-specific special rules, but the Chaos Space Marine operatives have the <LEGION> selectable keyword, so they’ll probably get subfaction rules before long.
Fire Teams
A Traitor Space Marine Kill Team is built from two fire teams, both of which can be either of the two below:
Chaos Space Marine (C) (Seek and Destroy/Recon/Infiltration/Security)

Chaos Space Marines are almost the same as Tactical Space Marines stats-wise, with only an extra Wound to make them stand out. The standard Chaos Space Marine can be equipped with either a Boltgun or or a Chainsword and Bolt pistol – all of which have 4 attacks and hit on a 3+. They’re strong fighters with 3 Action Points, and you can field 3 of them in a Fire Team. One of those three can be a Gunner (Flamers, Meltaguns, Plasma Guns), one can be a Heavy Gunner (Heavy Bolter, Missile Launcher), and one can be an Icon Bearer, which gives it an ability that let nearby friendly Chaos Space Marines change a failed hit into a normal hit if they also score a critical hit, as well as count for an extra Action Point Limit point for controlling objectives. If you don’t already have a Leader, one Chaos Space Marine can also be an Aspiring Champion, which can take Chaos Space Marine weapons or a Plasma Pistol, Power Fist or Power Weapon.
Chaos Cultist (C) (Recon/Infiltration)
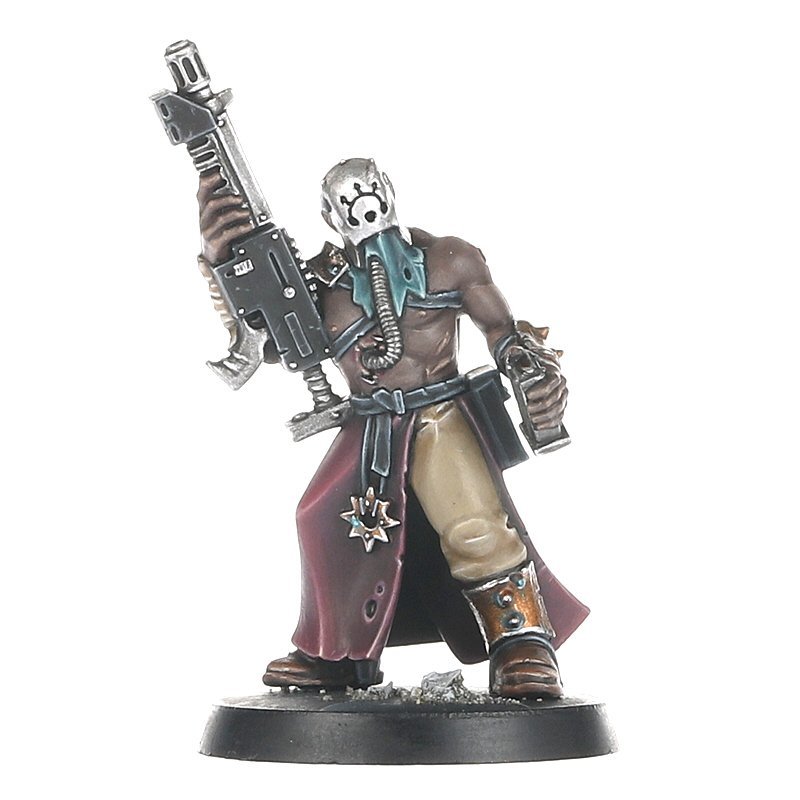
The standard Chaos Cultists have a Group Activation of 2, which means you can activate two of them at a time. Their Autoguns are just like Imperial Guard Lasguns, but they can also be equipped with Brutal Assault Weapons and Autopistols if you want to make a swarm of expendable melee troops. You can include eight Cultists in their Fire Team – two of them can be Gunners with Flamers or the pretty cool Heavy Stubbers, and if you don’t have a Leader, one can be a Cultist Champion who can wield a Shotgun that hits on a 2+. The real problem with Cultists is actually finding any models to use: The Cultists the weapon options are based on have been out of production for years, and the Cultists of the Abyss currently available don’t have all the right weapon options.
Ploys
Three of the cooler Ploys for the Traitor Space Marines are the Tactical Ploy Veterans of the Long War that gives you a do-over on a failed Shoot or Fight action, and Malicious Volleys/Hateful Assault that let Chaos Space Marines do two Shoot actions/two Fight actions in an activation.
Equipment
The Traitor Space Marines have quite a few different pieces of equipment, including grenades and special ammo, but the Grisly Trophy stands out with its ability to subtract 1 from the Attacks characteristic of enemy weapon actions within an aura around the bearer.
Death Guard
The Death Guard are Chaos Space Marines solely dedicated to the Chaos God Nurgle and their Primarch Mortarion. They’re very elite and exceptionally tough, and their unique aesthetic and big selection of terrifying melee weapons make them very different to regular Chaos Space Marines.
Special Features
The Death Guard don’t have any special faction rules, but the Plague Marines have the <PLAGUE COMPANY> selectable keyword, setting them up for subfaction rules in the future.
Fire Teams
The Death Guard Kill Team is built from two Fire Teams chosen from the two below:
Plague Marine (C) (Seek and Destroy/Security)
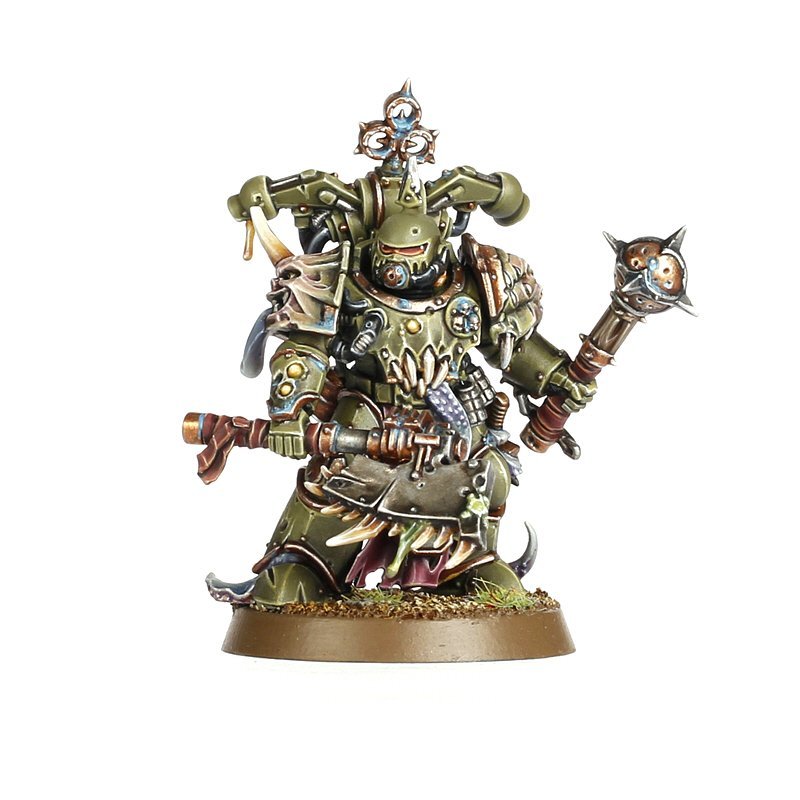
The Plague Marines are slow, but some of the toughest versions of Space Marines you’ll find in Kill Team, with their 3+ Save and a Disgustingly Resilient ability that lets them ignore a wound on a roll of 5+ as well as never being injured outside of Narrative Play. You can take 2 of them in a Fire Team. The regular version has a Boltgun and a pretty good Plague Knife, but you can also field one operative in the Fire Team as a Gunner, which has the usual Meltagun and Plasma Gun, but also a Flamer-like Plague Belcher.
You could also choose a Heavy Gunner (with either an armour-piercing Blight Launcher or an improved “Flamer” Plague Spewer). Another version you can take is more specific to the Death Guard: A Plague Marine Fighter is a close combat specialist with 6 melee weapons to choose between, with the terrifying Great Plague Cleaver among them. There’s also an Icon beare to choose from, with the extra objective marker control that always comes along with that, as well as an ability that lets nearby Plague Marines reroll 1s and 2s for Disgustingly Resilient.
What’s important to remember, however, is that you can only pick one of these specialists – the other operative in your Fire Team has to be a regular Plague Marine. This is too bad, since all the models and weapons are so cool, so taking two Plague Marine Fire Teams can be a good idea.
Finally, only Plague Marine Fire Teams have a Leader operative, the Plague Marine Champion, who is a really hard-hitting combat Leader who hits on a 2+ with almost everything.
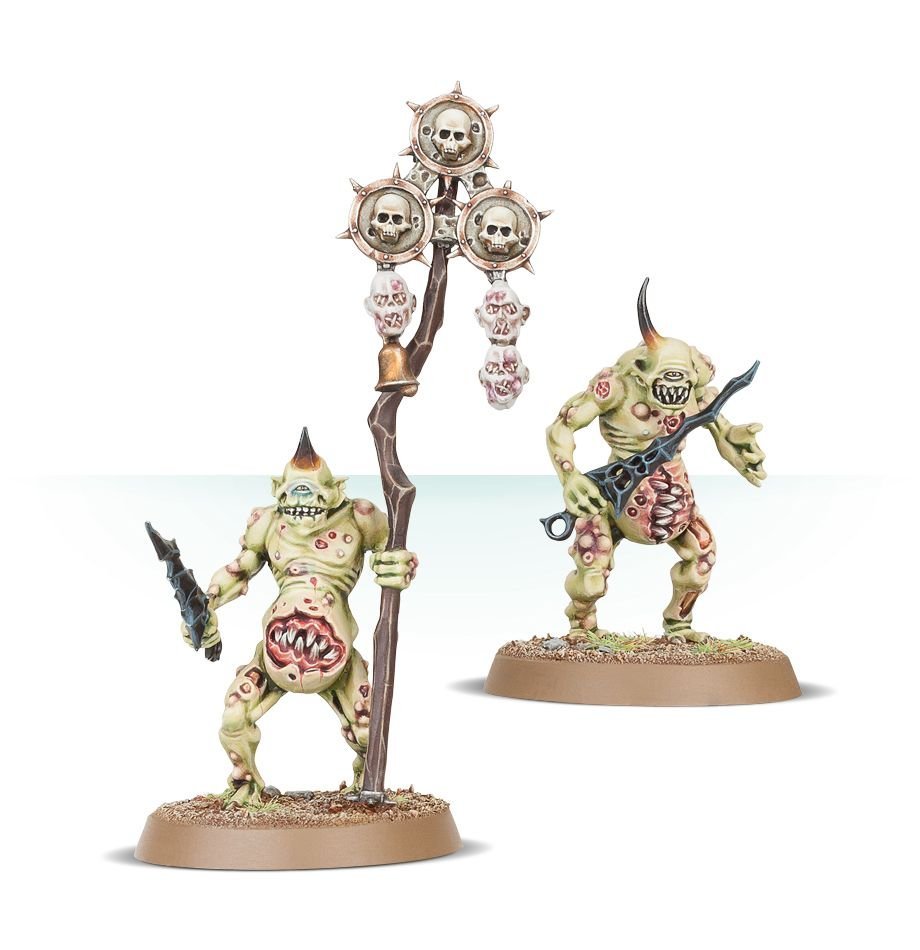
Poxwalker (C) (Infiltration/Security)

Poxwalkers also have the Disgustingly Resilient ability the Plague Marines have, but are otherwise very different as operatives: They have a Save of 6+, but a Group Activation of 2, so they’re made for swarming the enemy with their melee weapons while your Plage Marines mess stuff up elsewhere. You can take 8 of them in a Fire Team, but there are no specialists or Leader operatives to choose from, so use them as a screen/chaff unit for a Plague Marine Fire Team.
Ploys
The Death Guard have some of the same Ploys as the Traitor Space Marine Kill Teams such as Malicious Volleys/Hateful Assault, but they also have really thematic Tactical Ploys for their contagious ways such as Effluent Demise, which does Mortal Wounds to everyone around a Plague Marine when it’s incapacitated – you can just imagine one of these disgusting monsters exploding in a green cloud of disease.
Equipment
The Death Guard equipment is wonderfully thematic: One option is a Nurgling, the little imps that show up everywhere on Death Guard models, and another is the Plague Bell that can ring to make all nearby Plague Marines move faster, which is very handy for a Kill Team as slow as this one.
Thousand Sons
The Thousand Sons are another Kill Team of Chaos Space Marines dedicated to a specfic Chaos god, but where the Death Guard worship Nurgle, the Thousand Sons worship Tzeentch, the Chaos god of change. They’re the best psykers of the Traitor Legions, and in Kill Team, they’re represented by the magically undead Rubric Marines and the bestial Tzaangors.
Special Features
The Thousand Sons have faction-specific rules for the Psychic Powers their Aspiring Sorcerer can cast. These powers range from a single attack dice reroll to a mortal wound-dealing Shoot action and you can also try to roll a d6 to cast two of them instead of 1. Beware, however, that if you roll a 1 or 2 when trying to activate your psychic power, you take d3 mortal wounds instead – the Warp’s a dangerous thing to play with!
The Rubric Marines also have the <GREAT CULT> selectable keyword, which sets them up for getting subfaction special rules at some point.
Fire Teams
You build a Thousand Sons Kill Team from two Fire Teams which can both be either of the two below:
Rubric Marine (C) (Seek and Destroy/Security)
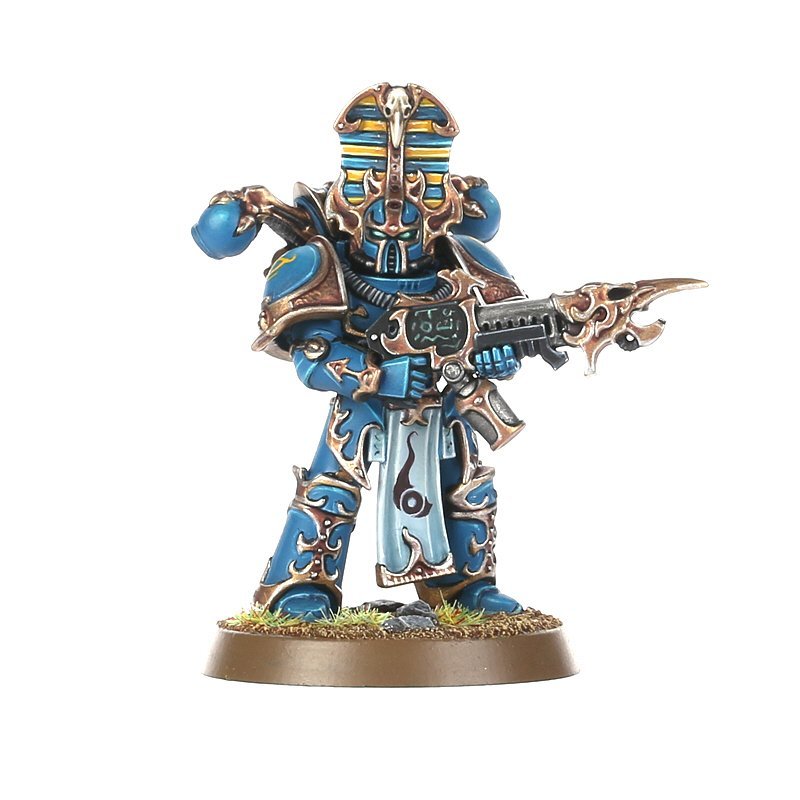
The Rubric Marines are largely just like Chaos Space Marines, only their boltguns are Infoerno Boltguns, which have an Armour-Piercing value of one. They also ignore wounds on a roll of 5+, and if an incoming attack against them has a Normal Damage of 3 or less, the Rubric Marine’s Save for that attack goes from a 3+ to a 2+ – so they’re pretty tough.
You can take 2 in a Fire Team, and while one of them has to be a regular Rubric Marine, the other can be either a Gunner (with either a Warpflamer, which is an armour-piercing Flamer, or a Soulreaper Cannon which is a sort of machine gun), an Icon Bearer which gives nearby Aspiring Sorcerers an extra Psychic Power as well as counting extra for holding objectives, or if you don’t already have a Leader, one can be an Aspiring Sorcerer, the psychic power-wielding Leader operative mentioned above in the Special Features section.
Tzaangor (C) (Seek and Destroy/Recon)
The Tzaangor are Chaos mutants which can be equipped with either a Chainsword and Autopistol or Tzaangor Blades, which have the Relentless special rule that lets them reroll all their attack dice every time they Fight. They also ignore Wounds on a 5+, but are otherwise much weaker than the Rubric Marines. You can field six of them in a Fire Team – one of them can be an Icon Bearer which is better at claiming objectives and can use an action to improve the Invulnerable Save (that 5+ from above) by 1 for Tzaangors around it.
Another can be a Horn Bearer, which can use an action to improve the Move characteristic of Tzaangors around it. If you don’t have a Leader, one Tzaangor can also be a Twistbray which is a Leader with the same weapons as a regular Tzaangor, but with an additional wound – which is not much, so you’re better off picking an Aspiring Sorcerer in a Rubric Marine Fire Team as your Leader.
Ploys
The Thousand Sons have the Malicious Volleys Strategic Ploy that all the Chaos Space Marines Kill Teams have, but also the Sorcerous Focus Tactical Ploy which lets you auto-succeed on casting a second Psychic Power with an Aspiring Sorcerer.
Equipment
The Thousand Sons has a good selection of equipment for both Rubric Marines and Tzaangors: For example, an Aspiring Sorcerer can get a Mythic Scroll which (you probably guessed it) lets you use a Psychic Power for free once, and the Tzaangors can carry a Treasure Trinket that gives you an extra Command Point.
Chaos Daemons
The Chaos Daemons are horrifying monsters of the Warp, each the embodiment of the power of one of the Chaos Gods. In Kill Team, Khorne is represented by Bloodletters, Slaanesh is represented by Daemonettes, Nurgle is represented by Plaguebearers, and Tzeentch is represented by Horrors.
Special Features
The Chaos Daemons don’t have any faction-specific rules.
Fire Teams
A Chaos Daemon Kill Team is built from two Fire Teams chosen among the following options:
Bloodletter (C) (Seek and Destroy)

Bloodletters are Daemons of Khorne, and they’re an entirely melee-focused Fire Team. Their Hellblades cause critical hits on a roll of 5+, and they have an Invulnerable Save of 5+ as well. You can field 6 of them in a Fire Team – one of those can be an Icon Bearer that can improve the Invulnerable Save of Bloodletters around it, and it is also better at controlling objectives. Another Bloodletter can be a Horn Bearer with an action that improves the Move characteristic of Bloodletters around it. If you don’t already have a Leader, one can also be a Bloodreaper which has an additional Wound and a better chance to hit with its Hellblade.
Daemonette (C) (Seek and Destroy/Recon)

Daemonettes are Daemons of Slaanesh, and they’re once again entirely close combat-based and have a 5+ Invulnerable Save. Their Claws have the Relentless special rule so they can reroll their attack dice. You can field 6 Daemonettes in a Fire Team, and one can be an Icon Bearer with the objective-claiming boost that comes with that role, as well as a Unique Action that improves the Invulnerable Save of nearby Daemonettes. One of those six can also be a Horn Bearer with it’s Movement-boosting action, and if you don’t have a Leader already, one can be an Alluress, which has a 2+ Weapon Skill for its Claws and an additional Wound.
Plaguebearer (C) (Security)
The Plaguebearers are Daemons of Nurgle, and as such, they’re naturally very tough to kill. This is represented in the game by them having both an Invulnerable Save of 5+ and a Disgustingly Resilient ability that gives it another 5+ wound prevention dice roll and an immunity to being Injured. You can field six of them in a Fire Team, and just like the rest of the Chaos Daemons, one can be an Icon Bearer, one a Horn Bearer and, if you don’t already have a Leader, one can be a Plagueridden.
Pink Horror (C) (Security)

The Pink Horrors are Daemons of Tzeentch with both a ranged and a close combat weapon, unlike the Fire Teams of the other Chaos Gods. It has an Invulnerable Save of 5+ like the other Daemons. You can field 6 of them in a Fire Team, one of which can be an Icon Bearer, one can be a Horn Bearer, and if you don’t already have a Leader, one can be a Pink Horror Iridescent. Apart from being able to shoot, what’s really interesting about the Pink Horrors (and their blue cousins below) is their associated Tactical Ploy Split, which lets you turn an incapacitated Pink Horror into two Blue Horrors for 2 Command Points.
Blue Horror (C) (Security/Recon)
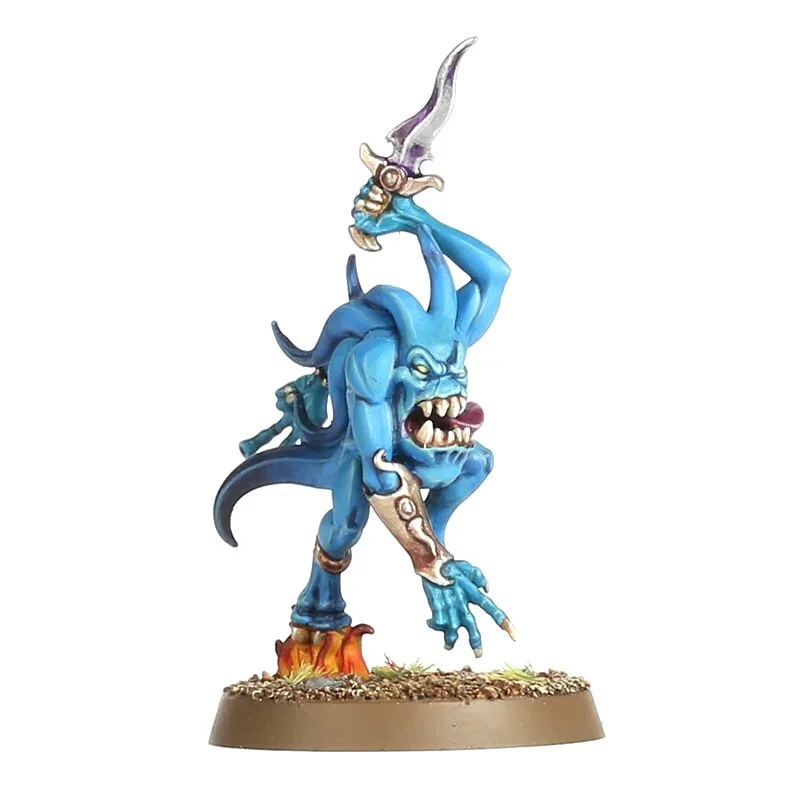
While most of the Chaos Daemon Fire Teams are very similar in their rules, the Blue Horror Fire Team are Chaos Daemons of Tzeentch with some very different mechanics. Stats-wise, they’re like weaker Pink Horrors, but you can field 8 of them in a Fire Team. Blue Horrors can also be generated by the Split Tactical Ploy for Pink Horrors, and they can also replace themselves with smaller Brimstone Horrors when incapacitated for 1 Command Point.
Ploys
In reality, Chaos Daemons don’t have a large selection of Ploys, since most of them are specific to one Fire Team, such as Split which is described above, or the Khorne-specific Strategic Ploy Unstoppable Ferocity, which boosts the Attacks of all Bloodletters for one Turning Point.
Equipment
The Chaos Daemon Kill Team’s equipment is also Fire Team-specific, such as a ranged vomit-weapon for Plaguebearers, or the Piercing Claws which can improve the Critical Damage of Daemonettes.
Craftworlds
An ancient and graceful civilization, the Aeldari Craftworlds have been in decline for thousands of years. Their warriors are still extremely skillful and dedicated to their craft, however, and their Kill Team operatives move with deadly speed and grace, defending their people no matter the cost.
Special Features
The Craftworlds Kill Team has no faction-specific rules, but its operatives do have the <CRAFTWORLD> selectable keyword, so they’re likely to get subfaction rules in the future.
Fire Teams
A Craftworlds Kill Team is made up of two Fire Teams chosen from the ones below:
Guardian Defender (C) (Security/Recon)

Guardian Defenders have both melee and ranged weapons, and their ranged Shuriken Catapult has the Rending critical rule that gives it an extra critical hit instead of a normal hit if it has already scored a critical hit in the same Shoot Action. Otherwise, they have a decent Save of 4+ and 8 Wounds, and you can field 5 of them in a Fire Team. One of these can be a Heavy Gunner, which is very different from the Heavy Gunners of other Kill Teams: It has no special weapons, but instead it has a Unique Action that lets it control another operative you can take called a Guardian Defender Heavy Weapon Platform. This Heavy Weapon Platform can be equipped with one of a selection of impressive weapons such as the Aeldari Missile Launcher og the Scatter Laser, and is always worth taking in this Fire Team – you just have to also pick a Heavy Gunner.
If you don’t already have a Leader, one Guardian Defender can also be your Leader, which also has a better Ballistics Skill and Weapon Skill than regular Defenders.
Storm Guardian (C) (Seek and Destroy/Recon)
Storm Guardians have Shuriken Pistols and Storm Guardian Blades, making them ideal for close quarters combat, and otherwise they share the same stats as the Guardian Defenders. You can field 5 of them in a Kill Team, one of which can be a Gunner with a Flamer or a Meltagun-like Fusion Gun. If you don’t already have a Leader, one can also be a Storm Guardian Leader with better weapons and an additional Wound.
Ranger (C) (Recon/Infiltration)
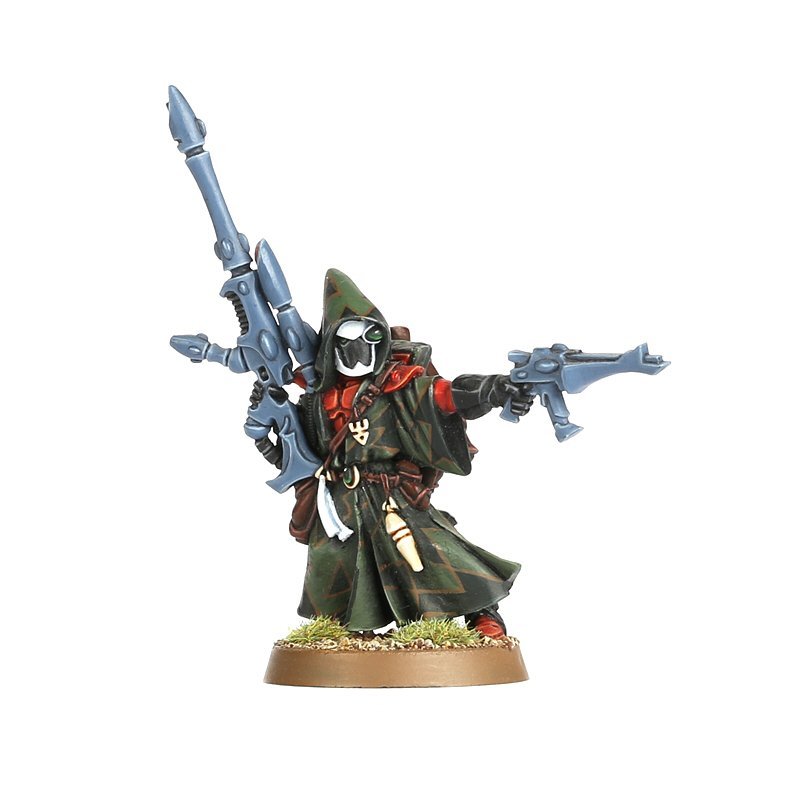
Rangers are less durable than Guardian Defenders and Storm Guardian, but their Ranger Long Rifles are Silent (it can shoot even when Concealed) and can deal Mortal Wounds, and they automatically succed one additional normal Save when they’re in cover. You can include 4 of them in their Fire Team, with one being a Leader if you don’t already have one.
Dire Avenger (C) (Seek and Destroy/Security/Recon)
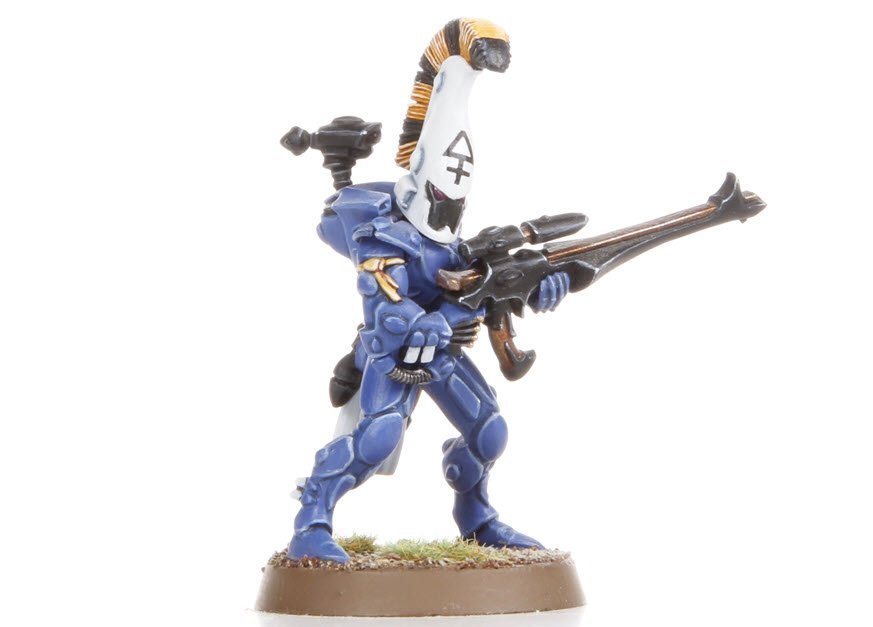
Dire Avengers are like harder-hitting Guardian Defenders with a very nice ability that means they don’t have to worsen their Ballistic Skill when performing an Overwatch action, which is very valuable for a pretty elite Fire Team. You can include 4 of them in their Fire Team, one of which can be their Leader (if you don’t already have one), the Dire Avenger Exarch, which is a pretty wild operative: It can choose from a long list of both ranged and melee weapons, including the very good Diresword. If you equip it with a Twin Avenger Shuriken Catapult, it can also perform the action Shuriken Storm, which gives it two Shoot Actions for the price of one, and if it’s equipped with a Shimmershield (which it can take in its Fire Team description, but doesn’t seem to have an option to be equipped with on its datacar – that is probably just an FAQ-able oversight), it can give a 5+ Invulnerable Save to nearby Dire Avengers. This is definitely the Leader to take for this Kill Team if you’re bringing Dire Avengers!
Ploys
A cool and thematic aspect of Craftworlds Ploys is that quite a few of them are about giving you extra Movement: Fleet lets you perform a Dash action after another move action, Hidden Paths let Rangers Dash to Cover, and Matchless Agility lets one operative skip its Shoot and Fight actions in exchange for moving an extra 2 inches/1 circle when it uses a Dash action. You’ll be skipping across the Killzone!
Equipment
The equipment of a Craftworlds Kill Team boosts what your operatives are already good at, such as a scope for Rangers that makes it easier for them to roll critical hits, or give you options that other Kill Teams get from their operative specialists, such as the Avenger Shrine Banner for the Dire Avenger Exarch, which makes it an Icon Bearer for the purposes of controlling objectives.
Commorites
The Drukhari Commorites have chosen the opposite path of the Aeldari after the collapse of the Aeldari golden age, giving in to all their worst tendencies and becoming pain-worshipping, brutal raiders all over the galaxy. They’re still fast and graceful, but also insane and merciless.
Special Features
The Commorite Kill Team doesn’t have any faction-specific rules, but the Kabalite operatives have the <KABAL> selectable keyword, and the Wych operatives have the <WYCH CULT> selectable keyword, so they’re bound to get subfaction rules in the future.
Fire Teams
There are two Fire Teams in a Commorite Kill Team, chosen from the ones below:
Kabalite (C) (Security/Recon)
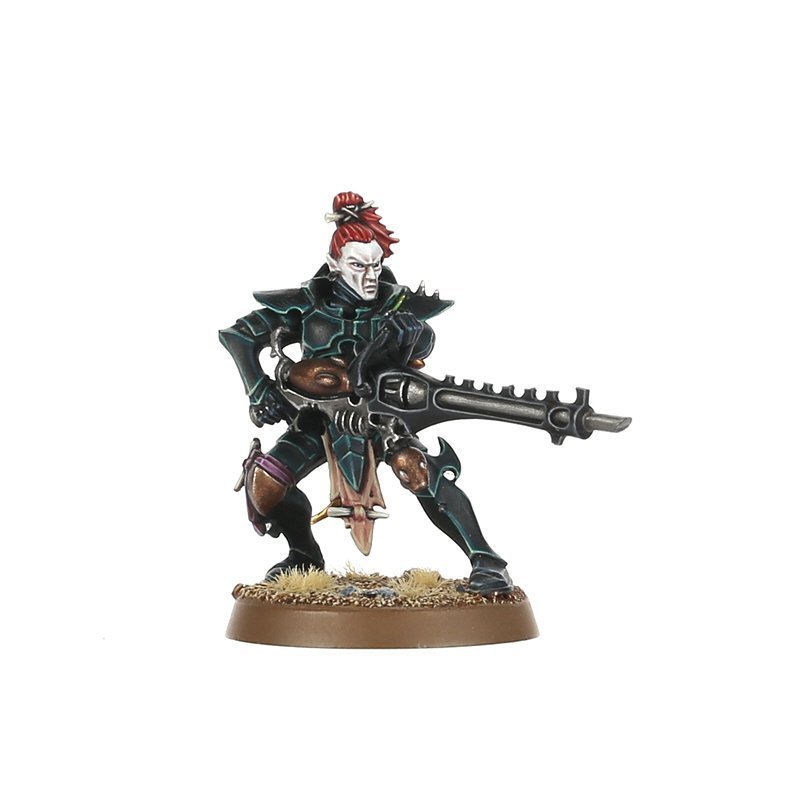
The standard Kabalites has a basic ranged weapon, the Splinter Rifle, that I really like: 4 attacks, 2 normal damage and 4 critical damage, but it scores critical hits on a 5+. Add to that a melee weapon that has the Rending rule that gives it the chance of an extra critical hit, and you have a basic operative that should churn out a good amount of critical hits. You can field 5 of these in their Kill Team, one of which can be a Gunner (with either an armour-piercing Blaster or a Shredder that does area damage on a critical hit), one a Heavy Gunner (with either a Dark Lance that’s an upgrade to the Blaster, or the Splinter Cannon that’s an upgrade to the Splinter Rifle) and, if you don’t already have a Leader, one can be a Sybarite which has access to some really good close combat weapons such as the Agoniser.
Wych (C) (Seek and Destroy/Recon)

The armaments of Wyches are similar to those of Kabalites, but reversed, so that their ranged and melee weapons have similar rules, but their melee weapons are better than their ranged weapons. On top of this, they have a worse Save, but also a 5+ Invulnerable Save, which is arguably better. You can field 5 of them in their Fire Team, two of which (three if you have two Wych Fire Teams) can be Fighters. Fighters add some versatility to your Kill Team with either the very dangerous close combat Razorflails or Hydra Gauntlets, or the Shardnet and Impaler weapon that lowers the Attacks characteristic of nearby enemy operatives, which can be a big advantage if you’re getting into big melee brawls. If you don’t already have a Leader, one can also be a Hekatrix, which has mostly the same weapon options as a Kabalite Sybarite (minus the Splinter Rifle).
Ploys
The Commorites have access to some very thematic Ploys, which is great, since their operative rules aren’t that colourful: The Strategic Ploy Agile Gladiators lets Wyches much more maneuverable, ignoring other operatives and move the first two inches of a climb, traversal or drop for free, as well as automatically passing jump tests, and also parrying better – The Ploy makes them the acrobatic combat artists they’re supposed to be. Prey on the Weak makes all operatives in the Kill Team able to re-roll some attack dice for every Shoot or Attack action against a target that has lost half or more of its wound, the sadistic bastards. For Tactical Ploys, they have Power from Pain, which gives one of your operatives an extra point to its Action Points Limit and the ability to Shoot or Fight Twice in their next activation if they were close to a recently incapacitated enemy operative.
Equipment
The Commorites have 11 different pieces of equipment, among them the awesome Haywire Grenade that scores criticals on a 4+ if the target(s) have a Save of 3+ or better (great against Space Marines! -but as of the October 8, 2021 FAQ, it can only be used once per battle), and the Kabalite Banner that gives you the Icon Bearer objective-controlling ability the Kill Team is otherwise lacking.
Troupe
The Harlequin Troupe is a truly unique Kill Team: Each of its highly skilled warriors plays a role in a lethal drama reenacted in the fight against their enemies, dedicated to the Aeldari God of Laughter. Their artistic combat style and taste for the theatrical lends itself well to Kill Team-style narratives of small, intense battles, and you can build a whole team from one box of them, so they’re a good place to start if you want a Kill Team that’s also challenging and fun to paint.
Special Features
The Troupe Kill Team doesn’t have any faction-specific rules, but they do have the <MASQUE> selectable keyword that might be used for subfaction rules in the future.
Fire Teams
A Troupe Kill Team is built as one single Fire Team.
Troupe (C) (Seek and Destroy/Infiltration/Recon)

A standard Player Operative has a Shuriken Pistol and one of 4 different (but all with 5 attacks and good damage values) close combat weapons. They also have 3 Action Points, a 4+ Invulnerable Save, and they move as though they could Fly – so they’re pretty great! You can field 8 of them in a Kill Team, always including a Leader with even more weapons to choose from, and up to two Gunners with either the Meltagun-lite Fusion Pistol or the Neuro Disruptor with Stun (the one that takes away Action Points from the target). Having 8 operatives with an Action Points Limit of 3, great mobility skills and an excellent Invulnerable Save is pretty impressive.
Ploys
As if they weren’t already great at moving around, the Strategic Ploy Rising Crescendo gives your entire Troupe the ability do Dash and Charge while close to enemy operatives, as well as moving an additional inch/Triangle whenever they Normal Move, Fall Back, Dash or Charge. Among their Tactical Ploys are the really good Hero’s Path, which gives you an action for 3 Action Points that lets you teleport anywhere in the Killzone not close to enemy operatives.
Equipment
Among the Troupe equipment is the Death Mask which gives you a Command Point when its wearer is incapacitated and the Wraithbone Talisman that lets you use the general Command Re-Roll Tactical Ploy for free once per battle in shooting or combat.
Greenskins
This raging horde of war-loving brutes are both one of the great terrors of Mankind within the game and one of the more humorous and fun factions of Kill Team as a game. They’ve also recently received a big and long-awaited update to their model range, so there has never been a better time to build a Kill Team of Waaagh!-screaming Orks – just be aware that the rules for the Ork Kommandos in the Octarius starter set are a different Ork faction with much more detailed rules than these lads.
Special Features
The Greenskins Kill Team doesn’t have any faction-specific rules, but they have the <CLAN> selectable keyword, which means they’ll probably get subfaction rules at some point.
Fire Teams
The Greenskins Kill Teams are made up of two Fire Teams, chosen from the ones below:
Boy (C) (Seek and Destroy/Security)

The Standard Ork Boy can choose between a Shoota Rifle or a Slugga/Choppa pistol/melee weapon combo for its loadout. None of it is particularly impressive (the ranged weapons have a 5+ Ballistic Skill), but they have 10 Wounds, which is above average for their type of operative. You can field 5 of them in their Fire Team, one of which can be a Gunner with either a Big Shoota or a Rokkit Launcha), one a Boss Nob if you don’t already have a Leader (he’s amazing and has access to all sorts of weird weaponry). Finally, you can replace one standard Ork Boy Fighter with two Boy Gretchin, which are really weak, can’t carry equipment or benefit from Ploys. They do, however, have a Group Activation of 2, so if you want to swarm the killzone, they’re you best option for that.
Clan Kommando (C) (Seek and Destroy/Infiltration)

The Clan Kommando Fighters are, confusingly, almost exactly the same as an Ork Boy Fighter with Slugga/Choppa. The only thing that distinguishes them is their access to the Strategic Ploy Skulk About that which makes them better at rolling saves while Concealed – because they’re the sneaky Orks, of course. You can field 5 of them in a Fire Team, and one can be a Kommando Nob if you don’t already have a Leader.
Speshulist (C) (Seek and Destroy)

You can only have one of your Fire Teams be a Speshulist Fire Team, and they’re basically your Heavy Weapons team. You can field 4 of them in your Kill Team, each of which can be either a Burna (with a Flamer-like weapon) or a Loota with the machine gun-like Deffgun. If you don’t already have a Leader, one of them can also a be a Spanner, which has 3 strong heavy weapons to choose between, one of which can be the armour-piercing Kustom Mega-Blasta.
Ploys
The Ploys of the Greenskins are about as Orky as can be. Take, for example, the appropriately named Strategic Ploy Waaagh! which grants you an turn a normal hit into a critical one when fighting if you already scored two normal hits, or the Tactical Ploy More Dakka that lets you make a free Shooting attack against a target if you just shot at it without causing any wounds. More is more when it comes to the Greenskins.
Equipment
One of the coolest Greenskin pieces of equipment is the Spanner-exclusive Kustom Force Field that grants a 5+ Invulnerable Save against shooting attacks for operatives inside a bubble around the Spanner if the shooter is outside of the bubble, but they also have more traditional stuff such as grenades and armour.
Tomb Worlds
These ancient and mysterious metallic warriors have been entombed across the galaxy for millions of years and are now marching tirelessly in their quest to restore their ancient empire. They were one of the two starter factions for Warhammer 40,000 9th edition, so their newly refreshed model range is cheaply available everywhere.
Special Features
The Tomb World Kill Team doesn’t have any faction-specific rules, but its operatives do have the <DYNASTY> selectable keyword, which means there’s a possibility they’ll get subfaction rules at some point.
Fire Teams
Tomb World Kill Teams have 2 Fire Teams, which can be either of the ones below (with the one restriction that only one can be a Necron Warrior Fire Team):
Necron Warrior (C) (Security)

Necron Warriors are pretty straightforward: They can equip either a Gauss Flayer or a Gauss Reaper (in the Compendium it looks like they can take both, but that was FAQ’ed on October 8, 2021), where the first is a rifle with unlimited range, and the secon has shorter range but the P1 rule that makes its critical hits armour-piercing. They also have Bayonets, which are average-to-good melee weapons. Like all other Tomb World operatives, they have the Living Metal ability that makes them regain up to 2 wounds when each Turning Point begins, which is very good. You can field 5 of them in a Fire Team, with no specialist operatives to choose from.
Immortal (C) (Seek and Destroy/Security)
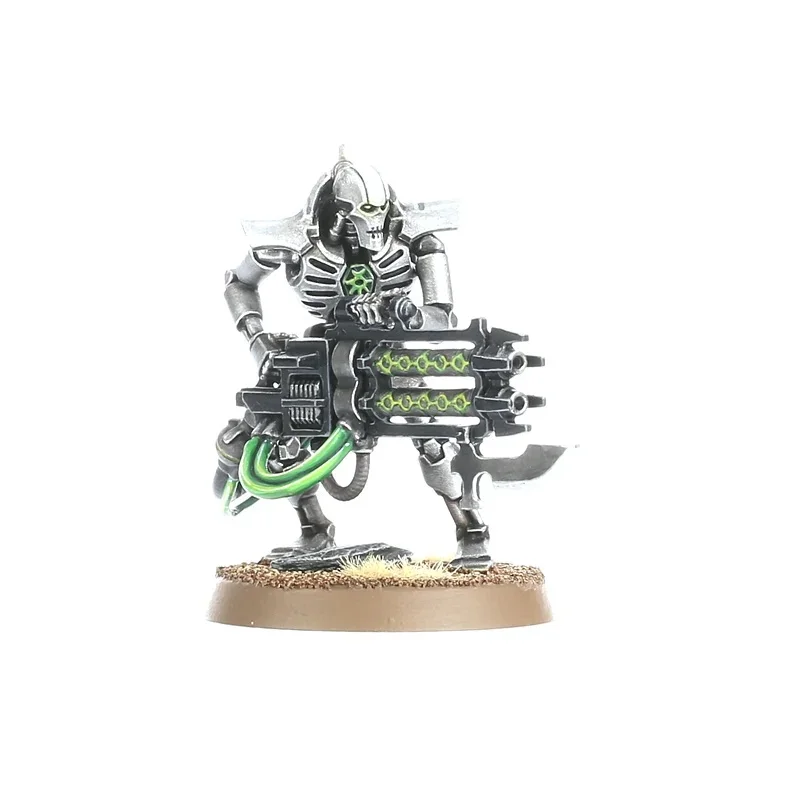
Immortals are basically better, more durable Necron Warriors with either the armour-piercing Gauss Blaster or the Tesla Carbine with which has the Splash 1 rule on critical hits, which does mortal wounds to the target and nearby operatives. You can field 4 of these in a Fire Team, and if you don’t already have a Leader, one can be a Leader which just has a better Weapon/Ballistic Skill.
Flayed One (C) (Seek and Destroy/Infiltration)

The Flayed Ones are the (horrifying) close combat specialists of the Tomb World Kill Teams, with 5 attacks hitting on a 3+ and the Rending critical hit rule. You can field 5 of them in a Fire Team, one of which can be a Leader which hits on a 2+ instead.
Deathmark (C) (Seek and Destroy/Recon)

The Deathmark are equipped with the excellent Synaptic Disintegrators, hitting on a 2+, being armour-piercing and doing mortal wounds on critical hits, but they’re also the only weapons with the Heavy special rules in the Kill Team, so be sure to balance them out with another Fire Team with more mobility. If you don’t already have a Leader, one of them can be a Deathmark Leader that adds a one-dice reroll to its Disintegrator.
Ploys
The Deathmark operatives have a cool Strategic Ploy that lets them change their order (from Engage to Conceal or vice versa) in a Turning Point, but the Tomb World Kill Team’s most iconic Ploy is the Tactical Ploy Reanimation Protocols, which lets you place a token on the killzone where one of your operatives were incapacitated. In the next Turning Point, you can roll a dice, and on a 3+(2+ for Necron Warriors), that operative returns to the killzone with D3 wounds remaining where the token was placed. If that’s not thematic for an army of metallic skeletons, I don’t know what is.
Equipment
While the Tomb Worlds have quite a few useful pieces of equipment, the Mindshackle Scarabs are truly unique: They give you an action that worsen the Action Points Limit of an enemy operative on a dice roll, but if you roll more than double the enemy operative’s Action Points Limit, you instead get to make a free Shoot or Fight action with them as if you were controlling that operative!
Hunter Cadre
The Hunter Cadre of the T’au Empire represents the military branch of this comparatively young empire at the fringes of the galaxy. The T’au are creating an empire where everyone works together for the Greater Good – or perishes. In a manner quite opposite Imperial human attitudes, the T’au are perfectly okay with intelligent machines and technological innovation, so the Hunter Cadre Kill Team is full of high tech weaponry and drones.
Special Features
The Hunter Cadre Kill Team has a faction-specific rule called Drones, which lets you fill operative slots in your Fire Teams with all sorts of different drones that can range from being full of guns to giving your Fire Team new abilities, generally improving the versatility of your Kill Team a lot. Drones can also protect your other operatives, so that attacks against one of your operatives can be directed against a drone instead. Drones are an integral part of playing Hunter Cadre Kill Teams, and the models for these drones are generally available in the same model kits as the Fire Teams they belong to.
Hunter Cadre operatives also have the <SEPT> selectable keyword, setting them up for gaining subfaction rules in the future.
Fire Teams
Hunter Cadre Fire Teams are made up of two Fire Teams, chosen from the options below:
Fire Warrior (C) (Security)

The standard Fire Warrior Shas’La operatives have a Save of 4+ and can choose between three ranged weapons: The Pulse Blaster, which is a really cool weapon that is really dangerous at close range but can also do a weaker attack with unlimited range if you need it, or the Pulse Carbine or Pulse Rifle. The Pulse Rifle has a Strategic Ploy called Aimed Pulse Volley associated with it, but is otherwise identical to the Pulse Carbine, so there’s no reason to ever pick the Pulse Carbine as far as we can tell. You can take 6 of them in a Fire Team, and if you haven’t already chosen a Leader, one can be a Fire Warrior Shas’Ui.
Pathfinder (C) (Recon)

Pathfinder Shas’Las are a bit more basic than the Fire Warriors, but they have the Unique Action Markerlight, which lets every one of your operatives re-roll one attack dice when shooting at a target marked by this action. You can field 6 of these in a Fire Team, and one of them can be a Heavy Gunner with either an Ion Rifle or the mortal wound-dealing Rail Rifle. If you don’t already have a Leader, one can also be a Pathfinder Shas’Ui.
Stealth Battlesuit (C) (Infiltration/Recon)

The Stealth Battlesuits are the really elite operatives of the Hunter Cadre Kill Teams. They have a Save of 3+, 10 Wounds , and are armed with powerful Burst Cannons. They also have the ability Camouflage Field, which means they’re almost always treated as being in Cover against shooting attacks, even in open terrain. If they’re Concealed, they can’t even be targeted from a Vantage Point. You can field 3 of them in a Fire Team, and one of these can swap their Burst Cannon for the Meltagun-like Fusion Blaster. One can also be a Stealth Battlesuit Shas’Vre if you don’t already have a Leader.
Ploys
Hunter Cadres are all about strong shooting, and that shows in Ploys like the Tactical Ploy Stand and Shoot, which lets you use a ranged weapon in close combat when attacked in melee, or the Strategic Ploy Breach and Clear which lets you ignore cover when shooting with Fire Warrior Pulse Blasters against nearby targets and reroll one of your attack dice for those shooting actions.
Equipment
You can choose the Markerlight that Pathfinders get for free as an equipment option for other types of operatives, but the Hunter Cadre equipment list also includes the Leader-exclusive Holographic Readout which lets a nearby friendly operative perform a mission action for one less Action Point than its usual cost.
Cadre Mercenary Kill Team
These carnivorous mercenaries of the T’au Empire are especially known for their ability to incorporate genetic traits of other species into their own by devouring members of those species.
Special Features
The Cadre Mercenary Kill Team doesn’t have any faction-specific rules
Fire Teams
The Cadre Mercenary Kill Team is built from just the one Fire Team below:
Cadre Mercenary (C) (Seek and Destroy/Infiltration/Recon)

The standard Kroot Carnivores are pretty basic with an average-to-good Kroot Rifle and Rifle Blades equipped. It has an ability called Masters of Camouflage (like all other operatives in this Kill Team) that changes its Save characteristic from 6+ to 4+ when it’s in cover. You can field 12 of these in a Kill Team, but you can replace one with a Leader, and up to 4 Kroot Hounds, which are melee specialists (and bird-dogs!) with the Rending critical hit rule, or you can use two of the 12 slots to field one Krootox, a mobile weapons platform gorilla-like monster with a whopping 16 Wounds and pretty good weapons for both melee and ranged combat, as well as an Action Points Limit of 3. These are all pretty old sculpts, but if you have them or are able to buy them, you’ll have a very unique-looking Kill Team.
Ploys
The Cadre Mercenary Kill Team has a Strategic Ploy that lets all friendly operatives Charge while concealed, as well as a Tactical Ploy called Gory Feast that lets an operative eat an incapacitated enemy hostile to regain D6 lost wounds, among others.
Equipment
Among the Cadre Mercenary equipment is a mortal wounds-dealing Kroot Hunting Rifle and the really cool Sure-Foot Charm that lets you group activate the bearer and one other nearby operative.
Hive Fleets
Hive Kill Teams are made up of Tyranids, a hive-mind species that swarms across the galaxy, devouring everything and incorpoating the biomass of the devoured into new and terrible lifeforms.
Special Features
The Hive Fleets have the faction-specific ability Synapse, which removes the penalties for being Injured as long as a Hive Fleets operative is close to another Hive Fleets operative.
The Kill Team’s operatives also have the <HIVE FLEET> selectable keyword, which allows it to get subfaction rules in the future.
Fire Teams
Hive Fleet Kill Teams are built from two Fire Teams, chosen among the ones below (the only restriction being that you can only select a Tyranid Swarm Fire Team once):
Tyranid Warrior (C) (Seek and Destroy/Security)

The standard Tyranid Warrior Fighter is a huge beast with 18 Wounds and can be equipped with two weapons chosen from two separate lists of options, which can end up with making them dual-wielding melee fighters or a combination of ranged and melee weapons – they have four arms, after all, so they can equip a lot of stuff. The weapons they can choose are all pretty good attacks- and damage-wise, so which ones you pick depends on whether you want to gain an extra attack from wielding two melee weapons, score critical hits on a 5+, Stun on a critical hit, or a number of other bonuses. The Lash Whip is a particularly interesting choice, being a ranged weapon that is also an aura around your operative that subtracts 1 from the Attacks characteristic of nearby enemy operatives.
You can field 3 of these in a Fire Team, one of which can be a Heavy Gunner that can either do area damage with a Barbed Strangler or pierce armour with a Venom Cannon (as well as having access to Fighter weapons such as the Lash Whip. If you don’t already have a Leader, one can be a Tyranid Warrior Leader, which has better Weapon and Ballistics Skills and an extra wound.
Genestealer (C) (Seek and Destroy/Infiltration)

Genestealers are very effective close combat fighters with a 5+ Invulnerable Save, a free Dash action every activation, an ability to always be Concealed, even from operatives on Vantage Points, and a choice between some effective melee weapons. You can field 5 of them in a Fire Team, one of which can be a Leader if you don’t already have one. The models are pretty old, but they’re a great choice for a sneaky melee-focused Kill Team.
Tyranid Swarm (C) (Seek and Destroy/Security/Recon)

You can field 8 operatives in Tyranid Swarm Fire Team, and each can be either a Termagant or a Hormagaunt. Both operative types have a Group Activation of 2, so they’re great for swarming the enemy. A Termagant can be equipped with either a Fleshborer, Spinefists or a Devourer, all of which are ranged weapons, but it also has Claws for close combat. If you choose the Devourer for an operative, it counts for two slots in your Fire Team, since that weapon is much better than the others with its ability to reroll hit rolls of 1. A Hormagaunt has a Scything Talons melee weapon with the Relentless trait that gives it full rerolls on its attacks, which is great when each has 4 attacks, and the weapon has a critical damage of 5.
Ploys
The Hive Fleets have three Strategic Ploys called Stalk (a free Move for one operative), Lurk (an improved save for Concealed operatives in cover being shot at) and Feed (extra damage on the first critical hit of any friendly Fight action), as well as Strategic Ploys such as Aggressive Biostrain which lets you repeat a shooting attack if it didn’t cause any wounds.
Equipment
Among the equipment of the Hive Fleets are the Flesh Hooks ranged weapon that scores critical hits on a 5+, and Feeder Tendrils, which let’s an operative heal after devouring an incapacitated enemy operative.
Brood Coven
The Brood Coven Kill Team are members of the Genestealer Cults, human-Tyranid hybrids worshipping the Four-Armed Emperor, who they hope will liberate them from the oppression of the Imperium. In reality, their uprisings and sabotage is just paving the wave for the Tyranids devouring their homeworlds. As a Kill Team, they’re a fun and unusual combination of xenos monstrosities and human guns, grenades and explosives.
Special Features
The Brood Coven Kill Team doesn’s have any faction-specific rules, but its operatives do have the <CULT> selectable keyword, which sets up the framework for them getting subfaction rules in the future.
Fire Teams
Brood Coven Kill Teams are made up of two Fire Teams, chosen from the ones below:
Neophyte Hybrid (C) (Security/Recon/Infiltration)
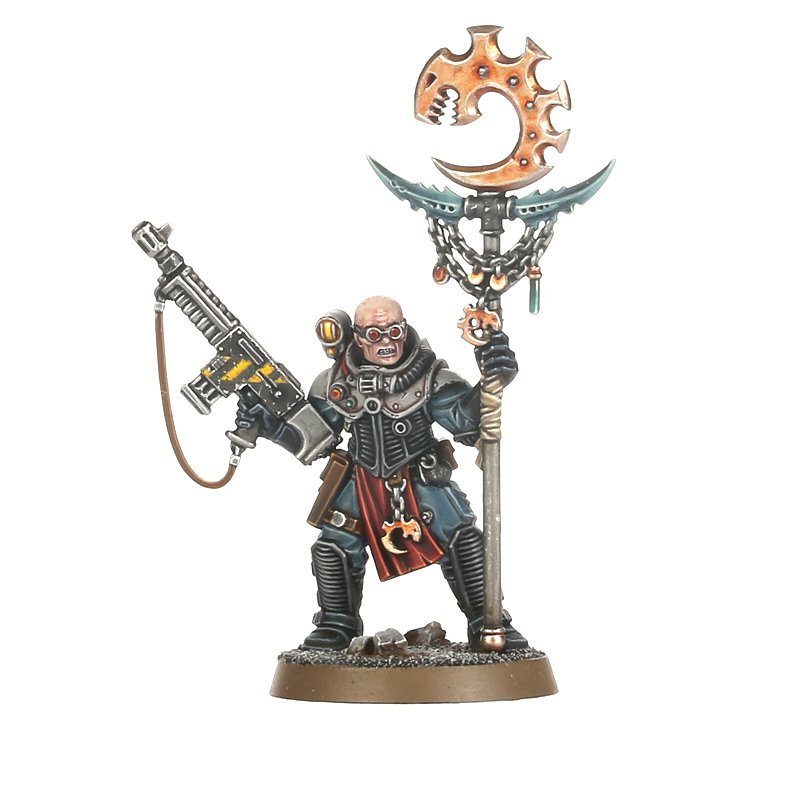
The standard Neophyte Hybrid Trooper can be equipped with either a weak Autogun or stronger Shotgun (in the Compendium, it looks like you can take both, but that was FAQ’ed on October 8, 2021) with limited range, and they have a Group Activation of 2. You can field 7 of them in a Fire Team, and while you can fill a Fire Team with just these group activating small-arms-firing Troopers, what makes the Fire Team special is, well, its specialists: Two can be Gunners, with either a Flamer, Grenade Launcher or the Stun-inflicting Webber (you can only choose each weapon option once per Fire Team). One can be a Heavy Gunner with either a Heavy Stubber, an armour-piercing Mining Laser or the Stun-inflicting Seismic Cannon. One can be an Icon Bearer which is better at controlling objectives and grant a single dice reroll for Shoot and Fight actions for nearby Brood Coven Operatives.
If you don’t already have a Leader, one can also be a Neophyte Hybrid Leader, which has its own selection of cool pistols and close combat weapons to choose from.
Acolyte Hybrid (C) (Seek and Destroy/Infiltration)

Standard Acolyte Hybrid Troopers are pretty basic pistol/close combat weapon operatives (even though their melee weapon is pretty good), but the Fire Team’s specialists are great. You can field 5 operatives in an Acolyte Hybrids Fire Team, and you can choose for two of them to be either up to two Gunners (with Hand Flamers), up to two Fighters (with either a Heavy Rock Cutter, Heavy Rock Drill or Heavy Rock Saw, all of which are really cool. Each option can be chosen once), or one Gunner and one Fighter. In addition, one can be an Icon Bearer which works more or less like the one for Neophyte Hybrids. If you don’t already have a Leader, one can be an Acolyte Hybrid Leader, who can choose some really good weapons, among them the Lash Whip with the attacks-reducing aura some Hive Fleets operatives can also take.
Hybrid Metamorph (C) (Seek and Destroy)

Hybrid Metamorphs are much like Acolyte Metamorphs, but with better standard melee weapons. You can field 5 in a Fire Team, two of which can be Gunners with a Hand Flamer, and one of which can be an Icon Bearer like the one for Acolyte Hybrids. You can also pick one as your Leader if you don’t already have one, and this Leader is largely like the one for Acolyte Hybrids, but with Metamorph weapons and without the option to take a Lash Whip.
Ploys
The Brood Covens have a Strategic Ploy called Cult Ambush which allows its operatives to change their order when they activate, and a Tactical Ploy called Underground which lets you set up a Concealed operative anywhere in the Killzone not close to enemy operatives, as well as a few other Ploys that are also all about sneaking, ambushing and overwhelming the enemy.
Equipment
The Brood Covens equipment is really cool, since it emphasizes the working-class roots of the Kill Team by more or less consisting of mining equipment: Theres Demolition Charges, a Mining Tool Rig and a Structural Surveyor that gives you bonuses for being near a specific terrain feature, among others.
FAQs
We’re updating this guide where it’s particularly relevant to new players of the various factions, but for the full FAQs released for Kill Team, you can always check here.
Other great resources:
- Kill Team Beginner’s Guide
- Kill Team Special Rules
- 40K Faction and Army Overview
- Warcry Warband Overview
Kill Team Factions Added in 2024–2025
Kill Team: Salvation (2024) and the associated release wave added several new operatives and updated faction rules. Here are the new and updated factions from this period:
Scout Squad (Space Marines)
Scout Squad brings lightly armoured Space Marine Scouts into Kill Team, offering a very different play pattern from the Phobos Strike Team or Intercession Squad. Scouts rely on stealth, infiltration, and snipers rather than heavy armour. Their low toughness is offset by their concealment abilities — they can deploy and move in ways unavailable to standard Space Marines. A strong choice for players who prefer an asymmetric, guerrilla playstyle over a direct stand-up fight.
Playstyle: Stealth, sniping, flanking. Lower durability, high mobility.
Death Guard (Plague Marines)
The Death Guard warband brings Plague Marines into Kill Team — slow, disgusting, almost impossible to kill. Every Death Guard operative has exceptional wounds and resistance compared to equivalently costed enemies. Their primary weakness is activation count — you have fewer operatives than most factions, so objective control requires planning. Pairs well with defensive positioning and attrition tactics. An excellent choice for players who enjoy a resilient, grinding playstyle.
Playstyle: Attrition, durability, slow advance. Fewer but tougher operatives than most factions.
Legiones Skitarii (Adeptus Mechanicus)
The Legiones Skitarii warband expands on the Hunter Clade faction with new operative options and updated dataslates. Mechanicus warbands excel at ranged damage with their distinctive arc and radium weapons, while their cyber-augmented resilience makes them surprisingly durable for their size. New operative types in the Salvation-era update give Skitarii players more tactical flexibility in melee and close support roles than the original Hunter Clade allowed.
Playstyle: Ranged firepower, adaptable, moderate durability. Good all-round choice for technical players.
Kill Team Faction Availability: Rotations and Rereleases
Unlike some GW game systems, Kill Team factions do not rotate out of the game entirely — older rules remain legal indefinitely. However, specific physical Kill Team box sets do go out of print and may become harder or more expensive to find at retail. GW periodically rereleases popular warbands or consolidates them into larger product sets.
If you are buying into a specific warband, check current GW website availability rather than relying on third-party stock. Older warbands (particularly from the 2021 relaunch) may now only be available secondhand or through specialist hobby stores with remaining stock.
Which Kill Team Faction Should I Start With?
For new players, the easiest entry points are:
- Intercession Squad (Space Marines) — Straightforward, durable, widely available. The standard Space Marine Kill Team. Good for learning the game without complex faction mechanics.
- Veteran Guardsmen (Astra Militarum) — Multiple operatives, relatively simple rules. Great for players who prefer a numbers advantage over individual durability.
- Blooded (Chaos Cultists) — Fast, aggressive, fun. One of the most popular competitive factions. High activation count rewards experienced players.
- Pathfinder (T’au) — Excellent ranged options, marker lights add a tactical layer. Best for players interested in the T’au aesthetic who want to dominate at range.
For per-faction deep dives, see our Kill Team Tau guide and Kill Team Blooded guide.