
How important is story in your hobby?
My name is Niall and I competed in the UK Golden Demon this year (2022) held at Warhammer World in Nottingham, England. This was my first time competing and to say I had a great time is an understatement.
I got to see some inspiring work up close, meet some amazing artists and of course, see Warhammer World itself. Although the competition was absolutely stacked with incredible painters, past winners and legends I was lucky enough to come away with a finalists pin and a commendation for my small diorama entered in the duel category.
Editor: You can see more of Niall’s work over at his Instagram. Niall also does commissions, so if you want to get your minis painted up to an amazing standard you can contact him via his Instagram and work out the details.
Types of Miniature Diorama at a Glance
Before you build your first diorama, it helps to pick the scale of project that fits your time, space and skill. Use this quick reference to find the type of miniature diorama that suits where you are in the hobby — then read the full step-by-step guide below.
| Type | Models | Difficulty | Time | Best for |
|---|---|---|---|---|
| Themed Display Base | 1 model | Easy | 2-6 hours | Beginners and any single hero model you want to showcase |
| Vignette | 2-3 models | Easy-Moderate | 1-2 days | Capturing a small interaction or duel between two characters |
| Small Narrative Diorama | 3-5 models | Moderate | 3-7 days | Telling a short story across a single scene with simple terrain |
| Large Story Diorama | 5-15+ models | Hard | 2-6 weeks | Multi-zone storytelling with custom terrain and lighting |
| Competition Diorama | Variable | Expert | 1-6 months | Golden Demon-tier entries with original sculpting, lighting and freehand |
Most first-time builders should start with a themed display base or vignette. The skills you learn there scale directly into bigger projects later.
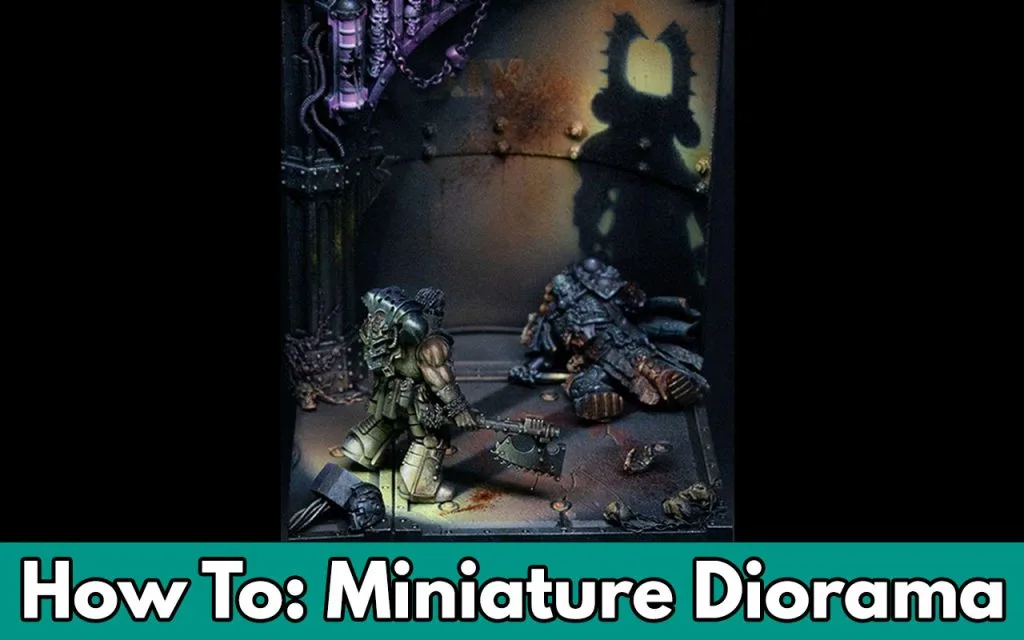
In this article, I’m going to cover how to make a miniature diorama of your own, with a focus on the narrative. We will talk about taking it from the initial concept, through varying stages all the way from doodle to display case and maybe even to the hallowed halls of the Golden Demon itself.
I will be using my piece to illustrate the process I used to complete it. As required for the Golden Demon my piece was set in one of Games Workshop’s settings and I will be referring to that throughout the article. However, you could easily use this process to make a diorama in any setting you like.

Find a story to tell by using your passion as a guide and limitations to cut avoid options
An idea for a diorama can come from almost anywhere and there are so many different ways to approach getting your initial idea together. This can often be intimidating as possibilities are endless but it gets easier the more decisions you make.
My trick? I have found that limitations rather than options spark creativity.
Your diorama could be taken from a dramatic character defining scene featuring your favorite hero or villain taken straight from the pages of a novel. Alternatively, it could be a story you yourself have come up with playing on established in universe conflicts with a cast of your own characters.
These are just some examples but the general rule that I have learned is to work on what excites and interests you. If you already have a character or faction that you would really like to represent then you’re half halfway through the first step. If not then my advice is to pick a setting that interests you first and work from there. Passion is a great driver!
For my piece, I was greatly inspired by a moment of conflict in Aaron Dempski-Bowden’s amazing novel “Betrayer” in the Horus Heresy series. In particular, I knew that I wanted to try and foreshadow this character’s future.
While I won’t go into detail to avoid spoilers, It’s a moment that really gives me chills when I read it and has always been on my hobby “To do list”, and so for me there were few options that could really compete with it. Maybe that’s a good acid test for a source of inspiration, look for what gives you chills.
Once you have an idea that excites and interests you, it’s time to start getting things down on paper.
Sketch your idea out as best you can with a pencil or using software, whatever is most comfortable for you. Being able to draw is not a requirement for this step, even using stick figures is cool. It’s not about having a perfect drawing of your idea, it’s about getting it out of your head and down on paper so you can look at it more clearly.
My diorama project started out as a messy doodle in the back of a notebook that could easily have been mistaken for nothing more than a scribble.
Dive deeper into your narrative by thinking about the scene of the story and what materials you can use to portray it
With that done, take a look at your sketch and start to take note of what materials you’re going to need
- What miniatures are you going to use for this project?
- Will you need to do any converting, kitbashing, sculpting or reposing?
Now, look at the scene you’ve come up with and think about the setting.
- Where are the characters?
- Are they on a desolate battlefield?
- The bowels of a spaceship?
- The deepest dungeon of a vampire’s castle?
Like any good story setting the scene is hugely important so often the setting of your diorama can be just as important as the characters within it.
Get some materials together
Once you know where your characters are, start to think about what materials you can use to illustrate that environment.
There are of course many suppliers of really great materials and great tutorials on how to scratch build almost anything you need. However, a step I have found to make this easier when building the backdrop for your diorama is to look for the shapes that you need in everyday items that you can repurpose.
Need a curved wall on a spaceship? Use PVC pipe. Want an overlapping metal panel? Find soft plastic from a school book protector. Industrial cabling? Guitar strings. You get the idea, take a look around you and i’m sure you can find a lot of really useful materials close at hand. This is also a very cost effective method.

Another point to consider with a diorama is what you are going to mount your piece on. Miniature plinths are usually your best bet as they are a sturdy, relatively cheap option that can be ordered online from many good suppliers. They also come in many different shapes, colors and sizes.
So while deciding on what plinth shouldn’t take up a huge amount of your planning time, picking one that’s the right fit for your project is something worth a few minutes of consideration. It might not be the best choice to pick a tiny plinth to display your huge epic battle scene or a massive one for your intimate duel between two rival heroes.
For my piece, I knew that my backdrop would need a curved wall. However, I didn’t want to mount the piece on a circular plinth as that seemed to interfere with the composition. So I opted instead to order a square plinth of appropriate size, trace the curve of the wall I wanted, cut the corners off with a hack saw and sand the remainder into a curve with an electric sander.
Put together your diorama pieces by dry fitting and experimenting
Once you have your materials it’s time to start putting things together and I have always found that dry fitting your diorama is always a good idea. So rather than jumping in with glue straight away, lean on easy to remove adhesive putties like white tac to play around with your composition. At this stage, it’s important to try different things with what you have and often you might discover that by changing things just a little your piece really begins to flow.
When it comes to building a diorama it’s often the case that things come to you on the fly, new additional ideas crop up along the way at different stages and you might find yourself saying “Wouldnt it be cool if?” My experience has taught me to give these ideas a chance when they arise and to never be afraid of changing things.
For a diorama, composition and posing of the miniatures are just as important as the painting, so take your time with this to really find the sweet spot that you’re pleased with.
Have a think about what you want to portray. What emotions are the characters experiencing at this moment?
- Are they angry?
- Fearful?
- Surprised?
- Suspicious?
Take this into consideration when posing your miniatures as body language is very useful when trying to communicate the story of your diorama.
I can’t tell you how long I spent ever so slightly moving things this way until I felt it was just right.
Composition is a huge topic deserving of a series of articles in itself to cover. Even then it is hugely subjective, so for now I simply want to advise you to take your time to consider as much as possible and check things from different angles before getting the glue out.
Once you have your composition set it’s time to start putting things together. I have found it easier myself to build the backdrop first and to keep the characters separate until the last stages.
Another consideration at this point is texture. What’s the history of the environment these characters find themselves in? Has it been damaged or abandoned? If the environment is supposed to be particularly dirty or damaged it might be worth doing some physical weathering on your backdrop before you paint it.
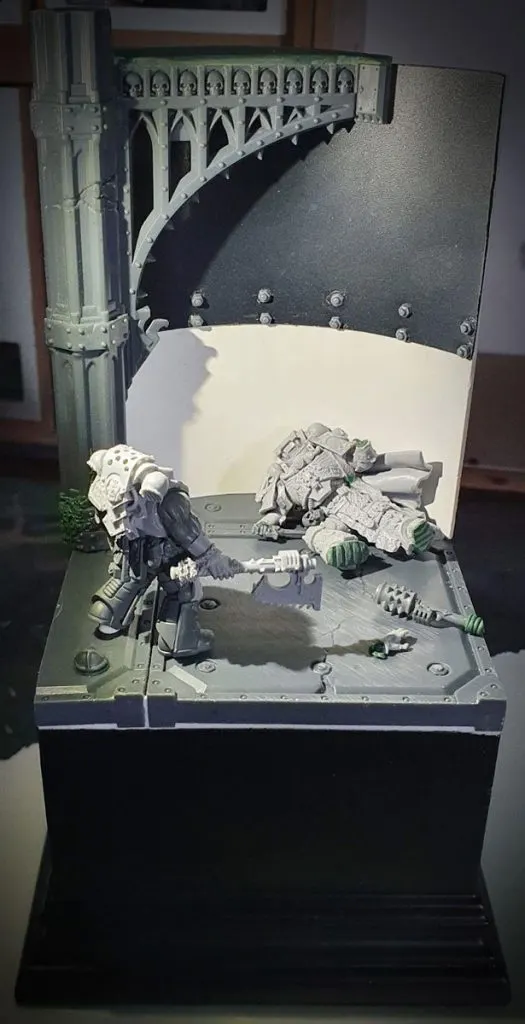
This can be done in many different ways to achieve different results. The backdrop of mine was made from pieces of the sanctum administratus terrain kit by Games Workshop, PVC pipe and plastic from a book protector. And while these were the right shapes for my purpose they were far too smooth. The setting was my interpretation of the fighting pits aboard the World Eaters flagship “The Conqueror”. I imagined it as a dank environment bearing damage and dirt from centuries of past battles.
So to help further represent this I used sandpaper to scratch the floor and walls removing the smooth finish, how subtle or heavy you want to go with this is up to you.
Bring your diorama to life by using Light and Darkness
Once your backdrop has been assembled and secured to the plinth and you have your characters built and posed just the way you want it’s time to start painting.
As a rule I always keep the backdrop and the miniatures separate while painting however there may be times when you want to put the miniatures in the scene to get a lay of the land. For that once again adhesive putty like blue tac comes in very handy. There are a lot of different opinions on what color primer to use and this is a matter of personal preference. I myself always use a matt black primer.
Once everything is primed it’s time to start thinking about light.
- Where is the light coming from in your diorama?
- Is it outdoors with natural light?
- Is it daytime?
- Is it nighttime?
- What’s the weather like?
- Is it sunny or cloudy?
- Is there anything obscuring the light?
- Is there a light source in the piece? Like a fire, a searchlight or a laser?
- Is it inside? If so, is the light coming in through a window or are there electric lights?
Once you know where your light is coming from and how many sources you have, the next decision is to decide how strong each light source will be. Balancing light in a diorama is again quite a subjective area however it’s always best to try and keep the brightness of a lightsource as reasonable as possible. For instance a single candle shouldn’t be brighter than a roaring fire.
With this established, remember that light travels in straight lines. Try to get an idea of where it will hit objects and where shadows might be created.
The method I use to establish this is by doing a light sketch using white ink through an airbrush to get an idea of where the light and dark areas will be. If you find yourself without an airbrush the same thing can be achieved by dry brushing with white paint. Just be careful to build this up slowly to avoid any loss of detail.
Once this step is completed you should have a rough black and white sketch of what your piece will be like. But don’t worry if you don’t get it exactly right at this stage there is plenty of time to fine tune things.
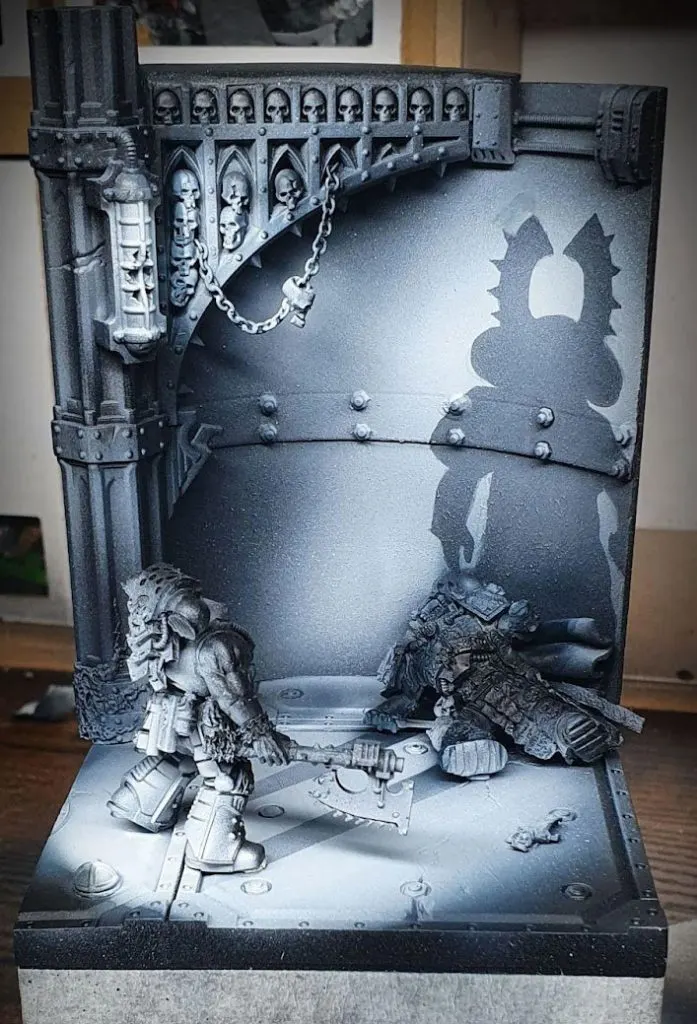
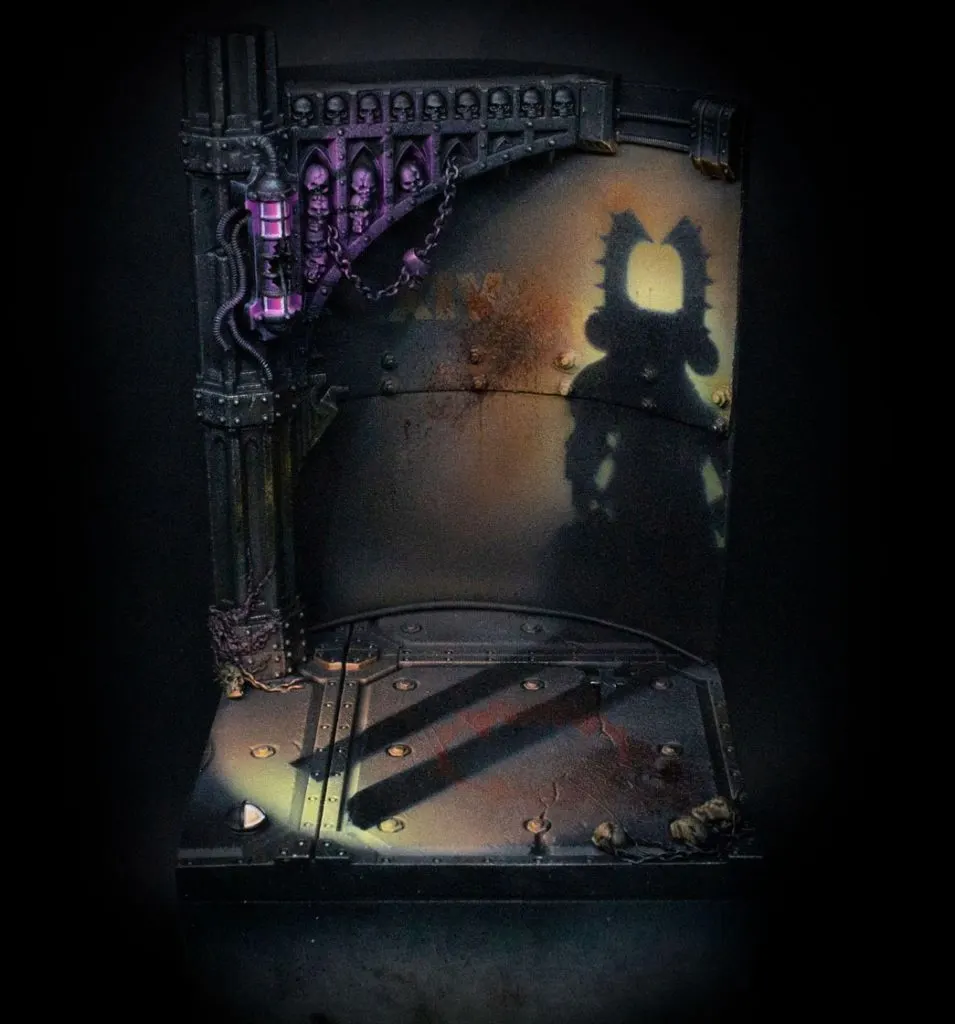
My piece had two sources of light, the primary light on the ground and the secondary light on the pillar.
As this was an interpretation of a book scene rather than an attempt at perfect adaptation, I took some artistic license to use the shadow this character cast to tell their story and foreshadow the future ahead of them. I managed this effect by using masking tape to cover the shape of the shadow being cast and then spraying over it with white ink to get an initial feel for how the shadow might look.
Paint up your diorama in several pieces and colour and texture
The next stage of painting is to decide on what colors you are going to use.
My advice is to get yourself a color wheel as I have found it to be an invaluable tool. They are not very expensive and are easily available from most craft stores, along with many online suppliers. But failing that, you can always look one up online and use that instead.
While most come with guidelines some general rules are that colors on opposite sides are complementary and provide high contrast, colors that form an isosceles triangle are split complementary providing a little more balance while retaining contrast, and an equilateral triangle provides a triadic color system that is classically balanced. All are equally useful; it just depends what you’re going for. You can read more about color theory here.

Now, depending on the decisions you have already made some of the colors may have already been decided for you.
For instance, is the particular faction or character you’re representing known for wearing a particular color? If so then great you have a starting point to work with and you can base the colors of the environment around that. If not, one option is simply to choose colors for the characters that you enjoy painting and are distinct from one another.
But color can also be considered from a narrative perspective as different colors evoke different things. If you are trying to portray a particular mood or feeling this can really help you out.
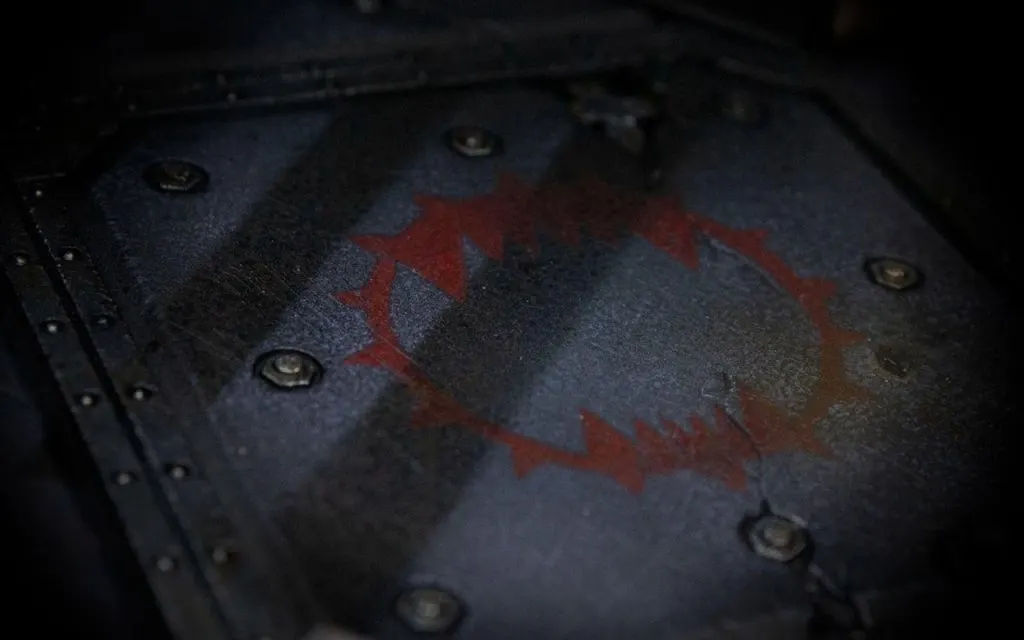
For example, with my piece I wanted anger to be a key part of what I was trying to communicate so with that in mind I knew I wanted to use reds and oranges.
Say you wanted to do a piece that was perhaps a bit more melancholic? With a character’s sadness being a focus then a palette of blues or cold purples might help you communicate that. However, once again different colors evoke different things for different people and I would advise doing a bit of research into this if you are perhaps going for something more subtle than rage or sadness.
Once you have your colors decided the first step is to coat each character and the environment with its base color. For me in this instance one of my characters needed to remain white, another needed to be a dark red and the environment needed to be a cold metallic blue. It’s important to do this first even if the character is hit by a strong light. A surface’s color is the combination of its own color and the color of the light that hits it. For instance, a bright yellow light will look different depending on if it’s hitting a red or blue surface.
Once the base colors are down another consideration at this point is backdrop texture.
While you might have added a physical texture to it previously while building, now it’s time to bring that out with your painting. Texture needs to be built up slowly in layers and I find that using a variety of different techniques together can be quite effective.
You can splash with washes, stipple with sponges, add scratches with small lines using a brush or edge highlight the physical damage that was put in earlier. I used all of these methods while painting my piece however my favorite by far has to be placing many small dots of paint to give the suggestion of a rough textured surface. It takes a while to cover an area but I quite like the effect.
Now with our base coat on and our environment textured we can get to painting the miniatures to the best standard that we can. This is a long process and the best advice I can give you for painting to your own highest standard is to paint slower than you feel you need to. Take your time, even if that particular edge highlight or blend seems easy, even if you feel like you might get three areas done in the time it might take you to do one at that speed, even if you’ve done it a hundred times before, take your time, don’t rush and the quality will improve.
Texture can also be considered from a narrative perspective with your miniatures. If a character’s armor is battle worn and damaged it can speak to the sacrifices and trials they have endured thus far. However, dirt and grime could also be used to illustrate corruption or a lack of moral fiber. While shining armor might symbolize a hero’s purity or a villain’s vanity. There are no wrong answers but it’s another narrative consideration.
We’re getting close to the end now and it’s time to go back in with the white ink through an airbrush and reestablish the lighting that we had in the black and white sketch. The color of your light source can then be added over this, less is often more here as you want to retain some of the underlying colors. I like to add another spray of white just at the brightest point of the light to really help sell the glow.
With this completed it’s time to fix your miniatures into the backdrop, stand back and take a look at your work.
At this stage you might want to go back in and make little adjustments. Push a highlight here, darken a shadow there.
This process can be as long or as short as you like and with my piece I made a snag list of a lot of little adjustments that I wanted to make before checking them off one by one. Once you’re happy with your piece take a step back and have a look.
Congratulations, you have just finished a miniature diorama.

Miniature Diorama FAQ
What is a miniature diorama?
A miniature diorama is a small three-dimensional scene built around painted miniatures, designed to tell a story or capture a moment. It combines a base, terrain, atmosphere and one or more models into a single display piece. Dioramas sit somewhere between a regular gaming model and a full art installation — the goal is not to play a game with them but to create a visual scene that feels alive when you look at it.
What is the difference between a vignette and a diorama?
The terms overlap, but the convention most modellers use is: a vignette contains one to three figures focused on a single moment or interaction (a duel, a portrait, an isolated character), while a diorama contains more figures and usually shows a wider scene with multiple things happening at once. A themed display base is the smallest version (one model on a story-driven base), and a competition diorama is the biggest. All of them share the same goal: telling a story with miniatures.
How long does it take to make a miniature diorama?
It depends entirely on size and ambition. A simple themed display base can be built and painted in an afternoon. A vignette with two or three figures usually takes one to two days of focused work. A small narrative diorama with custom terrain takes a long weekend or a week of evenings. Competition-level dioramas like Golden Demon entries can take anywhere from one month to six months or more, including planning, sculpting, painting and re-painting.
What materials do I need to start making dioramas?
The minimum starter kit is: a base (cork, MDF, plinth or even a printed plinth), basing material (sand, grit, static grass, small stones), white glue or PVA, super glue, basic paints and brushes, and the model or models you want to feature. From there you can add greenstuff or milliput for sculpting, balsa or foamcore for terrain, water-effects or resin for liquids, and small LEDs if you want to add lighting. Most first-time builders already own most of this from regular miniature painting.
How do I plan a miniature diorama?
Start with a story or moment — not the model. Decide what is happening in the scene, then choose the model or models that best tell that story, then build the base around them. Sketch the layout on paper first, dry-fit everything before gluing, and check the scene from the angles a viewer will actually see it. Limiting yourself to a single moment or emotion makes a diorama feel coherent — trying to include too much usually weakens the result.
What is the best base size for a miniature diorama?
For a themed display base, a standard 32mm or 40mm round Citadel base works fine. For vignettes, 60mm or 75mm round bases are popular, or an oval shape if you want to imply movement. For small dioramas, a 100mm round or square base or a small wooden plinth around 100x100mm gives you room for multiple figures and terrain. For larger dioramas, custom-cut MDF or wooden plinths sized to your scene work best — there is no fixed rule, only what fits the story you are telling.
Tips for first-time diorama makers?
Start small — a vignette is a much better first project than a five-model diorama. Pick a model you are excited to paint, then build a base that supports its story. Use limitations as a creative driver: a small base, a single colour palette or a single light source forces clearer composition. Always dry-fit before gluing and look at the scene from multiple angles before committing. And finish what you start — even a flawed completed diorama teaches more than three half-built abandoned ones.