
Introduction
Years from now, when we look back at hobby life during the pandemic, Warhammer Quest: Cursed City will probably be the product we most associate with all the strangeness and disruption of that period. It was teased for months, then revealed as the next big Warhammer Quest game with a beautiful mini-website that more than hinted at expansions, went up for pre-order, sold out within minutes – and then it almost completely disappeared from webstores and Games Workshop marketing!
Social media and and hobby channels, blogs and podcasts have been awash with discussions about what happened. Was it never meant to be more than a limited box release? Was it canceled? Did something go wrong in production? Is Games Workshop actually an evil company that just hates us?
In this article, we completely leave all the speculation behind and focus on something that needs more attention: the actual game.
I have been a big fan of the modern Warhammer Quest games since Warhammer Quest: Silver Tower, and I especially liked the Warhammer 40,000: Blackstone Fortress game that preceded Cursed City, so in this review, I take a look at how the Warhammer Quest rules have evolved, and how I think it holds up as a dungeon crawler tabletop game.
The Contents of the Box
Cursed City contains 60 miniatures, and they’re all top quality minis. They’re all push fit, which means you don’t have to use plastic glue to assemble them. If you want to paint the miniatures, however, I recommend clipping the little pegs used for push fit assembly and glue them together instead, since that’s a good way to avoid gaps where the pieces connect.
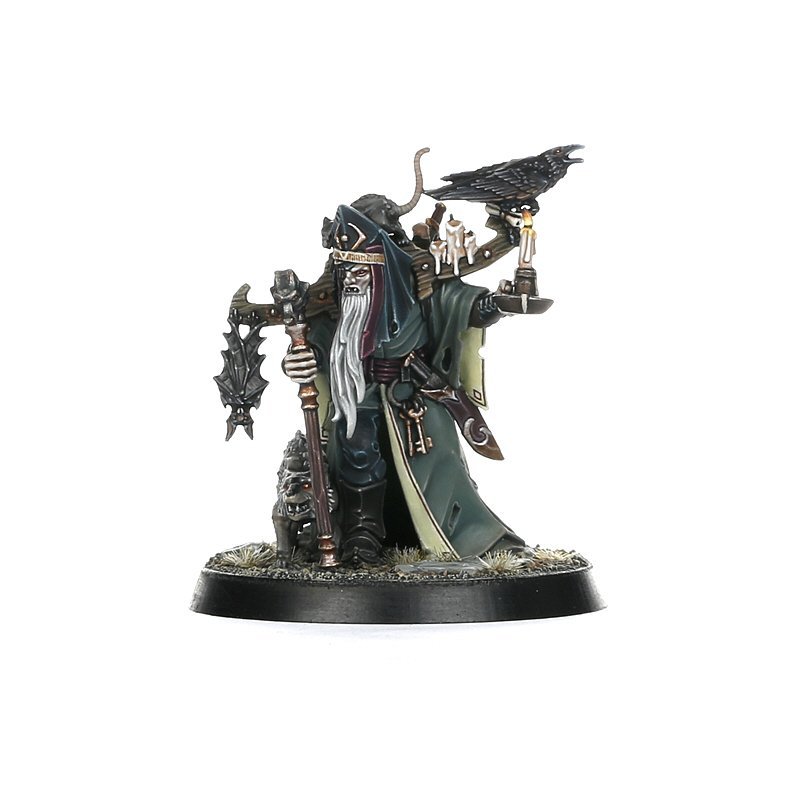
Since they are all so insanely detailed, the minis do make Cursed City a somewhat fragile game: The beard of the necromancer Octren Glimscry had snapped in two even before I cut it off its sprue, and I fully expect some of the spears of the Ulfenwatch skeletons to snap in storage or during a game, even though it hasn’t happened yet.
Speaking of storage, Cursed City is a game that, like its predecessor Blackstone Fortress, comes in a nice box, but doesn’t fit in it at all once you assemble the miniatures. It’s too bad that GW hasn’t come up with a solution for this on their own, but I strongly recommend getting Feldherr’s custom foam insert for the game box. It uses a foam tray to organize and protect all the miniatures within the game box, and I am very happy with the version of it I got for Blackstone Fortress.
The board tiles you play on are beautifully designed (they’re my favorite in the Warhammer Quest series to date, and that’s saying something), and the same goes for the game’s tokens and cards, all of which seem to be of even better quality than what I’m used to from GW.
The game continues the Warhammer Quest tradition of having split the rules into several small books in the box. While it’s only two books (plus a pamphlet with AOS warscrolls) this time around, it’s less annoying than it was in Blackstone Fortress, but I would still have preferred just one single rulebook. If one book was for a game master and the other was for the players, it might have made sense, but since everyone’s a player in Cursed City, there doesn’t seem to be a good reason for it.
All that being said, the rule books are still well-written and full of lore telling the story of how the city of Ulfenkarn fell to Radukar and his vampiric allies, and why every hero in the game has joined the fight to liberate the city.
Everything else, including cards, dice and tokens, is of really good quality, and while I might slightly prefer the grimdark futuristic aesthetic of Blackstone Fortress over Cursed City’s style, everything has such a high degree of finish that it’s clear to see that Games Workshop keeps pushing boundaries on design and artwork in a way few other companies can keep up with.
The Rules
The core gameplay of a modern Warhammer Quest game goes like this: You choose 4 adventurers to go on a series of quests to defeat villains and gain rewards. This means the game is cooperative: You and the rest of your gaming group are working together against a game that’s controlled by a number of card decks and randomization based on dice rolls. Adventurers are controlled by rolling a number of dice, placing them on their character card and then using those dice to carry out actions. These dice also count as your “hit points”: When you take damage, you have to remove dice from your card.
On top of this core set of systems, a Warhammer Quest game builds all sorts of other systems. The predecessor to Cursed City, Blackstone Fortress, had spaceships that gave in-game bonuses and served as the home bases of specific heroes, ancient alien weapons your characters could wield, and hex-based dungeon tiles. It added new enemies to the game the further you progressed into the game, and even a character who was two characters (two ratlings, Warhammer 40,000 hobbits)!
Cursed City builds upon many of the good mechanics from Blackstone Fortress, but pulls them all in a fantasy roleplaying game-like direction. This isn’t just true of its gothic medieval fantasy setting, but also of its addition of a levelling up system for your adventurers and a more granular combat system that includes the option to do different amounts of critical damage.
This means the game ends up with a lot of interacting systems. If you’re a regular reader of this site, you know that we usually like going through the rules of a game in great detail. We’re not going to do that with Cursed City, because it wouldn’t be very useful outside the context of playing the actual game. Instead, the following section explains the core mechanics of how actions in the game are resolved, so that you’ll have a decent idea if you’ll like its playstyle.
What happens in a turn?
- Before each turn starts, you take cards representing the heroes and the hostile groups active on the battlefield, shuffle them, and deal them in order on something called the combat track. This determines in which order they will get to take their activation. Your heroes can spend dice or other abilities to manipulate the order of the cards on the combat track.
- You also roll 5 destiny dice that will function as bonus dice for your heroes, as well as the activation dice for your heroes. The nightfall counter and turn counter are also moved.
- When it is the turn of one of your heroes, they can spend all the activation dice they want on actions. If they choose to leave some of them unused, they decrease their value by one, and can then use them to make weapon actions against hostiles who move into range of them outside of their turn. When their turn is done, the hero rolls a twelve-sided dice and if the roll is equal to or less than the total Wounds of the hostiles slain by them in that turn, they gain an inspiration point.
- When a hostile group gets its turn, you check to see if they run away (if a third or less of them are left on the battlefield), and then they roll a 20-sided dice on their behaviour table and carry out the corresponding actions.
- When everyone has had their turn, the turn ends, and you roll a twelve-sided dice and consult an event table to see if any events happen. If all your heroes aren’t out of action, the next turn begins.
Movement, Combat and Rolling Dice
As introduced above, you roll a number of dice for each hero before starting a round in the game. Those dice are placed on the character card, and they can then be used to perform actions. For example, if you want to move your hero, you need a dice with a roll of at least 1. If you want to search for treasure, you need a roll of at least 4, and the attacks and abilities that your hero can perform also require a dice roll of at least X.
When you want to attack, defend or heal, you only use regular dice to “pay” for the action. To actually carry out the action, you need custom dice that come with the game. Each of those dice have sides that count as successes, critical successes, and misses. There’s a six-sided dice that has a pretty low chance of rolling successes and critical successes, a eight-sided dice for a medium chance of success, and a twelve-sided dice for the strongest actions. Each ability indicates what dice should be rolled, and some even require you to roll multiple, such as Octren Glimscry’s Hollow Stare, which requires you to roll both an eight- and twelve-sided dice for a great chance of success.
You don’t have just two actions per turn like in some skirmish games: You can carry out as many actions as you have dice rolls for (the six-sided dice you roll at the beginning of a round), and there’s even a small pool of extra dice shared by the entire party of heroes you can use for extra actions. This means that you can carry out many actions in a turn, but what kinds of actions you can carry out is pretty random, based on how well you rolled at the beginning of the turn.
If you take a wound (take damage), you cover one of your spaces for dice with a token, so that, for example, if you could roll 4 dice at the beginning of a turn, you can now only roll 3, and so on.
Hostiles (enemy models) work in a similar way, but with a nice “A.I.” controlling their actions: When it is a enemy group’s turn (such as a swarm of bats), you roll a twenty-sided dice and look up the number of the roll on a table on the card of that hostile, which tells you what actions it carries out: Maybe it moves and attacks, or makes two move actions, or summons more hostiles. Hostile attacks use the same custom dice as your heroes.
What hostiles you meet during a quest is usually determined by drawing encounter cards from a deck. Unlike what was the case in Blackstone Fortress, all of the hostiles in Cursed City are part of this encounter card deck from the start. This means you can run into the dreaded Gorslav the Grave-keeper boss or the hulking Khosargi Guard on your first mission, and the big bosses will only leave the deck when you’ve taken them down in a boss battle quest called a Decapitation Journey. This means that enemy variety in the beginning of the game is pretty good, and it feels good to know you’ll slowly remove the worst threats from the encounter decks by putting enough effort into it.
In general, this system works very well, and while it seems like a true maze of rules when you start reading the rules and packing out all the cards and tokens, it really clicks when you’ve played your first quest.
Cursed City does a good job of building upon these core systems to give a sense of progression. Not only do you move closer and closer to the final boss fight by removing key hostiles through Decapitation Journeys, but your heroes also gain experience and level up to gain new traits depending upon what type of hero they are: Stalwart heroes such as Dagnai Holdenstock or Brutogg Corpse-Eater get better at healing and defence as they level up, while an Executioner hero improves its movement and attacks, and so on. This is a lovely new rpg-like system, and it also uses the mirroring design between heroes and hostiles seen elsewhere in the game: Each time your party levels up, encounter cards also get better, so you encounter more hostiles in each group.
Another example of this mirroring is the concepts of Inspiration and Empowerment. Your heroes gain inspiration points by carrying out specific actions or defeating hostiles, and while these can be used to reroll failed rolls and other small bonuses, they can also be collected to pay for making your hero Inspired. When this happens, you flip the card for that hero, and voila, their abilities are now better. On the Hostiles side of things, each round makes time progress, and sooner or later the day/night cycle turns to night, and all the hostiles become Empowered, which is Inspired for Hostiles. It’s basically that Batman meme about escalation in game form – your heroes can now level up, so now hostiles become more numerous. Your heroes Inspire, the hostiles Empower, and so on.
I’m generally a big fan of the direction in which Warhammer Quest is evolving with Cursed City, but cool core mechanics wouldn’t mean much without some heroes and hostiles with interesting rules and lots of character. Let’s have a look at the cast of characters for Cursed City.
Heroes
There are 8 heroes to choose from in Cursed City. Each hero has a Move statistic that has a number for both a normal move and running, as well as the three statistics Vitality, Defence and Agility, each with a specific custom dice associated with them. So, instead of having a number show how good a hero is at Defence, they have a specific dice. If it’s the six-sided one, they’re not good at Defence, but if it’s the twelve-sided dice, they’re great at it.
Each hero also has a number of keywords, determining their class, species, type and size, which can influence their interaction with the game’s rules in many ways. For example, only small models can occupy the same square as another small model on the game board. Each hero also has 4 squares for their activation dice, a number of weapon actions and some unique abilities. Finally, they have a Path to Glory, which is a special condition under which they gain inspiration points, and slots for traits, armour, weapons and a carried item. This is much more than what was available to each hero in Blackstone Fortress, so the game has certainly become more complex when it comes to the heroes you play. This is mostly a good thing, as I think most players would want a lot of gameplay depth from such an expensive game that you might even spend dozens of hours painting all the miniatures for, but the learning curve can be pretty steep if you’re not used to games of this type.
Most importantly, the complexity of the heroes makes sure that you have a lot of options for choosing your playstyle in the game. Let’s have a look at the heroes and how unique they all are from a gameplay perspective
Emelda Braskov
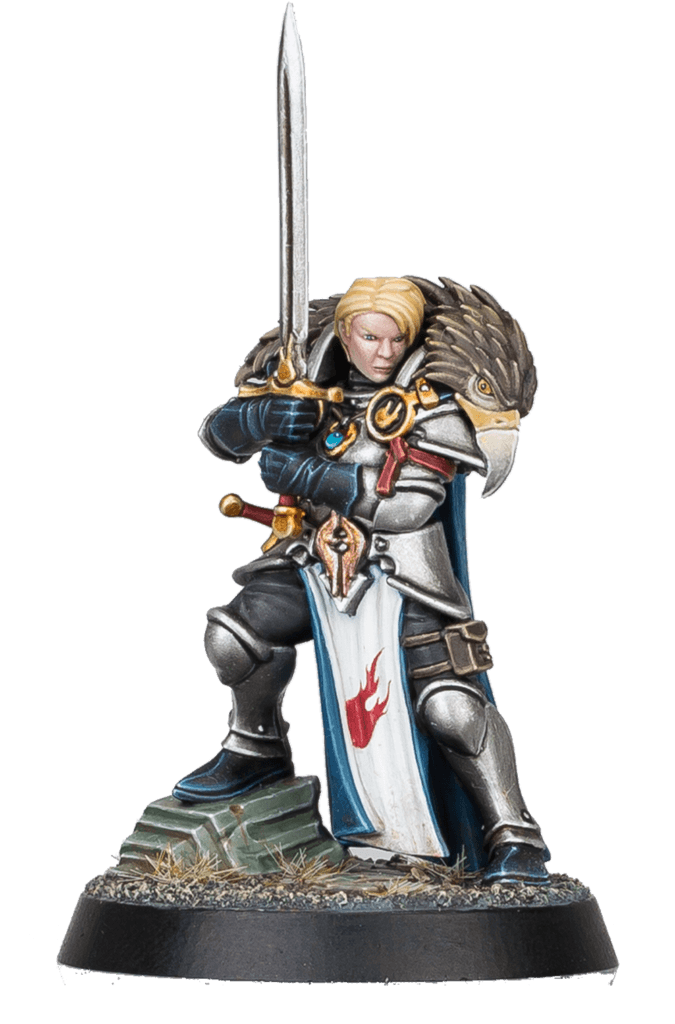
Emelda Braskov is a very straight-forward hero who plays just like her miniature looks: She has a powerful sword that she can use with any activation dice, and once a turn, she can swing it at two hostiles in one activation if she has a roll of 6. She can also switch places with one other hero on the combat track once per turn, which means you can let her have a turn before other heroes or before a hostile group you want her to cut to pieces. When she inspires, she gets even better at Defence, and she gains inspiration for killing 3 or more hostiles in one turn, so you can see where this is going: Braskov just needs to charge into the fray, swinging her sword at hostiles left and right. She’s not the most complex hero to use, but she’s great.
Brutogg Corpse-Eater

Brutogg Corpse-Eater is an Ogor, and he’s huge. He has the Stalwart class, which means that as he levels up, he gets really good at ignoring or recovering from wounds. This is great, because he’s the wrecking ball of your party, with an ability that lets him run through hostiles, damaging them as he tramples them down. His basic 1+ attack isn’t the greatest, so you really want to make use of his better weapons and abilities, such as Tenderising, an expensive but powerful ability that let’s you re-roll failed attack rolls for a buffed-up version of his mace attack. If you want a hero that can fight without any support and keep an entire hostile group occupied for a while, Brutogg is a good choice.
Cleona Zeitengale

Cleona Zeitengale is a Loremaster, which is the magic-using class in Cursed City, and she is one of my favorite heroes to bring in a party. She has a mediocre melee attack she can always use, but what’s really great about her is her abilities which offer great utility in specific situations: Her throwing knives stun their targets, which means a hostile struck by it misses its next activation. This is something you’ll always want to do to big monsters, since your heroes can’t take many wounds before they go down, and you can usually kill most big hostiles in one turn if you can prevent them from hitting you. Zeitengale can also remove ailments (such as stun, fatigue, diseased and so on) from herself and other heroes, and finally, she has an area-of-effect attack that can hit a hostile and then all the hostiles adjacent to it. It only does 1-2 damage to each, but in Cursed City, you’ll often run into hordes of zombies or other smaller hostiles, and bringing their wounds down so a melee hero can finish them off is always worth it.
In her inspired form, Zeitengale can even improve her or another hero’s activation dice, so they can use even better abilities. She’s a really good support hero, but she has terrible Defence, so keep her out of harm’s way.
Jelsen Darrock
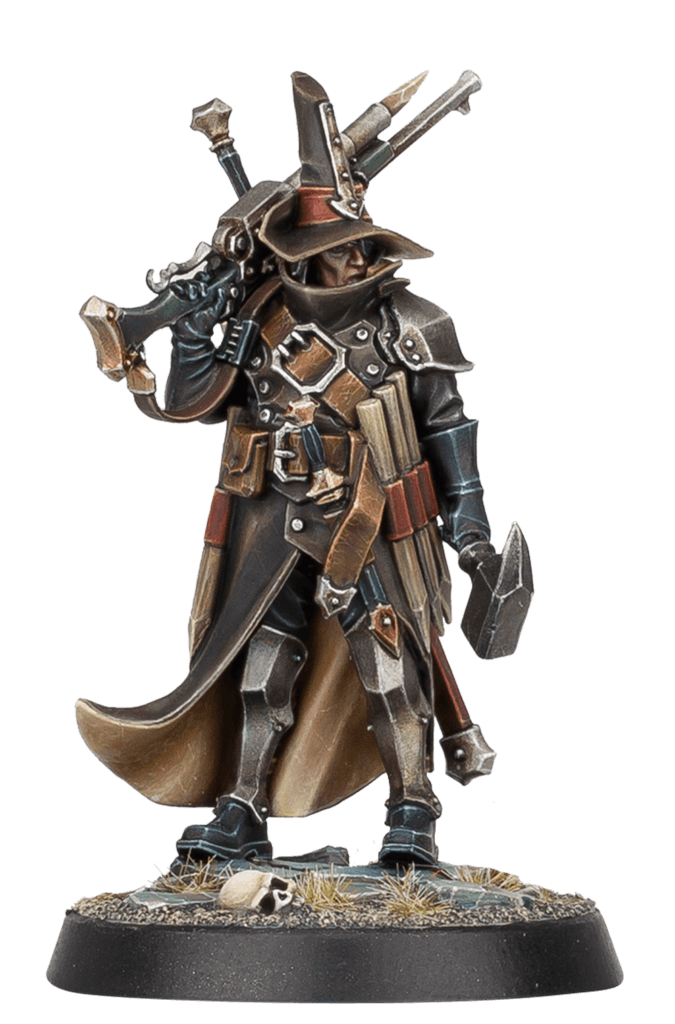
Jelsen Darrock is an Executioner, which means he gets more mobile and does more damage and his abilities get better as he levels up. His basic attack is a melee sword attack that’s pretty good, but on top of that, he has a rifle that he can use once per turn, and it hits really hard (you roll 2 8-sided dice for it, so you can do up to 8 damage in one attack). He doesn’t have many special abilities, apart from his Firewood Stakes, which is a small one-damage attack that he gets to use for free every time he hits a hostile with an attack without killing it.
Darrock is easy to inspire, since he gets an inspiration point every time he slays a hostile Champion (the leader of a hostile unit), and he only needs to do that three times to inspire. Inspiring him is crucial to using him well, since it makes his sword attack, the only attack he can use more than once a turn, much stronger.
Darrock is your monster hunter: He is great for taking out big targets consistently.
Dagnai Holdenstock
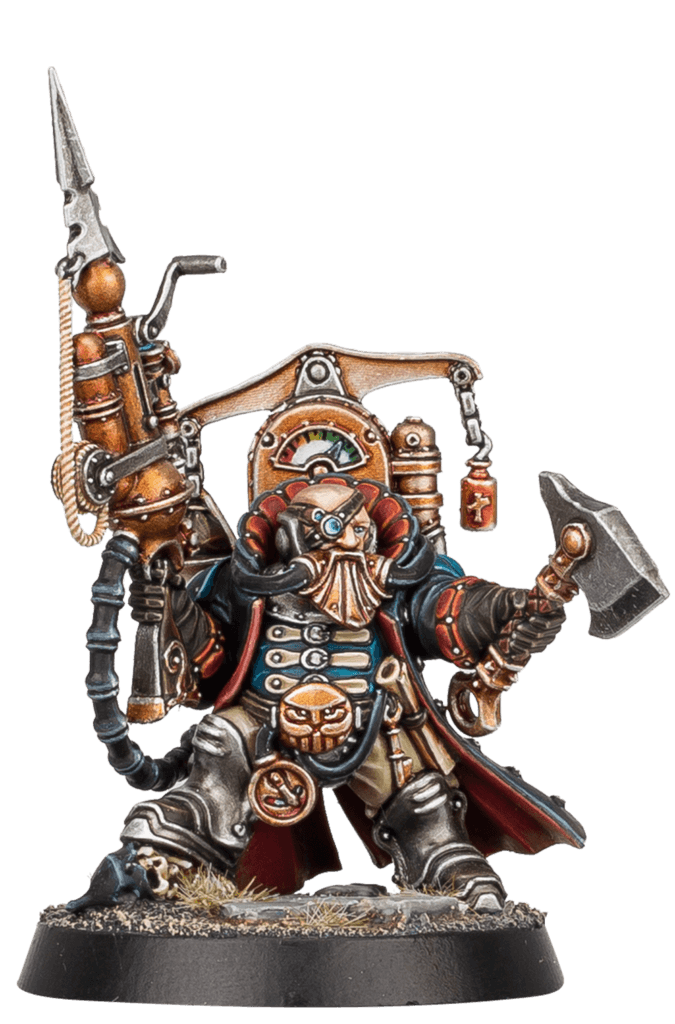
Dagnai Holdenstock is the other Stalwart of the group, so he has great survivability, and is a lot stronger than he looks. His axe is a good melee weapon he can always use, and a harpoon gun he can use once per turn for a roll of 4+, which lets him pull a hostile closer to him. The harpoon gun supports Holdenstock’s role as a “tank” able to keep hostiles closer to him than to more vulnerable heroes.
The rest of Holdenstock’s abilities are about acquiring treasure: He can carry more treasure than other heroes, he can loot it even if he’s not close to it, and he gains inspiration from looting. This is wonderfully thematic, since he’s an opportunistic greedy duardin (and to just make him even more of a dwarf/duardin, his move and run characteristics are the same), but its utility in an adventuring party is a bit limited. If you want to bring him in your party, send him forward to pull in hostiles and loot to inspire, since when he’s inspired, his basic axe attack becomes very good (2 12-sided dice!).
Octren Glimscry
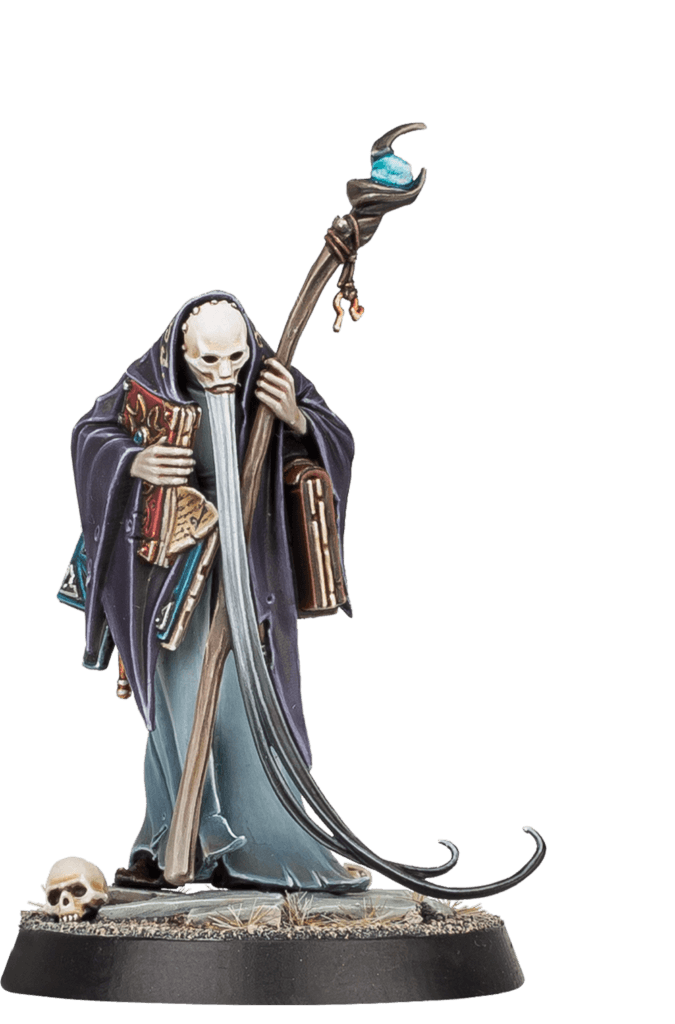
Octren Glimscry is the other Loremaster of the group, and he’s very different from Cleona Zeitengale. If you roll a really good bunch of activation dice for him (or have leveled up high enough in his Loremaster skills to manipulate those dice), he is terrifying: For a roll of 6, he can choose to take 1 damage to improve his 4+ attack Hollow Stare to become extremely powerful, and he is able to both stun and curse enemies. Cursing enemies makes your attacks do even more damage against them.
When Glimscry inspires, he even becomes able to control hostiles and make them attack each other, and this is easy to achieve since he even has a chance to gain inspiration from kills made by other heroes in the same tile as him.
Since Glimscry needs to suffer damage to maximize his damage output, he is even more vulnerable than Zeitengale, so if you take him in your party, make sure you have someone to defend him.
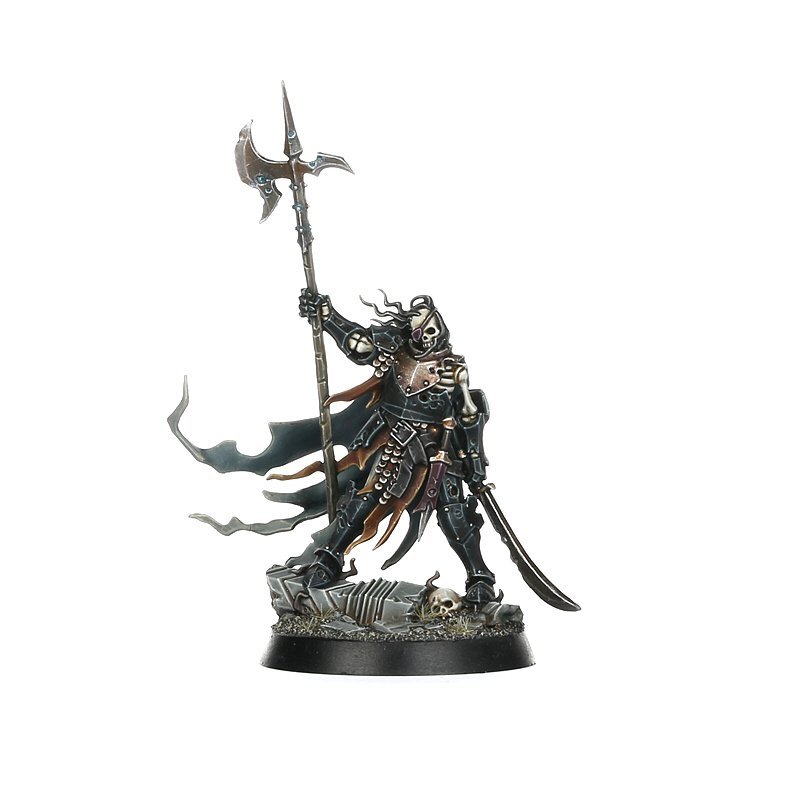
Glaurio ven Alten III

Glaurio ven Alten III is, as both his name and model implies, a noble from Ulfenkarn who sees fighting as more an art form than a job. His standard attack is okay, and his once-per-turn pistol attack can be used in both range and melee (and is very strong), so his basic damage output is good. On top of that, his ability Duelist lets him combine an attack and move action in any order, with the option to improve a sword attack within that action. This ability makes it easy for ven Alten to get in and out of combat, but it isn’t as amazing as many of the other abilities the other heroes have.
When inspired, ven Alten becomes a very capable fighter who can even trap hostiles (which prevents them from moving for one turn), but his biggest problem is that his Path to Glory (which gives him a unique way of earning inspiration points), is too situational: He has to slay the last hostile in a group. This means you have to start planning around that, instead of just killing whatever you can, and for that reason, I don’t think he is as fun to play as some of the other good fighters in the game.
Qulathis the Exile
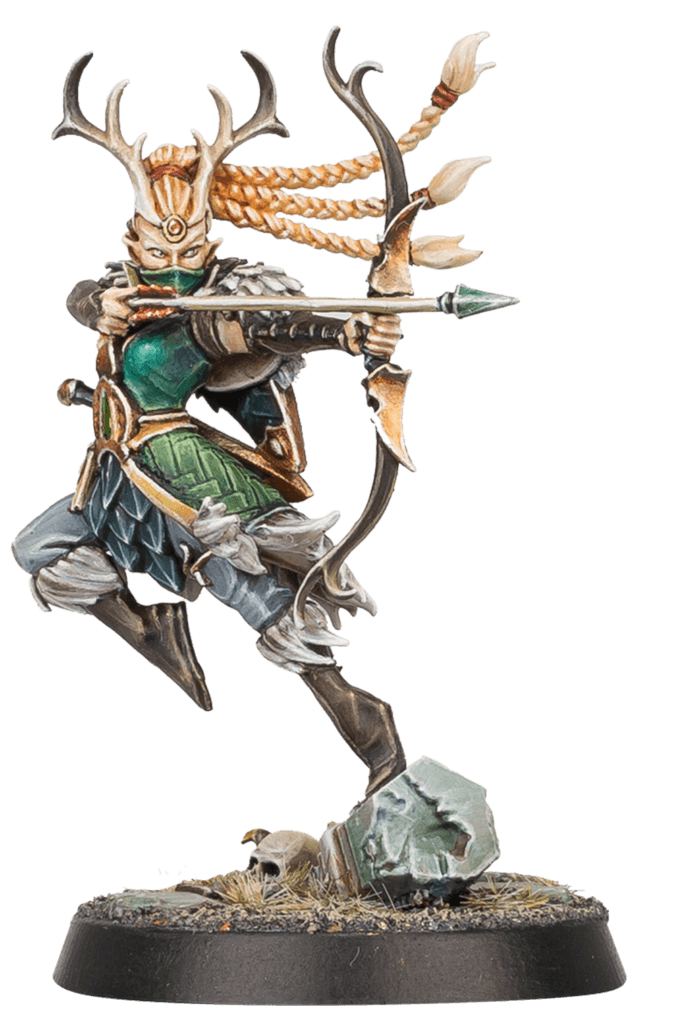
Qulathis the Exile is an Executioner like Jelsen Darrock, and while she doesn’t have the same damage output as him at first glance, I think she’s plainly just more fun to play. She has a good ranged attack that only takes an activation roll of 1, and a fairly weak and expensive melee attack. However, the two attacks interact in a fun way: If her melee attack takes out a hostile, Qulathis gains another activation dice with a value of 1. This means that if you take out a hostile in melee in a such a way that you aren’t adjacent to any other hostiles, you get a free ranged attack action or a move action. The synergy also works the other way around: If a sword action kills a hostile that’s been damaged by your ranged attack in the same activation, you gain an inspiration point.
The synergy between melee and ranged maps out the way Qulathis should be played: It’s all about using ranged attacks aggressively, moving forward shooting arrows and finishing enemies off with her sword, only to keep firing at the next set of hostiles. It’s a bit of a cliche by now, but there’s clearly a “Legolas at the battle of Pelennor Field/Helm’s Deep” tribute in this rules design.
When Qulathis inspires, both her attacks get a lot stronger, and she even gains the ability to use a roll of 6 to improve the damage of an attack action.
Finally, she has 3 Oaken arrow counters, which she can discard to make a ranged attack become immune to any kind of damage reduction – something that’s very useful against some of the more dangerous hostiles in the game. Save them for the most crucial attacks!
Qulathis is a pretty advanced hero to play, she is very vulnerable and she doesn’t synergize a lot with the other heroes, but she is great for darting around the board taking out smaller hostiles. If Jelsen Darrock is the single target Executioner, Qulathis is good against crowds.
Hostiles
Each type of Hostile in the game has a Move characteristic, a Wounds characteristic, a size, one or more weapon actions, some special rules and a Behavior Table. If it becomes night in the game, they switch to their Empowered version, which makes them stronger. Some hostiles also have Champion models, which are leaders of their packs with extra Wounds, as well as other special models with unique abilities. Like a good Batman story, the rules and character of the hostiles are really what makes or breaks a game like Cursed City, so let’s take a look at the “playstyle” of each hostile in the game.
Corpse Rats
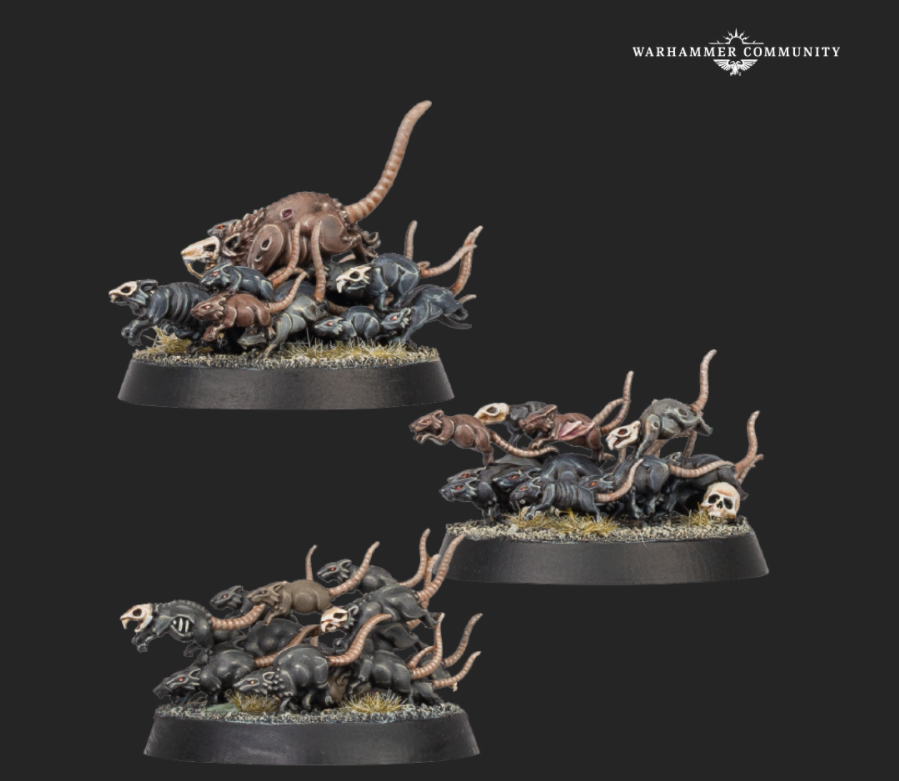
Corpse Rats are the most basic enemies in the game: They don’t hit very hard and have a low chance of actually hitting anything, but they have 3 wounds each, and their bites cause the ailment Diseased, which lowers the value of one of your activation dice, which can be annoying. The worst thing about them is that on behavior roll of 1-7, they heal all wounds you’ve dealt to them, so get them taken out in one activation if you can.
Bat Swarms
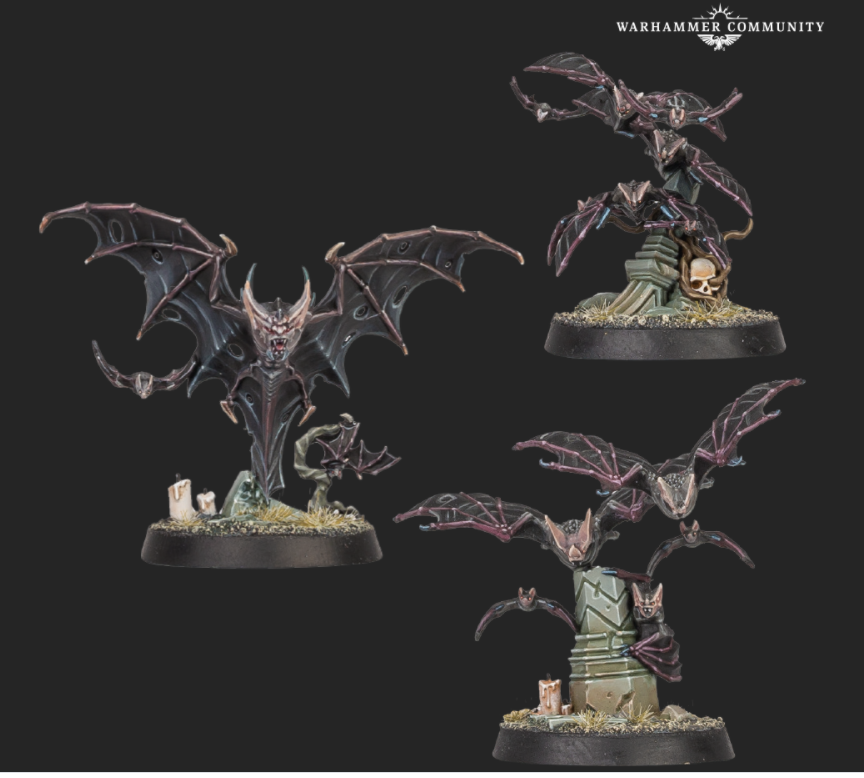
Bat Swarms move really fast, and they have a chance to reduce incoming damage by two, which, just like the case is with Corpse Rats, makes them more annoying than dangerous. On a behavior roll of 7-10, they can even lower the value of your activation dice. It might seem intuitive to ignore “chaff” monsters like bats or rats, but the ways in which they can debuff your abilities and swarm you can make you very vulnerable to other, stronger monsters, so “pest control” heroes such as Cleona Zeitengale or Qulathis the Exile can be crucial to keeping their numbers down.
Deadwalker Zombies
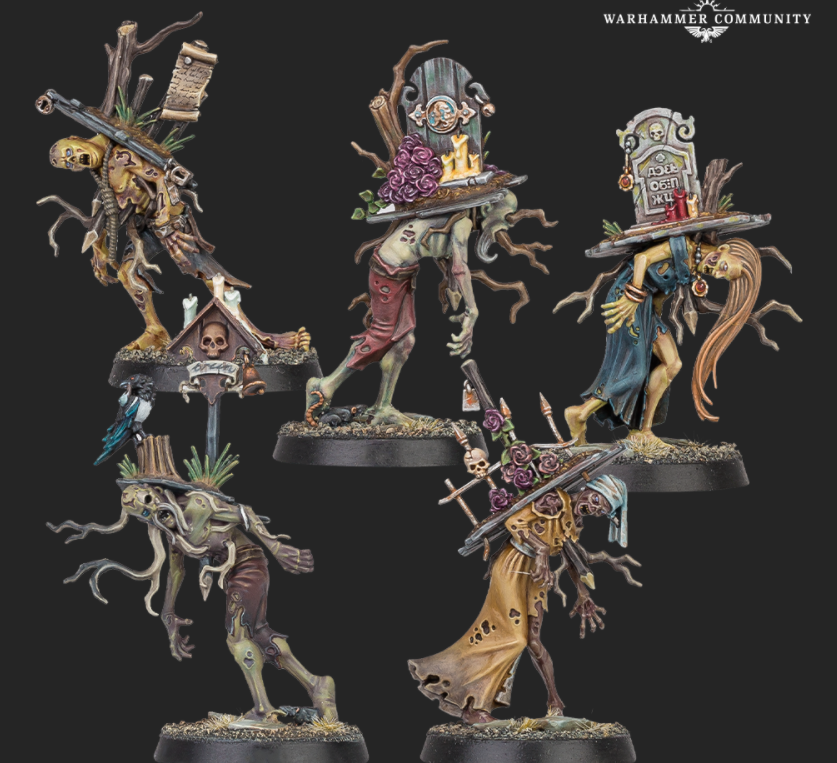
Deadwalker Zombies are trivial to take down one at a time, but if you let them, they’ll completely swarm the board. If they roll a 1 or 2 on their behavior table, they spawn a gravestone next to a hero, and then an additional zombie for each gravestone on the board. This means that if there are more than one gravestone on the board, you risk ending up with too many zombies to handle. They won’t neccessarily kill you, but they might block your path, which is very dangerous in some quests.
All of this becomes even more of a problem if Gorslav the Gravekeeper (see below) is on the battlefield, since he can bring zombies back to (un)life and grant them free actions.
Ulfenwatch
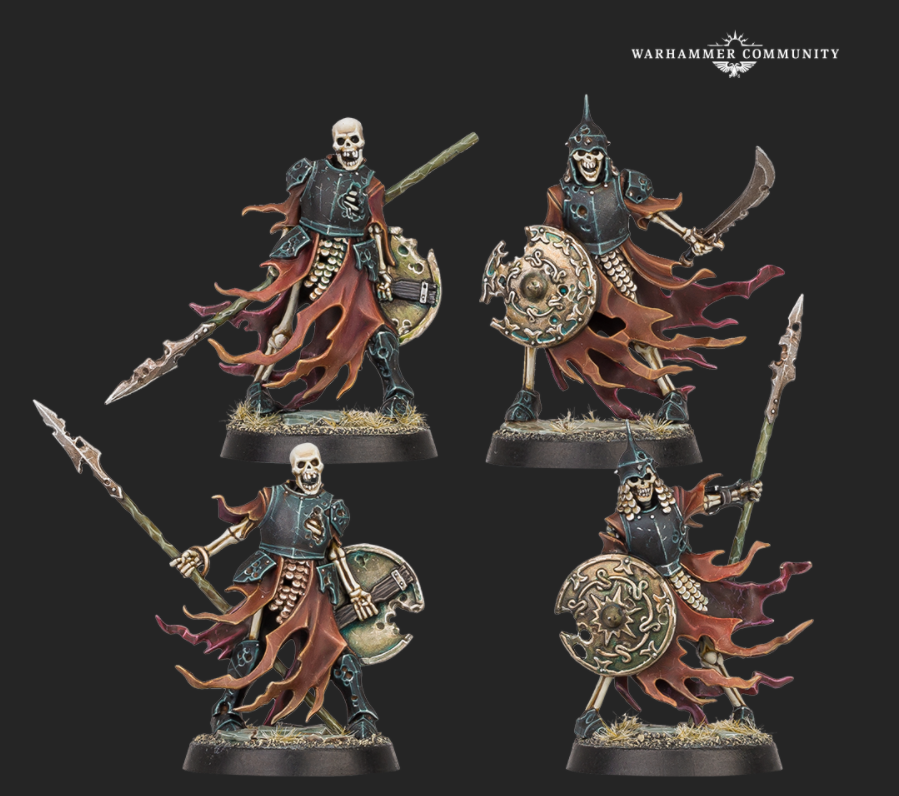
In the beginning of the game, you only meet the skeletal Ulfenwatch in small groups, which are easy to take down, but if you end up with multiple hostile groups of them, they can become a problem: Their Banner Bearers let all Ulfenwatch (regardless of hostile group) re-roll failed attack actions, and on a behavior roll of 1-2, all slain Ulfenwatch from a hostile group are revived and make an Advance action (they move and attack). Go for their Banner Bearers and take them out as fast as you can.
The miniboss Watch Captain Halgrim can make all Ulfenwatch on the battlefield Advance, so if he’s present, Ulfenwatch are even more of a priority.
Kosargi Nightguard

The Kosargi Nightguard are bastards. They have 10 Wounds each, hit really hard and if they roll a 10-12 on their behavior table, they charge in between heroes and then attack everyone they can reach in one activation. They can also reduce incoming damage, so they’re one of those hostiles you really want to stun if you can in order to take it out before it takes out any of your heroes.
Vyrkos Blood-born

The Vyrkos Blood-Born are fast and pretty deadly. They can ignore damage completely on a roll of 9-12 on a twelve-sided dice, and they have to always pick wounded heroes over unwounded ones when attacking. Take them out as fast as you can, and use multiple attacks rather than high-damage ones in order to avoid losing too much damage to their damage prevention rolls.
Vargskyr
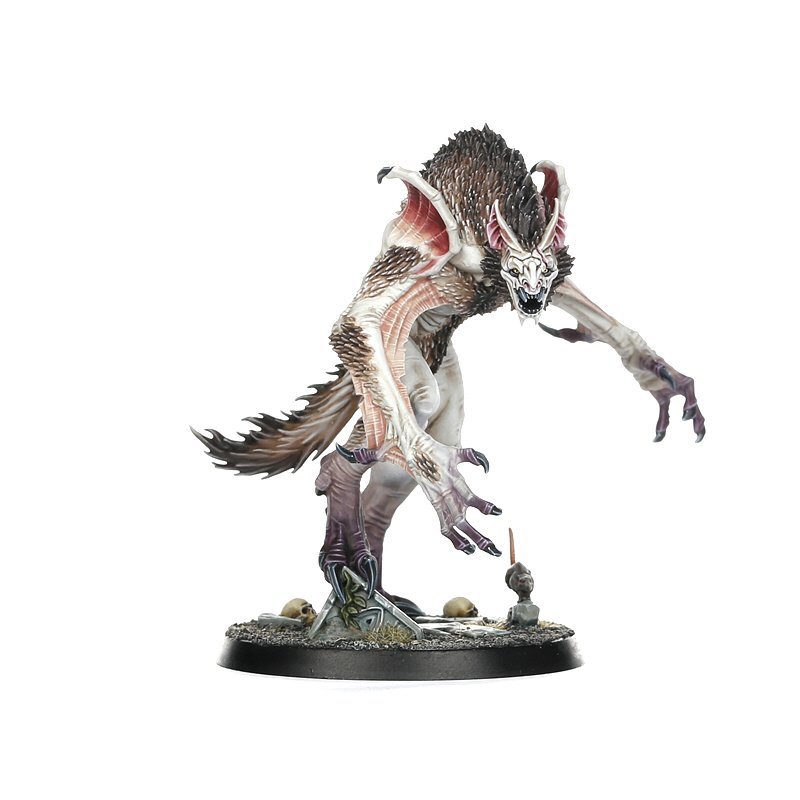
The Vargskyr is a monster in the very literal sense of the word. Huge and dangerous, it makes two behavior rolls rather than one, and has a chance to stun all your heroes, teleport right into the middle of your group of heroes with a terrifying but imprecise bite attack, and it has 14 wounds on top of that. Once again, stunning the Vargskyr is key to dealing with it, and if you can keep a tough Stalwart hero adjacent to it, it can’t make its teleporting attack. It’s one of the first monsters you’ll have a boss fight against, but it doesn’t leave the encounter deck after you defeat it, so it’ll be a threat throughout the game.
Watch Captain Halgrim
Watch Captain Halgrim is pretty easy to take out on his own, but as mentioned above, the real problem with him is that he significantly buffs all Ulfenwatch skeletons on the battlefield: They all get +1/+1 to their attacks, he can resurrect them, and he can make them take free move and attack actions. If he gets empowered, his buff gets even better, and his own attacks also improve significantly. Going on the Decapitation Journey to remove him from the encounter deck should be a priority as soon as possible in your game.
Gorslav the Gravekeeper

Where Watch Captain Halgrim improves Ulfenwatch on the battlefield, Gorslav the Gravekeeper improves Deadwalker Zombies. Almost no matter what he rolls on his behavior table, all zombies on the battlefield make an Advance action along with him, which can be pretty terrifying. This isn’t even the worst thing he can do: if he’s adjacent to a hero, on a behavior roll of 9-12 he can apply the Buried condition to them, which means they’re removed from play, take damage and need to roll 2 sixes on their activation roll (or one of the other heroes have to use 2 of their sixes) to unbury them. Don’t let him get too close! Luckily, Gorslav has no damage prevention, so if you can isolate him from the other zombies, he’s easy to take out.
Torgilius the Chamberlain
Torgilius the Chamberlain is to rats and bats what Gorslav is to zombies. He has a chance to resurrect and Advance either all Corpse Rats or Bat Swarms (or summon a new group of them if there are none), and he can also mess with the activation dice of your heroes. On top of this, his own attack hits very hard and can be used in both ranged and melee, so even though he looks like a cat person version of a necromancer, be very careful around him.
Radukar the Wolf

Finally, Radukar the Wolf is the big bad, the mega-villain of the game. He hits very hard, especially in his Empowered version, he makes two behavior rolls, he has a chance to make two weapon actions in an attack, he can summon Vyrkos Blood-Born, and he can make an adjacent hostile heal up and take an extra turn (at least that’s what I’ve decided: one of his abilities has a wording error in it that makes it nonsensical if you don’t add “a hostile” to its wording).
On top of all this, he has damage prevention, but he doesn’t need to roll for it: He simply reduces all damage by 1, or by 2 if he’s Empowered, to a minimum of 0. Remember those unpreventable Oaken Arrows Qulathis has? Save them for Radukar. Remember that even though he’s the final boss of the game, you’re probably going to meet him several times in your regular quests, since he is part of the encounter deck.
Journey Types
In Cursed City, you can choose between four different types of Journeys every time you set up a game:
- Hunt Journeys are very standard dungeon crawls: You have to take down 10 hostile champions and then escape. The Quest book has you roll to pick a dungeon map between 8 different maps, and then you draw encounter cards and start taking down champions. These are fairly risk-free journeys that will rarely get out of hand, and I think they’re good for learning the combat system and how to use your combination of heroes well. They also help you reduce Influence (see below).
- Scavenge Journeys are treasure hunts: You have to search for treasure at a specific location 10 times, but that location moves around the map all the time. You go on Scavenge Journeys to acquire Realmstone, which is a resource you use to buy permanent upgrades for your characters (see below), so they are good to go on when you need to prepare for a difficult boss fight, and you gain experience from them just as much as you do from a Hunt Journey.
- Deliverance Journeys send you on a quest to help civilians escape an avalanche of Death magic called a Suffocating Gravetide. Instead of rolling for a map found in the rulebook, you draw exploration cards and add new rooms to the battlefield as you progress. Some cards have civilians on them you need to warn of the Gravetide, and when you’ve done this at leasts 8 times, you can escape and end the journey. What makes this Journey type really intense and fun is that when the Nightfall token reaches a specific spot on its wheel (in the third round of the journey), the Suffocating Gravetide shows up and starts eating a room on the battlefield each turn, so you have to keep moving fast to not be consumed by it. This is a lot of fun! In most of the other Journey types, you can manage more or less every challenge if you use your abilities well and consider positioning all the time, but in a Deliverance Journey, you have to make tough decisions all the time and see if you can get past enemies rather than killing them if you don’t have to warn anyone in a specific room. The fact that the rooms are generated randomly just adds to the tension – you never know if the next room is tiny and full of hostiles while the Gravetide is right behind you. The designers clearly realised that this is the fun Journey type, since each boss fight (see below) starts with a modified version of one of these.
- Decapitation Journeys are the six boss fights you have to fight to complete the game. They are bespoke designs with specific hostile placements and special rules, and each of them stars one of the big villains of the game. Once you’ve beaten it, you can remove that hostile from your encounter deck and add their head(s) to the quest card. After each Decapitation Journey, you also raise the limit for how much your heroes can level up. When you’re done with the final Decapitation Journey against Radukar the Wolf, you get to open a secret envelope included in the game and read the text on it aloud – who know what’s in there?
Rewards and Penalties
Throughout the game, you can search for treasure. Some of this is single-use items for your heroes, such as healing potions, and some of it is Realmstone, which can be used to purchase Empowerments between missions.
These Empowerments range from stuff that helps make up for one of the weakness of your hero, such as one that changes the dice you use for Vitality rolls to heal, to huge buffs such as Hysh-Crystal Etching that lets you use once-per-turn abilities and weapons twice per turn.
You can also get a few special rewards through Crises – short choose-your-own-adventure events that may reward a hero mysterious items such as the Red Blade, whose purpose is revealed later in the game.
While I wish there were even more customization rewards, such as unlocking new mechanics for the game or granting you weapons with brand-new abilities, which was something Blackstone Fortress also excelled at, the reward systems in Cursed City are still good and offer you a sense of meaningful improvements for your heroes.
On the penalty side of things, the two biggest threats to your quest in Ulfenkarn is Fear and Influence. You track both characteristics on the quest card, and if either of them reach 10, you have lost the game. Failing journeys or getting a bad result on certain events makes Fear and Influence grow, while completing journeys and events shrinks either of them. This is a neat system that make sure your actions have consequences, and it’s nice that it’s absolutely possible to fail in the game. At least that makes a player like me be more aware of the game’s rules and what options I have.
Endgame and Replayability
The tragedy of Cursed City is that once the game is over, it’s over. The rulebook more than hints at expansions being planned for the game, but once you’ve beaten Radukar, the quest included in the game is essentially done. This is too bad, since you’ll then have a collection of miniatures you’ve spent a lot of time painting and no game left to play with them (unless you use them in games of Age of Sigmar, see below), but I really hope we will see expansions to the game some day, since that was one of the best things about Blackstone Fortress, which had a glorious line of expansions both big and small.
Solo Play
One final thing I would like to add is that Cursed City is a very good board game to play on your own! I have played some of my games for this review solo, and because of the way hostiles are controlled by behavior tables, it felt like a completely fair way to play, with plenty of challenge in it. And since progress in one Journey carries over to the next, it allows you to level up characters to play for when your friends come over to play. The only problem with it is that the game takes a while to set up, so it’s not something you would want to do after a long work day, and I suspect Netflix or your video game collection will seem like an easier choice when you need to unwind. If you’re lucky enough to have a room where you can keep the game set up permanently, actual gameplay after setting it up is pretty fast-paced, and I very much recommend it as a solo game.
Final Verdict
I have really enjoyed my time with Cursed City so far, both when it comes to painting the miniatures and playing the game. Each hero has style and character, and none of them play in the same way, so playing games with friends is always entertaining.
The difficulty of the game is a bit odd: Most of the time you’re just cleaving through hostile group after hostile group, so usually the game is more about completing objectives and managing resources than actually surviving. However, if the dice are in their favour, almost all hostile types have the abilities to mess up your plans, and if things start going badly, they often do so quickly, and because your heroes have fairly few wounds and lose agency (as in: the ability to carry out actions) each time one of the dice slots are covered by a wound token, it can be difficult to get back on track.
This randomness and unevenness is sort of a tell-tale sign that a set of rules was written by Games Workshop, and it’s something you have to embrace. If you really start doing the math and build the optimal team of four heroes with the right empowerments, I’m sure there’s a way to effortlessly complete the game in no time, but that’s not the point of a game like this. The point is to have fun exploring dungeons, finding treasure, and laughing at all the unfair and strange situations generated by all the randomization that permeates the game’s design.
If you liked Blackstone Fortress or its predecessors Shadows over Hammerhal and Silver Tower, and you can find a way to purchase Cursed City, I absolutely recommend that you go get it right away. It is an interesting evolution of the ruleset in the direction of a fantasy role-playing game, the lore and little events are great, and the hostile design is better than ever. It is such an awful shame that the game’s development seems to have ceased, but as a stand-alone product, it’s still one of the most fun dungeon crawlers I have played, and the models are some of the best Games Workshop has ever made.
Stick around for the bonus section below to read how you can use these wonderful models in games of Age of Sigmar!
Bonus: How do the Cursed City models fare in the Age of Sigmar tabletop game?
This section introduces the use of the miniatures from Cursed City boardgame in Age of Sigmar Matched Play games.
The focus is on Matched Play because obviously in Open Play you can use the miniatures however you prefer, but in Matched Play there are more restrictions, like in which armies units can be fielded and what is the minimum size unit. For army building information consult our guide.
Heroes
The heroes are all leaders currently without a “home”. With the new rules for Age of Sigmar 3.0 they don’t appear anymore in any Pitched Battle Profiles for their armies and therefore cannot be used. It may be possible that the upcoming City of Sigmar battletome changes this. For now let’s have a look at them for their potential.
All Cities of Sigmar heroes already belong to Ulfenkarn and cannot be given another City keyword (they cannot benefit from other allegiance abilities like Hammerhal, etc.). They are all named characters meaning they are Unique (they can be taken only once per army) and cannot be provided certain enhancements (artefacts for example).
Captain Emelda Braskov is tough and attacks strong. She can even give battleshock immunity within 9″ and with the new 3.0 rules this becomes even more important (no more multiple Inspiring Presence, for details see our guide on command abilities).
Jelsen Darrock is a witch hunter (but without they keyword) able to do 1 mortal wound in the shooting phase and one in the combat phase. An amazing model for a disappointing warscroll.
Glaurio ven Alten III is an interesting duellist able to push back mortal wounds when the attacker scores a natural 1 and a debuff of -1 to be hit in melee.
Octren Glimscry is the only wizard of the group. His spell provides a permanent -1″ Move to an enemy unit. For the rest he is the classic wizard to keep far from the melee to avoid being slaughtered (despite the 6+ after-save ward).
Cleona Zeitengale is the only priest of the group with some useful prayers. Unfortunately they are all on a 4+ and she can’t get buffs easily, meaning 50% of the time she will not do anything. The two prayers allow to heal a friendly model close-by or do mortal wounds to all units within a 3″ radius of a chosen point.
Despite being an Ogor, Brutogg Corpse-Eater is still part of Cities of Sigmar. He has different weapon profiles but his average damage is quite low (2 damage on average against a 4+ save). He can however heal himself after slaying any model.
Qulathis the Exile is the only Sylvaneth of the group, belonging to Engala Weald glade (yet to be explored) therefore cannot be given any other Glade keyword. It is currently not a Kurnothi. Her 24″ range is interesting but with 1 damage not exceptional. Her ability to receive +2 save when in cover is nullified by the Age of Sigmar 3.0 rule that the maximum save bonus is +1.
Dagnai Holdenstock is the only Kharadron Overlords of the group (also currently not usable in Matched Play). He belongs to Bharak-Mornar so cannot be given any other Sky-port keyword. His most interesting ability (16″ range) is the fact that has a chance to force a monster to move towards him until his next shooting phase. This is even more important now that units can shoot during the enemy charge phase as well but the chances for this ability to succeed are quite slim.
Hostiles
The hostiles all belong to the Soulblight Gravelords army. They are divided in 2 categories: leaders and simple units. All leaders are named characters meaning they are Unique (they can be taken only once per army) and cannot be provided certain enhancements (artefacts for example).
Radukar the Wolf is a hero and leader on the cheap side of point cost. He cannot be included in the same army as Radukar the Beast, that is his “evolution”. He is a vampire and a wizard and for that he gains access to abilities like healing himself after wounding or casting magic spells (and access to the Lore of Vampires). His command ability is also really useful as it can add +1 attack on all units after he charges.
Gorslav the Gravekeeper is a really cheap leader with the ability to resurrect half of a destroyed Zombie unit. He can be useful in an army that relies on this type of troops (and zombies really shine in the new edition) and, despite his frailness, he can redirect wounds destined to him to a nearby Zombie unit.
Torgillius the Chamberlain is a Deathmage with access to their lore, a missile attack and he gives a 5+ ward to all summonable units around him. At the right price he is a nice addition should you need cheap wizards.
Watch Captain Halgrim could be interesting in a Deathrattle army since it can issue three times the command At the Double paying it only once and is also Summonable, meaning can be brought back.
Vyrkos Blood-born is the first of the non-leader units. They are a slightly weaker version of a vampire with a pre-game move. They compete in this spot with Vargheists that seem to be superior.
Kosargi Nightguard are the bodyguards of Radukar the Wolf and really work in concert. They can take wounds in his place if nearby and they have a 5+ after-save ward. They even get +1 attack when near him. They are cheap and can be useful in a Cursed City thematic army.
Vargskyr is an amazing model that can only be taken as a single unit. It can charge up to 18″ away with 3D6 instead of 2D6 with the ability to heal back. Rules that do not do justice to the model.
Deadwalker Zombies are probably the best unit in Soulblight Gravelord when opportunely buffed. Unfortunately in Age of Sigmar 3.0 the minimum size is 20 models, so you will need to add 10 more to the ones in Cursed City to have the minimum legal unit to field. Or you can use them to replenish existing units when they exceed the maximum size.
The Ulfenwatch are Deathrattle Skeletons, battleline unit (together with Zombies) in a Soulblight army. Their minimum size is 10 and can be reinforced up to 30 models. They are a good unit that can return back dead models before fighting. They are not as strong as zombies but they are cheap enough to guarantee their presence on the battlefield.
Bat Swarms existed in the previous iteration of the Soulblight army (called Legions of Nagash) but are now, unfortunately, without warscroll and unusable in Age of Sigmar 3.0. They can be proxied as Fell Bats if you want to try but the base size is different and you would need to “upgrade” their base.
Corpse Rat don’t have a warscroll in Age of Sigmar 3.0