“We make war”
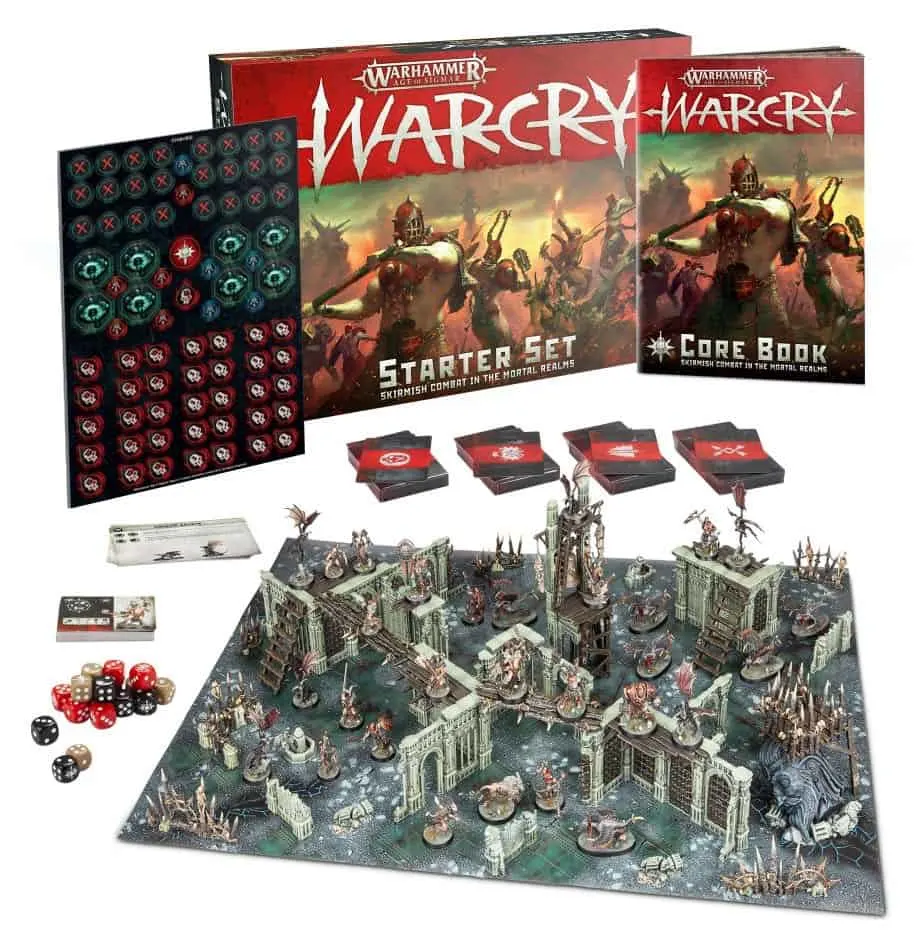
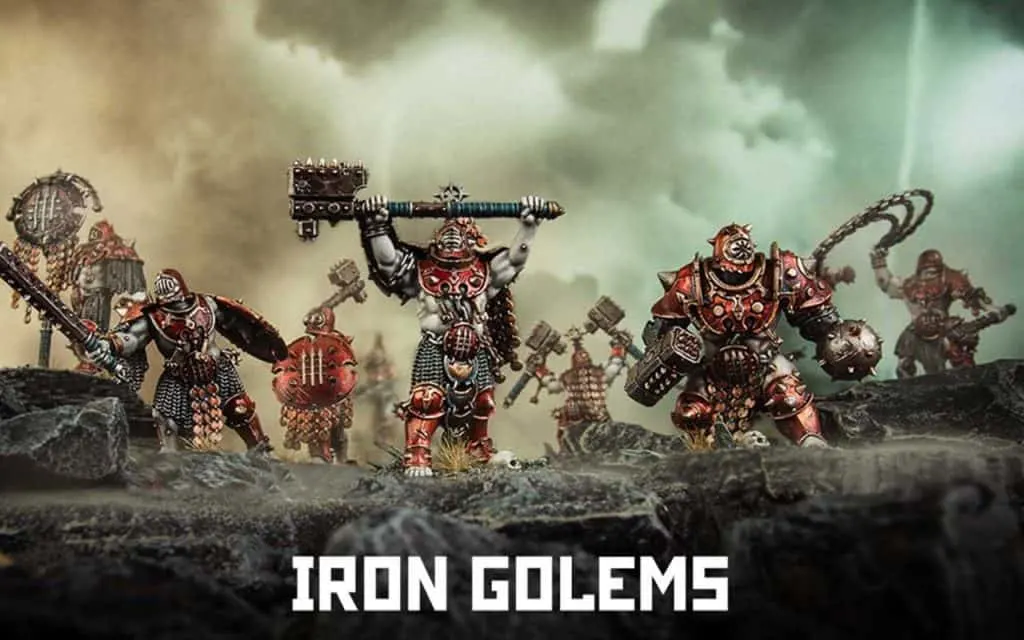
The Iron Golems is a warband from the Warcry Starter set, and they’re very tough.
Clad in metal armor and marching in line behind big shields, they are the most resilient of all the Chaos warbands.
If you want to play Warcry a bit more defensively and tactical than some of the more aggressive warbands, and if you like painting metals, the Iron Golems might be the right warband for you.
What changed in the new edition for the Iron Golems Warband?
Apart from the usual point cost update, many profiles have been brought in line with the newest warbands increasing the number of attacks, damage and more importantly: Wounds.
Briar and Bone added an optional battle trait.
Background and Lore of the Iron Golems Warband
The Iron Golems come from the Ferrium Mountains in Chamon, the realm of Metal, and unlike most of the other warbands, their lives are not all about destroying, pillaging and stealing.
They are smiths as well as warriors, and have come to the Bloodwind Spoil to become Archaon’s favorite suppliers of arms and armor.
As warriors, they are also less “chaotic” than the other Chaos warbands. They fight like a well-drilled army, with great discipline and, to a great extent, rather defensively.
They are all about order and control in the service of Chaos. This doesn’t make them the good guys at all, however, as they only respect strength and show no compassion for weakness of any kind.
In the Warcry Anthology, the short story The Iron Promise, follows a small detachment of Iron Golems sent to check up on a missing weapons delivery from a Chaos Duardin.
Something or someone is tearing the duardin’s forge apart from within, and the Iron Golems are sent into the depths on a classic monster hunt, where the monster is something quite different from what you would expect.
It is one of the best stories in the collection, so I won’t spoil it for you, but it showcases how an Iron Golems warband typically fights:
They move in tight ranks, pushing the enemy into a corner and wearing them down with their hammers while withstanding the enemy’s attacks with their armor and shields.
Overview and Points for the Fighters in the Iron Golems Warband
Note: if you haven’t read the basic rules for Warcry before reading this article, it might be helpful to know that the game’s abilities are activated by using 6 dice that you roll at the start of your turn.
If two of the dice show the same value, they can be used to activate a Double ability. If three show the same value, they can be used for a Triple ability, and so on.
So, when this article refers to an ability being a Double, a Triple or a Quad, it refers to this system. It might sound a bit confusing, but takes no time to get used to when you start playing

Dominar: 170 points
The Dominar is the Leader of the warband, and he’s designed to lead from the front.
His 4 Strength-5 attacks are strong on their own, but on top of those the Dominar has access to two cheap abilities that boost his own damage output.
Spine-crushing Blow is a Double that adds the value of the dice roll used to the Strength of the next attack action made by the Dominar. Since he already has a Strength 5 attack, this ability is mostly useful for hitting very high-Toughness enemies such as Splintered Fang fighters with shields or other Iron Golem warbands.
Most of the time, Strength 5 will be more than enough, but Spine-Crushing Blow is cheap if you need it, and even a Double roll of 1 should be enough to get the desired effect.
Lead with Strength is a Double that allows the Dominar to make a bonus move or attack action if they have taken an enemy fighter down in the same activation.
This is a very cheap ability to pull off, especially if you have done some damage to the enemy fighters close to your Dominar with other fighters first. If the dice rolls are on your side, you could take out two fighters in one activation with little effort.
As a frontline Leader, the Dominar doesn’t synergize that much with other fighters in your warband, but if you want to keep him alive longer, put him in a Battlegroup with the Signifer, who can buff the Dominar’s Toughness to 5 (more on that below).

Ogor Breacher: 220 points
The Ogor Breacher is one of the more unique assets of the Iron Golems. He has a whopping 30 wounds and a Toughness of 5, making him very, very hard to kill.
His attacks are just as extreme as his defence. He has 3 attacks, but they have a Strength of 6, a damage of 4 and a critical damage of 8.
In short, he hits very hard, and you can further increase his damage output with a universal ability like Onslaught, which gives you a +1 to a fighter’s Attacks.
The Ogor Breacher has access to one unique Triple ability, Living Battering Ram, which lets you do damage equal to the ability’s value at the end of his next move action.
This ability can be used pretty straightforwardly to do some damage to a fighter you are about to attack after a move action, but under the right circumstances, it can also let you take out wounded fighters without getting stuck where they were standing.
If, for example, you have 2 enemy fighters close to each other, and one has as many wounds left as the value of your Triple, you can use your bigger base strategically, ending your move within 1″ of both fighters, kill one with Living Battering Ram and use your other action to attack the surviving one.
The Ogor Breacher, then, can live up to his name and be an unstoppable force crashing through enemy lines, but with his insane defense characteristics, he can just as well be the immovable object you place on top of an objective or Treasure your don’t want to let go of.
Signifer: 125 points
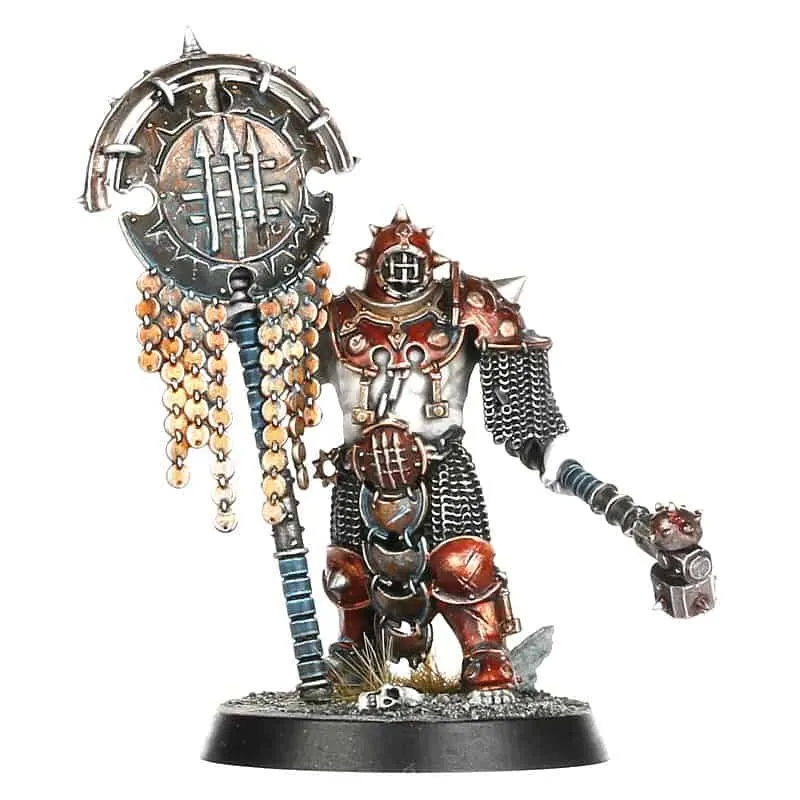
The Signifer has solid damage output, Toughness and Wounds, but if you want him in your warband, it should be because of his main function, which is to use his unique Triple ability, Stand Defiant.
Stand Defiant doubles down on the signature characteristic of the Iron Golems: their high Toughness.
It allows you to add 1 to the Toughness characteristic of your fighters within 6″ of the Signifer. This is a great ability, both because it gives more survivability to fighters with Toughness 4 (because the enemy will be less likely to score a hit against them), and because it can make your cheap shield-bearing Iron Legionary fighters Toughness 6.
Having low-tier fighters with Toughness 6 may sound like overkill, but it can be great in the sense that it can force your opponent to risk wasting the Attacks of one of their expensive high-Strength fighters (which might not even hit at all!) on removing one of your cheap fighters from an objective.
I generally think the high defence of the Iron Golems is best used tactically as a way of making the enemy waste their activations on attacks that have a low chance of taking out the target, but we’ll discuss that further in the Strategy section further down.
Prefector: 135 points
The Prefector is an alternate assembly option for the Signifer. He loses the Stand Defiant ability, but gains an extra point in critical damage.
This doesn’t seem like a big upgrade, if an upgrade at all, but the Prefector also gains access to Spine-Crushing Blow, the Double that he shares with the Dominar, and if this is used, even on a Double of 1, his Strength characteristic jumps to 5, and he is suddenly a cheap Dominar in terms of potential damage output.
So, if you would like to run a slightly more offensive-minded Iron Golem warband, the Prefector is a good choice over the Signifer.
He also looks really cool and can be assembled with an Untamed Beasts helmet in his left hand for maximum taunt value if you’re playing against them.

Drillmaster: 140 points
The Drillmaster is a very versatile fighter, with both a good melee attack and a 3-inch ranged attack with a Strength of 4.
Her main feature, however, is that she has access to the Quad ability of the Iron Golems, the appropriately titled Whirlwind of Death.
This ability allows you to do up to 6 damage to each enemy fighter within 3″ of the Drillmaster. If you have a Quad of 6 and can reach a big group of enemies standing close to each other, this ability is devastating.
The only downside to the Drillmaster is that she isn’t as tough as some of the other fighters. While it would be unfair to squishy warbands such as the Cypher Lords to call the Drillmaster a “glass cannon”, she doesn’t have the Toughness to stay alive after pirouetting into a group of enemies if any of them survive to retaliate.
Keep her well protected and she can wreak havoc on your enemies.

Iron Legionary: 75 points
The Iron Legionary has a pretty weak attack, but that’s fine, since his or her role is defined by a big shield that gives the fighter a Toughness of 5.
This makes the Iron Legionary a very cheap objective holder, and if placed near a Signifer, the Toughness can go up to 6 so even the strongest enemies will have a fairly hard time killing an Iron Legionary off in one blow.
Like all the other fighters of the Iron Golem warband, the Iron Legionary also has access to the Double ability Throw Bolas, which lets them roll 2 dice, and do 1 damage on each roll of 4-5 or on a 6 damage equal to the value of the Double to an enemy fighter.
If you have a high-value Double, this is a great ability to use, especially if you need the range because you are standing on an objective or in an important tactical position, as you should be doing with that shield.

Iron Legionary with Bolas: 75 points
The Iron Legionary has the same attack as the basic Legionary but loses the Toughness in favour of a Range 3″ attack with his Bolas.
Since, in my opinion, you will have access to the ability Throw Bolas most of the time, you don’t really need that extra 3″ attack, but if you have an idea for an Iron Golem warband geared towards more ranged attacks, the Iron Legionary with Bolas is a cheap option for it.
Iron Legionary with Twin Hammers: 70 points
The Iron Legionary with Twin Hammers is the other weapon option in the Iron Golems Kit with the same body as the Legionary with bolas.
It’s not impressive in any way, apart from the fact that it turns into a Toughness 5 fighter if it is in range of the Signifer’s Stand Defiant ability, making it equal to an unbuffed shield Legionary, but with an extra attack.
Since you generally won’t mind the enemy getting into melee range, the extra attack is a good choice, but if you have access to multiple kits, more Legionaries with shields would probably give you more control over the board than this pretty average fighter.

Armator: 90 points
The Armator is weird. Being a duardin, he is very slow (a move of 3″! Natural sprinters indeed…), and his attack is the same as the melee attack of the Drillmaster. He has 15 Wounds, which is a bit more than a standard Legionary but a bit less than the other specialists in the warband.
…And that’s it. He doesn’t have access to any special abilities, and he doesn’t really synergize with any of the other fighters.
What he doesn’t have in tactical versatility, he makes up for in sheer eye candy. He’s our first real look at a Chaos Duardin in the Age of Sigmar, for Grungni’s/Hashut’s sake! (I love duardin, sorry.)
He looks great in the warband as the diminutive counterweight to massive bulk of the Ogor Breacher, and since he’s a reasonable enough fighter who can’t keep up with the rest of your offense, he’s best used in a defensive position at an objective or to support another objective holder.
But, again, more than anything he looks really cool, and a warband of smiths needs a duardin.
Abilities for the Iron Golems Warband
- Throw Bolas (Double, everyone): Choose a fighter within 6 inches of your fighter, roll 2 dice. On each 4 or 5, do 1 damage to the fighter. On each 6, do damage equal to the ability’s value.
- Spine-crushing Blow (Double, Dominar and Prefector): Add up to 6 to the Strength of the next melee attack.
- Lead with Strength (Double, Dominar): After taking down an enemy, you can perform a bonus move or attack action.
- Living Battering Ram (Triple, Ogor Breacher): At the end of the next move action allocate up to 6 damage to an engaged enemy fighter.
- Stand Defiant (Triple, Signifer): Add 1 to the Toughness of friendly fighters within 6″.
- Whirlwind of Death (Quad, Drillmaster): Up to 6 damage to all close-by enemies.
Reaction for the Iron Golem Warband
Introduced in the new season of Warcry, Reactions are things that can be done in certain circumstances, but always during the enemy turn. They cost one action, so they can be used only by fighters that have not activated yet or are waiting. There are 3 universal reactions and one specific to each warband:
Clashing Iron (Everyone)
- When: During an enemy melee attack action but before hit rolls.
- What: Up to 2 critical hits count as normal hits instead.
Battle Trait for the Iron Golem Warband
The battle trait is an addition introduced in Briar and Bone which adds an extra optional rule that affects all characters with the same runemark, without using any ability dice. Each faction has its own but the Grand Alliance one can be used instead:
- Order – Courageous Defenders: When using Take Cover reaction the critical hit becomes normal hit on a 3+ instead of 4+.
- Chaos – Aspire to Glory: Once per battle round, add 1 to the first critical hit from a melee attack from a fighter whose cost is 125 points or less.
- Death- Deathless Minions: Once per battle round, a critical hit to a Minion from a shooting attack is counted as a normal hit instead.
- Destruction – Relentless Destroyers: During melee attacks the target cannot claim the +1 Toughness bonus from cover.
We Make War: After the initiative phase, can change a Double, Triple of Quad to a value of 6.
Strategy and Tactics for the Iron Golems Warband
The Iron Golems can be tricky to play.
They can’t really be described as a good all-round warband, as there are many aggression-based victory conditions they would struggle to win, because they are rather slow and don’t have that much range.
If you’re playing defence, however, or if you’re new and want to stay alive for long enough to learn how the game works, the high Toughness and good defensive abilities of the Iron Golems are great for just holding your ground while the enemy wastes their attacks on your well-armoured fighters.
The only thing that scares an Iron Golem is a critical hit. And now, their reaction, compensates even this. If you need to survive, at the cost of one of your actions, you can cancel out up to 2 enemy critical hits by transforming them to normal hits. You wouldn’t know in advance how many critical hits the opponent is going to score, but you can guess, from the amount of attacks, the value of their damage on critical hit, and your remaining wounds, if it is worth to risk it or not.
If you have the right dice rolls for it, and you position your fighters right, your Dominar, Ogor Breacher and Drillmaster can do a lot of damage.
While you don’t have many ranged attacks, you can really mop up a lot of low-wound enemies with the abilities of the Dominar and the Drillmaster.
If you want to play aggressively, bringing a Prefector helps your warband lean in that direction.
Finally, the Signifer lets some of your cheaper fighters become near-impenetrable walls of metal, so if you can lure your enemy into a situation where they have to attack buffed Iron Legionaries to get to where they want to go, you can really slow them down while you haul your strongest fighters to where you want to strike.
Even though they can be tricky to play, I still recommend the Iron Golems to beginners, because while they can be hard to win with, their abilities and general themes are easy to understand and play.
Pros and Cons of the Iron Golems Warband
Pros:
+ high Toughness and abilities that improve it =very hard to kill
+ some hard-hitting fighters (the Ogor Breacher in particular)
Cons:
– Slow, lack good mobility abilities
– Few viable options for attacking with a range further than 1″

Different build options and how to buy the Iron Golems Warband
The Iron Golems are available either as part of the Warcry Starter set or as a stand-alone Warband.
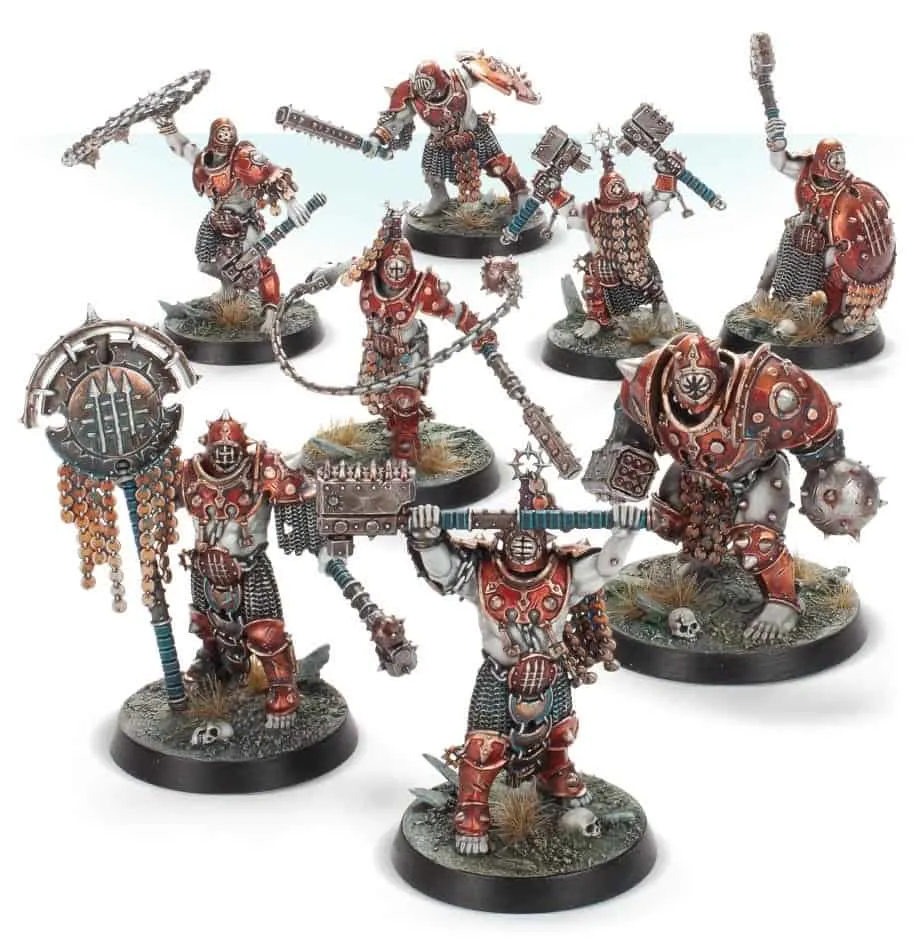
The Warband for Iron Golems contains the following miniatures:
- 1 Dominar
- 1 Drillmaster
- 1 Ogor Breacher
- 1 Prefector/Signifer
- 1 Armator
- 3 Iron Legionaries
There are not that many different assembly options on the sprues of the Iron Golems warband.
Your most important choices are if you want either a Signifer or a Prefector, and this choice depends mostly on how much you want to play a defensive Toughness-based warband. If that’s the case, go for the Signifer.
Next, you can choose if one of your Iron Legionary fighters should have Twin Hammers or a Hammer and Bolas.
As outlined above, having the Bolas is not going to change that much for you, and the bolas assembly is also more likely to break during transport, so that’s another good reason to go for the twin hammers.
If you’re painting the Iron Golems mainly for display, however, the bola-swinging fighter looks cool and adds some variety to the silhouettes of the warband, so it could be worth taking for that reason alone. Building your warband so it just looks great is nothing to be ashamed of.
If you end up building your warband from multiple kits, note that the weapons of the two shield-bearing Iron Legionary fighters can be swapped without much need for filing or greenstuff, so you can have four different shield-legionaries from two kits without any conversion skills even though it doesn’t say so in the assembly instructions.
You just have to clip a bit more off the hand with the hammer to make it fit the other fighter.
You can also buy a box of Iron Golems where you get double the amount of models.
This is good if you are keen on having different builds than the normal or if you want to play in a campaign (where your warband will grow).
Tips on painting the Iron Golems
Do you have some sweet looking Iron Golems you want to show?
I would very much like to display them right here on this page.
All you have to do is send my some files. You can read more about how to make that happen here.
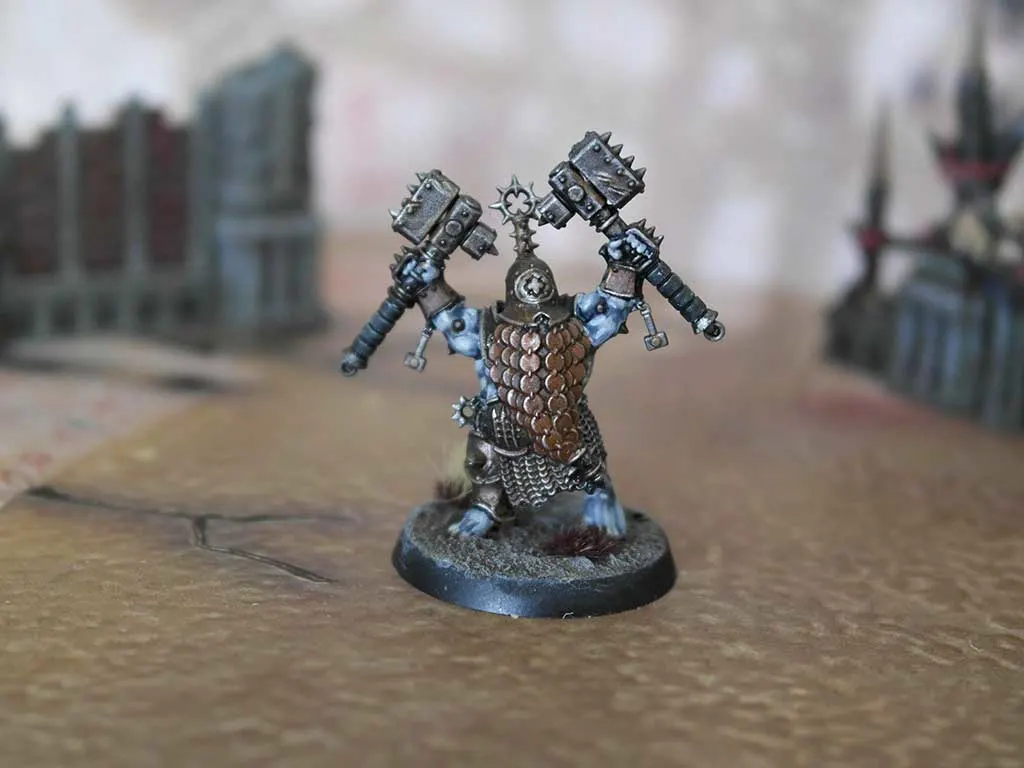

The Iron Golems can be painted to look great in no time at all because of one distinct feature: While other warband have feathers, cloth, jewelry, hair and bone, absolutely everything on an Iron Golem is either metal or skin.
So, if you pick a skin color and perhaps just two metallic colors, you’re good to go.
The grey skin in the box art for the Iron Golems is pretty easy to make with just a white or grey undercoat and a light grey wash, and the metal will look good with almost any wash or one of the Contrast paints.
If you want a weathered, dirty metal look, I can recommend using some of the new Contrast skintones such as Darkoath Flesh straight on Balthasar Gold or Leadbelcher, but good old Reikland Fleshshade will also do just fine.
I painted my Iron Golems (in this case, the Armator of course) with grey-blue skin which is just a Grey Seer undercoat with a Drakenhof Nightshade wash and a few highlights, and armor in Warplock Bronze with a mixture of the washes and Contrast paints mentioned above.
I used the Reikland Fleshshade Gloss to give it a shinier metallic feel, and Nuln Oil Gloss on the new Iron Warriors paint for the weapons. It takes a couple of hours per mini and looks good on the tabletop.
Games Workshop’s own Duncan has an easy to follow tutorial for painting the Iron Golems in a scheme close to the box art here.


