The Royal Beastflayers are deranged ghouls believing to be the best hunters at the court of powerful kings, roaming their lord’s lands to free it from the most horrible creatures, while they really despoil and threaten the natural order.
They are the second original Death warband created for Warcry, this time serving the Flesh-Eater Courts.
Background and Lore of the Royal Beastflayers Warband
Flesh-Eater Courts are delusional ghouls and vampires cursed to believe they are part of grandiose and noble courts, entertaining themselves with jousts and hunts, all the while protecting the lands against all sorts of evils.
In reality they are descendants from Ushoran, cursed by Nagash long ago and whose madness spread across the other vampires that then started gathering their followers in search of new lands to settle. The Royal Beastflayers are a group of ghouls that believe to be extremely good in the hunting sport, led by an Abhorrent that prefers the thrill of the chase to the politics and scheming enjoyed by his more noble fellows.
Through the hunt, ghouls can retrieve and feed on bones of extremely powerful creatures that can transfer some of their power to these cannibalistic beings making them much more dangerous.
A Royal Flaymaster leads them in battle, literally inserting weapons in his own flesh while imagining instead to tying them to his wrists like the knights would. A Baron is a lesser noble that managed to kill a significative beast, obtaining recognition and title, and the strength derived from feeding and wearing its remains.
The Offal Hounds are instead those ghouls that tried to feed on a king’s menagerie and as a punishment have been left for dead in a pit where they slowly mutated in bloodthirsty beasts that are now used by the Beastflayers to find their preys.
Archduke Deadfang is the leader of a ghoul court living west of the Gnarlwood that one day was visited by the elder drake Calcodrax who ravaged their encampment. The Archduke then requested all his Beastflayers to hunt the beast and bring his skin as proof. As its lair was deep within the Gnarlwood, the questing knights explored the cursed territory until they stumbled on a damaged Realmshaper Engine active since the fall of the Eye of Chotec, a huge Seraphon void-ship that is the cause of much disarray in the region.
These powerful machines are able to terraform the land around them at incredible speed, but manumitting them can incur the wrath of Ghur, the realm of Beast, itself. It is extremely dangerous to play with these forces, but now many Royal Beastflayers believe those engines are corrupting the land and need to be destroyed. Only the Stormcast Eternals and their Seraphon allies stand between them and potential realm-threatening devastation.
But how do they re-enact their hunting skills on a Warcry battlefield? Let’s find out.

Fighters in the Royal Beastflayers Warband
Note: if you haven’t read the basic rules for Warcry before reading this article, it might be helpful to know that the game’s abilities are activated by using 6 dice that you roll at the start of your turn.
If two of the dice show the same value, they can be used to activate a Double ability. If three show the same value, they can be used for a Triple ability, and so on.
So, when this article refers to an ability being a Double, a Triple or a Quad, it refers to this system. It might sound a bit confusing, but takes no time to get used to when you start playing
The Royal Beastflayers warband is made of 5 different fighters, of which 1 is the leader.

Royal Flaymaster: 175 points
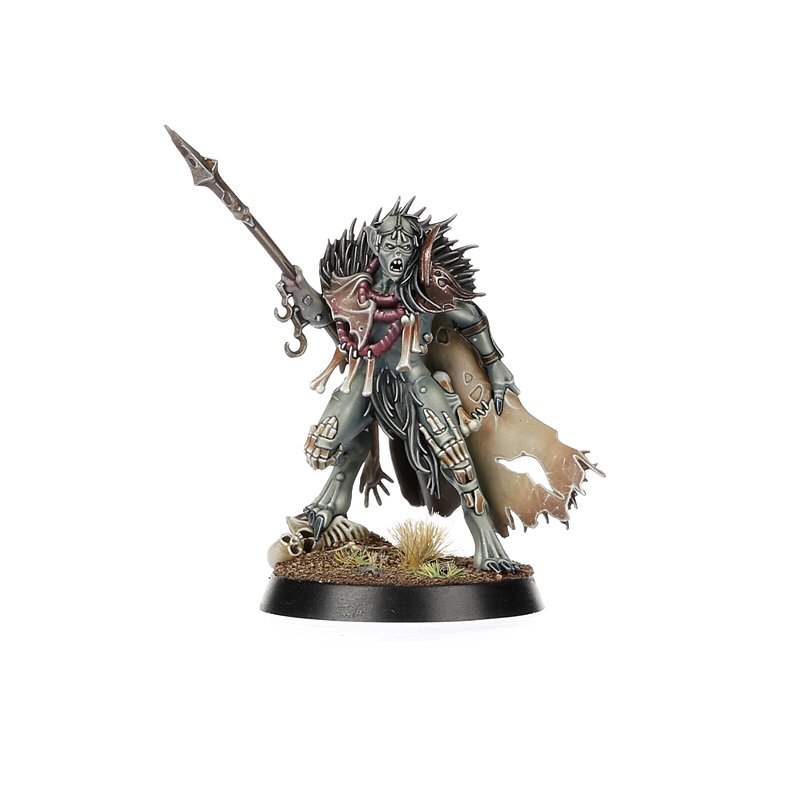
The Royal Flaymaster is the leader of this warband with an average profile for a leader but with good all-round statistics starting from the 5″ of Movement shared by most warband. 20 wounds and Toughness 4 may not make him the sturdiest hero, but an attack profile with 2″ allows him to attack from a safe distance. 3/5 damage on Strength 4 is not to be trifled with either.
But his role in the warband is not just to be a damage dealer: his Quad adds +2 Strength to all friendly fighters within 6″ compensating one of the weakness of this army. Even a mere Gore-squire with 4 attacks at Strength 5 and minimum damage 2 is bound to hurt.
While Quads are rare to find, the Flaymaster’s Triple is also an interesting one as it does not have any range (as long as the enemy is visible) and allocates as much damage as double the amount of your fellow companions surrounding (within 3″) the target. You cannot always have numerical superiority, but in some situation it can guarantee 4/6 wounds just by using ghouls as sacrificial pawns.
If you have only a Double, then you can use the generic ability Feed the Hounds that allows to heal any other fighter within 3″ up to the value of the ability. If you don’t have anything else to use those Double for, it is still a good healing area.
The final note goes for the warband reaction, that you are probably not going to use with this model, but it can be really interesting on the Ghouls: when an enemy disengages from you, you immediately allocate D3 damage to him. While your opponent can control when it happens, it is a great disincentive from retreating from a ghoul to grab objectives or shoot other targets.

Beastflayer Baron: 115 points
The Beastflayer Baron is a cheaper (and weaker) version of the Flaymaster with only 1″ range and 2/4 damage. His main ability costs a Double and allows up to 3 friendly fighters within 3″ from him to make a bonus move of a number of inches equal to the ability’s value.
Considering the 5″ movement, usually mobility is not a warband’s problem, however combining this with the Flaymaster Triple, Pack Tactics, can position your fighters for the nasty surprise to follow. Or you can just use it in the first round to get in a better position.

Ghoul Gore-squire: 95 points
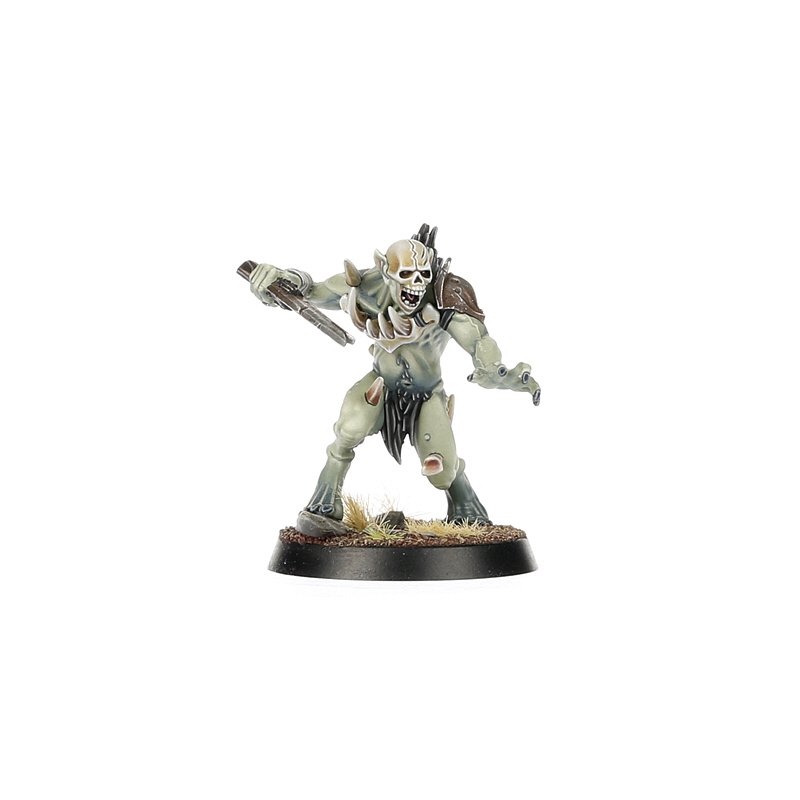
The Gore-squire is a stronger Ghoul, with 12 wounds, same Toughness 4 as the Flaymaster and Baron, and a minimum damage of 2 that, despite their Strength 3, gives another value to the 4 attacks.
He has his own ability that provides an extra movement (up to half the value of this ability in inches) to any friendly Beastflayer fighter starting within 3″ of him, meaning that he can also take advantage of it.

Ghoul Tracker: 55 points
The Ghoul Tracker is the most basic profile of this army. You may want troves of these to use the 5″ movement and various other mobility abilities to position them on objectives, block nasty enemies, and if you have a chance use the Flaymaster’s Triple to do free damage to an enemy.
While their attacks are in line with their cost, if the leader executes his Quad and provides an extra 2 to Strength then they can become much more dangerous. Otherwise, they are the perfect target to force certain enemies to either spend their actions killing them, or trigger D3 damage when disengaging.

Offal Hound: 130 points
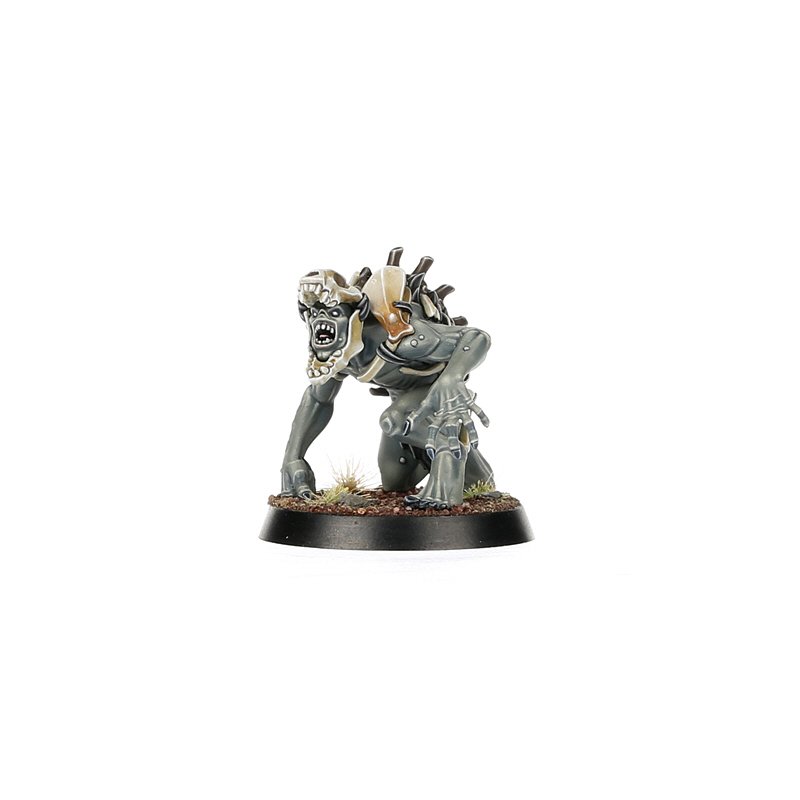
The Offal Hounds have the same attack profile of the Baron with 3 attacks at 2/4 damage, but they have 7″ movement at the cost of being a Beast with all its downsides. They have higher wounds (18) but lower Toughness (3) and their Double allows them to ignore vertical distance when climbing.
Abilities for the Royal Beastflayers Warband
- Feed the Hounds (Double, everyone): Heal up to 6 wounds to every other friendly fighter close-by after taking down an enemy.
- Sound the Hunt (Double, Beastflayer Baron): Up to 3 other fighters close-by can perform a bonus move of up to 6″.
- Clambering Horrors (Double, Offal Hounds): Ignore vertical distance while climbing this activation.
- Unleash the Hounds (Triple, Ghoul Gore-squire): Add up to 3″ to the Move characteristic of friendly fighters close-by.
- Pack Tactics (Triple, Royal Flaymaster): Allocate damage to a visible enemy equal to the double of friendly fighters close to that enemy.
- No Rest till our Quest is Done (Quad, Royal Flaymaster): Add 2 to the Strength characteristic of melee attacks of friendly fighters within 6″.
Reaction for the Royal Beastflayers Warband
Introduced in the new season of Warcry, Reactions are things that can be done in certain circumstances, but always during the enemy turn. They cost one action, so they can be used only by fighters that have not activated yet or are waiting. There are 3 universal reactions and one specific to each warband:
Tenacious Hunters (Everyone)
- When: An enemy within 1″ makes a disengage movement.
- What: Allocate D3 damage to that enemy.
Battle Trait for the Royal Beastflayers Warband
The battle trait is an addition introduced in Briar and Bone which adds an extra optional rule that affects all characters with the same runemark, without using any ability dice. Each faction has its own but the Grand Alliance one can be used instead:
- Order – Courageous Defenders: When using Take Cover reaction the critical hit becomes normal hit on a 3+ instead of 4+.
- Chaos – Aspire to Glory: Once per battle round, add 1 to the first critical hit from a melee attack from a fighter whose cost is 125 points or less.
- Death- Deathless Minions: Once per battle round, a critical hit to a Minion from a shooting attack is counted as a normal hit instead.
- Destruction – Relentless Destroyers: During melee attacks the target cannot claim the +1 Toughness bonus from cover.
The Hounds Bay: When an Offal Hound kills an enemy with a melee attack, another friendly fighter can move up to 3″.
Strategy and Tactics for the Royal Beastflayers Warband
The Royal Beastflayers are an interesting army with average statistics: apart the leader they don’t have heavy damage fighters, neither tanks. They have a good mobility and the numbers on their side, but no ranged potential.
While the Offal Hounds can ignore vertical distance when climbing, there’s no flying involved either. Overall the final verdict on this warband depends on their abilities, starting from the reaction, Tenacious Hunters, that is more of a disincentive for enemies to not disengage, but since it’s a rare occasion anyway, it may never occur. If it does, then a simple Ghoul could hit above his average just by reacting.
The other generic ability, Feed the Hounds, is a new type of mechanic that provides a really small area of healing after taking down an enemy. While it is more likely to be activated by your elite options, anyone within 3″ of it can benefit. And the 3″ area will be a recurrent trend in this warband, as 4 out of 6 abilities target friendly fighters within that bubble.
As is it phrased the activating fighter does not receive healing, so there’s that to consider. Same for the Baron when he activates his ability to have up to 3 comrades perform a bonus move. The third ability of this type is available to the Gore-squire and for a Triple adds up to 3″ movement to anyone, with the same warband runemark, starting their movement within 3″ of the activating model. In other words, a contorted way to say that the activating fighter has x” more movement for the rest of his activation, and anyone who starts their move next to him, benefits from the same buff. You do need a high valued Triple and the right number of models for it to be better than the Baron’s Double.
The fourth 3″ bubble ability is the culmination of the mobility tricks described so far: free damage to a visible enemy model (no range!) surrounded by your minions. If you are struggling to take down an elite enemy with high Toughness and wounds, correctly positioning your ghouls around him and using the Beastflayer Triple could make the trick. The damage depends on the presence of your fighters within that area, there’s no roll and no Toughness to consider in the equation. 4 ghouls = 8 damage straight, if you can place that many in such small place.
And this is the main trait of this warband that is its point of strength but also of weakness. While you can have on average 10 fighters, therefore most likely number superiority in the first rounds, they need to stay in close 3″ bubble to take advantage of most abilities, especially the healing because with Toughness 3 and 8 wounds the Trackers are going down fast, and the 12 wounds of the Gore-squire are not going to last much more.
Having so many fighters concentrated in few spots means you are not covering the entire board despite your numbers, and you are subject to area damage abilities. You can spread, using your Offal Hounds to chase weaker enemies or grab further objectives but then you lose cohesion and individually your fighters are easy to take down.
The warband Quad is a great one, that could change the tide of the battle if used at the right moment, but Quads are not easy to obtain and the 6″ range from the leader requires these small 3″ groups to be in relative proximity. Still, the minimum damage of 2 that everyone, except the Trackers, have can be efficient when coupled with high Strength if you can manage to hit on a 3+.
Overall this warband is a bit different than the previous ones, not underpowered and definitely not overpowered, that would require accurate positioning and knowing when you just have to leave someone behind and sacrifice him/her for the greater scheme.
Of course, the better if you can empathize and think like them, proud hunters directing their prey in a trap ready for the final blow.
Pros and Cons of the Royal Beastflayers Warband
Pros:
+ Above average speed and mobility tricks
+ Interesting close-pack abilities
Cons:
– Average Strength
– No ranged damage
Some thematic warbands for the Royal Beastflayers
Just for fun here we present few thematic warbands, meant more for fun or narrative context than for competitive play. Note that in narrative play you need to complete a quest that allows you to recruit a Hero before being able to add him to your roster.
Out of the box: 1 Royal Flaymaster, 1 Beastflayer Baron, 2 Offal Hounds, 3 Ghoul Gore-squire, 3 Ghoul Trackers.

How to buy a Royal Beastflayers Warband
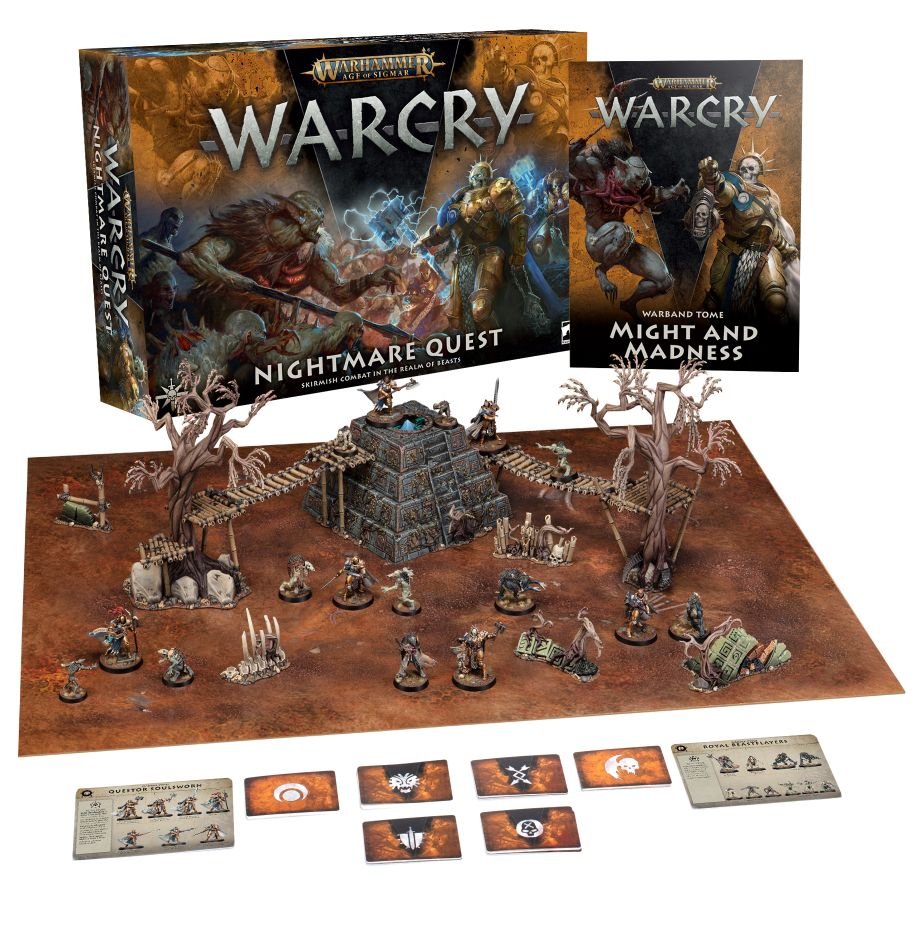
The warband was initially released as part of the Nightmare Quest set, but is since available as an individual box.
The sprues allow you to build:
- 1 Royal Flaymaster with 2 different weapon options
- 2 Offal Hounds
- 1 Beastflayer Baron
- 3 Ghoul Gore-Squire
- 3 Ghoul Tracker
Tips on painting a Royal Beastflayers Warband for Warcry
The Beastflayers can be painted as any other Flesh-Eater Courts model. As there’s plenty of tutorials online for them, Warhammer Community does not have a specific video for this warband (yet) but you can find the colour schemes on the Citadel app.
Some videos that I have personally used as inspiration for my Flesh-Eater Courts army are from GW itself in this Crypt Ghoul guide, a more advanced yet simple technique for your heroes from Painting Coach and a guide for speed painting the entire range in 24 hours from Vince Venturella.
