This is an article in a series where we do an overview of all Warcry Warbands for a Grand Alliance and exactly what fighter can be taken in each warband. This article is the warcry warbands for Chaos.
You can find the Warcry Warband overview for Order here and the Warband overview for Death & Destruction here.
If you are interested in the Bladeborn warbands, you can find our guide here.
We have many articles dedicated to Warcry that you can find at this link.
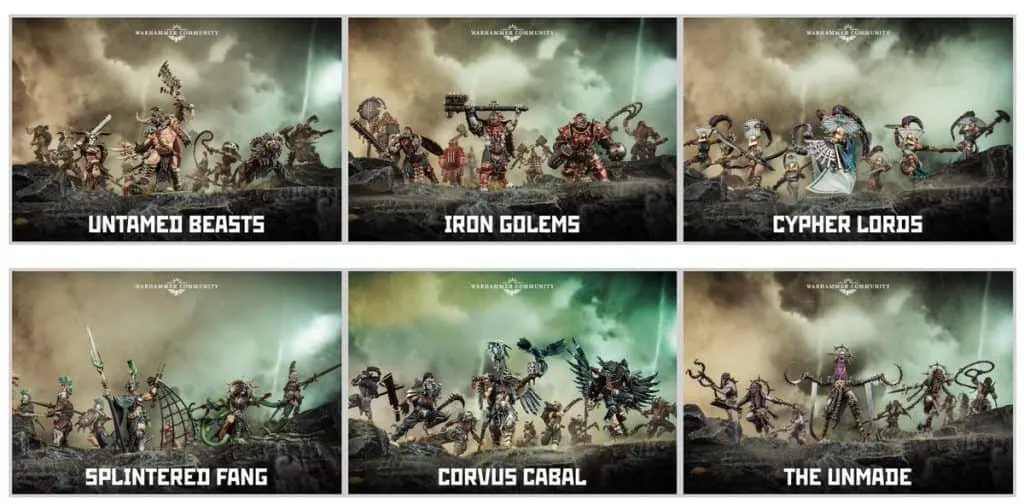
List of all Warcry Warbands
Chaos Warbands
- Beasts of Chaos
- Corvus Cabal
- Cypher Lords
- Iron Golems
- Khorne Bloodbound
- Khorne Daemons
- Nurgle Daemons
- Nurgle Rotbringers
- Scions of Flame
- Skaven
- Slaanesh Daemons
- Slaanesh: Sybarites
- Slaves to Darkness
- Spire Tyrants
- Splintered Fang
- Tzeentch Arcanites
- Tzeentch Daemons
- Unmade
- Untamed Beasts
- Darkoath Savagers
- Tarantulos Brood
- Rotmire Creed
- Horns of Hashut
- Chaos Legionnaires
- Jade Obelisk
- Claws of Karanak
- Darkoath
Order Warbands
- Cities of Sigmar Castelite Hosts
- Cities of Sigmar Darkling Covens
- Cities of Sigmar Dispossessed
- Daughters of Khaine
- Fyreslayers
- Idoneth Deepkin
- Khainite Shadowstalkers
- Kharadron Overlords
- Lumineth
- Seraphon
- Stormcast Ruination Chamber
- Stormcast Sacrosanct Chamber
- Stormcast Vanguard
- Stormcast Warrior Chamber
- Sylvaneth Warband
- Thunderstrike Stormcast
- Hunters of Huanchi
- Questor Soulsworn
- Wildercorps Hunters
- Vulkyn Flameseekers
- Ydrilan Riverblades
- The Twistweald
Death Warbands
- Flesh-Eater Courts
- Nighthaunt
- Ossiarch Bonereapers
- Soulblight Gravelords
- Askurgan Trueblades
- Royal Beastflayers
- Pyregheists
- Teratic Cohorts
Destruction Warbands
- Bonesplitterz
- Gloomsite Gitz
- Ironjawz
- Kruleboyz
- Ogor Mawtribes
- Gorger Mawpack
- Kruleboyz Monsta-Killaz
Miniatures and rules for the Warcry Warbands
If you are interested in all releases for Warcry, we have an article dedicated to it.
To play the game you need at least one warband and to know the core rules that are available separately or through various starter sets releases.
There are two types of warbands for this game:
- The “original” warbands, created specifically for this game with rules to use also in Age of Sigmar games.
- The “legacy” warbands, that take units from the main Age of Sigmar game and gives rules for Warcry. These are perfect if you already play Age of Sigmar and want to try out Warcry with your existing armies.
To play an original warband, you can just buy the related box and all cards and abilities will be included. However, consider all profiles have been updated in Warcry Compendium released in August 2022.
This is the list of original warbands:
- Iron Golems
- Untamed Beasts
- Corvus Cabal
- Cypher Lords
- Splintered Fang
- Unmade
- Spire Tyrants
- Scions of Flame
- Khainite Shadowstalkers
- Darkoath Savagers
- Tarantulos Brood
The second season, that moved to the Heart of Ghur, introduced new warbands to the fray:
- Rotmire Creed
- Horns of Hashut
- Chaos Legionnaires
- Jade Obelisk
- Hunters of Huanchi
- Claws of Karanak
- Askurgan Trueblades
- Questor Soulsworn
- Royal Beastflayers
- Gorger Mawpack
- Wildercorps Hunters
- Vulkyn Flameseekers
- Kruleboyz Monsta-Killaz
- Pyregheists
- Ydrilan Riverblades
- Teratic Cohorts
- The Twistweald
You may be able to find Warcry boxes for legacy warbands. Those are usually limited edition, contain a subset of all fighters that you could use for that warband but are a good deal and a nice starting point.
One important characteristic of legacy warbands is that most heroes and most units’ champion can be used as a leaders therefore the proportion of leaders/units is greatly unbalanced towards leaders, exactly opposite of the original warbands that have mostly only 1 leader option.
Chaos Warbands
| Warband Name | Warband Box | StG Box | Guide for Warband | |
|---|---|---|---|---|
| Skaven |  |  | Go to Guide | |
| Hedonites of Slaanesh: Sybarites |  |  | Go to Guide | |
| Untamed Beasts |  |  | Go to Guide | Buy Warband on Amazon |
| Iron Golems |  |  | Go to Guide | Buy Warband on Amazon |
| Cypher Lords |  |  | Go to Guide | Buy Warband on Amazon |
| Corvus Cabal |  |  | Go to Guide | Buy Warband on Amazon |
| Splintered Fang |  |  | Go to Guide | Buy Warband on Amazon |
| The Unmade |  |  | Go to Guide | Buy Warband on Amazon |
| Disciples of Tzeentch: Arcanites |  | Go to Guide | ||
| Disciples of Tzeentch: Daemons |  | Go to Guide | Buy Warband on Amazon | |
| Spire Tyrants |  | Go to Guide | Buy Warband on Amazon | |
| Slaves to Darkness |  | Go to Guide | ||
| Beasts of Chaos |  | Go to Guide | ||
| Maggotkin of Nurgle: Rotbringers |  | Go to Guide | ||
| Maggotkin of Nurgle: Daemons |  | Go to Guide | ||
| Blades of Khorne: Bloodbound |  | Go to Guide | ||
| Blades of Khorne: Daemons |  | Go to Guide | ||
| Hedonites of Slaanesh: Daemons | Go to Guide | |||
| Scions of Flame |  | Go to Guide | ||
| Darkoath Savagers |  | Go to Guide | ||
| Tarantulos Brood |  | Go to Guide | ||
| Rotmire Creed |  | Go to Guide | ||
| Horns of Hashut |  | Go to Guide | ||
| Chaos Legionnaires |  | Go to Guide | ||
| Jade Obelisk |  | Go to Guide | ||
| Claws of Karanak |  | Go to Guide | ||
| Darkoath |  |

Untamed Beasts
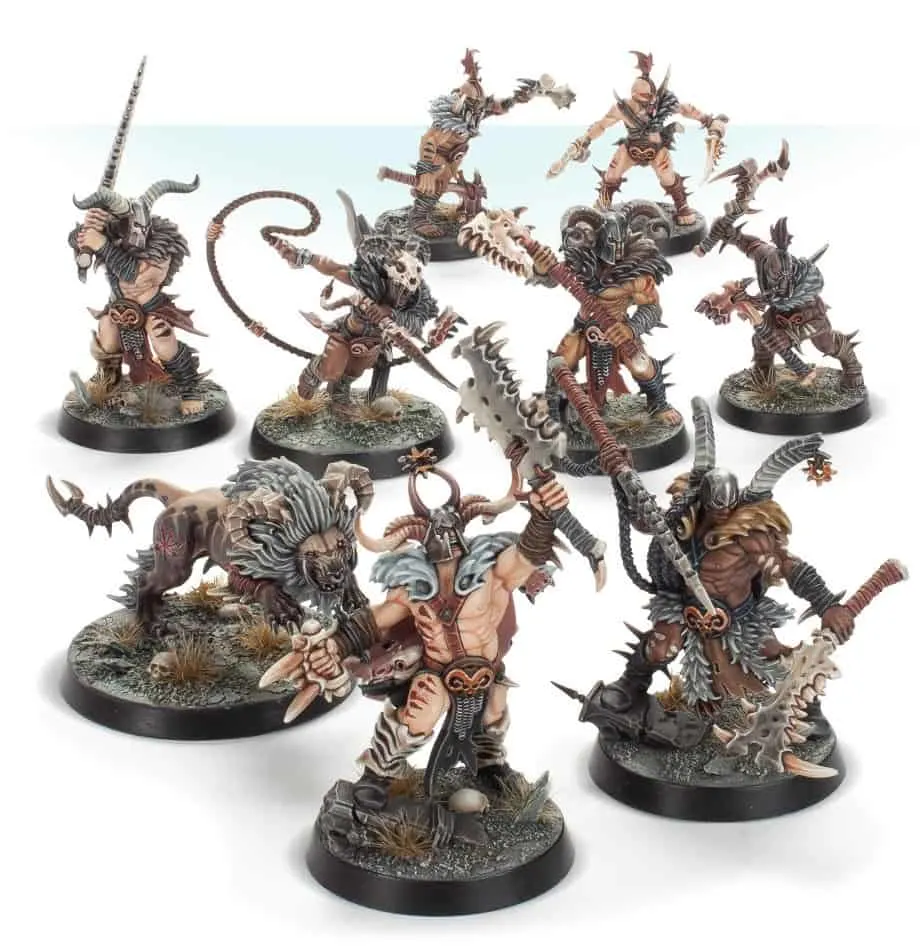
The Untamed Beasts are one of the starter warbands ever released for Warcry. They are originally from Ghur, the Realm of Beasts, and as such they represent its wild and primal aspect.
They have 7 fighters of which 1 is a leader.
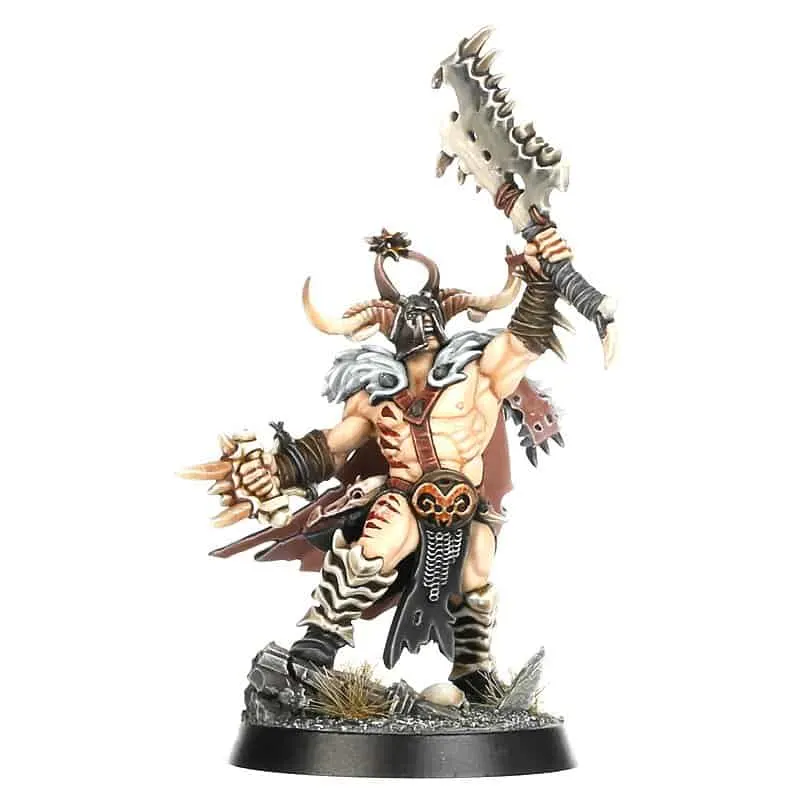
The Heart-Eater is the leader of the Untamed Beasts with an excellent damage output (5 attacks at Strength 5 with damage 2/5) and a comparable cost.
The First Fang is the Brute of the Untamed Beasts. He carries a bone axe like most of his kin, but the real star of his load-out is his harpoon. It only has 2 attacks but does as much damage as the Heart-eater’s axe and has a range of 8″.
The Beastspeaker has both a melee and a ranged attack, just like the First Fang, but her best ability is Beastmaster (Double) which gives the Rocktusk Prowler a bonus attack action if it is visible and within 4″ of the Beastspeaker. This makes her and the Prowler the power couple of the Untamed Beasts.
Technically a Tamed Beast, the Rocktusk Prowler is the pet lion/ram hybrid of the Beastspeaker. With its 8″ move, 20 wounds and serious damage output, it is one of the main threats to anyone going up against the Untamed Beasts. You can give it bonus attack actions outside of its turn with the Beastspeaker’s ability, and the Prowler itself can use Pounce (Triple) to damage any model within an inch of the destination of its move action.
The Preytaker is your average barbarian stereotype. He is tough, he hits hard with a two-handed weapon (the Sawtooth Blade gives an extra attack, while the Fanged Axe gives +1 to Strength and to damage on critical hit) and he wears a pretty silly horned helmet and not that much else. Where most of the other warriors of the Untamed Beasts need to be used in pretty specific ways, the Preytakers are great to have if you need to hold an objective or just hit something in the face really hard.
The best feature of the Plains-runner is that he/she is really cheap. The Plains-runners die easily (3 toughness, only 8 wounds), but they fill out your warband, and every model on the board is two additional activations per turn, so numbers are always good.

Abilities for the Untamed Beasts Warband
- Savage Fury (Double, everyone): +1 to Move and Attacks for 1 activation.
- All-Out Attack (Double, Heart-eater): After taking down an enemy you can perform a bonus Move and Attack action.
- Beastmaster (Double, Beastspeaker): A friendly Beast within 4″ can perform a bonus attack.
- Pounce (Triple, Rocktusk Prowler): At the end of the next move action allocate up to 6 damage to an engaged enemy fighter.
- Harpoon Snag (Triple, First Fang): Make a bonus attack action and then move the target up to 6″ closer to the First Fang.
- Unleash the Beast (Quad, everyone): Increase up to 3 Attack and Strength of melee attacks for the rest of the round.
Reaction for the Untamed Beasts Warband
Brute Resilience (Everyone)
- When: During an enemy melee attack action but before hit rolls.
- What: 1 damage less (to a minimum of 1) from each successful hit.
Battle Trait for the Untamed Beasts Warband
Worthy Prey: At the beginning of the round, if there’s no worthy prey on the battlefield, select an enemy fighter as a worthy prey. Treat all abilities against them as they had value 6.
Pros and Cons of the Untamed Beasts Warband
Pros:
+ Good all-round warband with no significant weaknesses
+ The Rocktusk Prowler and First Fang have excellent ability combos
+ Cheap basic fighters
Cons:
– Lacks Range 2 weapons for melee
– As a balanced warband, they don’t have anything they really excel at
– Weak basic fighters

Iron Golem
The Iron Golems is one of the original starter warbands. They represent one of the aspect of the Chaos followers in Aqshy, the Realm of Fire. They are ingenious and famous for their forges, in clear contrast with the wilder Untamed Beasts.
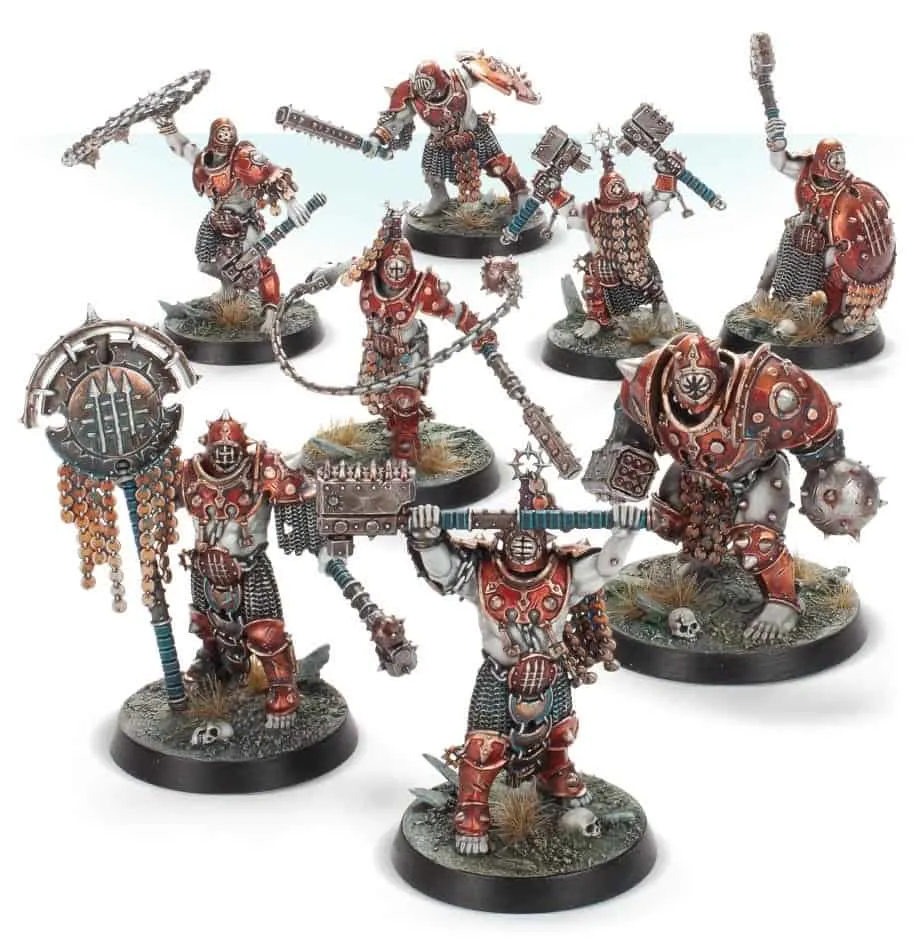
They have 9 fighters of which 1 is a leader.

The Dominar is the Leader of the warband, and he’s designed to lead from the front. His three Strength 5 attacks are strong on their own, but on top of those, the Dominar has access to two cheap abilities that boost his own damage output. As a frontline Leader, the Dominar doesn’t synergize that much with other fighters in your warband, but if you want to keep him alive longer, put him in a battlegroup with the Signifer, who can buff the Dominar’s Toughness to 5.
The Ogor Breacher is one of the more unique assets of the Iron Golems. He has a whopping 30 wounds and a Toughness of 5, making him very, very hard to kill. His attacks are just as extreme as his defence. He has 3 attacks, but they have a Strength of 6, a damage of 4 and a critical damage of 8.
The Signifer has solid damage output, Toughness and Wounds, but if you want him in your warband, it should be because of his main function, which is to use his unique Triple ability, Stand Defiant. This allows you to add 1 to the Toughness characteristic of your fighters within 6″ of him, making the entire warband extremely resilient to anything than critical hits.
The Prefector is an alternate assembly option for the Signifer but he can reach the same potential damage output of a Dominar with his signature ability Spine-Crushing Blow for a fraction of the cost.
The Drillmaster is a very versatile fighter, with both a good melee attack and a 3″ ranged attack with a Strength of 4. Her main feature, however, is that she has access to the Quad ability of the Iron Golems, the appropriately titled Whirlwind of Death, an ability that can allow some serious area damage.
The Iron Legionary is the basic fighter with a pretty weak attack, but his or her role is defined by a big shield that gives him/her a Toughness of 5, making for an excellent cheap objective holder.
The Iron Legionary with Bolas is a slightly more expensive Legionary with a 3″ ranged attack thanks to his Bolas.
The Iron Legionary with Twin Hammers is the other weapon option in the Iron Golems Kit with the same body as the Legionary with Bolas. He’s not impressive in any way, apart from the fact that it turns into a Toughness 5 fighter if it is in range of the Signifer’s Stand Defiant ability, making it equal to an unbuffed shield Legionary, but with an extra attack.
The Armator is weird. Being a duardin, he is very slow (3″ move), and his attack is the same as the melee attack of the Drillmaster. He has 15 Wounds, which is a bit more than a standard Legionary but a bit less than the other specialists in the warband. …And that’s it.

Abilities for the Iron Golems Warband
- Throw Bolas (Double, everyone): Choose a fighter within 6 inches of your fighter, roll 2 dice. On each 4 or 5, do 1 damage to the fighter. On each 6, do damage equal to the ability’s value.
- Spine-crushing Blow (Double, Dominar and Prefector): Add up to 6 to the Strength of the next melee attack.
- Lead with Strength (Double, Dominar): After taking down an enemy, you can perform a bonus move or attack action.
- Living Battering Ram (Triple, Ogor Breacher): At the end of the next move action allocate up to 6 damage to an engaged enemy fighter.
- Stand Defiant (Triple, Signifer): Add 1 to the Toughness of friendly fighters within 6″.
- Whirlwind of Death (Quad, Drillmaster): Up to 6 damage to all close-by enemies.
Reaction for the Iron Golem Warband
Clashing Iron (Everyone)
- When: During an enemy melee attack action but before hit rolls.
- What: Up to 2 critical hits count as normal hits instead.
Battle Trait for the Iron Golem Warband
We Make War: After the initiative phase, can change a Double, Triple of Quad to a value of 6.
Pros and Cons of the Iron Golems
Pros:
+ high Toughness and abilities that improve it = very hard to kill
+ some hard-hitting fighters (the Ogor Breacher in particular)
Cons:
– Slow, lack good mobility abilities
– Few viable options for attacking with a range further than 1″
Cypher Lords
The Cypher Lords are one of the original warbands at Warcry launch. They are from Hysh, the Realm of Light, and they survive with deceit and treachery by pretending to be abiding citizens by day while spreading chaos by night.
They have 6 fighters of which 1 is a leader.
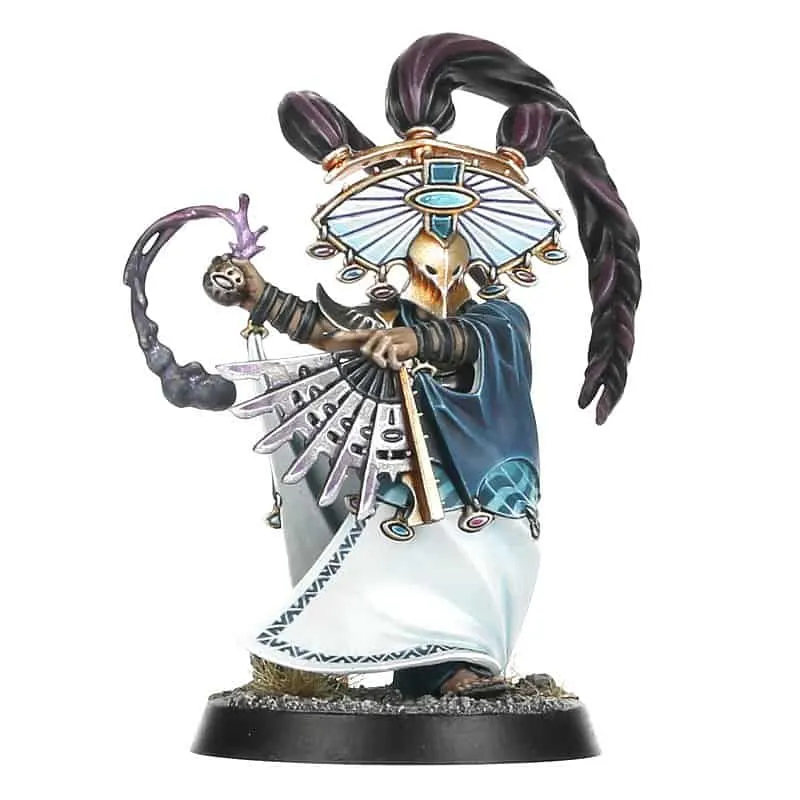
The Thrallmaster is one of the more powerful Leaders among the original Warcry Chaos warbands. He has access to two special abilities that can really help you control the battlefield and keep your fighters alive. In addition five attacks at Strength 4 with a critical damage of 6 is a lot for a man armed only with a fan.
The Luminate is the second in command in a Cypher Lords warband, and while she is visually very different from the Thrallmaster, a good way to think of her in terms of tactics is that she is a slightly toned-down version of him.
The Mindbound are the most basic fighters of a Cypher Lords warband. They are vulnerable, with a Toughness of 3 and 10 wounds, and their attacks are nothing special, either. Like the cannon fodder of the other warbands, they are best thought of as precisely the pawns they are depicted as in the lore.
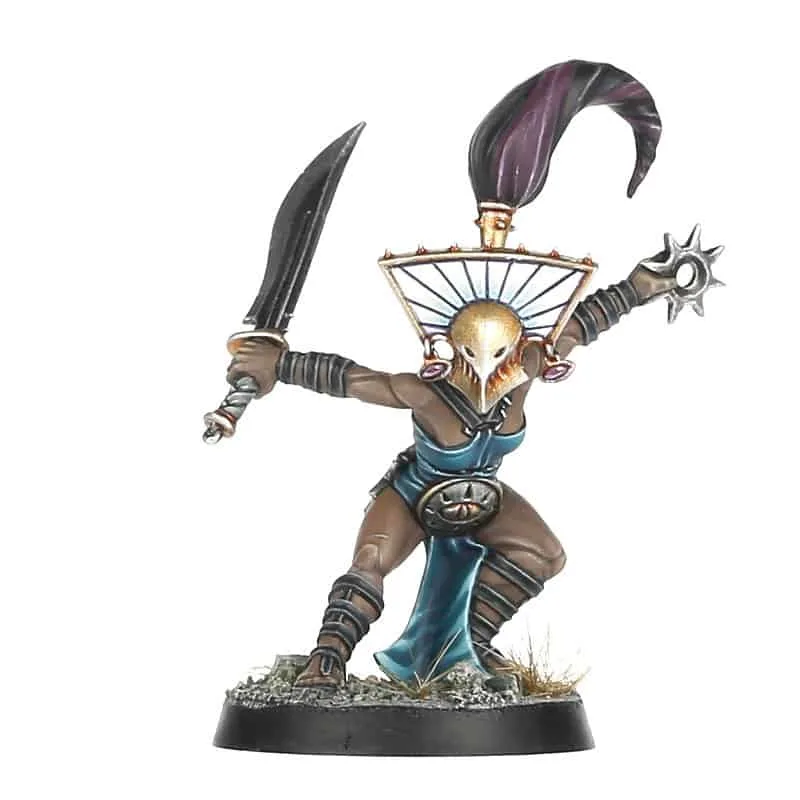
The Mindbound with Double-bladed Sword is mostly the same as the regular Mindbound, but it has a 2″ melee range, one less attack, better critical damage and access to the ability Low Sweeping Blow (Double), which works like Throwing Stars and Chakrams damage-wise, but for each fighter within 2 inches of this fighter.
The Mirrorblades are punchier versions of the Mindbound. That might sound a little boring, and 10 wound and 3 toughness is a little weak for their cost. However, it also means that, like the Mindbound, the Mirrorblades with Duelling Swords are Minions, and can be teleported around by the Thrallmaster and Luminate to get up close with their five attacks Strength 4 for 2 regular damage and 4 critical damage.
The Mirrorblade with Glaive is to the Mirrorblade with Dueling Swords what the Mindbound with Double-bladed Sword is to the regular Mindbound – and that’s just a fancy way of saying that the Mirroblade with Glaive gives you +1 weapon range and access to Low Sweeping Blow.
Abilities for the Cypher Lords Warband
- Throwing Stars and Chakrams (Double, everyone): A chance to do up to 12 damage to an enemy within 6″ depending on 2 dice roll and the ability’s value.
- Acrobatic Leap (Double, everyone): Add 1″ and Fly to the Move characteristic but can’t move vertically more than 3″.
- Low Sweeping Blow (Double, Mindbound with Double-bladed Sword and Mirrorblade with Glaive): A chance to do up to 12 damage to all enemies within 2″ depending on 2 dice roll and the ability’s value.
- Shadowy Recall (Triple, Thrallmaster and Luminate): Take any Mindbound or Mirrorblade from anywhere and set it up within 6″ from this fighter.
- Shattered Doom Globe (Triple, Thrallmaster): Subtract 1 from all enemy attacks within 6″.
- Spinning Somersault Strike (Quad, everyone): A bonus move action flying and then a bonus attack action.
Reaction for the Cypher Lords Warband
Unexpected Assault (Everyone)
- When: After an enemy finishes a move within 3″.
- What: A bonus move for a friendly Thrallmaster or Luminate that needs to end within 1″ of the enemy fighter.
Battle Trait for the Cypher Lords Warband
Matchless Acrobats: After using an ability, roll a die, on a 5+ add a wild dice to the reserve.

Pros and Cons of the Cypher Lords
Pros:
+Good damage
+Strong leader and champion with great abilities
+great mobility
Cons:
– low Toughness overall – fighters go down easily
– slightly expensive points-wise

Corvus Cabal
The Corvus Cabal is one of the original warbands at Warcry launch. They are from Ulgu, the Realm of Shadow. They have affinity with carrion birds and this is represented by their abilities to sneak from the rooftops.
They have 6 fighters of which 1 is a leader.
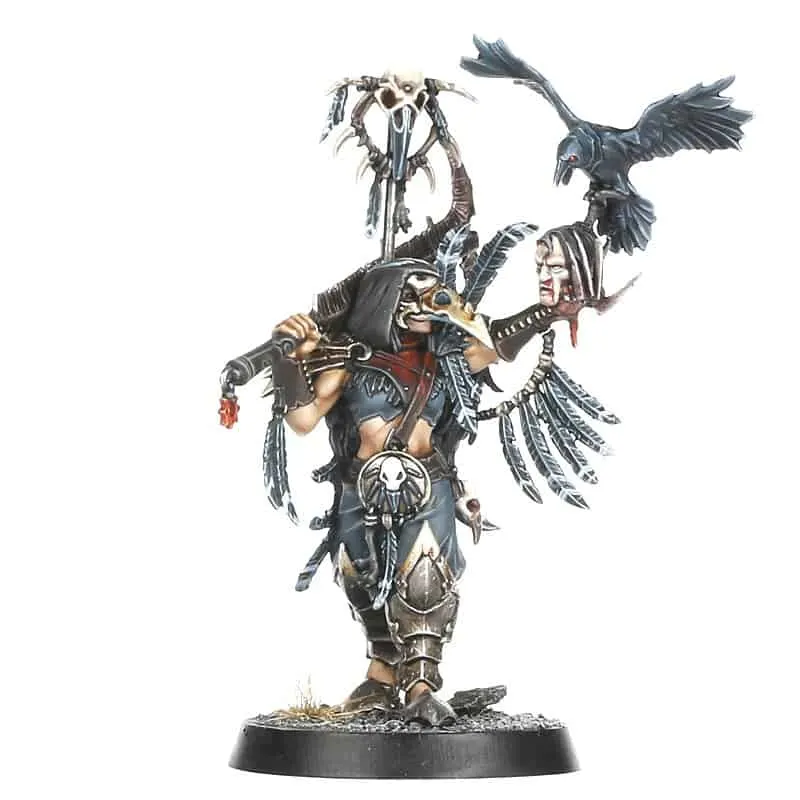
The Shadow Piercer is the Leader of the Corvus Cabal warband. She is fast, with the Move characteristic of 5″ that she shares with most of the warband, and she has 4 attacks for 2/5 damage. What makes her stand out among the Chaos leaders of Warcry, though, is her access to some very good abilities.
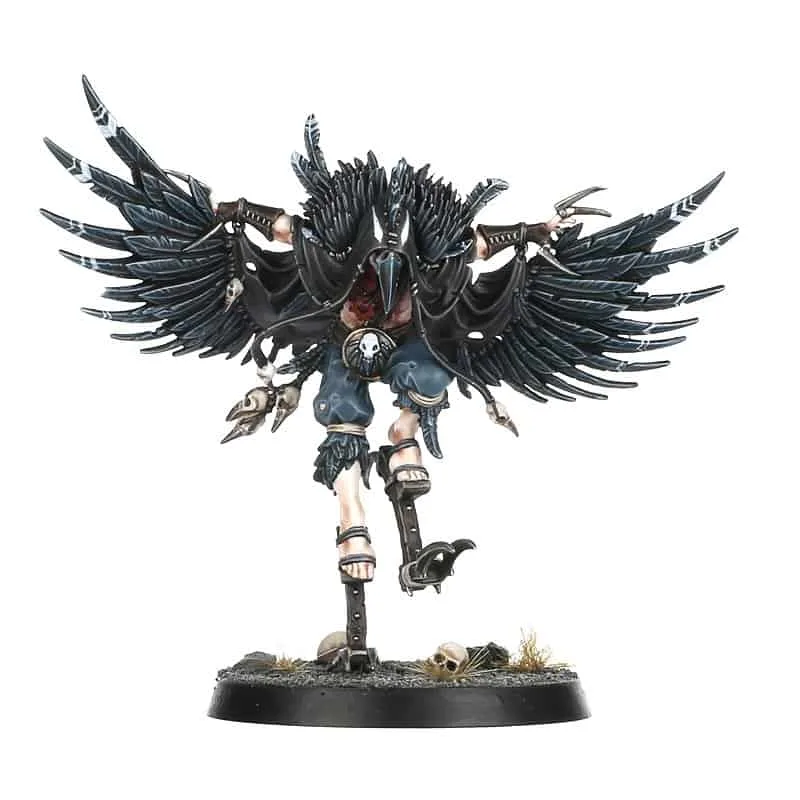
The Shrike Talon is a champion-type fighter for the Corvus Cabal warband. Aside the amazing sculpt, he is also deadly in combat with a Move characteristic of 8″, 5 attacks that do 2/4 damage. That’s a lot of potential damage that you can swiftly apply to anything on the battlefield with such high Move Characteristic.
The Spire Stalker is a mid-tier fighter in the Corvus Cabal warband. He has almost the same weapons profile as the Shrike Talon (it has one less attack), but it has 15 wounds instead of 20 and a Move of 5″ rather than 8″. Those stats are still good, and while the potential damage output of a Spire Stalker is much the same as fighters in similar roles in other warbands, it is definitely an advantage to be able to do that kind of damage with a far-moving fighter.
The Cabalist is the most basic fighter of a Corvus Cabal warband. It has 4 attacks and the warband signature Move characteristic of 5″, but with only 8 wounds and a meagre Toughness of 3, he goes down easily.
The Cabalist with Spear is an upgraded version of the standard Cabalist. For a higher cost, it adds 1 to critical damage and a crucial +1 to the range of its attacks. The added range adds to the survivability of the Cabalist, since it can attack stronger melee-focused foes without fearing a double action counterattack.
The Cabalist with Familiar has the same attack profile as the standard Cabalist but has access to the Double ability Harrying Raven, which is otherwise only available to the Shadow Piercer.
Abilities for the Corvus Cabal Warband
- Raven Dart (Double, Everyone): A chance to do up to 6 damage to an enemy within 8″.
- Swift Climb (Double, Spire Stalker): Do not count vertical distance when climbing.
- Harrying Raven (Double, Shadow Piercer and Cabalist with Familiar): The target enemy fighter within 20″ cannot make disengage actions this turn.
- Swooping Attack (Triple, Shrike Talon): Perform a bonus move action, and if it finishes 3″ or more lower, then you can also make a bonus attack action.
- Grisly Trophy (Triple, Shadow Piercer): After taking down an enemy, increase by 1 the melee Attack characteristic of all friendly fighters within 9″.
- Death from Above (Quad, Everyone): Make a bonus move action with a fighter. Then, that fighter can make a bonus attack action with +1 Strength if the move ended 3″ or more lower than when it started.
Reaction for the Corvus Cabal Warband
Raptor Strike (Everyone)
- When: An enemy finishes a move within 5″ horizontally and vertically lower.
- What: A bonus move action towards the enemy inflicting impact damage on him.
Battle trait for the Corvus Cabal Warband
Plunging Killers: Add 2 to the Strength characteristic of fighters who finished their move 2″ or more lower than their starting position.

Pros and Cons of the Corvus Cabal
Pros:
+ One of the fastest Chaos warbands
+ Can take advantage of scenery to great effect
+ Versatile Leader figure with many useful abilities that improve your warband
+ Sneaky good damage (loads of attacks) compared to price per model
Cons:
– Many Corvus Cabal fighters are very vulnerable
– Not the highest critical damage profiles (bit average critical on whole warband is fair)
– Abilities depending on the scenery
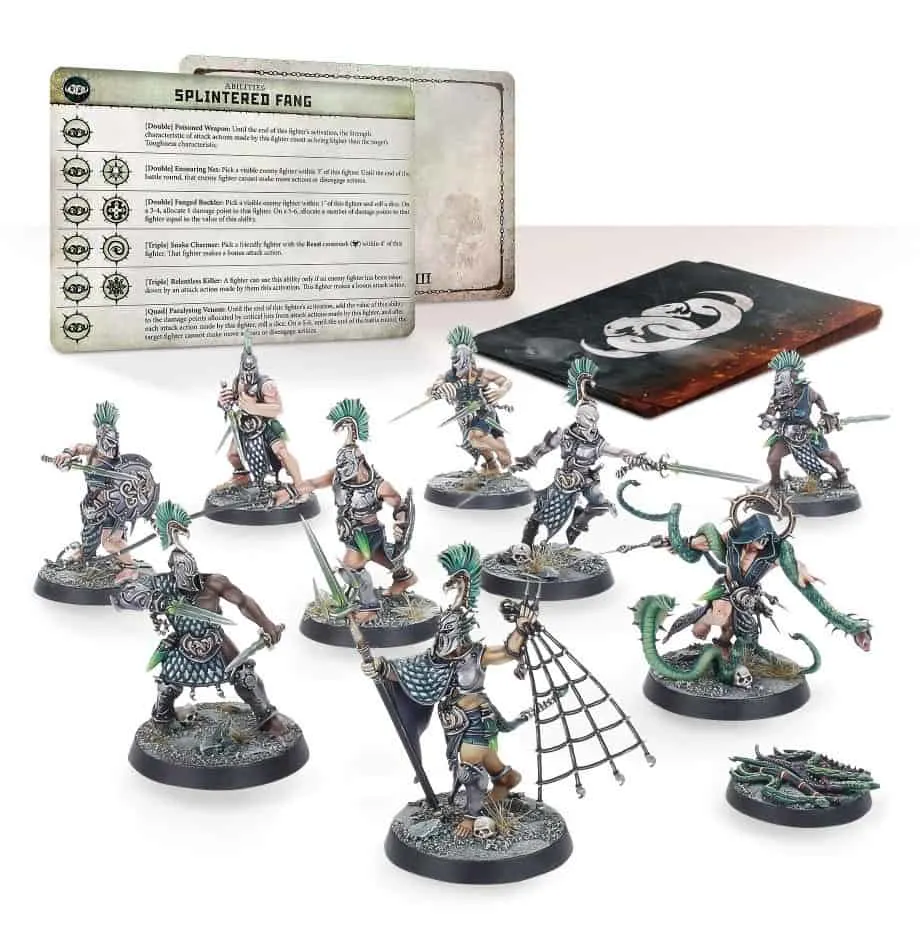
Splintered Fang
The Splintered Fangs are one of the original warbands at Warcry launch. They hail from Ghiran, the Realm of Life and they are attuned with serpents of all sorts that some are able to control and from which they extract their poisons.
They have 10 fighters of which 1 is a leader.
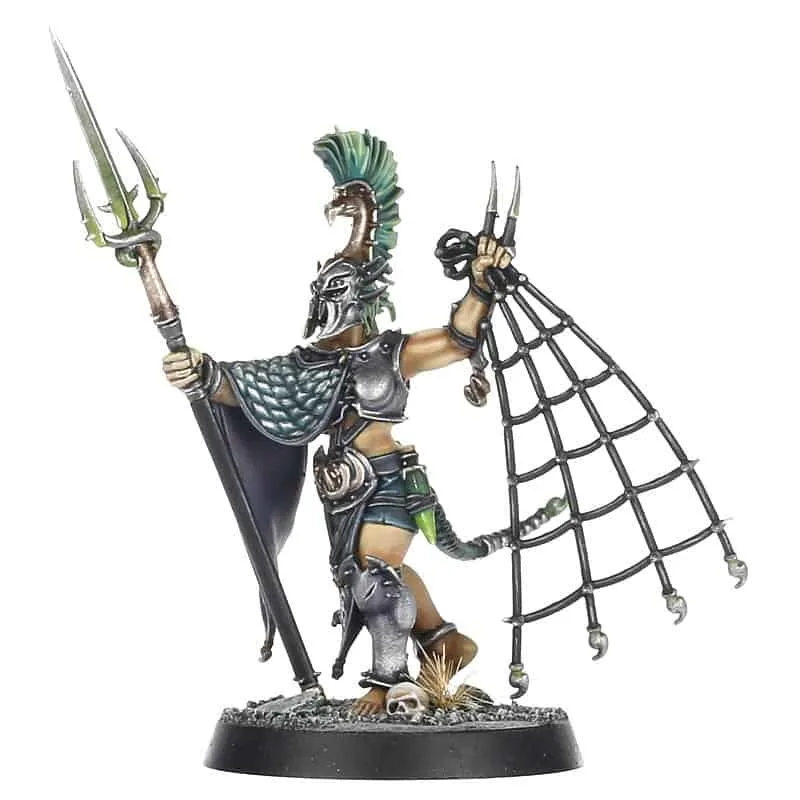
The Trueblood is the leader of the Splintered Fang warband. She has 4 attacks that do 2 damage or 5 critical damage, so she is not one of the top damage-dealers among the original Chaos warband leaders. However, she is one of the more tactically useful leaders. Her unique ability, the Double Ensnaring Net, lets her pick an enemy fighter within 3″, who is then unable to make move actions or disengage actions for the rest of the battle round. This can be used tactically to then poke the enemy with ranged attacks from other fighters avoiding retaliation.
The Serpent Caller is one of the best fighters of the Splintered Fang warband. He has a 4 attacks on a 2″ range weapon and 2 on a 8″ range profile, both for 2/4 damage at Strength 4. These are decent attack, and, in addition, his unique ability, Snake Charmer allows him to let a friendly fighter with the Beast runemark, which in his case mostly means a Serpents fighter (described below), make a bonus attack action.
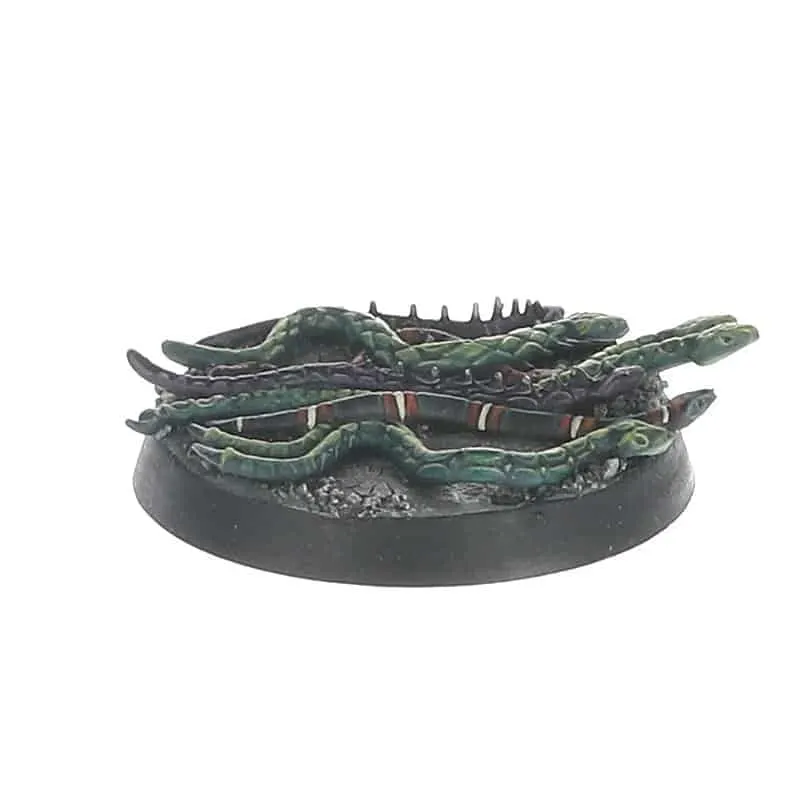
The Serpents fighter doesn’t look like much. Visually it is literally a bunch of snakes on a base, but it is one of the more interesting fighters among the Chaos warbands. It only has 6 wounds and a ridiculous 2 in toughness, so it will go down easily, but it has 5 attacks that do only 1/4 damage and 6″ Movement.
The Pureblood is a simple, but effective fighter. He is on the better end of average in every way, with 4 in both Strength and Toughness, and with decent damage and critical damage for his points.
The Venomblood with Barbed Whip is one of several options for building a Venomblood, the mid-tier Splintered Fang fighter. Now with an updated ranged profile and Toughness 5 has a role in the warband.
The Venomblood with Spear and Shield, instead of the whip, carries a spear that has one inch less in range, but a better damage profile of 2/4 damage.
The Venomblood with Duelling Blades functions like a cheaper version of the Pureblood: it has 4 attacks with 2 damage and a critical damage of 4, which is good for its cost, but it only has 3 in Strength. As a small bonus, this Venomblood has a move of 5″ to compensate with his Toughness of 4.
The Venomblood with Blade and Barbed Whip is an alternative build option for the Venomblood with Duelling Blades, and if you want some flexibility in your tactical options, it’s not a bad choice: losing one of his swords to wield the whip, he has one less attack in melee, but gains a 3″ range attack in return.
The Clearblood is the most basic fighter of the Splintered Fang warband, and it’s really not remarkable in any way: Strength, Toughness and critical damage don’t go higher than 3.
The Clearblood with Shield trades 1 attack less (3) for a higher Toughness (4), meaning it could last a bit more while holding objectives. On top of that, it gets access to Fanged Buckler like the shielded Venombloods, which is a strong ability for a basic fighter!
Abilities for the Splintered Fang Warband
- Poisoned Weapon (Double, everyone): For one activation, treat the Strength characteristic of a fighter as always higher than an enemy fighter’s Toughness (= you hit on 3+ against anything).
- Ensnaring Net (Double, Trueblood only): Pick an enemy fighter within 3″, who can then make no move or disengages actions for the rest of the battle round.
- Fanged Buckler (Double, Venomblood with Spear and Shield, Venomblood with Barbed Whip and Clearblood with Shield): A good chance to do 3 damage to an engaged fighter.
- Snake Charmer (Triple, Serpent Caller): Allow a nearby Beast (e.g. Serpents) to perform a bonus attack action.
- Relentless Assault (Triple, Pureblood): After taking down an enemy, you can perform a bonus move followed by a bonus attack action.
- Paralysing Venom (Quad, Everyone): Up to 6 more damage on critical hits. In addition for each attack action, on a 5+ prevent the target from moving or disengaging.
Reaction for the Splintered Fang Warband
Vicious Riposte (Everyone)
- When: During an enemy melee attack action but before hit rolls
- What: 2 damage to the attacking fighter for each 1 and 2 rolled.
Battle Trait for the Splintered Fang Warband
Weapons Dripping with Poison: Once per round a friendly fighter can use the ability Poisoned Weapon with a value of 6 without using any ability dice.
Pros and Cons of the Splintered Fang
Pros:
+ good damage on critical hits overall
+ strong general abilities that negate enemy advantages
+ fighters tend to have many attacks
+ good options for immobilizing enemies
Cons:
– the synergy with Serpents now became much more expensive
The Unmade
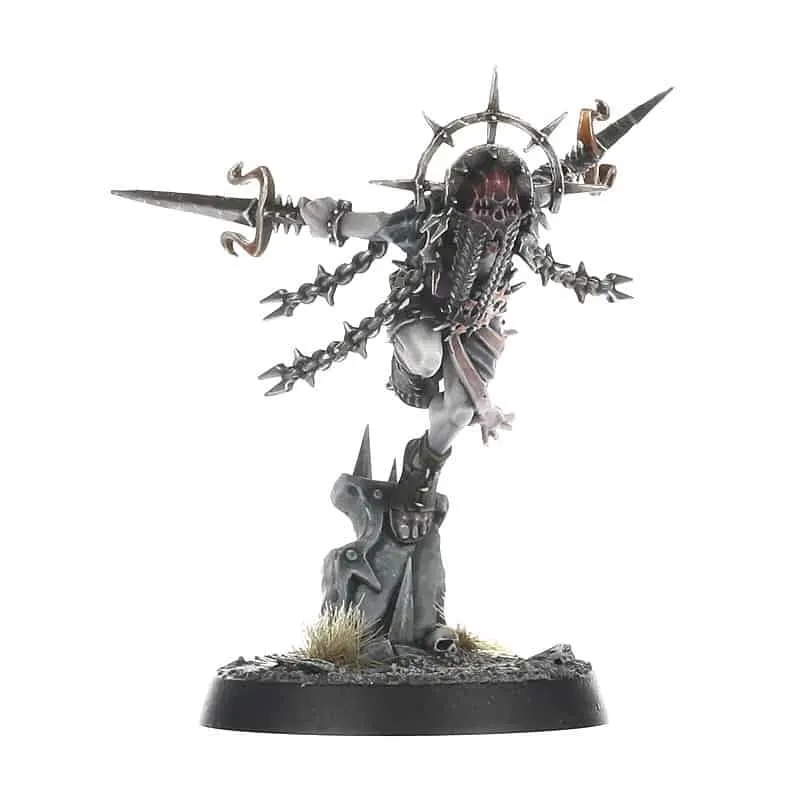
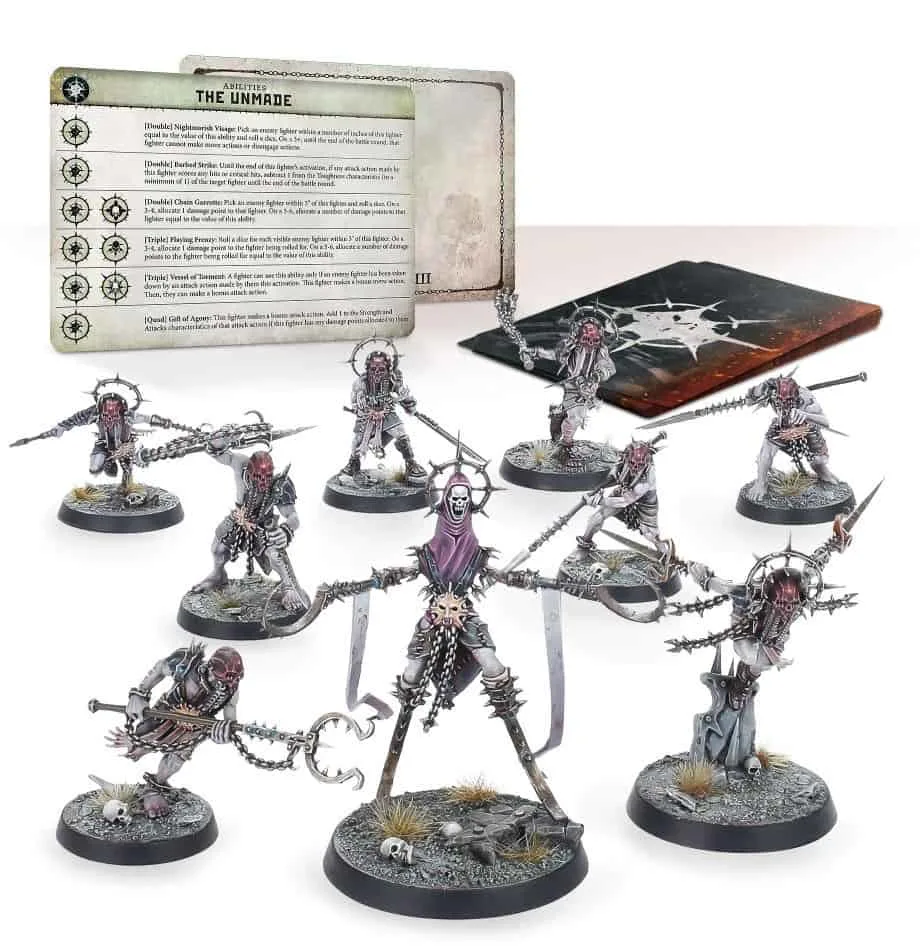
The Unmade Warband is one of the original warbands at Warcry launch. They hail from Shyish, the Realm of Death and they are a masochistic cult celebrating agony as opposite of death. And this is better represented by their use of their own faces as belts…
They have 5 fighters of which 1 is a leader.

The Blissful One is the Leader of the Unmade, and perhaps more than any Leader among the original Chaos warbands, he’s the most important fighter in the warband. He is both very fast and very, very deadly: he has an impressive Move characteristic of 8″ and 5 melee attacks with a critical damage of 6!
While it doesn’t come close to the Blissful One in Move and Damage (or points cost, or number of missing limbs, thankfully), the Joyous One is still a strong fighter for its cost. It is fast, with a move of 5″, 4 attacks with decent Strength and Damage and an ability that can do area damage.
The Ascended One is a middle tier fighter. They have 4 attacks with Strength 4, a damage of 2 and a critical damage of 4, so while they are unlikely to one-shot enemies, they are very capable of going toe to toe with many fighters around their own points cost.
The Awakened One with Brutal Polearm is the cheapest fighter of the Unmade warband. In most ways, they are a much weaker version of the Ascended Ones, but they also cost half the points while still having access to 3 out of 4 of the same abilities.
The Awakened One with Flail is an alternative build that replaces the 2″ range weapon for a 1″ range knife attack and a decent 3″ range attack.
Abilities for the Unmade Warband
- Nightmarish Visage (Double, everyone): A good chance to prevent an enemy within range (up to 6″) from moving or disengaging.
- Barbed Strike (Double, everyone): Reduce by 1 the enemy Toughness if at least a hit is scored.
- Chain Garotte (Double, Ascended One): A chance to do up to 6 damage to an enemy within 5″.
- Flaying Frenzy (Triple, Joyous One): A chance to do up to 6 damage to all enemies within 3″.
- Vessel of Torment (Triple, Blissful One): After taking down an enemy you can perform a bonus Move and Attack action.
- Gift of Agony (Quad, everyone): Make a bonus attack action and add 3 to Strength and Attacks if the target is already injured.
Reaction for The Unmade Warband
Shared Pain (Everyone)
- When: During an enemy melee attack action but before hit rolls.
- What: 1 damage to the attacking fighter for each hit but 2 extra damage to the defending fighter for each critical hit.
Battle Trait for The Unmade Warband
Shared Bliss: Once per battle, when taking down an enemy with the reaction Shared Pain, obtain a Quad with value 1.
Pros and Cons of the Unmade
Pros:
+ very versatile abilities, most of them usable by everyone in the warband
+ very strong and fast Leader
+ good synergies between leader/champion and basic fighters via abilities
Cons:
– if the Leader goes down, you lack a strong damage source
– many fairly weak fighters
– lack exceptional Strength or Toughness on any fighters
The Spire Tyrants
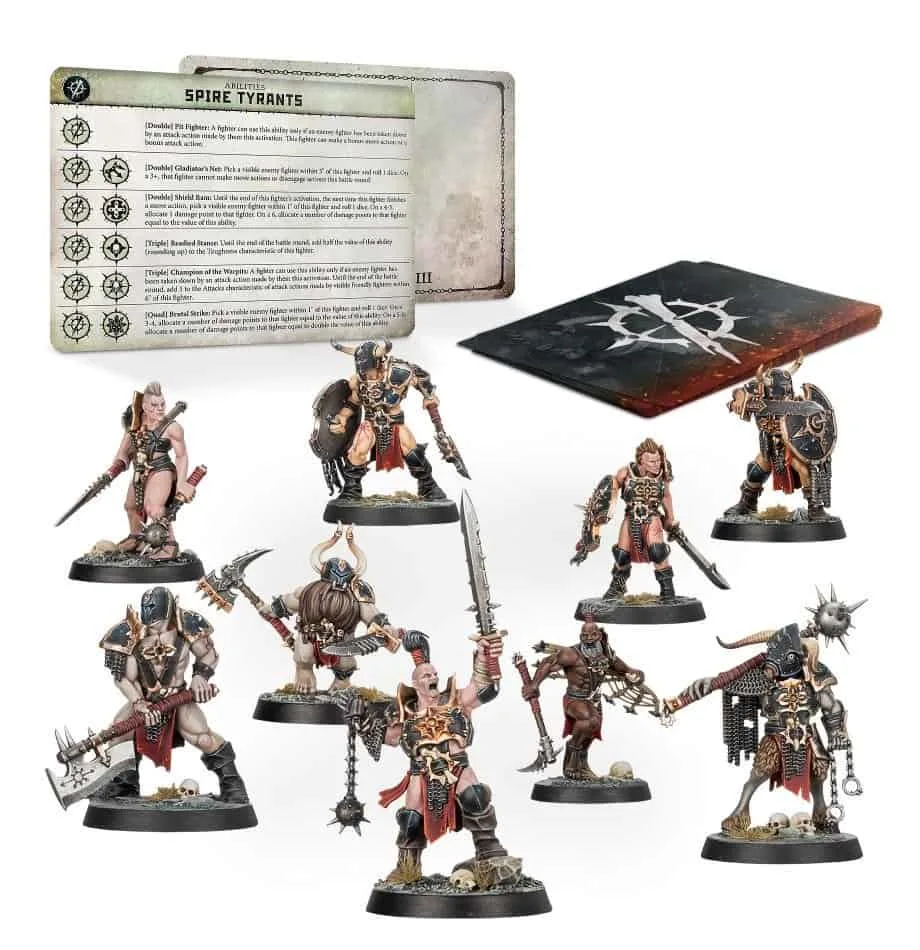
The Spire Tyrants‘s home is the Eightpoints, Archaon’s headquarters and a focal point to any realm whose realmgate is still open. They are born in the never-ending bloodshed of Varanspire’s arenas and they claim to be Archaon’s chosen.
They have 9 fighters of which 1 is a leader.
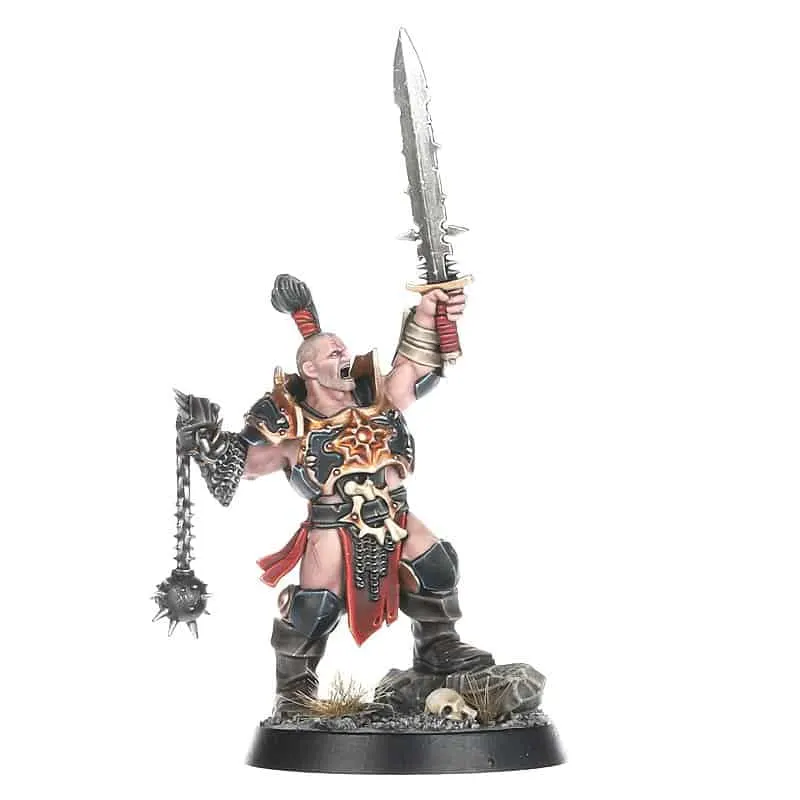
The Pit Champion is the Leader of the Spire Tyrants warband. He has a good melee attack with 4 attacks at Strength 5 and a 3″ range attack for striking from a distance. But his main trait is his special ability, the Triple Champion of the Warpits, that lets him add 1 to Attacks of nearby friendly fighters after he kills an enemy fighter.
The Headclaimer is a Brute fighter for the Spire Tyrants warband. He has the same melee attack profile as the Pit Champion , and the same defence profile with less wounds. This means that he is one of the strongest fighters of your warband.
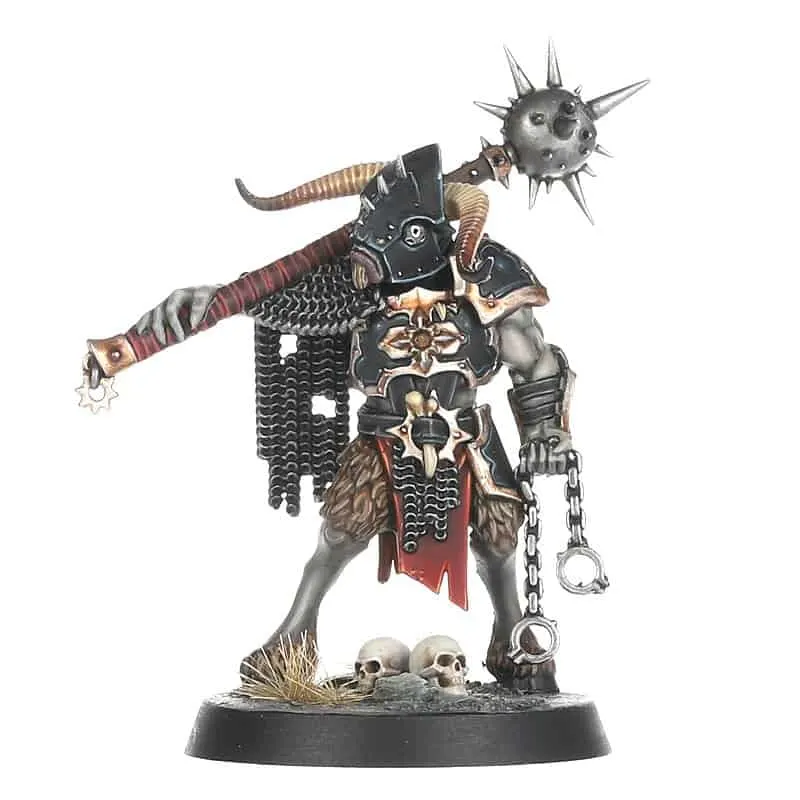
The Bestigor Destroyer is another Brute fighter for the Spire Tyrants warband. Its abilities are similar to the Headclaimer, but it has 3 more wounds, one less attack and a stronger damage profile with a critical damage value of 6.
The Pit Veteran with Shield is an elite fighter, with 3 attacks with Strength 4 and 2/4 damage, that greatly benefit from being close to the Pit Champion when his +1 attacks ability goes off.
The Pit Veteran with Dual Weapons is an alternative build option with Toughness 4 instead of 5 but one additional attack.
The Pit Fighters are the most basic fighters of the Spire Tyrants warband, and this version can be built with either a Punch Dagger which brings it up to 4 attacks (which is great for a low cost fighter), or a Spear which gives them a range of 2″ but one attack less.
The Pit Fighter with Net has the same statistics profile as the Pit Fighter with Punch Dagger, but with 1 less damage on critical hit. He makes up for this with his unique ability, the Double Gladiator’s Net, which lets him tie an enemy fighter to the ground for one battle round on a dice roll of 3+.
The Frenzied Rager is an elite fighter for the Spire Tyrants Warband. Like a true duardin, he only has a Move characteristic of 3″, but he has 4 attacks with Strength 4 for a 2/4 damage.
Abilities for the Spire Tyrants Warband
- Pit Fighter (Double, everyone): If a fighter has taken down an enemy fighter in the same activation, perform a bonus move or attack action.
- Gladiator’s Net (Double, Pit Fighter with Net): On a 3+ an enemy within 3″ cannot move or disengage for the rest of the battle round.
- Shield Ram (Double, Pit Veteran with Shield): At the end of the next move action allocate up to 6 damage to an engaged enemy fighter.
- Readied Stance (Triple, Frenzied Rager, Pit Veteran with Dual Weapons, Pit Veteran with Shield): Add up to 3 to this fighter’s Toughness for the rest of the battle round.
- Champion of the Warpits (Triple, Pit Champion): After taking down an enemy, add +1 to the melee attacks of friendly fighters within 6″.
- Brutal Strike (Quad, Headclaimer and Bestigor Destroyer): A good chance to allocate 8 damage to an engaged enemy.
Reaction for the Spire Tyrants Warband
Gladiatorial Display (Everyone)
- When: During an enemy melee attack action but before hit rolls.
- What: Allocate 4 damage to the attacking fighter if it does not score any critical hit.
Battle Trait for the Spire Tyrants Warband
Entertain Me!: Once per round a friendly fighter can challenge to a duel an engaged enemy. Until the end of the round their value of Strength will be the same as the Toughness of the challenged opponent.
Pros and Cons of the Spire Tyrants Warband
Pros:
+ good synergies between fighters and abilities
+ average to good Toughness and Strength values
+ Many options for extra attack actions or allocation of damage points from abilities
Cons:
– doesn’t excel at any one statistic (speed, number of attacks, wounds etc)
– not an easy warband to master for beginners
– very dependent on combos, with the best abilities locked behind actions that take enemy fighters out of action (which can be hard against very though warbands)
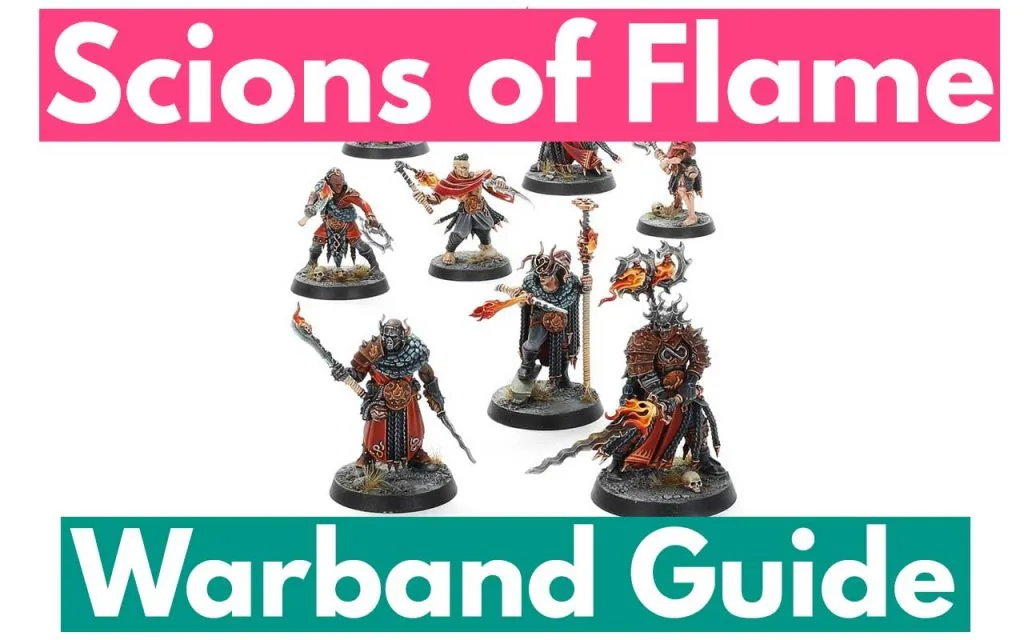
Scions of Flame
The Scions of Flame are the last Chaos warband representing one aspect of the Mortal Realms. This time it is Aqshy, the Realm of Fire. They were first released in the Warcry: Catacombs box set and then separately.
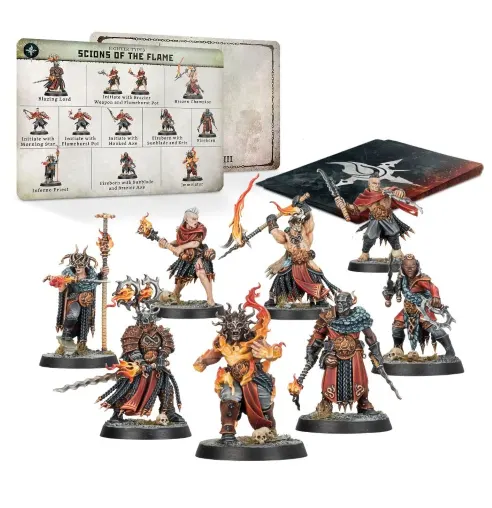
They have 11 fighters of which 1 is a leader.

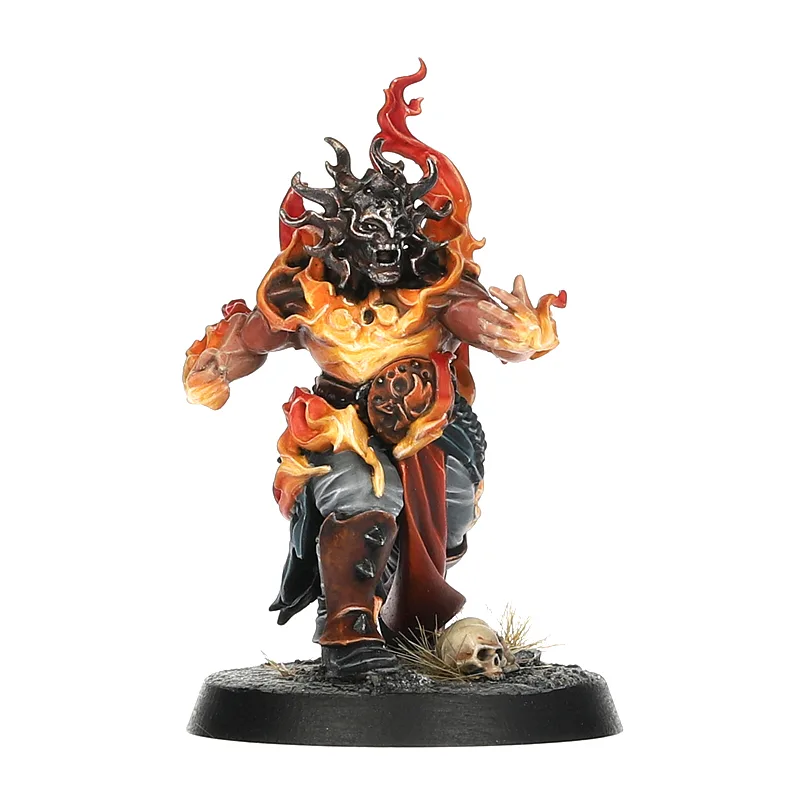
The Leader of the Scions of the Flame warband, the Blazing Lord, is a very good close combat leader for his point cost. His defensive stats are nothing to brag about (20 Wounds and a Toughness of 5), but his attacks are great: he has 4 of them, they have a critical damage of 6, and his attacks have a Range of 2″. He has access to various abilities including Ignited Fervour, which gives 1 extra Attack to every friendly fighter while they are around him.
The Brazen Champion is a specialist fighter in the Scions of the Flame warband, and his speciality is more or less being the melee part of what the Blazing Lord does. He has a similar defensive profile, one less Attack, the same critical damage, but one more point in normal damage, to a total of 3 normal damage.
The Inferno Priest can best be described as the sorcerer of the Scions of the Flame. She has a 5″ range firebolt attack with two attacks and 4 critical damage, as well as a 2″ range melee attack with the same damage profile, but her most important contribution to the warband is her access to the Quad ability Engulf in Flames. This ability has the potential to do an insanely high amount of damage as long as you keep rolling 6s…
Like the Inferno Priest, the Immolator is a kind of human explosive. He has the 5″ Move that makes him the fastest fighter in the warband and 18 Wounds, making him more suited to getting into melee combat than the Inferno Priest. His melee attack has 4 attacks and a good critical damage of 5, and his unique ability, Inferno, allows him to do some area damage (3″) but nothing too spectacular.
The Fireborn is a mid-tier fighter type , and it comes in three versions.
- The standard Fireborn has 12 Wounds, 4″ Move, and a good melee profile with 4 attacks and a critical damage of 4. He has the ability Throw Fire Bomb that can do some ranged damage.
- The Sunblade and Kris can’t throw firebombs, but has a critical damage of 5, which is impressive for a fighter with that cost. It sacrifices one point of Strength to get this damage profile, but that doesn’t matter if you’re going for critical hits.
- The Sunblade and Brazier Axe has exactly the same statistics as the standard Fireborn, but without the ability to throw firebombs, which makes it a worse choice than the other two.
The Initiates are the basic fighters of the Scions of the Flame. They have a low Toughness of 3 and 2 wounds less than a Fireborn (10). They have different profiles:
- The Brazier Weapon and Flameburst Pot has a fairly weak damage profile with 3 Attacks and a critical damage of 4, but also access to the Throw Firebomb ability.
- The Hooked Axe trades number of attacks (4) for Strength (3) compared to the one above, making him more likely to score that critical hit for 4 damage. It does lose the Throw Firebomb ability, however.
- The Flameburst Pot is identical to the Brazier Weapon but with 1 attack less for a cheaper profile.
- The Morning Star has the coveted 3″ range melee attack, that means he does what a spear attack does (being able to attack in melee without fear of retaliation from 1″ range attack weapons), but better!
Abilities for the Scions of the Flame Warband
- Fiery Might (Double, Everyone): Up to +3 Strength for melee attack actions.
- Beheading Strike (Double, Brazen Champion and Blazing Lord): Add up to +3 damage on critical hit for the next melee attack action.
- Throw Firebomb (Double, Initiate with Flameburst Pot, Initiate with Brazier Weapon and Fireborn): A chance to do up to 12 damage to to an enemy within 6″ depending on 2 dice roll and the ability’s value.
- Inferno (Triple, Immolator): A chance to do up to 6 damage to all enemies close-by.
- Ignited Fervour (Triple, Blazing Lord): Add 1 to the Attacks characteristic of melee attack actions of friendly fighters close-by.
- Engulf in Flames (Quad, Inferno Priest): A chance to do an incredibly high number of wounds to an enemy close-by.
Reaction for the Scions of the Flame Warband
Blaze of Fury (Everyone)
- When: During an enemy melee attack action but before hit rolls.
- What: 1 damage to the attacking fighter for each hit or 2 for each critical hit.
Battle Trait for the Scions of the Flame Warband
Seared Wounds: Enemy fighters heal 1 wound less per healing action.
Pros and Cons of the Scions of the Flame
Pros:
+ great variety of damage-dealing abilities
+ many attacks and good critical damage
+ Strong melee leader who can buff the attacks of other fighters
+ 3 Champions with unique abilities and good damage output
+ Long range melee attacks on a lot of fighters
Cons:
– average speed and survivability
– lacks movement abilities
– the only ability all fighters can use is not very useful
– some redundant build options in the kit
Guide for the Scions of Flame.
Beasts of Chaos
Beasts of Chaos is one of the legacy warbands from the Chaos Grand Alliance, you can play almost all miniatures from that range. The Beasts of Chaos represent different races of anthropomorphic animals and monsters united in their hatred against civilization.
They have 26 fighters of which 12 are leaders.
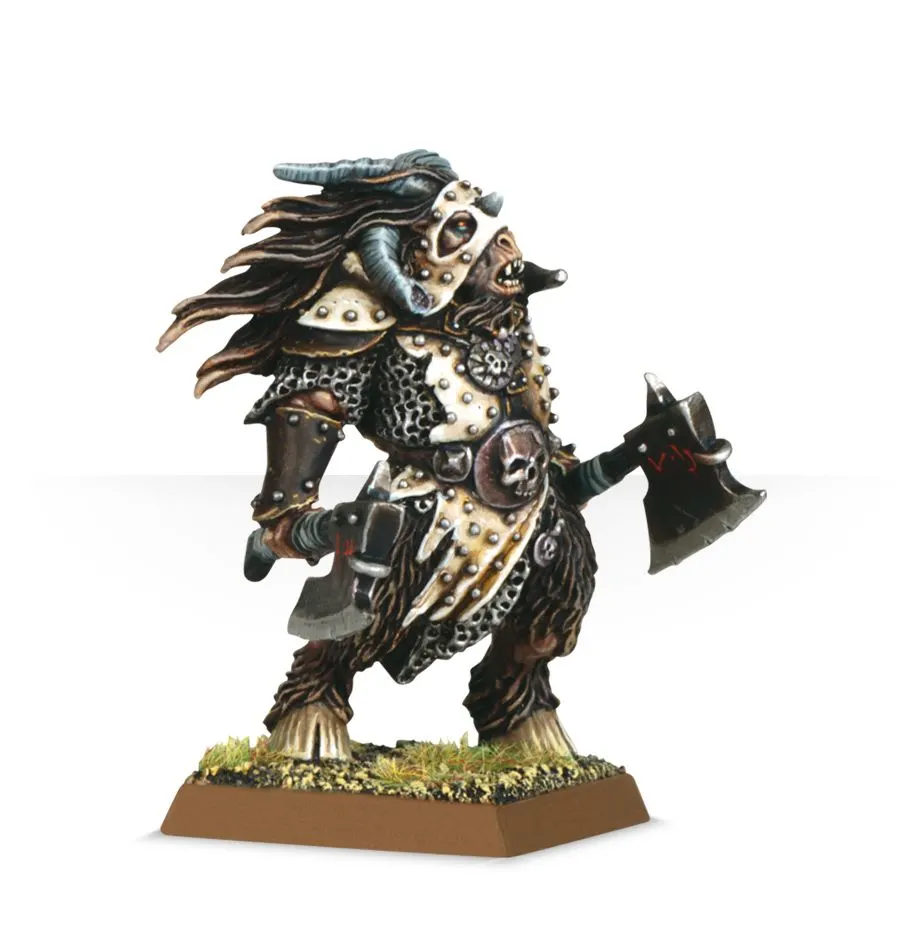
The Beastlord is one of the leader option, a slightly more buffed Gor Foe-Render. He has its own Leader ability, Grisly Trophy that can be activated in the same activation he takes an enemy fighter out of action. adding 1 to the melee attacks of friendly fighters surrounding him.
The Great Bray-Shaman‘s unique Double ability, Devolve, lets you move an enemy fighter closer to your Bray-Shaman, so if the shaman is standing next to your melee Leader or a pack of hard-hitting friendly fighters, this is a cheap way to single out a target you want to take down without getting too many enemy fighters drawn into the melee. He also has a good medium Range attack with a critical damage of 6, which gives him something to do while staying safe behind your battleline.
The Gors are cheap fighters and have different weapon loadouts:
- The paired Gor-Blades has 3 weak melee attacks and only 3 Toughness, but it does have a nice 5″ move and 10 wounds, which isn’t bad for its points cost.
- The Gor-Blade and Beastshield has an added point in Toughness and one less melee attack. It is definitely better at surviving than the other Gor, but since the game is generally skewed towards critical damage (which ignores Toughness), it’s not a great upgrade.
- The Foe-Render is the Gor Leader, and he is a buffed-up version of the Gor with paired Gor-Blades. He has access to the Leader Ability Rip, Gore and Tear! which gives him a bonus move or attack action after killing an enemy fighter once during an activation.
There are two types of Ungors, those focussed on melee are divided in:
- The basic Ungor with Ungor Blade and Half-Shield is a weaker version of the shield-carrying Gor with less wounds for a cheaper price if you are short in points.
- The Leader, the Halfhorn, which has the Leader ability, more wounds and a better attack, but which doesn’t really bring anything interesting to the table.
- The one with Gnarled Shortspear and Half-Shield is a much better use of the Ungor kit with a nice 2″ range spear attack with a critical damage of 4, and a Toughness of 4 as well.
The Ungor Raider and its Leader version, the Ungor Raider Halfhorn, together with the Great Bray-Shaman, are the only fighters in the Beasts of Chaos warband with a Ranged attack profile. The basic fighter’s melee attack is as good as the one on a basic Ungor, but it also has 2 3″-15″ range attacks. The Raider Halfhorn has same wounds and melee profile as the Ungor Halfhorn, in addition to the same ranged attack of the Raiders and the Leader ability which can give you an extra move or attack action.
The basic Bestigor has three Strength-4 2/4 damage attacks and 12 wounds. It also has access to the Triple ability Bestial Charge, that damages opponents after it completes a Move action. The Bestigor Leader, the Gouge-Horn, has more wounds than the basic version, 1 extra attack and a critical damage of 5. This combined with the Bestial Charge ability and the Leader ability makes the Bestigor Leader another strong contender for your choice of warband leader.
The Dragon Ogors are massive elite units with a Move of 6″, 30 Wounds and 4 Toughness. They top that with an ability to damage an opponent from a considerable distance. They have three weapon profiles:
- Paired Ancient Weapons with a whopping 5 Strength-4 attacks – if you are close enough to attack twice, that’s a lot of chances for hitting its critical damage of 4!
- Draconic War-Glaive‘s specialty is its 2″ range attack, which just increases its survivability even more.
- Draconic Crusher has 3 attacks with a very good critical damage of 6.
The Dragon Ogor Shaggoth is a separate fighter but his stats are really similar to the Dragon Ogor with Draconic Crusher. What he adds to the fray is his ability to heal all other Dragon Ogors around him and of course that he is a leader allowing you to field an entire Dragon Ogor warband if you so wish.
The Bullgors are another elite unit with the ability to heal themselves after taking down an enemy (Bloodgorge). There are 3 different types each with their own Leader version:
- The Bullgor with Bullgor Axes has 30 wounds, 4 Toughness and 4 Strength-5 attacks.
- The Leader version, the Bloodkine with Paired Bullgor Axes, has 5 more wounds, an extra attack and an extra point of critical damage, but an excessive cost compared to its utility and other leaders.
- The Bullgor with Bullgor Great Axe has the same base stats and ability as its dual-wielding brother, but it has 3 melee attacks with a critical damage of 6, which is really good. If you can get it into a situation where it can attack twice, you have a shot at doing good damage. Its leader version, the Bloodkine with Bullgor Great Axe is also really good with 3 of those attacks, but with a critical damage of 8.
- The Bullgor with Bullgor Axe and Bullshield loses attacks (3) to add in Toughness (5) compared to the Paired Bullgor Axes version. Same for its leader version, the Bloodkine with Bullgor Axe and Bullshield that has 2 attacks less than a Bloodkine with Paired Bullgor Axes (3).
The Doombull is similar to the Bloodkine with Bullgor Great Axe, with just one more Attacks and three more Wounds for a much higher cost. It is a nice upgrade if you have the points to spare.
The Centigor, and its Leader version, the Gorehoof, add mobility to the warband with an excellent 10″ Move. But that’s it…
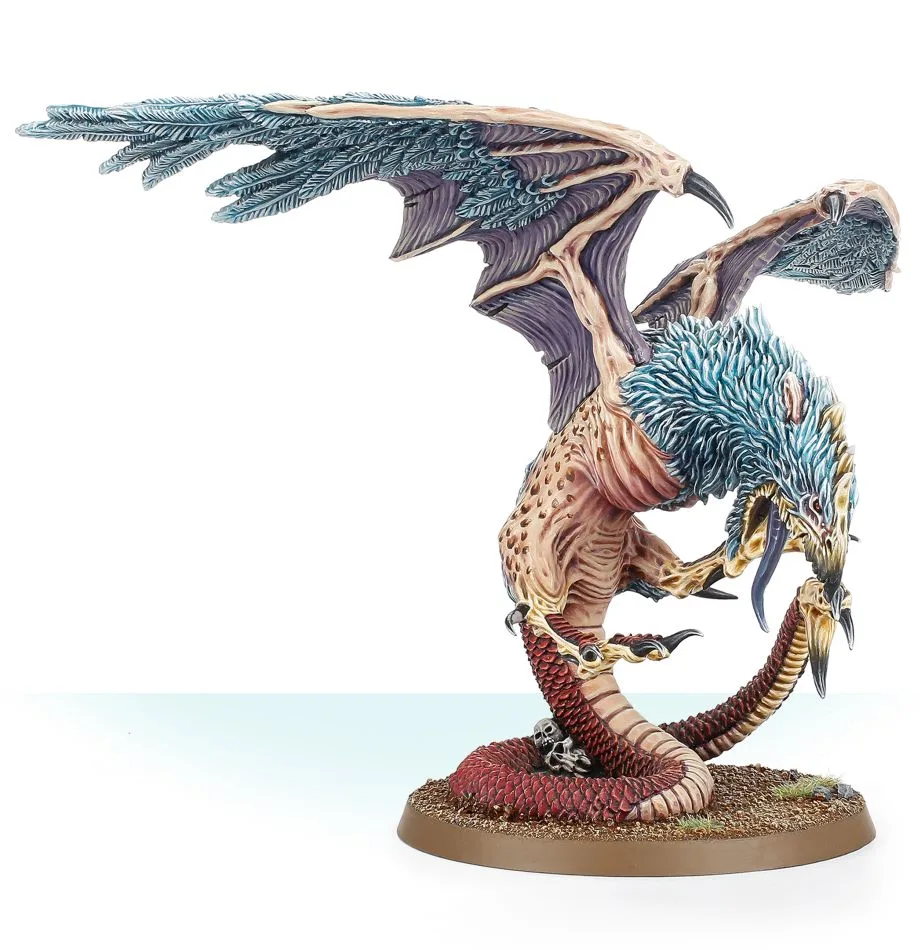
The Cockatrice is a a strong Flying creature with 30 wounds and a powerful melee attack. It also has access to Triple ability Petrifying Gaze, which lets you do damage to an enemy based on a dice roll, and then subtract 1 from their Move statistic.
Abilities for the Beasts of Chaos Warband
- Brayherd Ambush (Double, Everyone): Make a bonus move action up to 6″ but only on the first round.
- Bloodgorge (Double, Doombull and all Bullgors): Heal up to 6 wounds after taking down an enemy.
- Rip, Gore and Tear! (Double, all Leaders): Make a bonus move or attack action after killing an enemy fighter.
- Devolve (Double, Great Bray-Shaman): Move an enemy fighter towards the Great Bray-Shaman.
- Petrifying Gaze (Triple, Cockatrices): Up to 6 damage and a -1″ Move penalty on a fighter within 8″.
- Bestial Charge (Triple, all Bestigors): At the end of the next move action allocate up to 6 damage to an engaged enemy fighter.
- Volley of Arrows (Triple, all Ungor Raiders): Add up to 3 more missile attacks to the next action.
- Bring Down the Storm (Triple, Dragon Ogors): Up to 6 damage to an enemy within 20″.
- Grisly Trophy (Triple, Beastlord): After taking down an enemy, add +1 to melee attacks to all friendly fighters in range.
- Empowering Lightning (Quad, Dragon Ogor Shaggoth): Heal all Dragon Ogors in an area around the Dragon Ogor Shaggoth.
Reaction for the Beasts of Chaos Warband
Brute Resilience (Everyone)
- When: During an enemy melee attack action but before hit rolls.
- What: Subtract 1 damage received (to a minimum of 1) for each hit.
Battle Traits for Beasts of Chaos Warband
Beastman Ambush: After deployment, you can pick a fighter from each deployment group to set in reserve and deploy again one at a time in turn 2, 3 and 4 from the battlefield edge.

Pros and Cons of the Beasts of Chaos Warband
Pros:
+ Many options for fielding both elite and horde warbands
+ Fast warband with access to both high damage and ranged damage
+ Good Double abilities
+ Some of the new Leaders improve synergies in the warband
Cons:
– Some redundancy among fighter types
– Many sculpts are old and dated finecast resin
Khorne Bloodbound
Khorne Bloodbound is one of the legacy warbands from the Chaos Grand Alliance, in particular the mortal side of Khorne followers. You can play almost all miniatures from that range (the others are available through the Khorne Daemons warband).
Khorne is one of the four Chaos Gods, the one most dedicated to violence: he does not care from whence the blood flows, only that it flows. His mortal followers take this philosophy really seriously, as failure means their skull adorning someone else’s belt.
They have 26 fighters of which 15 are leaders.
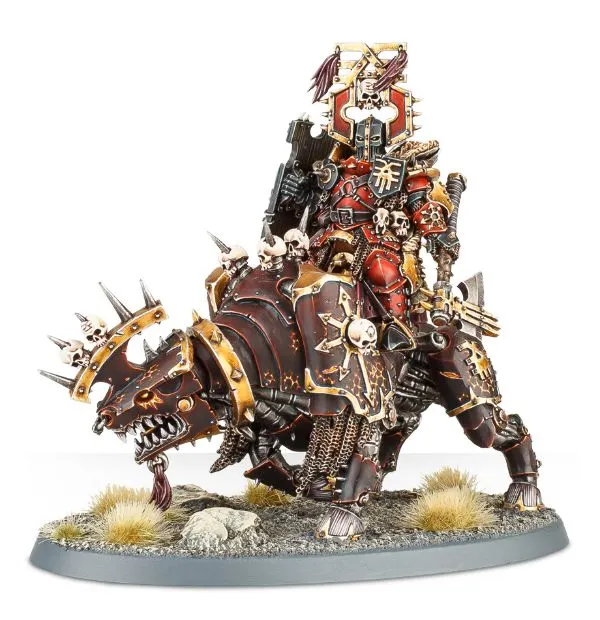
The Mighty Lords of Khorne come in two versions: on foot and riding a Juggernaut. Interestingly, despite being the maximum level a Khorne mortal can achieve before demonhood, their special abilities involve their loyal companions instead: Flesh Hound’s Blood-dark Claws represent the attacks of the little dog next to the version on foot, while Murderous Charge represents the impact of the Juggernaut at the end of a move action.
Here follows a list of heroes with no special abilities:
- The Aspiring Deathbringer has 4 attacks at Strength 4 for 2/4 damage and Toughness 5, comparable to a Mighty Lord.
- The Exalted Deathbringer with Impaling Spear drops 1 Attack (3) for 2″ range and much more damage (3/6) but lower Toughness (4).
- The Exalted Deathbringer with Ruinous Axe gets back the Attack lost (4) but loses the 2″ range and 1 damage on critical hit (3/5).
- The Skullgrinder costs a fortune with his Strength 5 but has only 2 Attacks for 3/6 damage. Toughness 5 and 2″ range guarantee longevity, but seems a bit overpriced for that amount of attacks.
The Slaughterpriests have access to two special abilities. Bloodbind forces an enemy to move towards the them, useful to displace an opponent, while Bloodboil instead allows for area damage. The Slaughterpriest with Bloodbathed Axe has 3 attacks, Wounds 4 and 3/5 damage but 2″ range, while the Slaughterpriest with Wrath-hammer and Hackblade has also a profile with 3″ range.
The icon bearer of Khorne, the Bloodescrator has access to Rage of Khorne, that is an upgraded Lord of Skulls ability adding +1 to melee attacks of all friendly fighters within 16″ range.
The Bloodstoker is used mostly to poke a Khorgorath within 4″ for a bonus attack.
The Mightly Skullcrushers are Khorne heavy cavalry and come with 6″ Movement but Toughness 6 that will make extremely hard putting down these literal Juggernauts. Their special ability is Murderous Charge that does damage on impact at the end of their movement. There’s three flavours: the Skullhunter that is the unit champion working as a leader, and those armed with Ensorcelled Axe or with Bloodglaive, where the axe is the one statistically better.
The Wrathmongers are tough elite warriors with lots of attacks, the Wrathmaster being their leader option. They have access to Blood-fuelled Attack, allowing them for bonus movement and bonus attack with spiced up Strength.
Skullreapers are cheaper than Wrathmongers but share a similar profile: 20 wounds (25 for the leader), Movement and Toughness 4, 4 attacks at Strength 4 for 2/4 damage. The Skullseeker is the Leader option.
The Blood Warriors have different weapon profiles, but they all share Movement 4”, Toughness 4 and 15 Wounds (20 for the Champion):
- The base weapon is Goreaxe and Gorefist: 3 attacks at Strength 4 for 2/4 damage.
- Same profile shared by the Chaos Champion, the Leader option (although with 1 attack more).
- The Goreglaive adds more Strength (5) damage on a critical (2/5).
- A pair of Goreaxes increase the number of attacks (4 instead of 3).
The Bloodreavers are the cheapest fighters in the warband, including the leader, the Chieftain and it shows in a weaker profile with less wounds and Toughness 3. They compensate with greater mobility (5”) and a decent number of attacks for the point cost: 4 attacks at Strength 3 for the Reaver Blades or 3 attacks at Strength 4 for the Meatripper Axe.
The Khorgorath is a highly priced fighter with 30 wounds, Toughness 4 and Movement 4”. He does not excel in defence, but rather in attack: 3 attacks at Strength 5 for 4/8 damage. He can also get a bonus attack if a Bloodstoker “whip him to frenzy”.
The Flesh Hounds are the only unit available in both Khorne Daemons and mortals, apart from that they distinguish themselves for their 8″ movement.

Abilities for the Khorne Bloodbound Warcry Warband
- Blood for the Blood God (Double, Everyone): If a fighter takes down an enemy in the same activation, it can make a bonus move or bonus attack.
- Gorefist (Double, Chaos Champion or Blood Warrior with Gorefist): Pick an enemy unit within 1” and roll a dice: on a 3+ do 3 damage.
- Lashing Bone Tentacles (Double, Khorgorath): Pick an enemy unit within 6” and roll 2 dice: for each 4-5 do 1 damage, for each 6 as much damage as the value of the ability.
- Whipped to Fury (Double, Bloodstoker): Pick 1 Khorgorath within 4″ and make it perform a bonus attack.
- Flesh Hound’s Blood-dark Claws (Double, Mighty Lord of Khorne): Allocate a random amount of damage to an engaged enemy.
- Bloodbind (Double, all Slaughterpriests): Pick an enemy fighter within 8″ and move him towards you up to 6″ as if they were jumping.
- Lord of Skulls (Triple, all Leaders): If a leader takes down an enemy this activation, add 1 to the melee Attacks of all friendly fighters within 6”.
- Daemon-forged Weapons (Triple, all Skullreapers): Until the end of the battle round, add up to 6 to the damage characteristic on critical hits for melee weapons.
- Murderous Charge (Triple, all Mighty Skullcrushers and the Mighty Lord on Juggernaut): At the end of the next move action allocate up to 6 damage to an engaged enemy fighter.
- Bloodboil (Triple, all Slaughterpriests): Pick an enemy fighter within 8″ and allocate a random amount of damage depending on the value of the ability and dice rolls.
- Blood-fuelled Assault (Quad, all Wrathmongers): This fighter does a bonus move and then they can make a bonus attack. In addition, add up to 3 to the Strength of melee weapons.
- Rage of Khorne (Quad, Bloodsecrator): Add 1 to the melee Attacks of all friendly fighters within 8″.
Reaction for the Khorne Bloodbound Warband
Khorne’s Due (Everyone)
- When: During an enemy melee attack action but before hit rolls.
- What: 2 damage to the attacking fighter for each miss and 1 more to the defending fighter for each critical hit.
Battle Trait for the Khorne Bloodbound Warband
No Respite Before removing a slain fighter, on a 4+ allocate D3 damage to an enemy fighter within 1″.

Pros and Cons of the Khorne Bloodbound
Pros:
+ Many attacks
+ High wounds
+ Balanced units
Cons:
– No ranged option

Khorne Daemons
Daemons of Khorne is one of the legacy warbands from the Chaos Grand Alliance, in particular the daemonic side of Khorne followers. You can play almost all miniatures from that range (the others are available through the Khorne Bloodbound warband).
Khorne is one of the four Chaos Gods, the one most dedicated to violence and his daemons represent just that: they can appear anywhere violence and bloodshed is so diffused that reality splits and allows the Blood Legions to invade.
They have 8 fighters of which 4 are leaders.
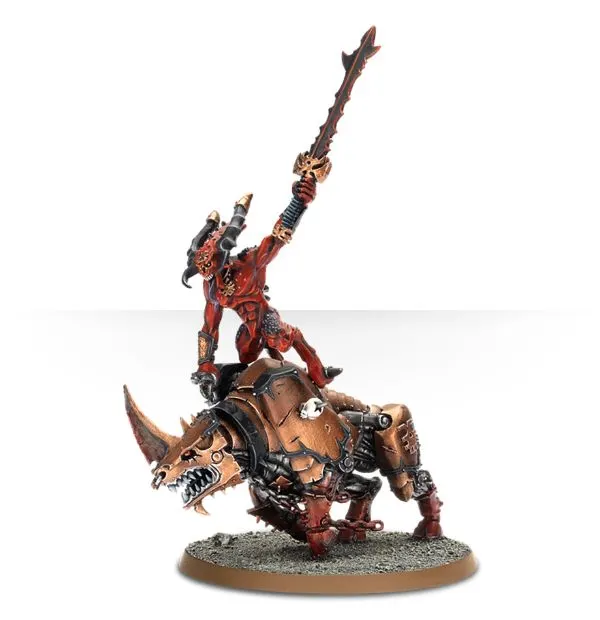
The Heralds of Khorne are the strongest Bloodletters chosen for their ferocity and leading by example. The Skullmaster charges in battle atop a Juggernaut with his ability to do damage on impact at the end of a movement (Murderous Charge).
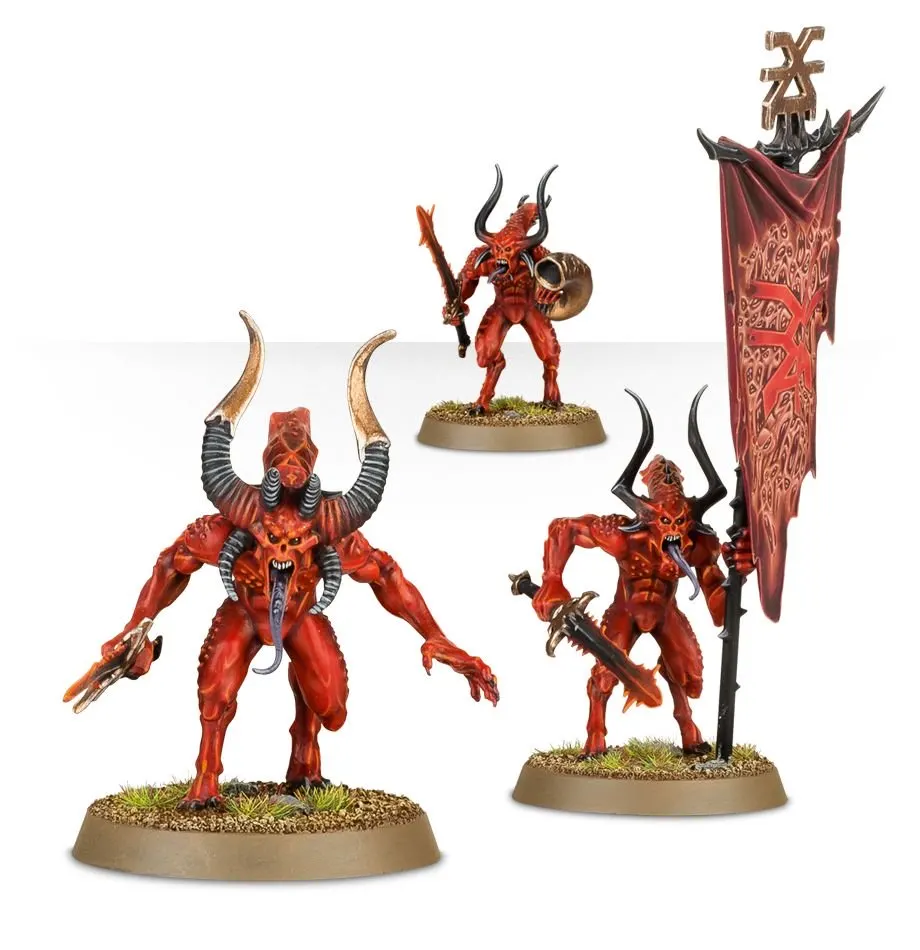
The Bloodcrushers are the heavy infantry of Khorne Daemons with decent Movement (6”) and resilience (25 Wounds, 30 for the champion and Toughness 4). Khorne Daemons have similar weapon profiles, making it easier to remember: Bloodcrushers have 4 attacks (5 for the champion) at Strength 4 for 2/4 damage (2/5). The unit champion, the Bloodhunter, is also a leader, a bit less pumped than a Skullmaster.
The Flesh Hounds are the real Khorne cavalry with a Movement of 8” and the ability to get in the fray even faster thanks to the ability Hungry for Flesh. They have a weapon profile similar to a Bloodcrusher. The Gore Hound is not a leader but with Burning Roar can do some ranged damage.
As the Skullmaster represents the Bloodcrushers, the Bloodmaster represents the Bloodletters, sharing a similar profile to the Bloodreaper and the same Decapitating Strike ability: add up to 3 to the damage on critical hits of the next melee attack.
The Bloodletters are the cheap infantry of Khorne Daemons, on the squishy side (10 wounds with Toughness 3) but quite cheap considering the amount of attacks (4 at Strength 4 for 1/4 damage). The leader, the Bloodreaper, costs almost the double for a bit more wounds and a weapon profile more in line with the other leaders (5 attacks at Strength 4 for 2/4 damage).
Abilities for the Khorne Daemons Warcry Warband
- Blood for the Blood God (Double, Everyone): If a fighter takes down an enemy in the same activation, it can make a bonus move or bonus attack.
- Decapitating Strike (Double, all Bloodletters and the Bloodmaster): Add up to 3 to the damage on critical hits for melee attacks.
- Hungry for Flesh (Double, all Flesh Hounds): Can be used only if there’s at least an enemy within 6”, then this fighter can make a bonus move towards the closest enemy.
- Locus of Fury (Triple, all Leaders): If a leader takes down an enemy this activation, add 1 to the melee Attacks of all friendly visible fighters within 6” of the leader.
- Murderous Charge (Triple, all Bloodcrushers and the Skullmaster): At the end of the next move action allocate up to 6 damage to an engaged enemy fighter.
- Burning Roar (Quad, Gore Hound): Roll up to 6 dice, for each 2+ allocate 2 damage to a single visible enemy within 8”.
Reaction for the Khorne Daemons Warband
Khorne’s Due (Everyone)
- When: During an enemy melee attack action but before hit rolls.
- What: 2 damage to the attacking fighter for each miss and 1 more to the defending fighter for each critical hit on melee.
Battle Trait for the Khorne Daemons Warband
Blood Calls To Blood: At the end of each battle round, roll 2D6 and on a 8+ allocate 3 damage to a single injured enemy fighter.

Pros and Cons of the Khorne Daemons
Pros:
+ Many attacks
+ Balanced units
Cons:
– No ranged units
– Not a lot of options
Nurgle Daemons
Daemons of Nurgle is one of the legacy warbands from the Chaos Grand Alliance, in particular the daemonic side of Nurgle followers. You can play almost all miniatures from that range (the others are available through the Nurgle Rotbringers warband).
Nurgle is the most jovial of the Chaos Gods, always eager to spread his “gifts” to the entire world. And his daemons reflect this side, gathering in Befouled Bands, happy to fester any corner of the realms and distribute the dubious boons under form of diseases and pestilence.
They have 9 fighters of which 5 are leaders.

The Poxbringer is now much cheaper, despite being the only ranged option in the warband with 2 Attacks that can reach 7″ for 3/6 damage. He is the only leader without special abilities.
The Spoilpox Scrivener has the highest strength in the Befouled (5) but only 2 Attacks (for 3/5 damage). He has however access to many abilities, including Menacing Overseer that increases the number of Attacks for friendly fighters nearby. If you have two leaders (or two activations), you can combine it with Grandfather’s Blessing to add +1 Strength as well.
Sloppity Bilepiper is the fastest leader (only behind the Plague Drones and Nurglings) with 4″ Movement. His special ability however solves the other problem of the warband outside of Strength: Movement! For a Double he can increase of 1″ the Movement of all friendly fighters nearby.
The Plague Drones are the fastest unit in this warband with 6” flying Movement that allows them to reach corners otherwise difficult. High wounds and Toughness (4) will allow them to resist most attacks and, on the other hand, dish out some of their own. The unit champion, the Plaguebringer, is a leader.
The Plaguebearers are cheap units, including the cheapest leader of this warband, the Plagueridden, to be used as sacrificial pawns. Despite this they still have a decent profile but what distinguishes them is their trademark ability: Cloud of Flies. This ability reduces by 1 the number of attacks that targets them.
The Beast of Nurgle is the elite unit of this warband. It is now a Beast (meaning they cannot open doors), with a “bestial” profile: 30 wounds, Movement 4”, Toughness 4, 4 attacks at Strength 4 for 2/4 damage.
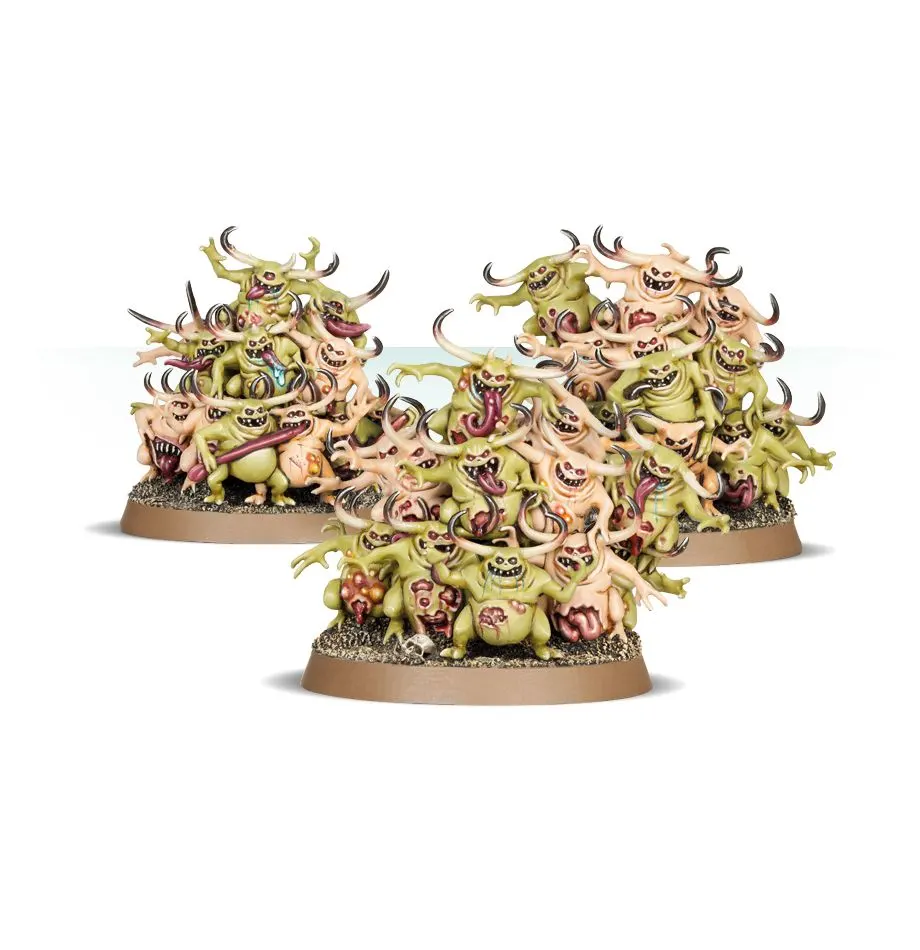
The Nurglings are an interesting fighter, or to better put it, a swarm of mini fighters. With 20 Wounds but Toughness 3, they can take some punches before being knocked out, but then, for a Quad, you can heal them as much as 12 wounds in a single round.
Abilities for Nurgle Daemons
- Disgustingly Resilient (Double, Everyone): Roll up to 6 dice and for every 3+ remove an allocated wound to this fighter.
- Acidic Slime Trail (Double, Beast of Nurgle): Disengage from an enemy and allocate up to 6 damage to him.
- Venomous Sting (Double, all Plague Drones): Pick a visible enemy fighter within 1” and roll a die: on a 2+ that unit cannot make move or disengage actions until the end of the battle round.
- Jolly Gutpipes (Double, Sloppity Bilepiper): Add 1″ to the Move of friendly fighters starting within range.
- Cloud of Flies (Triple, all Plaguebearers): Subtract 1 from the Attacks characteristic (to a minimum of 1) for attacks that target this fighter.
- Grandfather’s Blessing (Triple, all Leaders): Add 1 to the Strength characteristic of melee weapons for all friendly fighters within range.
- Disgusting Sneeze (Triple, Spoilpox Scrivener): Up to 6 damage to a single enemy fighter within 7″.
- Endless Swarm (Quad, Nurglings): Remove up to 12 wounds from this fighter.
- Menacing Overseer (Quad, Spoilpox Scrivener): Add 1 to the Attack characteristic of melee weapons for all friendly fighters within range.
Reaction for the Nurgle Daemons Warband
Impossible to Wound (Everyone)
- When: During an enemy melee attack action but before hit rolls.
- What: 1 damage less (to a minimum of 1) from each successful hit.
Battle Trait for the Nurgle Daemons Warband
Infection Vectors: At the start of the battle round, for each enemy fighter engaged, on a 5+ allocate them 1 damage. Does not work with other Maggotkin of Nurgle fighters.

Pros and cons of Nurgle Daemons
+ Well balanced warband
– No ranged options

Nurgle Rotbringers
Nurgle Rotbringers is one of the legacy warbands from the Chaos Grand Alliance, in particular the mortal side of Nurgle followers. You can play almost all miniatures from that range (the others are available through the Nurgle Daemons warband).
Nurgle is the most jovial of the Chaos Gods and the Rotbringers are those mortals that embraced his diseases as boons from a benevolent God and are eager to spread further their pestilence.
They have 12 fighters of which 7 are leaders.
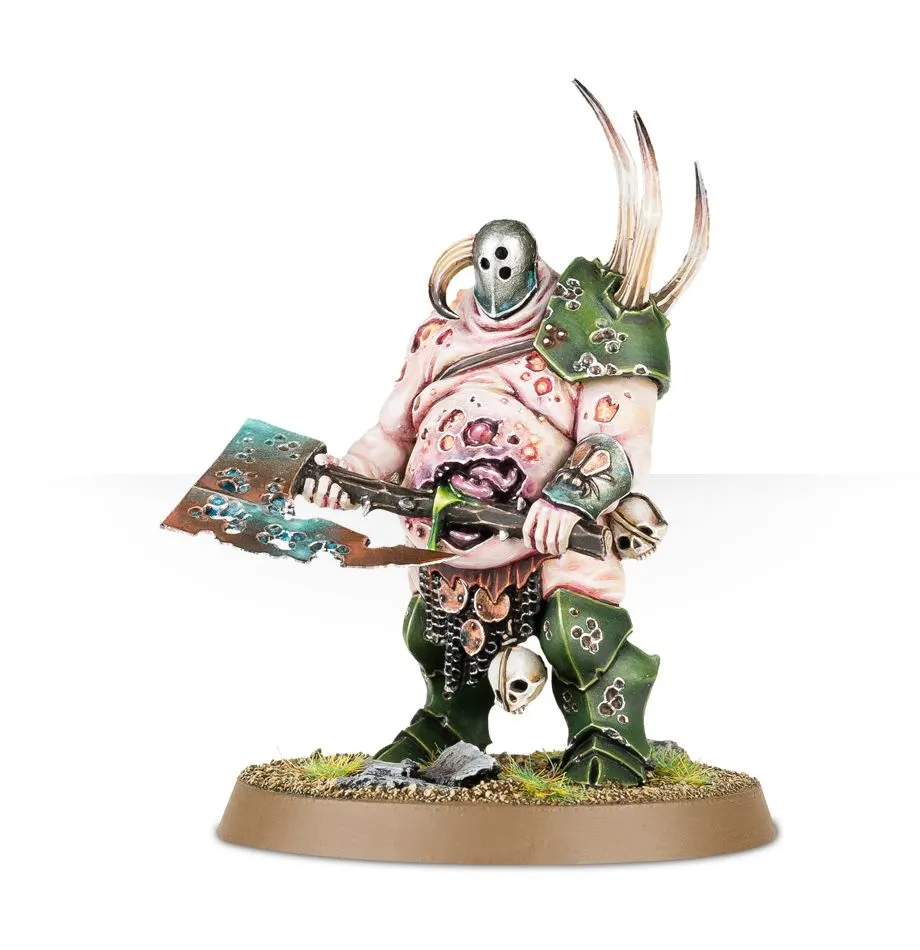
The Lord of Plagues is the heavy hitter of the warband with Strength 5 and 3/5 damage. 32 Wounds and Toughness 4 guarantee him some longevity too. He does not have special abilities however and does cost a fifth of the warband.
The Lord of Blight loses 1 in Strength (4) and damage on normal hit (2/5) compared to the Lord of Plagues, but adds Toughness (5) and the special Double Thrice-ripened Death’s Hand for a chance of some random damage.
The Rotbringer Sorcerer excels in debuffs with the ability to damage AND reduce the Toughness of enemy fighters down to 1. In addition he is the only fighter in the warband with a ranged attack profile (up to 7″ range for 3/6 damage).
The Harbinger of Decay is another debuffer. For a Triple he can make a bonus attack and if he scores a critical (on 4 Attacks) he then has a 50% chance to reduce permanently the opponent movement by 1″ for each success. The Harbinger of Decay with Doom Bell has less attacks and Strength (both 3) and his ability for a Quad prevents the use of abilities and reactions within 7″ from him. A good ability if you get a Quad at the right time, but not an exciting profile otherwise.
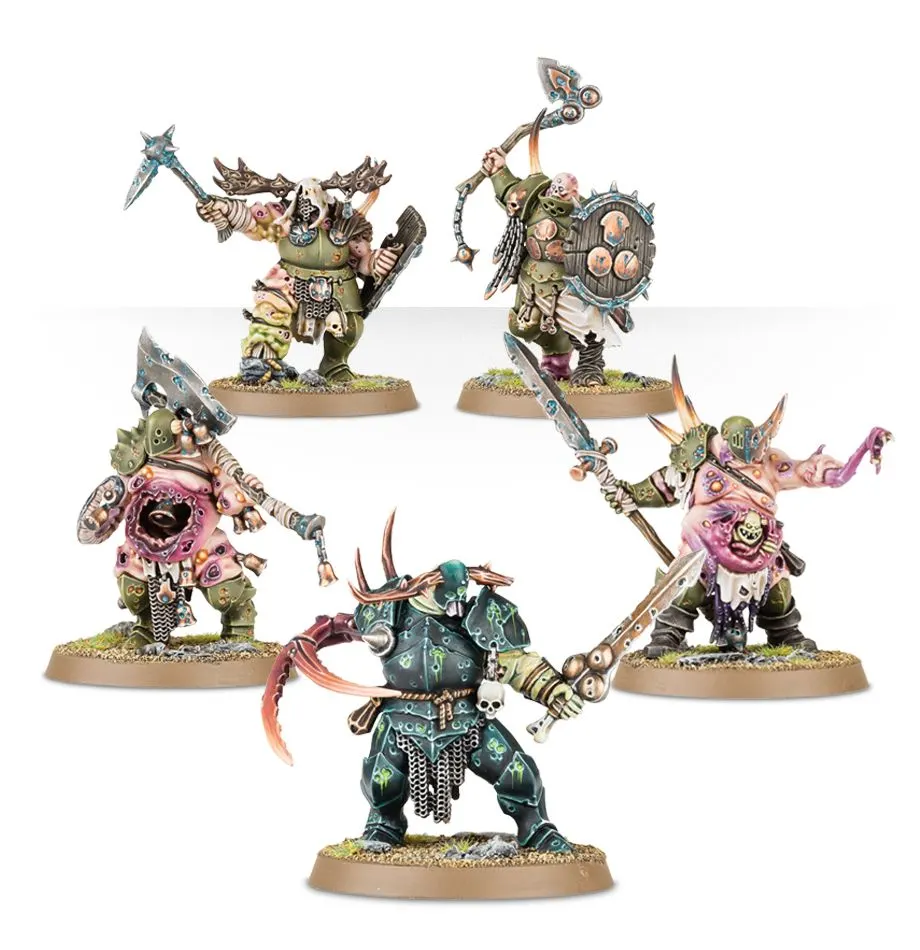
The Putrid Blightkings represent most of your army: slow but resilient with 3” movement, Toughness 4 and 25 wounds (30 for the leader). They have similar weapon profiles but at least two have a special ability that differentiates it from the others.
- The Putrid Blightlord is the Leader version, has 4 attacks at Strength 4 for 2/5 damage that makes him a hard nut to crack with a punch back.
- The Sonorous Tocsin has 2” range attacks and an ability that adds Movement to friendly fighters.
- The Icon Bearer instead adds Toughness to all friendly fighters in range.
- The one with Blighted Weapon has the same weapon profile of the Icon Bearer and no special ability
- The one with Filth-encrusted Shield loses one Attack compared to the Icon Bearer, but increases the Toughness to 5.
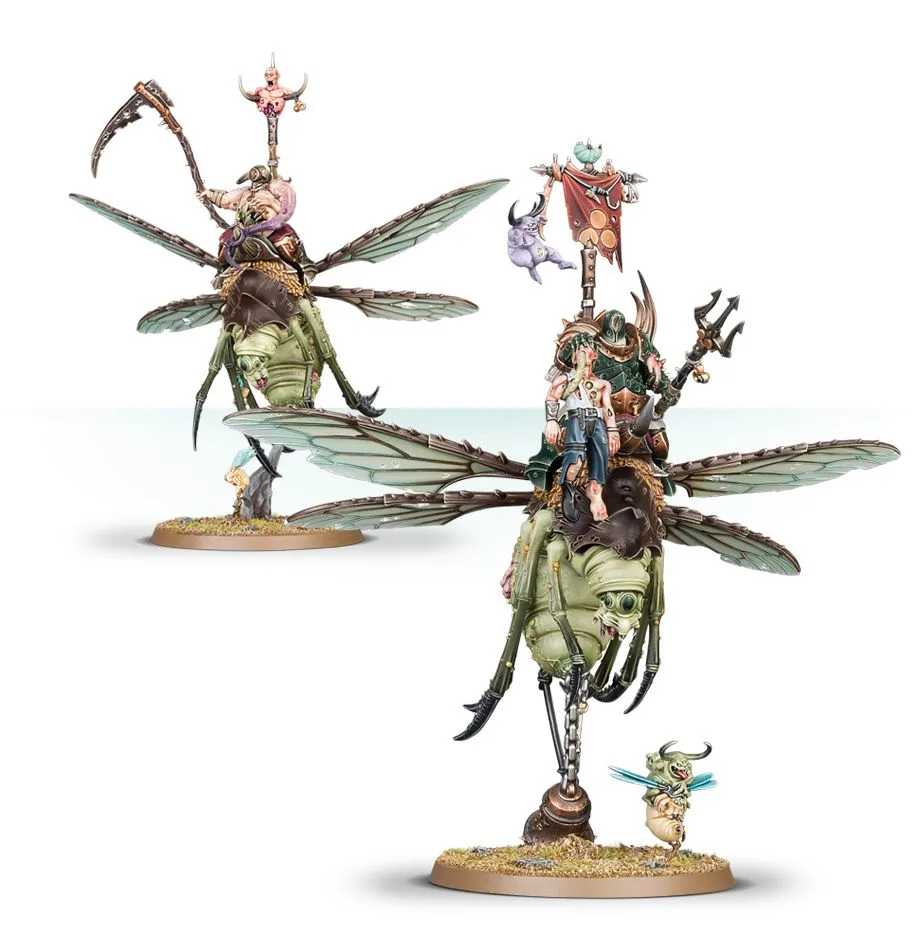
The Pusgoyle Blithglords represent the winged side of this warband. With a flying movement of 6” they are also the fastest unit available and 38 Wounds (42 for the Lord of Afflictions) with Toughness 4 makes them extremely resistant. The Lord of Affliction is the most expensive fighter in the warband with a profile of a heavy hitter able to take more than a punch.
Abilities for Nurgle Rotbringers
- Virulent Discharge (Double, Everyone): A chance (on a 4+) to allocate up to 6 damage to an engaged enemy.
- Venomous Sting (Double, Pusgoyle Blightlord and Lord of Afflictions): Pick a visible enemy fighter within 1” and roll a die: on a 2+ that unit cannot make move or disengage actions until the end of the battle round.
- Toll the Sonorous Tocsin (Double, Putrid Blightking with Sonorous Tocsin): Add 1 to the Move characteristic of friendly fighters that start the action within 7”.
- Thrice-ripened Death’s Hand (Double, Lord of Blights): A chance to do some random damage depending on ability value and dice roll (up to 12) to a 7″ away fighter.
- Stream of Corruption (Triple, Rotbringer Sorcerer): A chance (on a 5+) to do up to 3 damage and reduce by 3 the Toughness (to a minimum of 1) of an enemy within 7″.
- Blighted Icon (Triple, Putrid Blightking Icon Bearer): Add 1 to the Toughness characteristic of friendly fighters within 7”.
- Grandfather’s Blessing (Triple, Putrid Blightlord): Add 1 to the Strength characteristic of melee weapons for all friendly fighters within 7”.
- Rotsword Stab (Triple, Harbinger of Decay): Perform a bonus attack and for each critical hit on a 4+ reduce permanently of 1″ the Movement of the opponent fighter.
- Unnatural Regeneration (Triple, Everyone): Remove up to 12 wounds if the fighter is not engaged.
- Toll of the Doom Bell (Quad, Harbinger of Decay with Doom Bell): Until the end of the battle round, enemies within 7″ from him cannot use abilities or reactions.
Reaction for the Nurgle Rotbringers Warband
Impossible to Wound (Everyone)
- When: During an enemy melee attack action but before hit rolls.
- What: 1 damage less (to a minimum of 1) from each successful hit.
Battle Trait for the Nurgle Rotbringers Warband
Disease-ridden: At the start of the battle round, for each enemy fighter engaged, on a 5+ they cannot use abilities or reactions this battle round. Does not work with other Maggotkin of Nurgle fighters.
Pros and cons of Nurgle Rotbringers
+ Elite units
+ Ultra resilient
– Low mobility
– No ranged options

Skaven
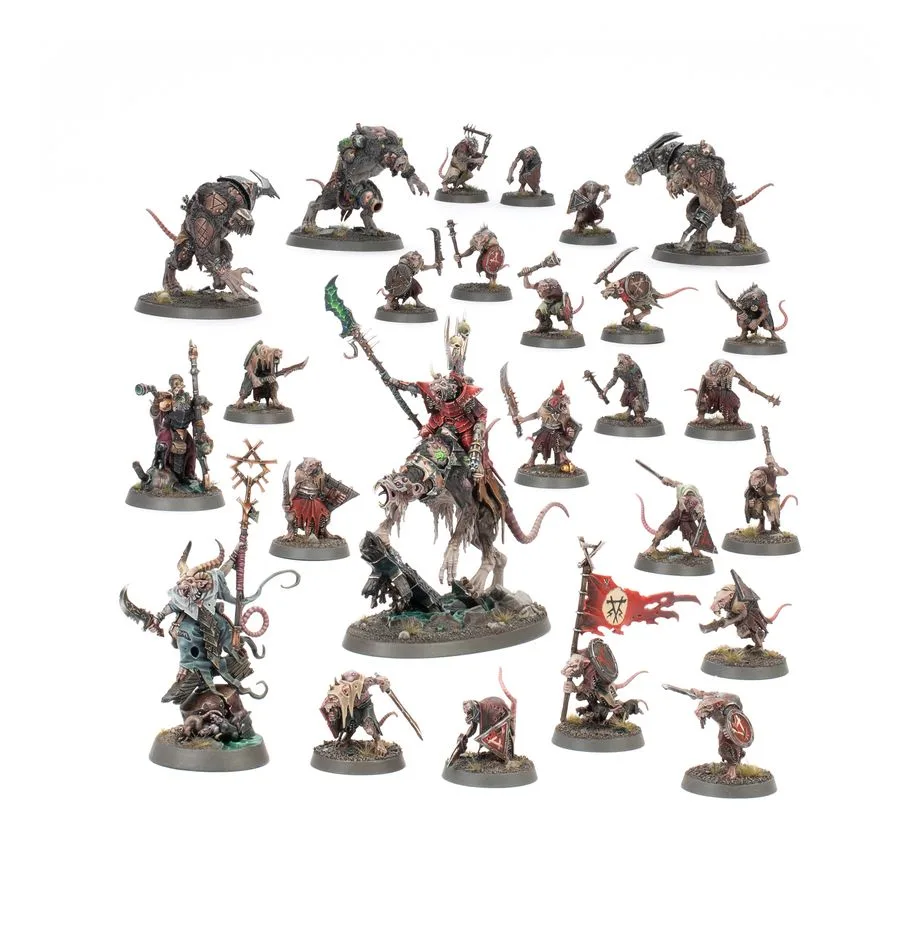
Skaven is one of the legacy warbands from the Chaos Grand Alliance, you can play almost all miniatures from that range.
The Skaven are a race of mutated ratmen, vicious and deceiving often involved in all sorts of treacherous and chaotic activities. For convenience, the list below is split in Clans (the different sub-factions to which each Skaven belongs to) but there is no limitation in Warcry from which clan to build your warband. So feel free to mix at your pleasure.
They have 38 fighters of which 14 are leaders.
Clans Verminus
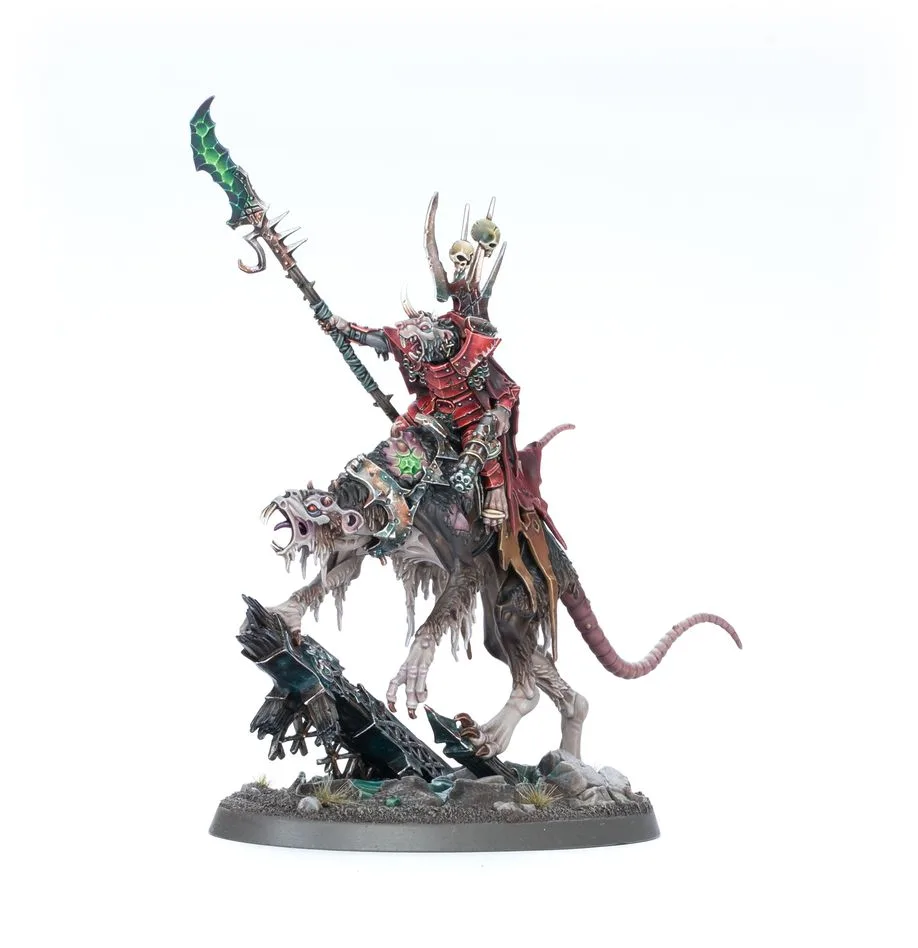
In Clans Verminus, the Clawlord is your main leader option. He has higher damage output than a Clawleader or a Fangleader (4 Attacks at Strength 4 for 2/5 damage), more Wounds (18) and same Agility (Movement 6″ and Toughness 4) than the rest. The new profile, the Clawlord on Gnaw-beast, is a bit faster but being Mounted it comes with some limitations, has the same attack profile, but also a shooting attack with 8″ range and a thematic new ability.
While technically part of the Masterclan, the Grey Seer fits with Verminus quite well providing some ranged attacks up to 7″ range for 3/6 damage that can be further increased with the use of Consuming Warpstone Token. But be careful, as you could increase your damage as much as hurt yourself!
The Clanrats are the most numerous of Clan Verminus foot soldiers and they come in different versions:
- The Clawleader is the champion and the Leader with a similar profile to the Bringer-of-the-Word but no special ability.
- The Rusty Blade offers 3 attacks at Strength 3 for damage 1/3.
- The Rusty Spear has only 2 attacks but at 2” range and for damage 1/4.
The Stormvermin are the elite of the “normal rats”, with an excellent movement (6”), decent wounds (10 or 15 for the leader) and higher than average damage (2/4). Except for the Fangleader they are both armed with Rusty Halberds that provide 2” range, however the Shield increases the Toughness from 4 to 5 losing one attack (2 instead of 3). The Fangleader has 4 attacks at Strength 4 and access to Lead from the Back. Combined with the Stormvermin Hired Bodyguard ability that prevents the Leader from being targeted as long as it stays within 1” from the Stormvermin activated, makes a really close swarm of Stormvermin lethal and the leader more durable.
Clans Pestilens
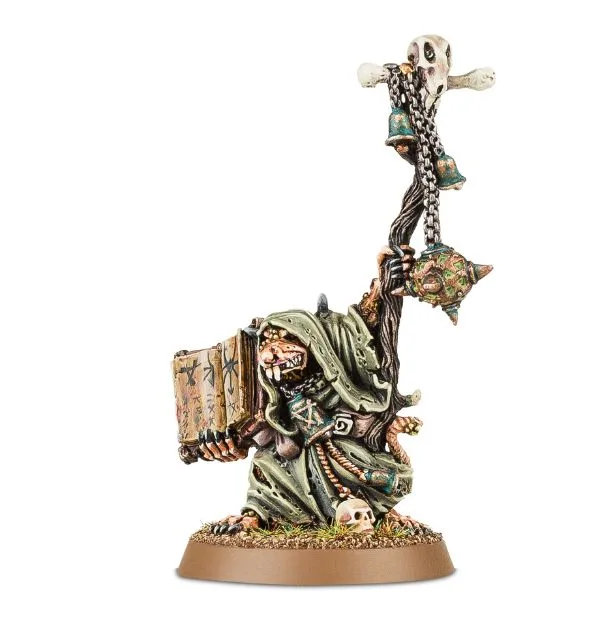
The Plague Priest is surprisingly one of the few magic users with no ranged attack but he does have a 2″ range on melee. Despite the appearances he is a decent melee fighter with 4 attacks for 2/4 damage, Toughness 4 and 18 Wounds. His strongest ability however, shared with the Bringer of the Word, is the Triple Recite from the Book of Woes, that prevents the use of any ability within a 3″ radius from him.
The Plague Monks are some of the cheapest units available to the Skaven and present interesting options for you. They are also the base troop for Clans Pestilens.
- Foetid Blade and Woe-Stave guarantee 2” range, 3 attacks at Strength 3 and damage 1/5.
- A pair of Foetid Blades have more attacks (4) but less range (1”) and damage (1/4).
- The leader, the Bringer of the Word, the model armed with a book, compares with the Plague Priest: for less points the combat profile is similar decreasing only the range (1″) and the Wounds (12).
The Plague Censer Bearers are the “elite” fighters of Clans Pestilens. They have more consistent damage (2/4) than a Plague Monk, higher Strength (4) and the 2″ range that guarantees survivability on a 8 wounds fighter with Toughness 3. On top of that for a Triple, they can fumigate nearby fighters for up to 3 damage (on a 3+).
Clans Moulder
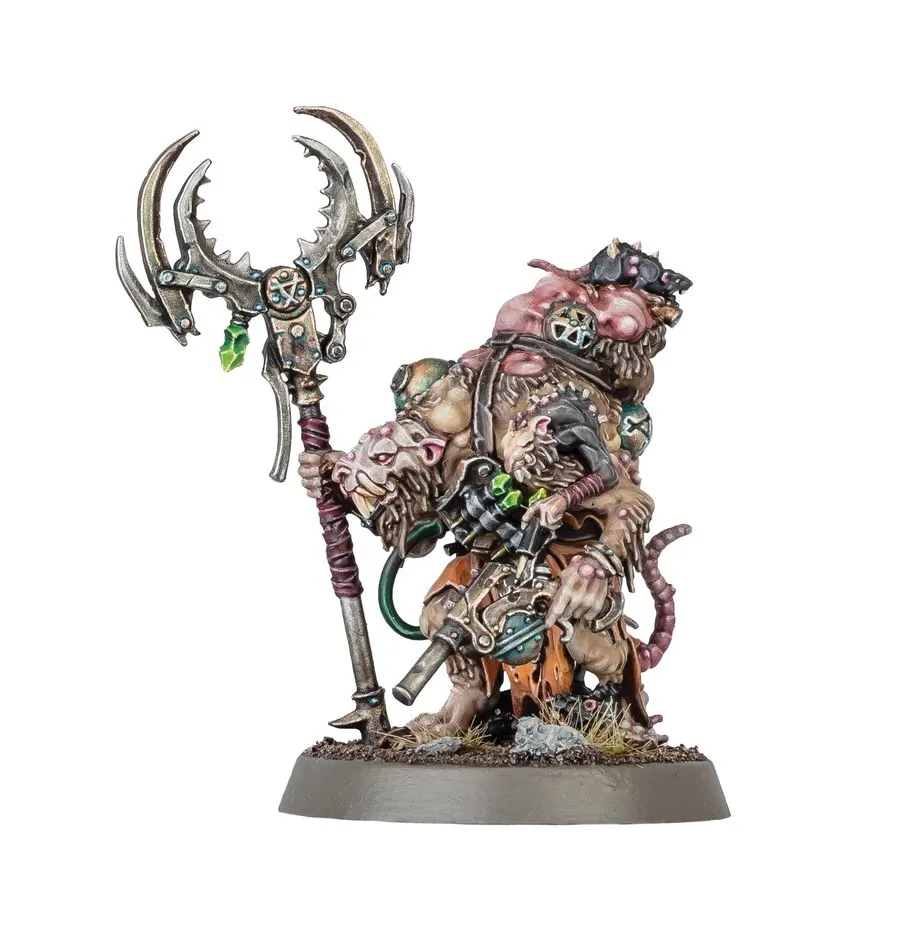
Master Moulder is an upgraded version of a Packmaster with more damage both on melee (2/4) and on ranged attacks (1/3 on 3″). Apart the traditional abilities to run away or improve the attacks of nearby units, Master Moulders and Packmaster can prompt a nearby Beast to perform a bonus attack (Crack the Whip).
The Packmasters are useful to boost Rat Ogors or Giant Rats and Giant Rats are one of the cheapest unit in the entire game(!).
Rat Ogors new profile has still 2 variations: one exclusively melee and one ranged. Both have an impressive number of wounds (28), good movement (5”) and Toughness (5). However the attacks differ, with the Rat Ogor pumping out 4 attacks at Strength 6 for 3/6 damage, while the Rat Ogor with Warpfire Gun has only 2 melee attacks with Strength 5, but, to compensate, it can shoot up to 12″ away with the other 2 attacks with same strength/damage.
The Packmaster is there to “Crack the Whip”, helping the Master Moulder to keep the beasts in line by giving them a bonus attack action. See above for details.
The Giant Rats are one of the cheapest and squishiest unit in the game (4 wounds at Toughness 2) but they come in numbers.
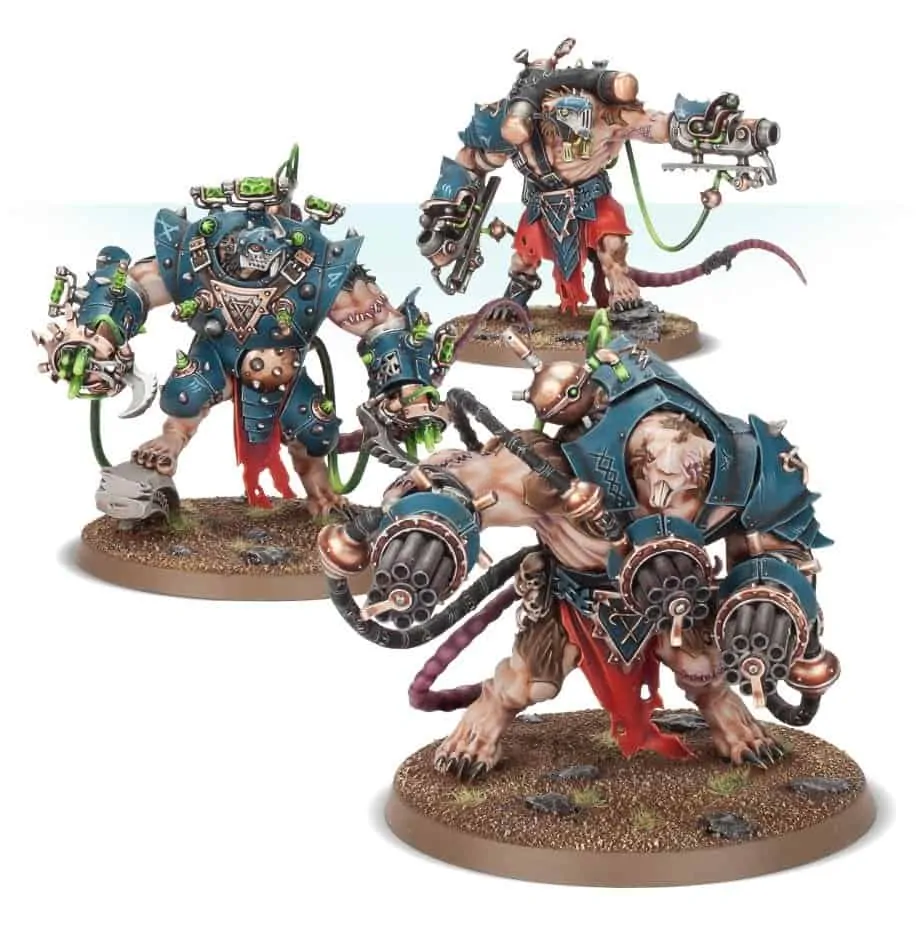
The Stormfiends are the most expensive Skaven unit and also some of the biggest hitters of the entire game. They are technically both Moulder and Skryre. You have many weapon options roughly divided in 3 melee options and 3 ranged options. The 3 ranged being:
- The Warpfire Projector is the one with the shortest range (3-8”) but greatest Strength (5 in 2 attacks) and damage (3/6).
- The Ratling Cannon increases range (3-10”), attacks (4 at Strength 4) and loses a bit of damage (2/4).
- The Windlauncher has an impressive 3-20” range, less attacks (2 at Strength 4) and same damage as the Ratling.
The 3 melee options can really do some damage, some of the best in the game:
- Grinderfists provide 4 attacks at Strength 5 for 4/8 damage.
- If you need more attacks for the same damage the Doomflayer Gauntlets provide 5 attacks at Strength 4.
- Finally, the Shock Gauntlets have “only” 4 attacks at Strength 4 but 4/10 damage! A lucky dice throw can do from 16 to 40 damage in a single action.
Clans Skryre
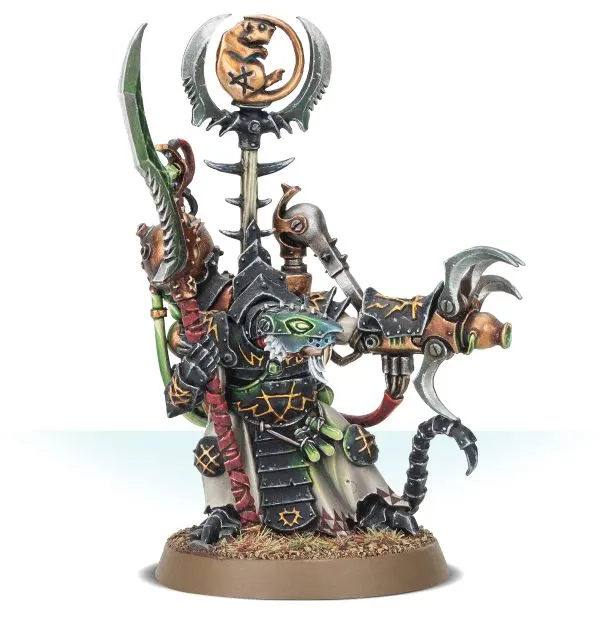
The Warlocks are the leaders of the Clans Skryre specialized in use of warpstone in their machines. All Clans Skryre have access to Expand Warpstone Spark Canister, that for a Quad allows an extra attack with increased damage. The Arch-Warlock is a more melee focussed fighter, with 3 attacks at Strength 5 for 2/4 damage. 18 Wounds at Toughness 4 do not guarantee him survival however if he is not quick to get rid of nuisances.
The Warlock Bombardier has 2 weapon profiles, with the melee being forgettable but the ranged attack hitting up to 15″ away for 2/4 damage at Strength 4.
The Warlock Engineer reduces the range (8″), Strength (3) and damage (1/4) but he is also cheaper and a better melee fighter with 2/4 damage on Strength 3. The latest addition, the Warlock Engineer with Warplock Jezzail, has a 24″ range attack at Strength 4 for 2/4 damage, which makes him a more damaging Bombardier but also the more expensive Warlock.
Skryre Acolytes are the basic infantry of Clans Skryre and one of their cheapest units. However their maximum efficiency is in their single ranged attack for 3/6 damage.
The Warplock Jezzails long “rifles” have a single shot up to 20″ range for 4/10 damage!
The Doom-Flayer is a real melee fighter with 5 Attacks at Strength 5 for 2/4 damage. For some reason it counts as a Mounted unit but with 7″ Movement and 18 Wounds is a veritable good combatant.
The Warp-Grinder is another melee machine, cheaper than the Doom-Flayer, but less attacks for more damage (3 for 2/5). Toughness also goes down to 3 and Wounds to 12 making it less survivable.
Finally the Warpfire Thrower is the ranged machine, with 8″ range for 1/4 damage. The rest of the profile is similar to the Warp-Grinder.
Clans Eshin
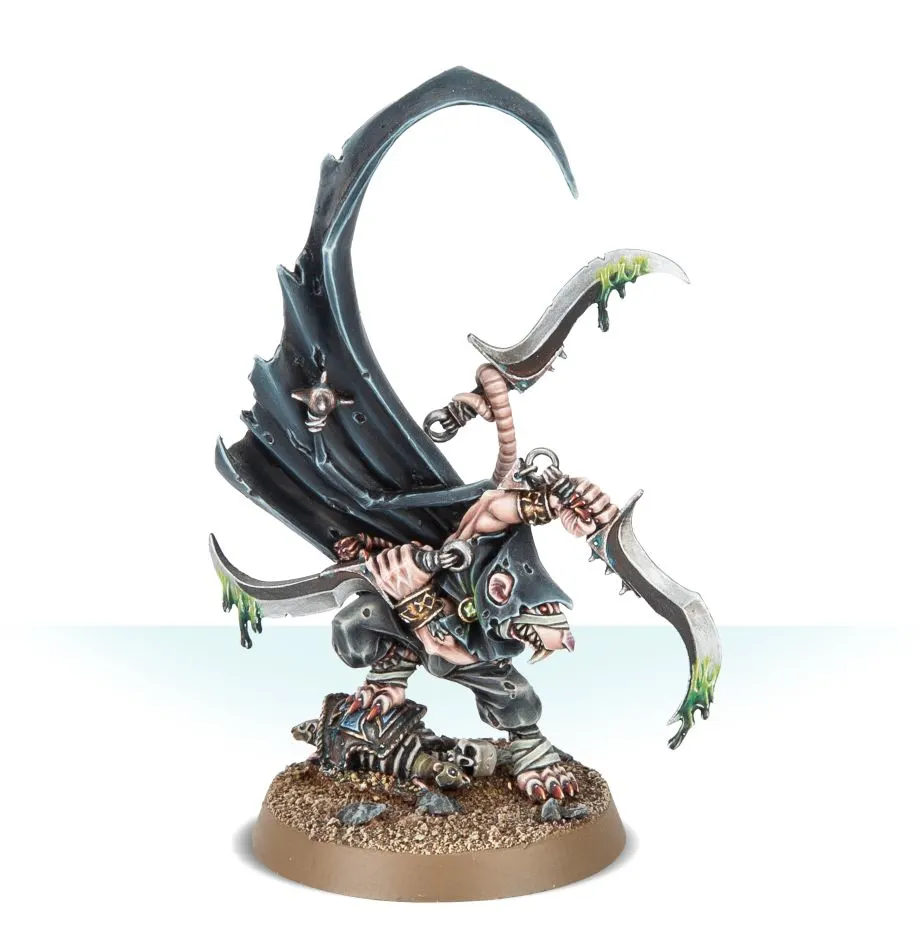
The proud leader of an Eshin Scurrypack is the Deathmaster, also the most expensive leader available for Skaven. Equally able in ranged and melee attacks, his special ability, Running Death, allows him a bonus move or disengage action and +1 to critical hit damage.
Night Runners are the expendable units of Eshin Scurrypacks of which the Nightleader is the Leader option. A Nightleader is a cheaper and weaker version of a Deathmaster. The Night Runners instead are better used to poke enemies from distance with their 8″ attack at 1/2 damage.
The Gutter Runner is an upgraded Night Runner with better ranged damage (1/3), more melee attacks (4), damage (1/4) and more wounds (10).
Abilities for the Skaven Warcry Warband
- Scurry Away (Double, Everyone except all Stormvermins, all Stormfiends, all Rat Ogors, Warplock Jezzail, Warpfire Thrower, Warp-grinder and Doom-Flayer): Enables a bonus disengage move on a 2+.
- Crack the Whip (Double, Packmaster and Master Moulder): Pick a visible fighter with the Beast runemark (Rat Ogor or Giant Rat, but also the Thralls Razorgor or Chaos Warhound) to make a bonus attack action.
- Hired Bodyguard (Double, Stormvermin but not the leader): Until the end of the battle round friendly Leaders within 1” of this fighter cannot be targeted.
- Consume Warpstone Token (Double, Grey Seer): A chance to power up the damage on ranged attacks (or self-inflict damage).
- Warp Lightning (Double, all Warlocks): Damage up to 6 enemies in a chain for 1 Wound each.
- Flesh-mend (Double, Master Moulder): Heal up to 3 Wounds to a nearby fighter with the Beast runemark (Rat Ogor or Giant Rat, but also the Thralls Razorgor or Chaos Warhound).
- Unleashed Warp-fury (Double, both Rat Ogors): Perform a bonus attack and then double the damage point allocated to this fighter.
- Crushing Charge (Triple, all Stormfiends and Rat Ogors): Up to 6 damage to an engaged enemy at the end of the next Move action.
- Poisonous Fumes (Triple, Plague Censer Bearer): Chance to damage up to 3 Wounds to nearby enemies.
- Running Death (Triple, Deathmaster and Nightleader): Perform a bonus Move or Disengage action and add +1 to your damage on critical hits.
- Lead from the Back (Triple, all Leaders): Add 1 to the melee Attack characteristic of nearby friendly fighters.
- Recite from the Book of Woes (Triple, Plague Priest and Bringer-of-the-Word): Until the end of the battle round enemies cannot use abilities while within 3” of this fighter.
- Forward, Minion! (Triple, Clawlord on Gnaw-beast): A friendly non-hero non-monster fighter can perform a bonus attack and a bonus move but if it does not kill the enemy or end the movement engaged, it suffers D6 damage.
- Warpstone Sights (Triple, all Warlocks): During this fighter’s activation, an enemy within 18″ is considered as having up to 6 Toughness less (to a minimum of 1). If the value of the ability is greater than the enemy’s Toughness, each hit of the next ranged attack counts as a critical hit, and after each ranged attack, this fighter moves up to 3″ away jumping.
- Expend Warpstone Spark Canister (Quad, all Warlocks, Skryre Acolyte, Warplock Jezzail, Warpfire Thrower, Warp-grinder and Doom-Flayer): Perform a bonus attack adding up to +3 to the damage.
Reaction for the Skaven Warband
Musk of Fear (Everyone)
- When: after an enemy moves within 3″ of the fighter reacting.
- What: another friendly fighter within 3″ of the reacting one, can perform a bonus move or disengage action as long as they finish more than 3″ from the original moving enemy.
Battle Trait for the Skaven Warband
There Are Always More: At the start of battle round 3 and 4 you can return a slain fighter costing 70 or less from a battlefield edge.
Pros and Cons of the Skaven
Pros:
+ High mobility
+ Horde abilities
+ Strong elite units
+Ton of options
Cons:
– Fragile leaders and no impressive special abilities

Slaanesh Daemons
Daemons of Slaanesh is one of the legacy warbands from the Chaos Grand Alliance, in particular the daemonic side of Slaanesh followers. You can play almost all miniatures from that range (the others are available through the Slaanesh Sybarites warband).
Slaanesh is the Chaos God of excess, and while he has been imprisoned for centuries, portions of his essence transpire to the Mortal Realms in form of daemons. What they search depends on who is leading the warband of Soulfeasters: freeing Slaanesh, replacing him or just going about…
They have 12 fighters of which 7 are leaders.
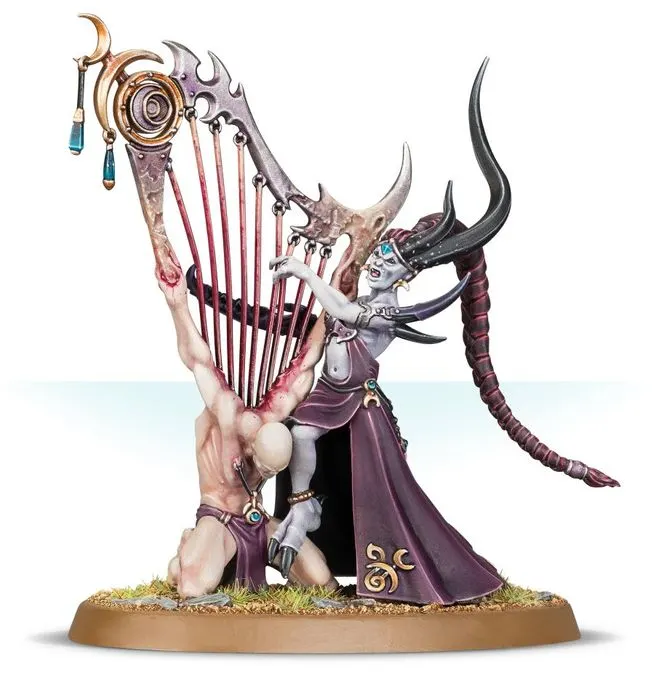
The Contorted Epitome is an essential piece in your warband able to pick an enemy fighter and force him to skip his activation for a round. As all Slaanesh leaders, the Epitome, can also increase the Strength of nearby fighters by 1 (Locus of Excruciation) greatly increasing the efficacy of this warband in melee as they have lots of Attacks but low Strength.
The Infernal Enrapturess can reduce by 1 (to a minimum of 1) the number of attacks of all enemies nearby compensating the overall fragility of the Soulfeasters. She has also a ranged attack with 15″ range, 3 Attacks and 1/4 damage.
The Viceleader has the same ranged attacks of the Epitome and only 1 attack less in melee (5) becoming herself a prime choice for the Locus of Excruciation that brings her Strength to 4. Her special ability allows to increase her damage by 1 combining well with the Locus.
The Hellstriders are the “heavy” cavalry of the Soulfeasters. With Toughness 4, they are some of the most resistant in the warband, combined with the 20 wounds (25 for the Hellreaver) and the 2” weapon range. They have 3 weapon profiles: the Hellreaver, the leader of the unit, has 4 attacks at Strength 3 for 1/4 damage. The Hellstrider with Claw-Spear has 1 attack less than the leader, while the one equipped with Hellscourge increases his range to 3” for 4 attacks at Strength 3 and damage 1/3. They are also available in a Slaanesh Sybarite warband.
The Fiends represent the elite of this warband. They have only 8” movement but they can go past archways and doors. The low Toughness (3) is compensated by the high wounds. Their weapon profile is in line with the rest of the warband: 4 attacks at Strength 3 for 2/4 damage. The Blissbringer (the leader of this unit) has 1 more attack (5). The Fiends specialize in blocking their adversaries preventing any move or disengage action of an engaged enemy.
The Seekers represent the light cavalry of the Soulfeasters. They have a similar profile to the Hellstriders only dropping Toughness to 3, but increasing their attacks to 5 at the cost of a more limited range (1″). The Heartseeker, the leader, performs more normal damage (2/4). Both can increase their damage by 1 with the use of a Double.
The Daemonettes are the cheapest unit of this warband, allowing to field several and point on numbers to take down your enemies. They are relatively fast to be infantry troops (5”), with low Toughness (3) and average wounds. Their unit champion, the Allurer, is also a leader.
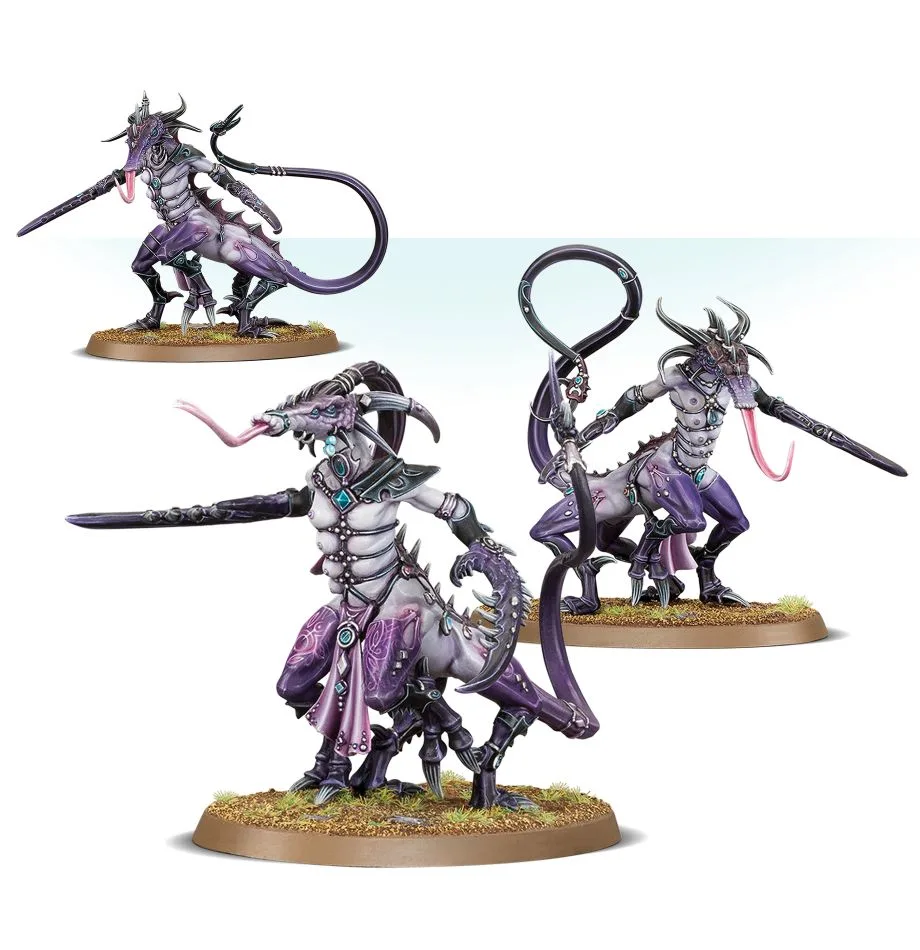
Abilities for the Daemons of Slaanesh
- Lithe and Swift (Double, Everyone): Add 3″ to the next Move action.
- Sadistic Killers (Double, all Seekers and Daemonettes plus the Viceleader): Add 1 to the damage of hits and critical hits for melee attack actions.
- Crushing Grip (Double, all Fiends): Roll a die for an enemy fighter within 1”, on a 2+ that enemy cannot move or disengage until the end of the battle round.
- Discordant Disruption (Double, Infernal Enrapturess): Subtract 1 (to a minimum of 1) to attacks made within 6″ of this model.
- Impaling Strike (Triple, Hellreader and Hellstrider with Claw-Spear): At the end of the next move action allocate up to 6 damage to an engaged enemy.
- Locus of Excruciation (Triple, all Leaders): Add 1 to the Strength characteristic of melee weapons for all friendly fighters within 6”.
- Deadly Venom (Triple, all Fiends): Add up to 3 to the damage for the next melee attack action.
- Mirror of Absorption (Quad, The Contorted Epitome): Prevent activation and reactions of one enemy model for the battle round.
Reaction for the Daemons of Slaanesh Warband
Shared Pain (Everyone)
- When: During an enemy melee attack action but before hit rolls.
- What: 1 damage to the attacking fighter for each hit and 2 for each critical hit.
Battle Trait for the Daemons of Slaanesh Warband
Lure of the Missing God: After the initiative phase,

Pros and cons of the Daemons of Slaanesh
+ Many attacks
+ High mobility
+ Some powerful abilities
– Low Toughness
– Limited ranged options
Slaanesh Sybarites
Slaanesh Sybarites are one of the legacy warbands from the Chaos Grand Alliance, in particular the mortal side of Slaanesh followers. You can play almost all miniatures from that range (the others are available through the Slaanesh Daemons warband).
Slaanesh is the Chaos God of pleasure and obsession and his mortal followers are called Sybarites, each representing a particular trait brought to the excess.
They have 20 fighters of which 9 are leaders.
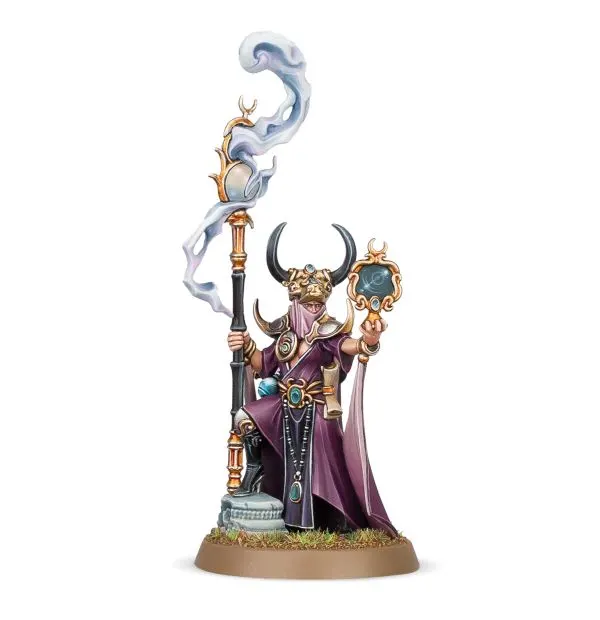
The Shardspeaker is the wizard of Slaanesh Sybarites and a capable leader with an average ranged attack (7″ range, 3/6 damage at Strength 3) and a much more modest melee profile (3 attacks at Strength 3 for 1/4 damage). Where she excels is her Triple: Tendrils of Unnatural Smoke, that reduces by 1 the Attack characteristic of all enemy combatants within 6″, for an impressive defensive ability.
The Lord of Pain is the proper leader of the Dark Revellers, the name of Sybarite warbands. 25 Wounds on Toughness 4 make him an average fighter for survivability, while his weapon profile is tough: 4 Attacks at Strength 5 for 3/5 damage with 2″ range. But his main trait is the ability to increase the Strength of nearby friendly fighters (Paragon of Depravity).
The Hellstriders are the “heavy” cavalry of the Sybarites. With Toughness 4, they are some of the most resistant in the warband, combined with the 20 wounds (25 for the Hellreaver) and the 2” weapon range. They have 3 weapon profiles: the Hellreaver, the leader of the unit, has 4 attacks at Strength 3 for 1/4 damage. The Hellstrider with Claw-Spear has 1 attack less than the leader, while the one equipped with Hellscourge increases his range to 3” for 4 attacks at Strength 3 and damage 1/3. They are also available in a Slaanesh Daemons warband.
The Slaangors are the heavy hitters of the Dark Revellers. High wounds, average Toughness (4) and good movement (6″) makes them a versatile unit. A Slake-Horn, the unit Leader, has 4 attacks at Strength 4 for 3/5 damage, while the Fiendblood loses only 1 damage on normal hit (2/5).
The Slickblade are the newest cavalry for Slaanesh, melee oriented. Both the Hunter-Seeker and the Seeker compare with the Hellstrider with Claw-Spear. They cost more, have less Toughness (3) but more damage on normal hit (2/4 instead of 1/4) and more Strength. They share same Movement (10″), Mounted trait, decent Wounds (20, 25 for the leader) and weapon range (2″).
Where the Slickblade are the melee focussed cavalry, the Blissbarb are the ranged cavalry. They have same Movement (10″), mounted runemark, Toughness (3), and Wounds. They are much poorer in melee with 4 Attacks at Strength 3 for 1/3 damage but have 2 Attacks (3 for the High Tempter, the unit Leader) at Strength 3 for 1/3 damage (1/4 for the High Tempter) at 15″ range.
The Myrmidesh Painbringers are the tankiest unit Slaanesh has ever seen. With Toughness 5 and decent wounds they represent the objective holders, the guys that “can get the job done”. In melee they also have a good profile with 4 Attacks at Strength 4 (Strength 3 for the Painbringer) for 2/4 damage. The damage can be further increased by 1 by using their special ability Dance of the Wailing Blade. The Myrmidesh Painmaster is a good all-round leader with more durability than a Lord of Pain, but less synergistic.
Where the Myrmidesh excel in defence, the Symbaresh excel in offense.
- The leader, the Egopomp, has 2″ range on 4 Attacks at Strength 5 for 2/4 damage making him an excellent war machine for his cost.
- The Merciless Blades have 4 Attacks at Strength 4.
- The Sinful Cleaver has 3 Attacks but Strength 5 and 2″ range.
- The Excruciator Slash increases the range to 3″, loses a bit of Strength (3) but he is also the cheapest option.
The Blissbarb Archer are the cheapest units of the Dark Revellers. Even the Blissbarb Archer High Tempter is one of the cheapest leaders around. The weapon profile is similar to the Blissbarb Seekers, with 1 less attack, exactly as for the High Tempter, making the only difference between the two units the lower Wounds and Movement and the fact not being Mounted they can go anywhere they please.
The Blissbrew Homonculus is the cheapest fighter in the warband, has the same melee profiles as the Archers and can buff any unit using Volley of the Tearing Blades within 3″ of him by adding +1 Strength.
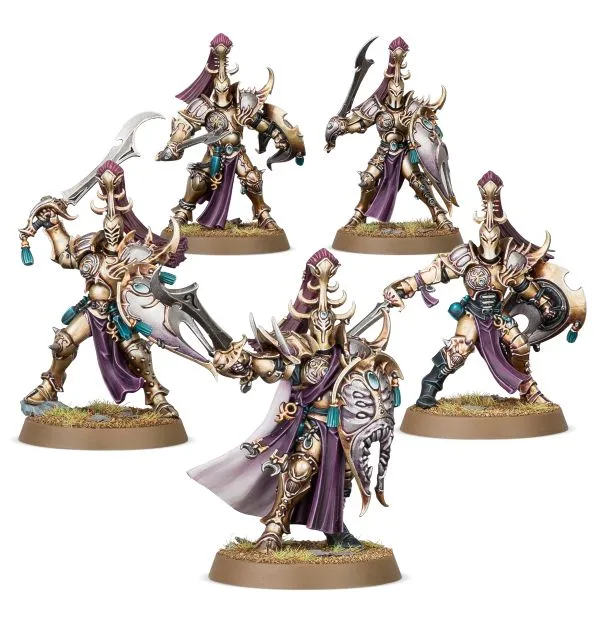
Abilities for the Hedonites of Slaanesh
- Unrivalled Velocity (Double, Everyone): Add 3″ to the next Move action.
- Violence and Excess (Double, all Leaders): After taking down an enemy you can perform a bonus move or attack.
- Dance of the Wailing Blade (Double, all Myrmidesh Painbringers): Add 1 to the damage inflicted this round by hits or critical hits.
- Slaves to Impulse (Double, all Slaangors): Perform a bonus move towards the closest enemy as long as it was maximum 6″ away.
- Impaling Strike (Triple, Hellreaver with Claw-Spear, Hellstrider with Claw-Spear and all Slickblade Seekers): Up to 6 damage to an engaged enemy at the end of the next Move action.
- Volley of Tearing Blades (Triple, all Blissbarb Archers and Blissbarb Seekers): Add +2 Attack to the next ranged attack action and +1 Strength if next to the Blissbrew Homonculus.
- Tendrils of Unnatural Smoke (Triple, Shardspeaker): Reduce by 1 (to a minimum of 1) the enemy Attacks within 6″ of this fighter.
- Paragon of Depravity (Quad, Lord of Pain): Add up to 6 to the Strength of melee attacks of friendly fighters within range.
- Ego-driven Excess (Quad, Symbaresh Twinsouls): Perform a bonus move or a bonus attack. Perform another bonus move or attack every time this fighter takes down an enemy.
Reaction for the Hedonites of Slaanesh Warband
Shared Pain (Everyone)
- When: During an enemy melee attack action but before hit rolls.
- What: 1 damage to the attacking fighter for each hit and 2 for each critical hit.
Battle Trait for the Hedonites of Slaanesh Warband
Pain-fuelled Rapture: after receiving some damage from an attack or a reaction, this fighter can decide to allocate itself 3 damage to obtain +2 attacks in the next melee attack action this round.
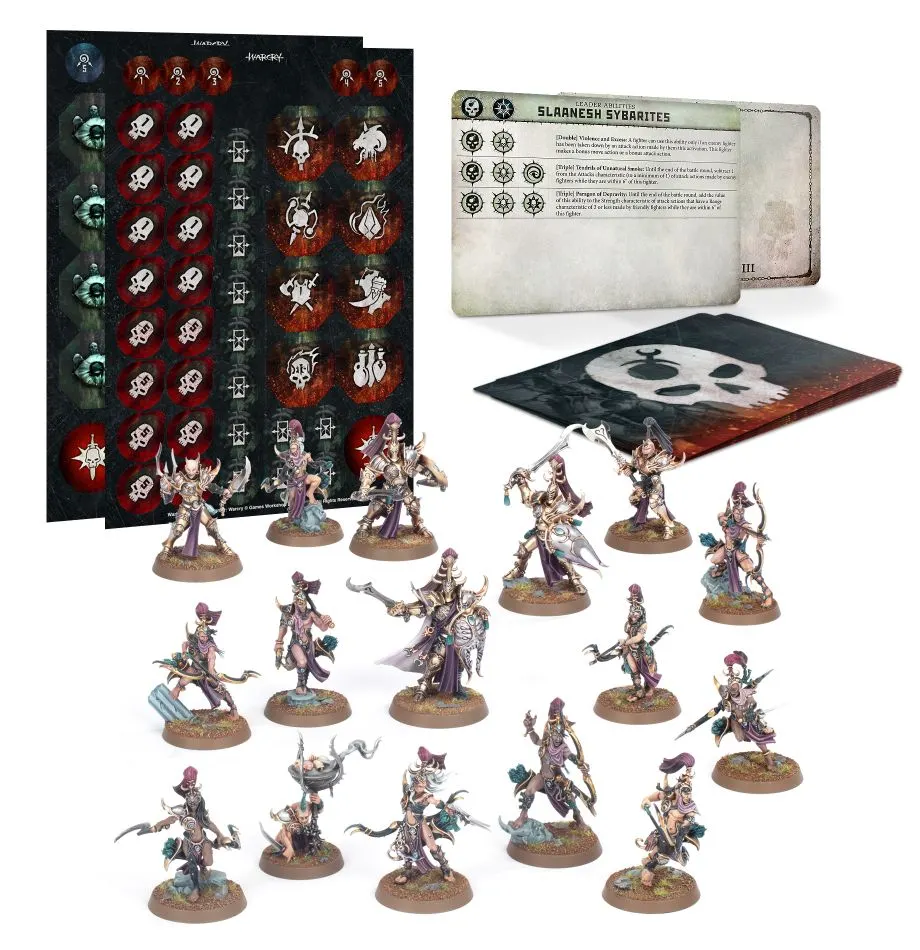
Pros and cons of the Slaanesh Sybarites
+ Many attacks
+ Good mobility
+ High versatility
– No game changer abilities
– Glass cannons

Slaves to Darkness
Slaves to Darkness is one of the legacy warbands from the Chaos Grand Alliance, you can play almost all miniatures from that range, except of course the original Warcry warbands.
The Slaves to Darkness represent all chaotic warriors that have not pledged their allegiance to a specific God yet, all those starting their Path to Glory, trying to get the attention of one God and receive their boons ascending to daemonhood.
They have 31 fighters of which 17 are leaders.
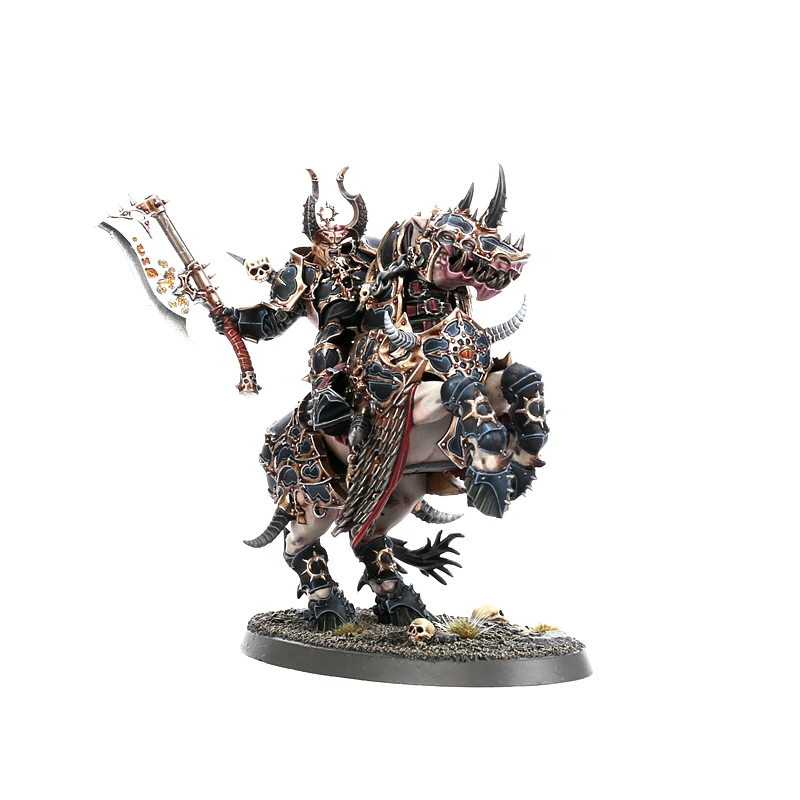
The Chaos Lord on Daemonic Mount is a strong mounted leader in between the Doom Knight and the Chaos Lord on Karkadrak.
The Chaos Lord on Karkadrak is a stronger, but slower, version of the previous lord. He has access to the same abilities as the other mounted Chaos Lord and he is one of the most durable Slaves to Darkness Leaders in melee with his Wounds characteristic of 38, Toughness 6 and 5 Attacks at 2″ range.
The Varanguard are some of the most expensive fighters in the warband, now split in 3 different profiles, all Leaders:
- The Ensorcelled Weapon is the most expensive with 4 attacks and 3/5 damage.
- The Daemonforged Blade drops one attack but increases Strength (5) and damage (3/6).
- The Fellspear adds 2″ range to the equation, something you don’t really need on a Varanguard and 2/6 damage compared to the Ensorcelled Weapon.
The Darkoath Chieftain is an improved version of the Marauder Chieftain with an ability that buffs his damage output. This means that opportunely buffed he has a greater damage output than the Varanguard at a fraction of the cost.
The Chaos Sorcerer Lord is the only Leader in the warband with an actual ranged attack. His survivability is decent with a Toughness of 4 and 22 wounds, but he can shoot at a distance, fight tolerably in melee, and he has access to the Double ability Daemonic Power, which lets you buff the Strength and Attacks characteristic of the next melee attack action another friendly fighter makes.
The unmounted Chaos Lord is a very good melee fighter with 4 strong Attacks with a range of 2″, but the best thing about him is his access to the Triple ability Spurred by the Gods, which lets him boost Attacks of friendly fighters close to him for the rest of the battle round.
The Exalted Hero of Chaos is not a bad Leader at all, but the Chaos Lord is a better fighter and the Darkoath Warqueen is an even cheaper option if you just want access to the ability Spurred by the Gods.
The best thing of the Darkoath Warqueen is the access to the ability Spurred by the Gods but she also has the same attack profile of a Chaos Lord on Daemonic Mount at a fraction of the cost.
The Chaos Marauder with Barbarian Flail is a lot like other very cheap fighters in Warcry with a 4″ Move, a low Toughness, 10 Wounds and 3 attacks at Strength 3 but with an amazing 3″ range. The Chaos Marauder with Barbarian Axe and Darkwood Shield is similar to the other Marauder, but the shield gives an extra point in Toughness at the cost of a forgettable melee profile. The Marauder Chieftain, the unit champion, is a Leader with 15 Wounds, 4 Toughness, 4 attacks and a low damage profile of 1/4 damage.
The Chaos Warriors are divided in two groups: those with the Chaos Runeshield that have Toughness 6 and access to the ability Shield Ram that allows them to do damage at the end of a Move action, and those without that have Toughness 5 and more attacks:
- Pair of Chaos Hand Weapons is the most balanced with 4 attacks at Strength 4 for 2/4 damage.
- Chaos Hand Weapon and Chaos Runeshield loses 1 attack (3).
- Chaos Greatblade adds 1 to the Strength compared to the above profile.
- The Chaos Halberd with Chaos Runeshield adds 2″ range and higher damage (2/5) to the equation but sacrificing the Attacks (2).
- Their leader, the Aspiring Champion, has the same weapon profile as the one armed with a Pair of Chaos Hand Weapon but retains Toughness 6 and has higher wounds.
The Chaos Chosen has a profile similar to the Chaos Warrior with Chaos Greatblade, but, aside from an extra damage on normal hit, what differentiates him is the access to the awesome Quad Ability Lead the Slaughter, which increases the Attacks characteristic of every friendly fighter within 6″ by half the value of the ability’s value for the rest of the battle round. To activate it, the Chaos Chosen first has to take out an enemy fighter. The Chaos Chosen Exalted Champion is the Leader option, with an extra attack, more wounds and access to the leader abilities and Lead the Slaughter.
There are 3 different Chaos Marauder Horsemen fighter types, plus a Leader version. What they all have in common is the Mount Runemark, which means that they can’t climb terrain and that they have access to the ability Trampling Hooves, that damages a nearby unit after a move. The Barbarian Axe and Darkwood and the Barbarian Flail have a similar weapon profile of the basic marauder with the same weapon, while the Marauder Javelin and Darkwood Shield allow 2″ range and an ability for ranged damage. Their leader, the Horsemaster, has 4 extra Wounds, a better melee profile (4 attacks for 2/4 damage) but can’t compete with more melee-oriented leaders of this warband.
The Chaos Knights are mounted versions of the equivalent Chaos Warrior, armed with Cursed Lance and Chaos Runeshield or Ensorcelled Weapon and Chaos Runeshield. The Doom Knight was the go-to option for mounted warbands, but the Chaos Lord on Deamonic Mount or Karkadrak are better options.
The Ogroid are all veritable beasts with high wounds (28), Toughness and incredible attacks (4 at Strength 5). And those can even be improved, once per game, thanks for their Double. The Thorakon are the leader option and the main difference between the Goroan Falchion and Shield and the Goroan Great Axe is that the shield increases Toughness (from 5 to 6), while the axe has 2″ range and increased damage (from 2/4 to 3/6). The same difference can be seen in the Ogroid Theridon, but in this case the Gorean Great Axe has only 3 attacks (the only one of the group with less than 4 attacks).

Abilities for the Slaves to Darkness Warband
Fighter Abilities
- Imbued with Dark Power (Double, Everyone): Add up to 6 to the Strength of melee attacks this activation.
- Throw Javelin (Double, Chaos Marauder Horseman with Marauder Javelin and Darkwood Shield): A chance to do up to 6 damage to an enemy fighter at range.
- Shield Ram (Double, Chaos Marauder with Barbarian Axe and Darkwood Shield, Chaos Warrior with Chaos Hand Weapon and Chaos Runeshield): A chance to do up to 6 damage after engaging an enemy.
- Trampling Hooves (Triple, all mounted characters): Do up to 6 damage after engaging an enemy.
- Lead the Slaughter (Quad, Exalted Champion and Chaos Chosen): After taking down an enemy, improve by 3 the Attacks characteristic of all friendly fighters nearby.
Leader abilities
- Daemonic Power (Double, Chaos Sorcerer Lord): Add 1 to the Strength and Attack characteristic of the next action of a friendly fighter in range.
- Relentless Killers (Double, all Varanguard): Add up to 3 to the Attacks characteristic in the next melee attack action.
- Spurred by the Gods (Triple, Chaos Lord, Exalted Hero of Chaos, Darkoath Warqueen): Add 1 to the attack characteristic of melee attacks of close-by friendly fighters.
- Knights of Chaos (Triple, Chaos Lord on Karkadrak, Chaos Lord on Daemonic Mount): Add 2 to the Move characteristic of friendly mounted fighters with Toughness 5 or more (themselves, all Chaos Knights and Varanguards).
- Champion of Darkness (Triple, all Leaders): After taking down an enemy, make a bonus move action and then a bonus attack action.
- Deathblow (Quad, Darkoath Chieftain): Add up to 6 to the damage on normal and critical hits of the next melee attack action.
Reaction for the Slaves to Darkness Warband
Boon of Fortitude (Everyone)
- When: During an enemy melee attack action but before hit rolls.
- What: Remove 3 wounds already allocated to this fighter.
Battle Trait for the Slaves to Darkness Warband
For the Glory of the Dark Gods: At any time there are more slain enemies than slain friendly fighter, add 3 to the ability value to a maximum of 6.
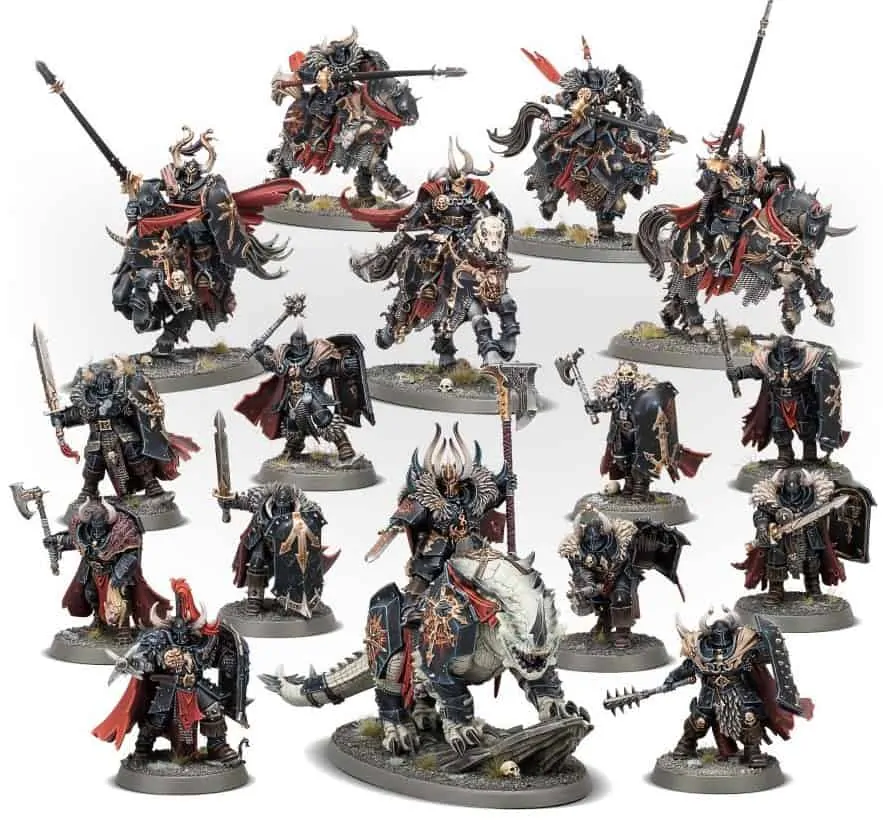
Pros and Cons of the Slaves to Darkness Warband
Pros:
+ Many options for attacks with more than 1″ range.
+ Strong Attacks-boosting abilities.
+ Chaos Marauder Horsemen are fast and durable objective and treasure grabbers.
+ Strong melee Leaders suitable for the new hero role.
Cons:
– Availability of some of the models and the incompatibility of fighter types and recent sculpts.
– Expensive Chaos Warriors because of high Toughness.
– Low standard damage not helped by universal Strength buff ability.
Tzeentch Arcanites
Tzeentch Arcanites is one of the legacy warbands from the Chaos Grand Alliance, in particular the mortal side of Tzeentch followers. You can play almost all miniatures from that range (the others are available through the Tzeentch Daemons warband).
Tzeentch is the Chaos God of change and there’s plenty of cults hidden in all cities of the mortal realms venerating the Changer of Ways. They are the Arcanites, the mortal followers of the Architects of Fate.
They have 25 fighters of which 13 are leaders.
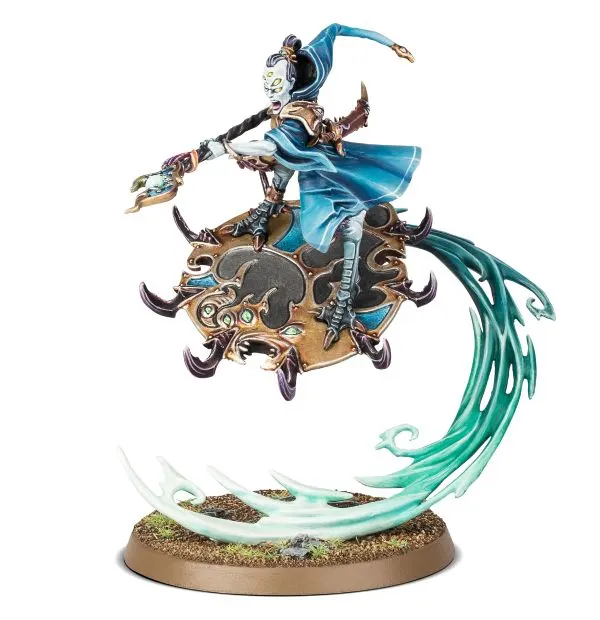
The Magisters of Tzeentch are powerful wizards on their own. Their ranged profile is the same across many leaders of this warband: 3-15″ range, 2 Attacks, Strength 3 and 3/6 damage. Strength can be further upgraded with Locus of Sorcery. The Magister on Disc of Tzeentch has a slightly better melee profile, greater movement (10″) and Toughness (4) than the normal Magister.
The Tzaangor Shaman is identical to the Magister on Disc, except he is… a little more birdy… and expensive…
The Ogroid Thaumaturge is a bestial wizard, in the true sense of the word. With a similar ranged profile to the other leaders, he distinguishes himself in melee with Strength 5 for 2/5 damage.
The Gaunt Summoners have identical profile to the Magisters but they have access to Warptongue Blade, an ability that can do some damage on an engaged enemy. The one on Disc of Tzeentch can fly.
The Curseling, Eye of Tzeentch is another example that starts from the Magister profile and then improves: Toughness 5 (highest in the warband) and 2/5 as damage.
The Fatemaster is one of the few leaders without ranged attack. His weapon profile is similar to the Curseling with the increased damage (2/5) but with the nice addition of the 2″ range that compensates with his lower Toughness (4) and Wounds (25). He can also fly 10″. Complements his profile the best supporting ability available to the Tzeentch Arcanite: Lord of Fate that allows to add 1 melee attack to all nearby fighters.
Of the elite Tzaangors, the Skyfires are the most expensive and the one with the longest range, up to 20”. Their bows have Strength 4 and damage 2/5 making them hard hitters. Their melee attack is also above average, with 4 attacks at Strength 4 and damage 2/4. Their special ability, Guided by the Future, can increase the damage but only against opponents that have not activated yet. The Aviarch is the unit Leader and an extremely versatile option.
The Tzaangor Enlightened are the other half of the Skyfire box and can come in 2 variants: flying on a Disc of Tzeentch 10” or on foot for 5” Movement. They have only one weapon profile with range 2” and 4 attacks (5 both Aviarchs) at Strength 4 for 2/4 damage. Their special ability allows them to increase their damage against opponents that have already activated that turn.
The Tzaangors are the tough infantry of the Arcanites and come in different shapes and tastes.
- The Twistbray is the leader option, and as the Aviarchs, he has access to Master of Destiny and not much else.
- The Savage Greatblade can do more damage on a critical (2/5) but loses 1 in Toughness (3).
- Same resistance also for the Mutant that has however 4 attacks at Strength 3 for damage 1/4.
- Blade and Shield trades Toughness for number of attacks: 2 attacks at Strength 3 but Toughness 4.
- And a pair of Blades has 3 attacks, same strength as above but Toughness 3.
The Acolytes have a 10” range for 2 attacks (3 for the Adept) at Strength 3 and damage 1/3. They also have different loadouts available and that includes a leader:
- The Kairic Adept, that does not offer anything new outside of being the cheapest leader.
- The Acolyte with Cursed Glaive hits at 2” range for 4 damage on critical hit.
- The Acolyte with Cursed Blade loses 1” range and 1 damage on critical (1/3) to his melee attack but adds one more attack.
- The Paired Cursed Blades trade Toughness (3) with more Attacks (4 with 1/3 damage).
- The Scroll of Dark Arts is a bit in the middle, with the sorcerous bolt becoming 2 attacks at strength 4 for damage 1/4 and his melee profile similar to the Blade and Shield with 1 attack less.
- The last Acolyte is the one armed with Vulcarch. The bird allows him to prevent an enemy unit from disengaging.

Abilities for the Tzeentch Arcanites Warcry Warband
- Uttered Words of Arcane Power (Double, Everyone): Add 1 to Attack and Strength of the next melee attack.
- Vulcharc (Double, Acolyte with Vulcarch): Pick an enemy fighter within 20” of this fighter, until the end of the battle round it cannot disengage.
- Vicious Beak (Double, Tzaangor Mutant): A chance to do up to 6 damage on an engaged enemy.
- Locus of Sorcery (Double, all Leaders): Add up to 3 to the Strength of the next ranged attack action.
- Brutal Rage (Double, Ogroid Thaumaturge): If at least 15 Wounds have been allocated to this fighter, add +1 Attack permanently to melee attacks.
- Guided by the Future (Triple, all Tzaangors Skyfires): Add up to 3 to the damage of hits and critical hits for the next attack action targeting an enemy fighter that did not activate this battle round.
- Guided by the Past (Triple, all Tzaangors Enlightened): Add up to 6 to the damage of hits and critical hits for the next melee attack action targeting an enemy fighter that already activated this battle round.
- Master of Destiny (Triple, all Leaders): Add the value of this ability (to a maximum of 6) to any ability used by a fighter within 12” of the leader.
- Warptongue Blade (Triple, both Gaunt Summoners): A chance to do some damage depending on the value of the ability and dice roll on an engaged enemy.
- Lord of Fate (Quad, Fatemaster): Increase by 1 the melee attacks of friendly fighters within 9″.
Reaction for the Splintered Fang Warband
Twist of Fate (Everyone)
- When: During an enemy melee attack action but before hit rolls.
- What: Change the value of one of your doubles with the value of one of the hit rolls.
Battle Trait for the Tzeentch Arcanites Warband
Warp Fate: After the initiative phase, for each Double, Triple and Quad, roll a dice. On a 4+ that ability assumes a value of 6.
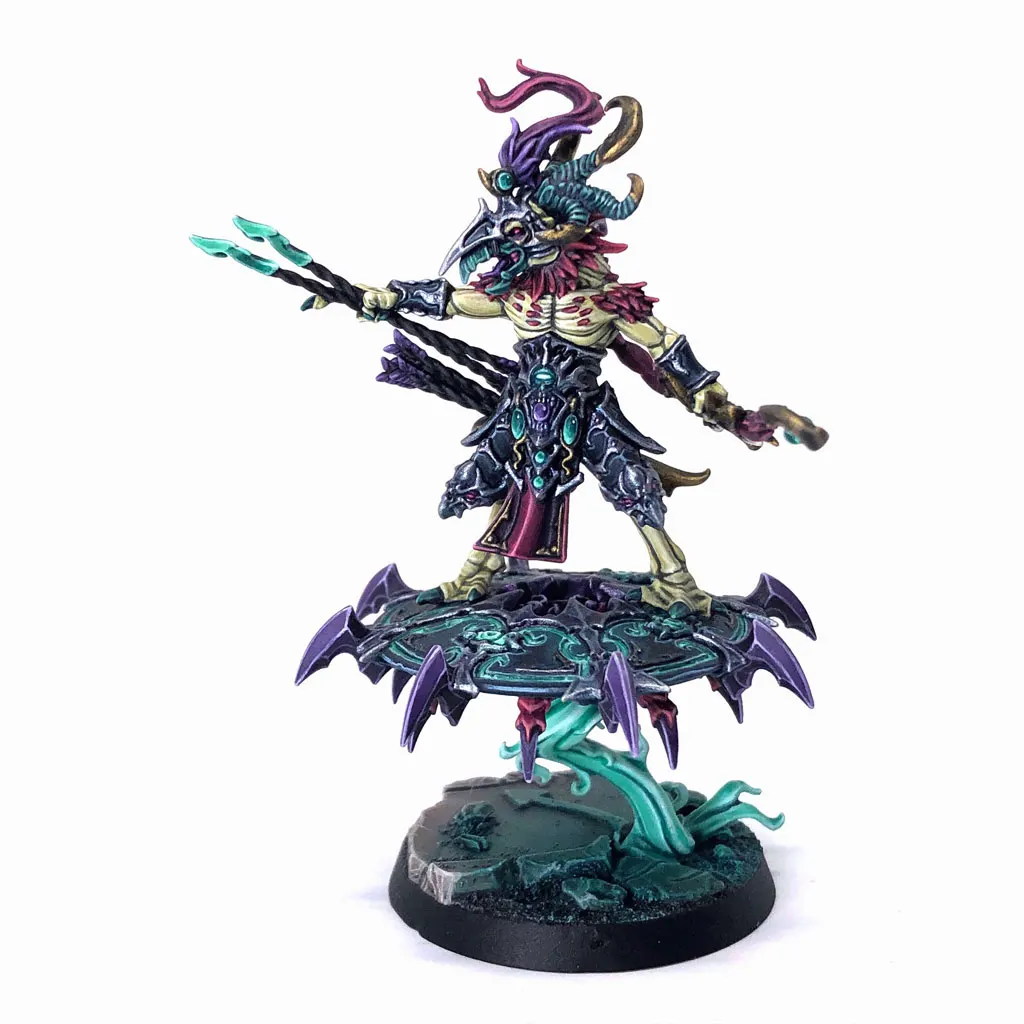
Pros and Cons of the Tzeentch Arcanites Warband
Pros:
+ Good ranged options
+ Versatile with high mobility
Cons:
– No heavy hitters
– No powerful ability

Tzeentch Daemons
Daemons of Tzeentch is one of the legacy warbands from the Chaos Grand Alliance, in particular the daemonic side of Tzeentch followers. You can play almost all miniatures from that range (the others are available through the Tzeentch Arcanites warband).
Tzeentch is the Chaos God of change, sitting from his citadel, the Crystal Labyrinth, he sends forth his hordes of daemons. From horrors shooting sorcerous bolts to flock of screamers, they all have one thing in common: they are extremely whimsical and ready to betray even each other if opportunity arises.
They have 12 fighters of which 6 are leaders.
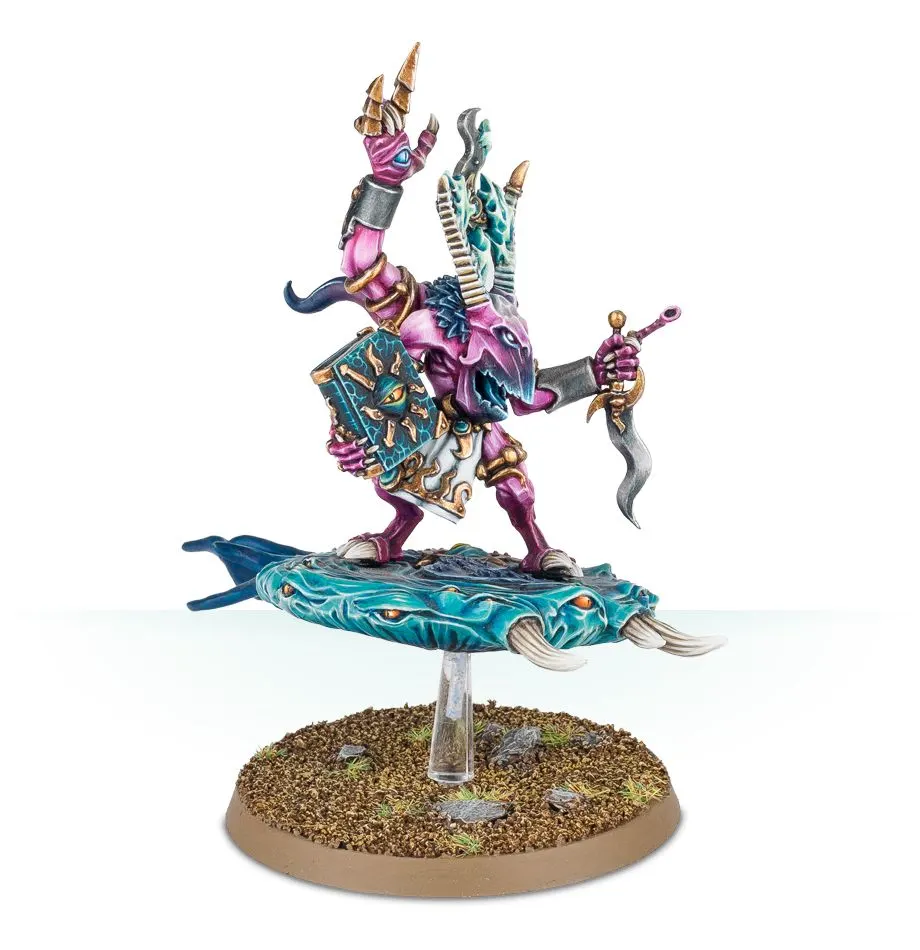
The Heralds of Tzeentch have an identical ranged attack with 15″ range, Strength 3 but 3/6 damage that can be pumped up to Strength 6 using the Locus of Sorcery.
Their melee profile instead changes depending on the weapon chosen and the leader:
- The Staff of Change provides 2″ range and a good damage (2/5).
- The Ritual Dagger has more attacks but 1″ range and less damage (2/4).
- Both Changecaster have 1 attack less than the corrispettive Fluxmaster weapon.
The Fluxmaster can fly and use Blue Fire for some random ranged damage. The Changecaster has a lower movement, does not fly but has the potential to do more ranged damage with his ability.
The Flamers of Tzeentch represent two different models that can also be purchased separately. The leader of the unit of Flamers of Tzeentch is called Pyrocaster, while the Exalted Flamer can be found also riding a Burning Chariot (although in this version is not usable in Warcry). All Flamers share the same ability: Capricious Warpflame that can do up to 6 damage to any enemy fighter within 3”. The Flamer is the only non-leader option of a group with a similar profile but one less attack.
The Screamers of Tzeentch are another flying unit with an impressive movement of 12”. Their main ability, Latching Bite, allows them to improve their Strength characteristic (from 4 to a potential 7).
The Horrors of Tzeentch are the most unusual of the Warcry fighters and are very thematic. Pink and Iridescent Horror have access to the Split reaction that allows to replace that fighter with 2 Blue Horrors, while the Blues can be replaced with a Brimstone Horror. Horrors have a ranged attack with 3-10” range at Strength 3 with decreasing damage depending on the Horror, and a melee attack at Strength 3 following the same trend. The Iridescent is the Leader option.
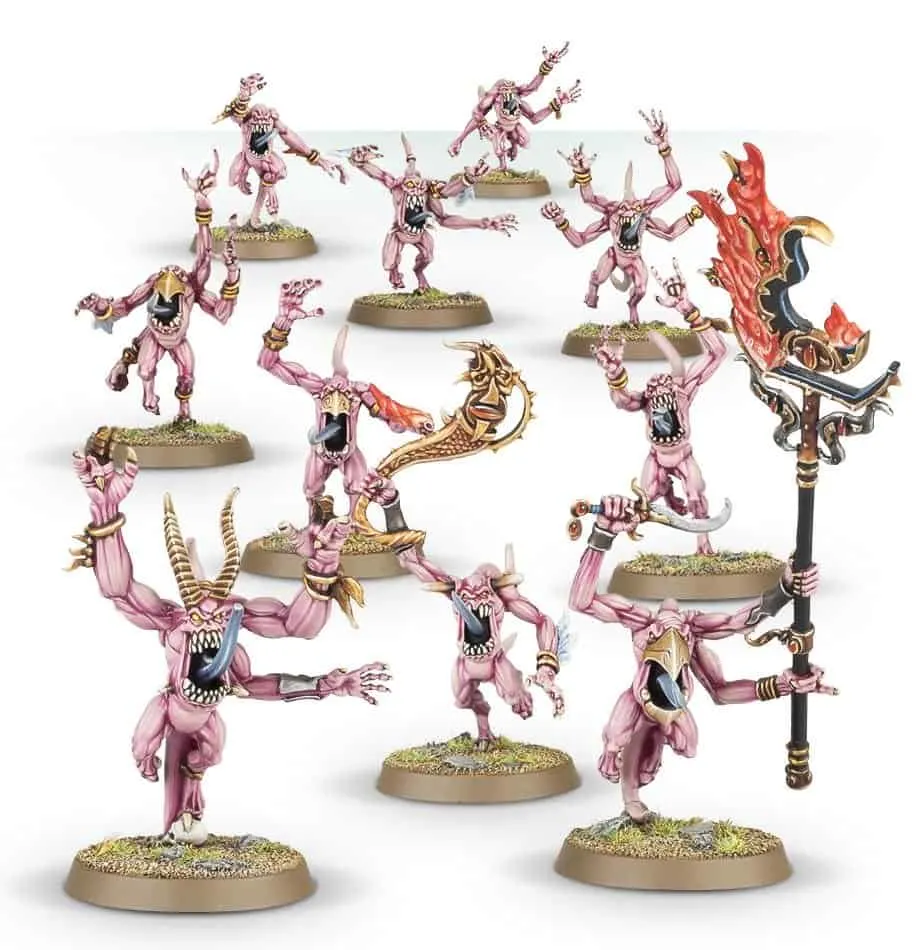
Abilities for the Tzeentch Daemons Warcry Warband
- Locus of Sorcery (Double, Everyone): Add up to 3 to the Strength of the next ranged attack action.
- Blue Fire (Double, both Fluxmaster): A chance to do some damage depending on the value of the ability and dice roll on an enemy 9″ away.
- Latching Bite (Triple, Screamer): Add up to 3 to the Strength characteristic for the next attack action and prevent the target from moving or disengaging for the rest of the round.
- Master of Destiny (Triple, all Leaders): Add the value of this ability (to a maximum of 6) to any ability used by a fighter within 12” of the leader.
- Pink Fire (Triple, both Changecaster): A chance to allocate up to 9 damage to an enemy 9″ away.
- Capricious Warpflame (Quad, Pyrocaster, Flamer and Exalted Flamer): Allocate up to 6 damage to all close enemy fighters.
Reaction for the Tzeentch Daemons Warband
Twist of Fate (Everyone)
- When: During an enemy melee attack action but before hit rolls.
- What: Change the value of one of your doubles with the value of one of the hit rolls.
Split (Iridescent Horror and Pink Horror)
- When: After the damage received is calculated.
- What: Replace this fighter with 2 Blue Horrors within 3″
Split Again (Blue Horror)
- When: After the damage received is calculated.
- What: Replace this fighter with a Brimstone Horror within 3″.
Battle Trait for the Tzeentch Daemons Warband
Warp Destiny: After the initiative phase, swap the value of any two Double, Triple or Quad with each other.

Pros and Cons of the Tzeentch Daemons Warband
Pros:
+ Decent ranged options
+ Ability to multiply fighters
Cons:
– No heavy hitters
– Fragile
– Can be hard to play for beginners

Tarantulos Brood
The Tarantulos Brood were first released in the Warcry: Red Harvest box set. They worship a representation of Chaos called the Eightfold Watcher, and as such they venerate the eight-legged and eight-eyed spiders that they can control and whose tainted blood they use to induce multiple mutations on themselves.
They have 7 fighters of which 1 is a leader.
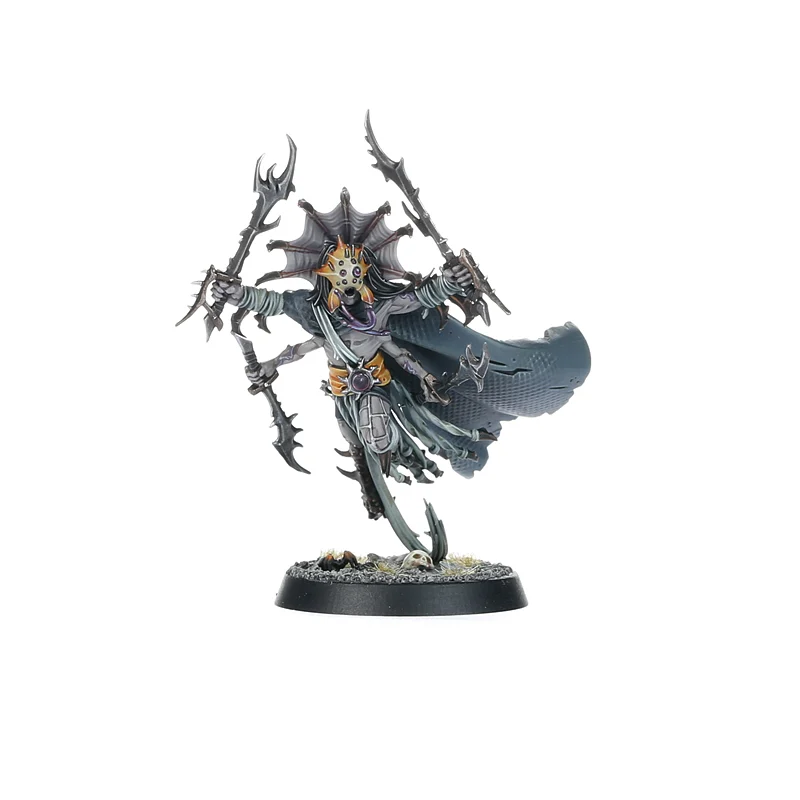
The Broodmaster is the only leader option available to this warband. His 6 arms allow him a greater speed (6″) and more Attacks (5 at Strength 4 for 2/4 damage). He is however squishy with Toughness 4 (quite average) and 18 Wounds (slightly below a Leader average). He has access to 3 abilities, of those noteworthy Scuttling Symbiosis that allows a nearby Spider Swarm to move or attack and Creeping Summons that allows to resurrect Spider Swarms.
The Doomweaver is the elite fighter of your warband and comes with 2 weapon profiles:
- The Trident allows for 2″ range, 3 Attacks at Strength 4 for 2/4 damage, while the Net allows the use of Silken Strangle-nets that for a Triple can prevent (on a 3+) a fighter within 3″ from performing move or disengage actions until the end of the round.
- The Flail has 3″ range, 3 Attacks at Strength 3 for 1/4 damage, while the Goad has only 1″ range, but a better profile with 4 Attacks at Strength 4 for 2/4 damage.
The Broodkin are the basic fighters of this warband and have 3 different profiles:
- The Broodin with Scythe and Spider Claw has two different weapon profiles: a Scythe for increased range (2″) but less attack potential (Strength 3 on 1/4 damage) and the Spider Claw for less range but more attack potential (Strength 4 for 1/5 damage).
- The Broodkin with Sai has 3 Attacks at Strength 4 for 1/3 damage.
- While the normal Broodkin increases the Attack to 4 but loses in Strength (3).
The Spider Swarm is the cheapest unit in the warband and it shows in its profile: Toughness 1 and 8 Wounds, 4 Attacks but at Strength 1 for 1/2 damage. However it is really synergistic with the rest of the warband and the amount of attacks allow it to soon or later land a critical hit.
Abilities for the Tarantulos Brood Warband
- Scuttling Symbiosis (Double, Everyone except Spider Swarm): Select a Spider Swarm nearby and make it perform a bonus move or attack, if the ability’s value is at least 4.
- Silken Strangle-nets (Double, Doomweaver with Trident and Net): A chance to prevent a close-by enemy from moving or disengaging for the rest of the round.
- Skittering Ascent (Double, Broodmaster, both Doomweavers and Spider Swarm): Do not count vertical distance when climbing.
- Envenomed Projectile (Triple, all Broodkin): A chance to do up to 12 damage to a single enemy within 6″.
- Creeping Summons (Triple, Broodmaster): Restore a spider swarm previously taken down.
- Gift of the Eightfold Watcher (Quad, Spider Swarm): A bonus attack action. Then roll as many dice as the ability’s value and on a 6 the target cannot move or disengage and gets 10 extra damage.
Reaction for the Tarantulos Brood Warband
Defensive Blades (Everyone)
- When: During an enemy melee attack action but before hit rolls
- What: 2 damage to the attacking fighter for each 1 and 2 rolled.
Battle Trait for the Tarantulos Brood Warband
Eightfold Allies: Once per battle any fighter in this warband can use Creeping Summons without using any ability dice.
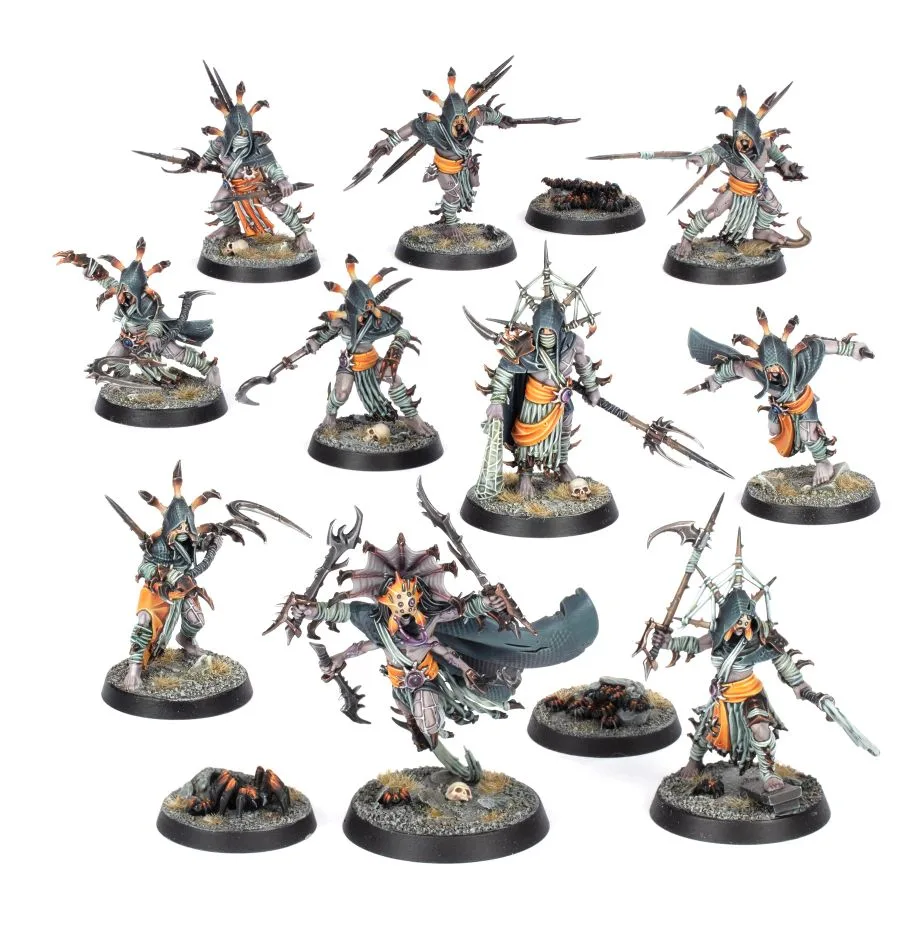
Pros and Cons of the Tarantulos Brood Warband
Pros:
+ High movement
+ Low cost of models
+ Thematic play with the spiders
Cons:
– Low Toughness and Wounds
– No big damage dealers
– Hard to manage in certain situations
Guide for the Tarantulos Brood

Darkoath Savagers
The Darkoath Savagers were first introduced in the Warcry: Red Harvest box set. They take their name from the great oaths that they swear to the Chaos Gods. Oaths that they have to fulfil at all costs, making them the most brutal and fierce warriors pledging to the Chaos forces.
They have 12 fighters of which 2 are leaders.
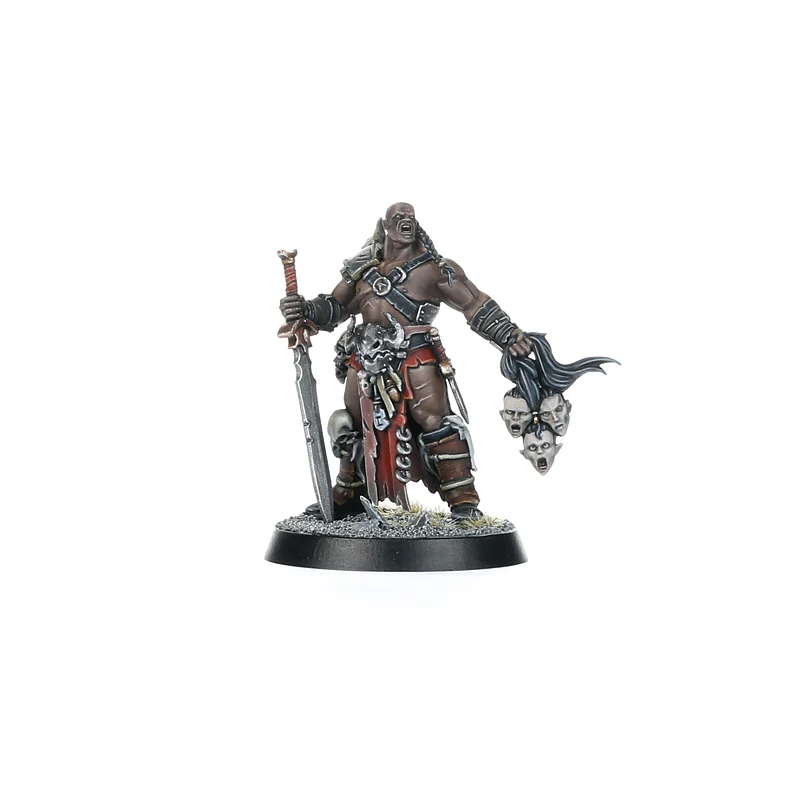
The Slaughterborn is the only leader option of this warband but he is a strong leader compared with other original Warcry leaders. There are 2 weapon options to choose from: the Greatblade for more attacks (5 on Strength 5) or the Greataxe for more Strength (4 on Strength 6) and damage (3/5 instead of 2/5). The most important ability that all Darkoath Savagers share is A Vow Fulfilled that allows to increase the value of Toughness, Attack or Strength for the rest of the battle after taking down a targeted enemy.
The God-speaker is a strong supporting character. He is the only one with a ranged profile (up to 7″) with 2 powerful attacks for 3/6 damage. While he is weaker in melee, he has access to Curse of Withering, that can permanently reduce the Toughness of an enemy but needs to be within 3″.
The Wrathtouched is your killing machine: 15 Wounds on Toughness 4, 4 Attacks with Strength 4 and 1/5 damage. While the damage output seems low compared to a cost above average, his ability, Furious Rampage, allows to do area damage to anyone nearby him.
The Proven is the elite fighter of this warband. Notably, they do not have any special ability and differ only for the weapon profile:
- The Greataxe is the most damaging (3/5) with 3 Attacks at Strength 5. It’s also the most expensive.
- The Greatblade is the most balanced, with 4 Attacks at Strength 4 (damage 2/4).
- The Greatspear adds range (2″), more damage on critical hit (2/5) and Strength (5) but loses 1 Attack (3).
- The Greatflail increases the range further (3″) but, compared to the Greatspear, loses 1 in Strength and in critical damage (4 and 2/4).
The Gloryseekers are your basic infantry and also the cheapest unit in this warband. As the Proven, they also don’t have special abilities and a similar starting profile with 10 Wounds, Toughness 3 and Strength 4. Their weapon profiles:
- The Shield adds 1 to the Toughness putting them in pair with the Proven but with lower Attacks (3 for 1/3 damage).
- Paired Weapons are the opposite, putting 4 Attacks in the fray.
- The Greataxe is the one with the highest damage (2/4) but only 2 Attacks.
- The Spear allows a 2″ range for 1/4 damage. Its Axe profile was dropped in the new version.
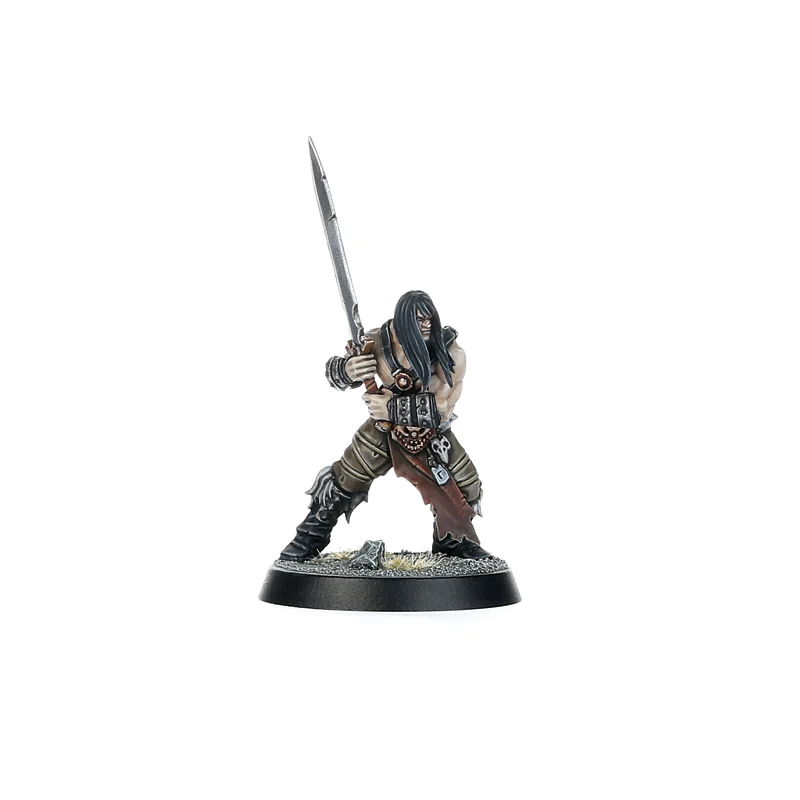
Abilities for the Darkoath Savagers Warband
- A Vow Fulfilled (Double, Everyone): If an enemy is killed during the activation of this ability, for the rest of the battle you can increment by 1 per enemy killed Toughness, Attacks or Strength of one weapon profile.
- Visions of Glory (Double, God-speaker): Add up to 6 wild dice to be used from next round.
- Display of Brutality (Double, all Slaughterborns): A bonus move or attack after taking down an enemy.
- Furious Rampage (Triple, Wrathtouched): A chance to damage all nearby enemy units up to 6 damage each.
- Curse of Withering (Quad, God-speaker): A chance to permanently or temporarily reduce the Toughness of an enemy close-by.
- Deathblow (Quad, Everyone): Add up to 6 to the damage to each hit in the next melee attack action.
Reaction for the Darkoath Savagers Warband
Instinctive Dodge (Everyone)
- When: During an enemy melee attack action after seeing the hit rolls.
- What: On a 4+ for each critical hit, treat it as a normal hit.
Battle Trait for the Darkoath Savagers Warband
Seeking Glory: Add two wild dice to the pool after slaying an enemy leader with a melee attack.
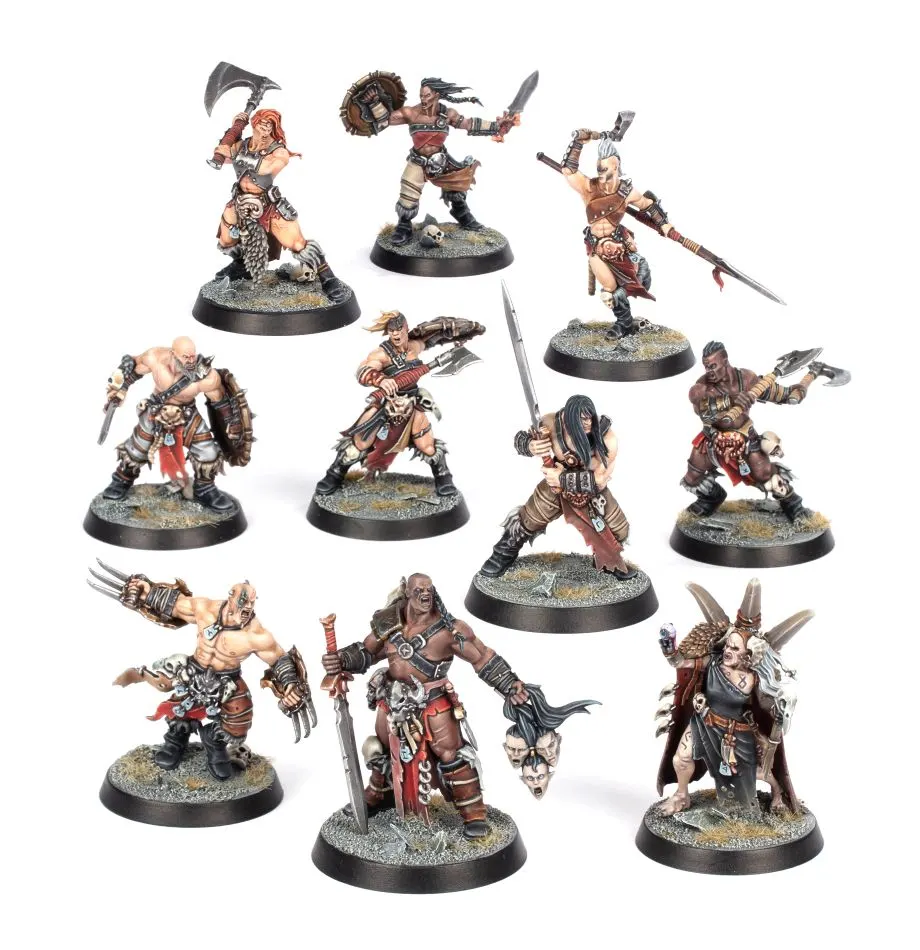
Pros and Cons of the Darkoath Savagers Warband
Pros:
+ Excellent abilities
+ Good warband cohesion
+ Good attacking stats
Cons:
– Low movement
– Could struggle with elite warbands
– Limited range capabilities
Guide for the Darkoath Savagers
Rotmire Creed
The new season of Warcry launched with a box set in Ghur, the Realm of Beasts. The Rotmire Creed is the first warband that was revealed pitted against the Horns of Hashut. While they don’t call their god directly Nurgle, you will see they share many traits with the Plague God followers, by whom they were corrupted.
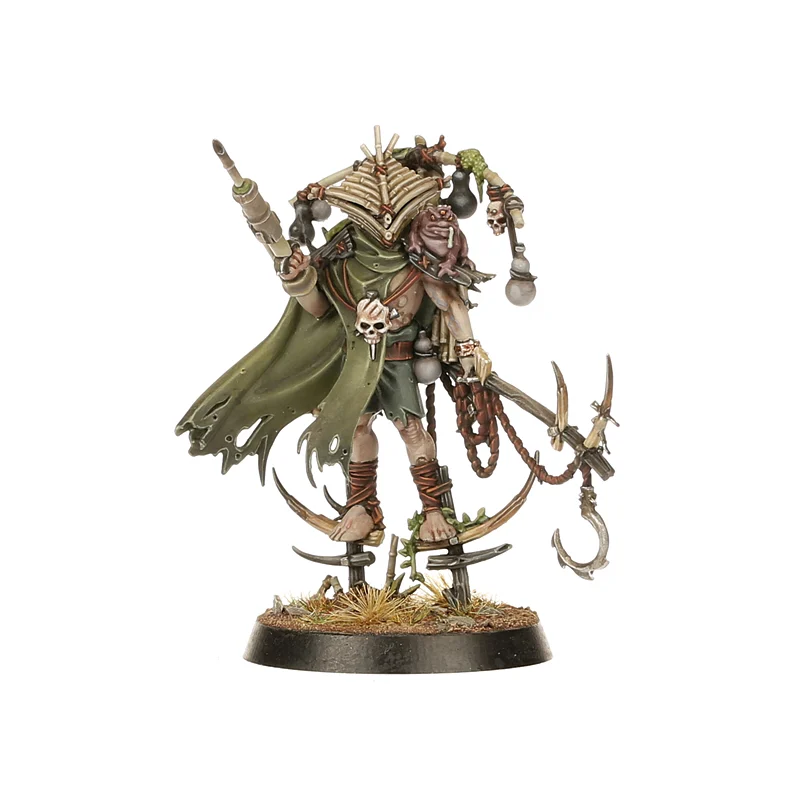
The Witherlord is the only leader option available to this warband. He has a good profile with 4 attacks at Strength 4 for 3/5 damage and good survivability with Toughness 4 and 20 Wounds. He has access to the warband default ability, Gruesome Harvest, a Double that can be used only after killing an enemy in melee. It allows, from this moment on, to count his abilities as having a value of 6 independently from the dice value. Combine it with his signature ability, Lethal Injection, that for a Triple allows to roll as many dice as the value of the ability and for each roll greater than the enemy Toughness, allocate 5 damage and you increase dramatically the chances to do some real damage.
The Bloated One represents the champion of your warband with 18 wounds and Toughness 4, and an area of effect ability, Slashing Attack, that can damage all enemy fighters within 3″. They have 2 weapon profiles:
- The Raker-claws adds 1 attack more to an already strong profile (5 attacks for 2/4 damage).
- The Raker-claw and Hooked Net trades 1 attack (only 4) for an extra ability, Hooked Net, that on a 3+ does as much damage as the ability (can be combined with Gruesome Harvest explained above) and prevents the target from moving or disengaging.
The Carrion Catcher is the elite fighter of your warband and comes with 2 weapon profiles:
- The Snatcher-hook allows for 2″ range, 3 Attacks at Strength 4 for 2/4 damage and enables the use of Ensnaring Strike, that for a Quad provides a free attack action with critical hits preventing the target from moving or disengaging.
- The Impaler has the same range but better critical damage (2/5) and no extra ability.
Both have access to the Double Blowpipe, that synergises well with the warband abilities, reducing enemy Toughness and increasing the damage if they were able to use Gruesome Harvest beforehand.
The Mirefolk Outcasts are your basic infantry, also coming with 2 weapon profiles:
- The Bilewood Weapons point on quantity, with 4 attacks for 1/3 damage.
- The Bilewood Weapon and Shield instead prefers quality with 2″ range, 4 damage on critical hit but only 3 attacks. They are more expensive but they also increase their Toughness to 4 being in line with the rest of the warband (their alternative profile has Toughness 3).
They also have access to Blowpipe, that can really soften up some tough opponents for a round. For the rest, they are your cannon fodder but with 10 wounds they can survive a bit of damage.
Abilities for the Rotmire Creed Warband
- Gruesome Harvest (Double, Everyone): After taking down an enemy, treat all ability values as 6.
- Blowpipe (Double, all Carrion Catchers and Mirefolks): A chance do up to 6 damage and reduce enemy Toughness.
- Hooked Net (Double, Bloated One with Raker-claw and Hooked Net): A chance to do up to 6 damage and prevent the engaged target from moving or disengaging.
- Slashing Attack (Triple, all Bloated Ones): A chance to do up to 6 damage to all close-by enemies.
- Lethal Injection (Triple, Witherlord): A chance to do insane damage based on the engaged enemy’s Toughness and dice rolls.
- Ensnaring Strike (Quad, Witherlord and Carrion Catcher with Snatcher-hook): A bonus attack action and on a critical hit prevent the target from moving or disengaging.
Reaction for the Rotmire Creed Warband
Bile Blood (Everyone)
- When: During an enemy melee attack action.
- What: a good chance to do 3 damage for every critical hit endured.
Battle Trait for the Rotmire Creed Warband
Waiting for Lord Leech: Enemy fighters engaged by 2 or more fighters cannot disengage.

Pros and Cons of the Rotmire Creed Warband
Pros:
+ Good movement
+ Structured hierarchy, each fighter has a role
+ Synergetic play
Cons:
– No big damage dealers
– Not enough Nurgle
Horns of Hashut
The Horns of Hashut are the vanguard of Hashut’s armies and they are ready to reduce the Gnarlwood to ashes. While initially they tried to have the best of Ghur the traditional way with burning and soiling, they soon realised they needed something more powerful if they wanted to succeed.
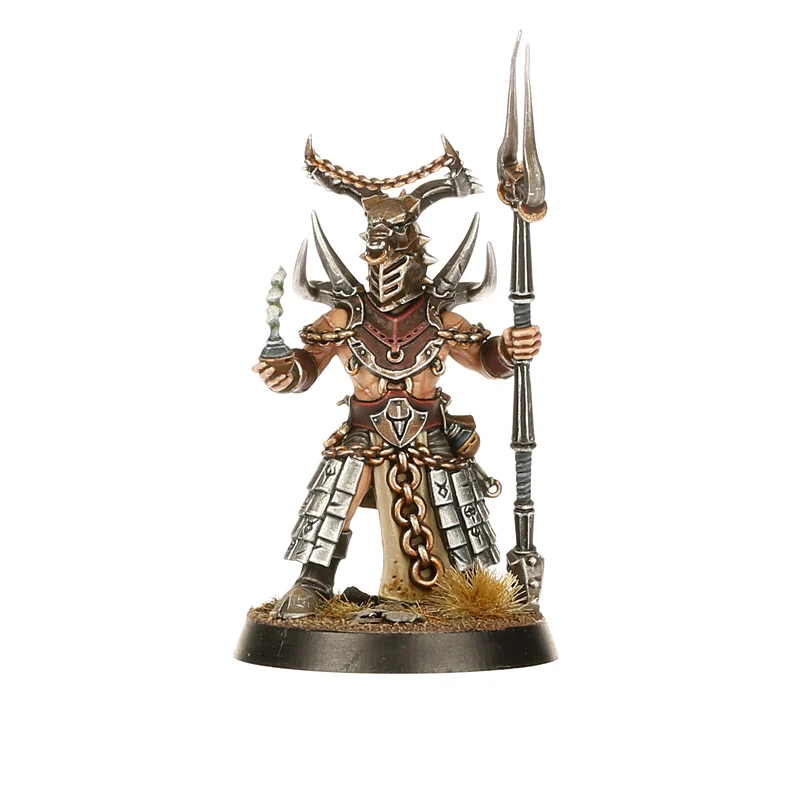
The Ruinator Alpha is the leader of the Horns of Hashut and comes with two profiles:
- The War Bident provides less attacks (3) but higher damage on critical hits (2/5)
- The Heavy Flail provides more attacks (4) but more consistent damage (2/4)
Both weapons have 2″ range and come on a profile of a leader quite survivable (20 wounds on Toughness 4). Normally we would recommend more attacks as more attacks increases the chances to land critical hits, hence more damage. However, in the case of the Horns, for a Double you are able to score critical hits on a 5+ instead of a 6 (Merciless Cruelty, it requires the target fighter to have at least 5 Wounds).
But Ruinator Alpha abilities don’t stop there, he basically has access to all warband abilities except one.
The Ruinator is another powerful fighter, with a profile similar to the Ruinator Alpha with Heavy Flail but only 1″ Range and 15 wounds instead of 20. He has also access to all same abilities except the Leader one, meaning he is a better target to use both the warband’s reaction and Stampede of Iron.
The Demolishers come in 3 different versions, but the one with Flamehurler distinguishes himself from the group. He is the only fighter of this warband, apart from the leaders, to have his own ability: Engulfing Flames of Dark Artifice that performs an area of effect attack. He is also the only fighter of this warband (and of the entire Heart of Ghur starter set) to have a ranged attack up to 6″ Range. It is not extremely damaging with 1/5 damage on 3 attacks, but Strength 5 should guarantee few hits. Keep him away from the front line however, since his melee profile is quite weak.
The other two Demolishers are pretty similar to each other, trading Attacks for Toughness:
- The Crushing Weapon and Shield brings the Toughness to 5 but loses 1 attack.
- The Crushing Weapons express the full damaging potential with 4 attacks at Strength 4 for 2/4 damage, but Toughness is left at 4.
The Shatterer is the basic infantry of the warband. A cheap profile with no special abilities, he doesn’t even have access to the Reaction… His profile is in line with his cost: 3 attacks at Strength 3 for 1/4 damage.
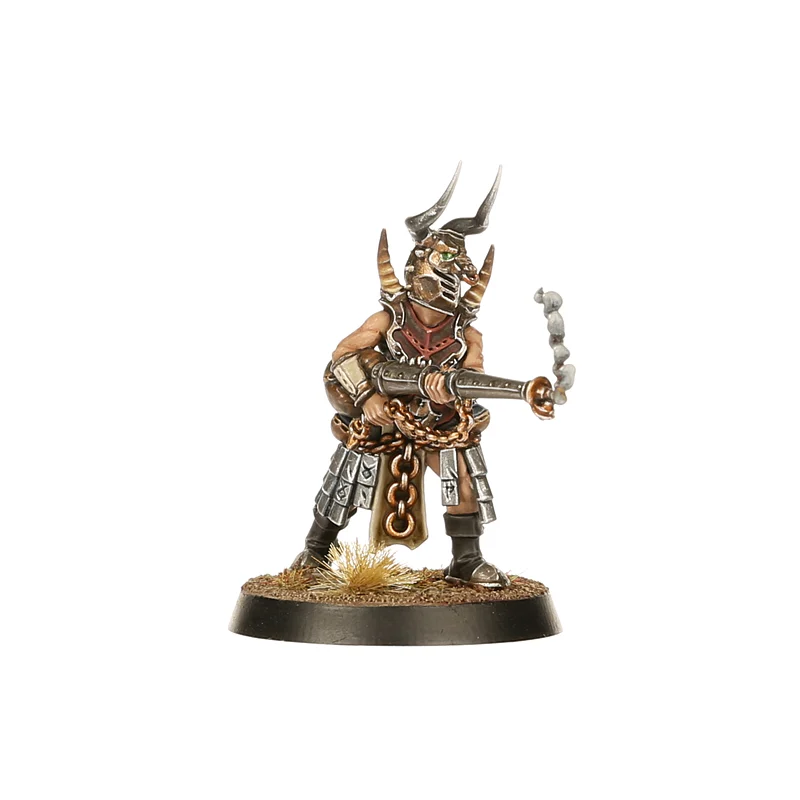
Abilities for the Horns of Hashut Warband
- Merciless Cruelty (Double, Everyone): If the target is wounded, count critical hits on 5+ instead of 6 on the next attack.
- Stampede of Iron (Double, Everyone except Shatterer): A chance to do up to 6 damage at the end of a move action after engaging an enemy.
- Lay to Waste (Double, both Ruinator Alpha): After taking down an enemy perform a bonus move or attack action.
- Engulfing Flames of Dark Artifice (Triple, Demolisher with Flamehurler): A chance to do up to 18 damage to a near-by enemy and half of it to close-by fighters.
- Ash Bomb (Triple, Everyone except Shatterer): Determine a point on the battlefield, every enemy close to it have -1 Toughness and Attacks until the end of the round.
- Unleash the Raging Taurus (Quad, both Ruinator Alpha and Ruinator): A bonus attack action with +1 damage on critical hit.
Reaction for the Horns of Hashut Warband
Breath of Cinder and Smoke (Everyone but Shatterers)
- When: After an enemy ends a movement close-by.
- What: A chance, depending on the enemy Toughness, to do 3 damage and reduce Strength on melee by 1.
Battle Trait for the Horns of Hashut Warband
A Realm of Fire and Ash: Any enemy fighter suffering impact damage subtract 2 from their roll [they don’t get damaged only on a 6+].
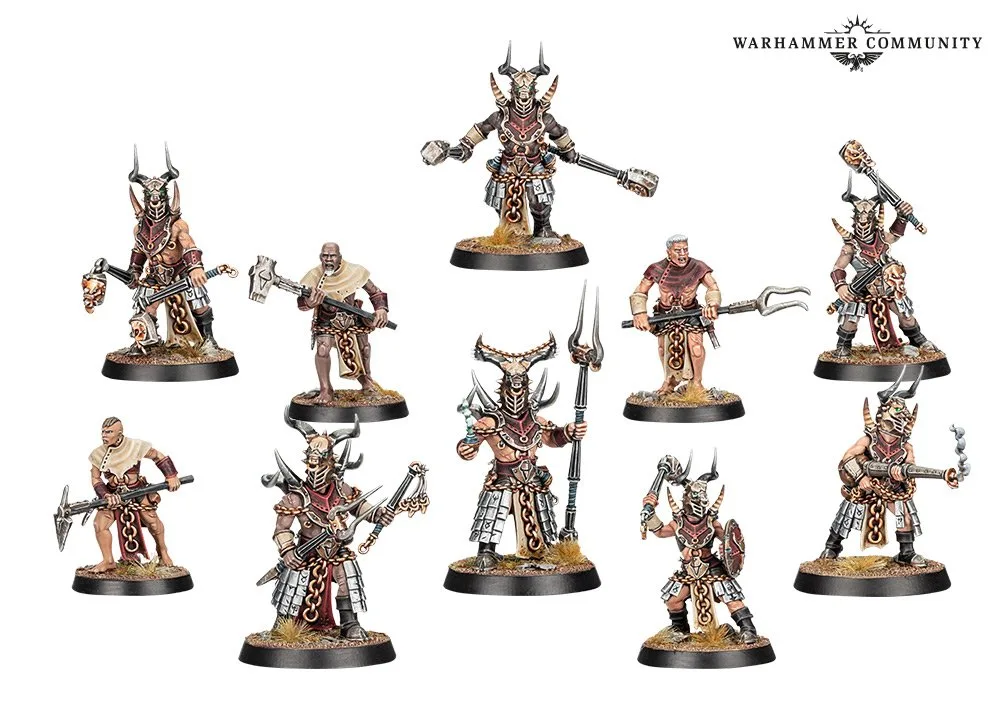
Pros and Cons of the Horns of Hashut Warband
Pros:
+ Good movement
+ One ranged option
+ Abilities widely available to all fighters
Cons:
– No big damage dealers
– No significative synergies
Chaos Legionnaires
The Chaos Legionnaires are the first individual box released for Warcry since it moved to the Realm of Beasts of Ghur. While on the surface they look innocent chaos followers, in reality they follow Be’lakor and his hidden agenda to sow confusion and discord in the Chaos forces.

The Decuriarch is the only Leader option available to this warband. He has a strong profile with an impressive Toughness 5 and 22 Wounds. His attacks are also in line with Chaos leaders: 4 attacks at Strength 4 for 2/5 damage.
The difference, often, is made by the abilities he has access to, including Dark Pact that allows to do some ranged damage (up to 12″) to a single enemy (but also D3 damage to himself) and The True Master’s Favour. This once costs a Triple but allows to increase by 1 the melee attacks of every friendly fighter within 9″ as long as the Decuriarch takes an enemy down first. With his melee power it shouldn’t be a problem to find a sacrificial opponent and buff all other companions, making this ability a must every round.
The Mutandor with Beast Spear is an elite champion with a significative cost due in part to his 2″ range weapon (the highest in the entire warband). It has Strength 5 that should enable to crack the toughest armours, and a good 2/5 damage.
The Hornhelm are the specialised infantry, better than the troop but less scary than a Mutandor. Or are they? They don’t have the 2″ range weapon or the 5″ Movement, but for the rest they have a similar profile and arguably a better damage output in most situations. The Darkiron Mace with Strength 4 but minimum damage 3 is really interesting, while the Steelbite Axe has greater Strength (5) and more damage on critical hits (2/6) making it a better option against armoured enemies.
The Hornshields are your basic troops, but do not expect cheap cannon fodder. Toughness 5 and 12 Wounds means you need some good critical hits to put them down.
Even their weapon profiles are relatively dangerous:
- The Sword is the basic one with 4 attacks at Strength 4 for 1-3 damage.
- The Axe loses an attack (3) to increase Strength (5) and damage on critical hit (1-4).
- The Mace is the most expensive because it has a greater minimum damage (2-4) on the Axe profile (with Strength 4 although).
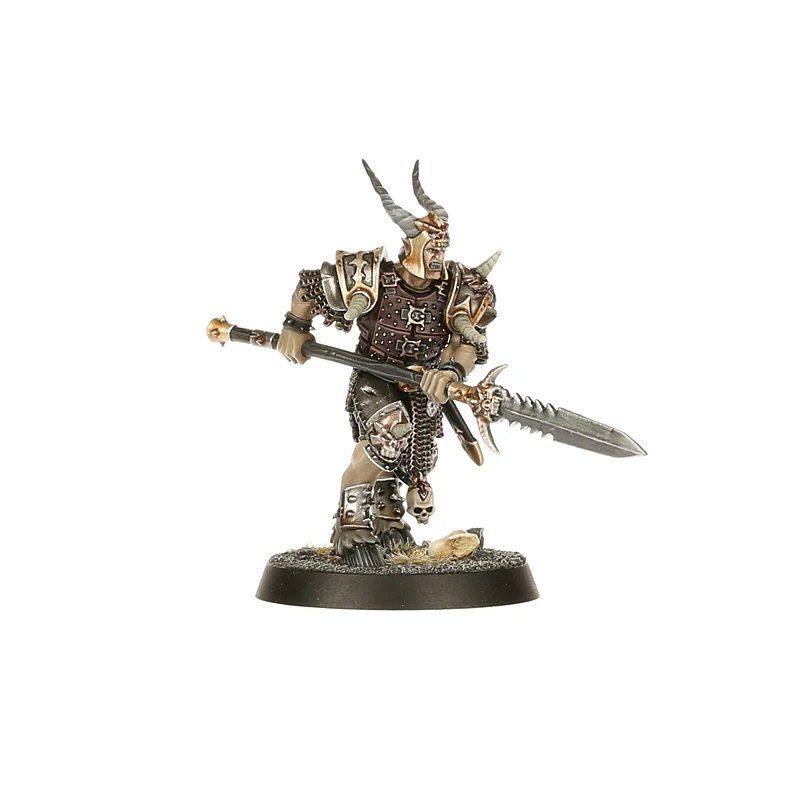
Abilities for the Chaos Legionnaires Warband
- Shield Ram (Double, Decuriarch and all Hornshield): A chance to do up to 6 damage at the end of a move action after engaging an enemy.
- Dark Pact (Double, Decuriarch): A chance to do up to 6 damage to an enemy at 12″ range but also D3 damage to himself.
- Brutal Swing (Double, both Hornhelm): Add up to 3 to the damage on critical hits for the next attack action.
- Headlong Charge (Triple, Mutandor): A bonus attack if at the end of 2 Move action you are within 2″ of an enemy.
- The True Master’s Favour (Triple, Decuriarch): After taking down an enemy, increase by 1 the melee attacks of all friendly fighters within 9″.
- Wrath of the First Prince (Quad, everyone): A bonus attack of which up to 3 hits can become critical hits instead.
Reaction for the Chaos Legionnaires Warband
Call to Arms (Everyone)
- When: After an enemy ends a movement close-by.
- What: Allows another friendly fighter to perform a bonus move towards the enemy that just moved.
Battle Trait for the Chaos Legionnaires Warband
Master Manipulators: When determining initiative, this player determines who wins in case of tie.
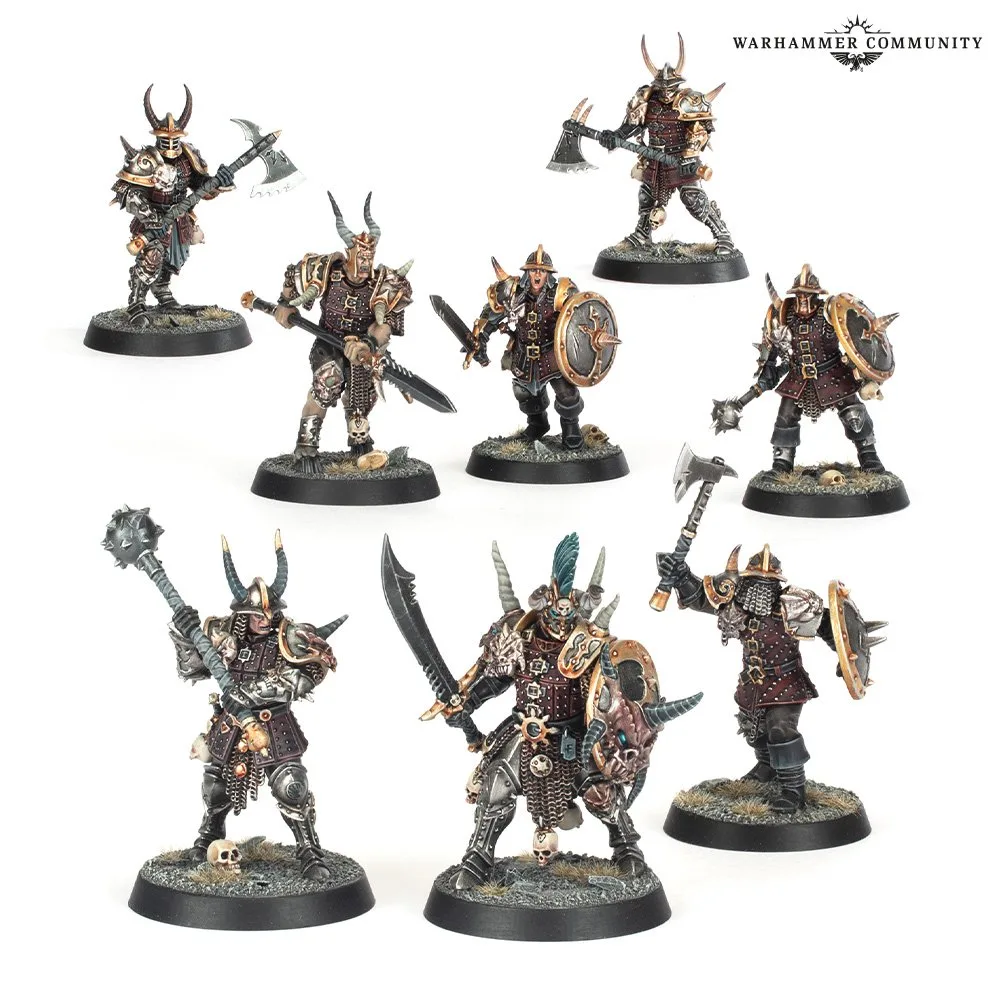
Pros and Cons of the Chaos Legionnaires Warband
Pros:
+ Strong and tough fighters
+ Excellent Quad and Leader’s Triple ability
Cons:
– No ranged options
– Subjectively ridiculous names
Guide for the Chaos Legionnaires.
Jade Obelisk
The Jade Obelisk originate from a proud city of sculptors tricked by Tzeentch and now forced to forever satisfy the being imprisoned in the obelisk at the centre of their city, the Speaker in the Stone, who, in exchange of continuous sacrifices involving also destroying other divinities monuments, grants them a skin made of stone.

The Nephrite Priestess is the leader of the Jade Obelisk. She is not particularly versed in fighting, but with 4 attacks for 1/4 damage and 20 wounds she will survive few rounds. With 4″ movement she is one of the fastest in the warband, but do not push too much or she will be quickly surrounded.
The Idolarc is the little bird-pet of the warband. Its attacks are not that scary, with 1/3 damage, and is not even too resilient, with 8 wounds on Toughness 3, but its main advantage is the 8″ flying movement, that is double the next faster fighter in the warband. Its Gaze of the Idolarc can greatly reduce the Movement or the Toughness of an enemy within range.
The Obelisk Bearer is a strong fighter with a good melee profile (4 attacks at Strength 4 for 2/4 damage) and good defence as well (Toughness 4 for 20 wounds). But the main reason why you take him (or even a couple) is because half of the warband abilities require his presence to work, including the generic Double available to everyone.
The Desecrator is the elite fighter of this warband with strong attacks (Strength 5) and great damage potential, with access to the Double Rock-shattering Blow that adds 1 to the Strength and to the damage on hit and critical hit of the next melee attack action. There are two different profiles:
- the Statue-smasher Hammer has 3 attacks for 3/5 damage
- while the Iconoclast Picker has 4 attacks for 2/5 damage.
The Defacer with Stonecutter Tools represents the melee basic fighter, and as such, is both pricey and damaging, being just a little behind the Desecrator with Picker. Their Strength is reduced from 5 to 4 and the damage on critical hit from 5 to 3, but keep all other interesting aspects like the 4 attacks or the 2 damage on normal hit.
The Defacer with Antithete Bow is an archer, to compensate the lack of overall range in the warband. And 15″ range attacks for 1/3 damage are not game-changing but definitely useful to start chipping wounds while remaining in a strategic position.
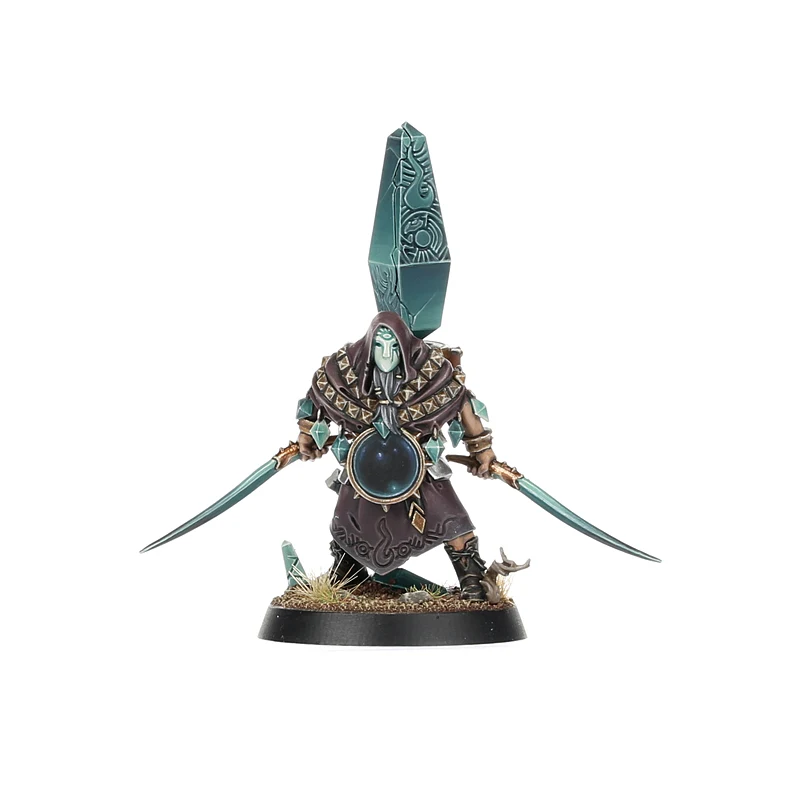
Abilities for the Jade Obelisk Warband
- Stonewarp (Double, Everyone): Heal as much as 3 wounds if in range of an Obelisk Bearer or 6 wounds if in range of a Nephrite Priestess.
- Hammering Strikes (Double, Defacer with Stonecutter Tools): After damaging an enemy in melee, add up to 3 to the damage of the next melee attack targeting the same enemy.
- Rock-shattering Blow (Double, both Desecrators): Add 1 to Strength and damage for the next melee attack action.
- Bloody Tribute (Triple, Nephrite Priestess): After the Priestess takes down an enemy, an Obelisk Bearer in range can perform a bonus move.
- Gaze of the Idolarc (Triple, Idolarc): Subtract up to 3 to the Move or Toughness characteristic of the enemy in range.
- Might of the Speaker (Quad, Obelisk Bearer): A friendly fighter up to 9″ away can perform 2 bonus actions (move, attack or disengage in any combination).
Reaction for the Jade Obelisk Warband
The Curse of Jade (Everyone)
- When: When targeted by a melee attack but before the hit rolls.
- What: Subtract 1 to the damage received by each hit and critical hit (to a minimum of 1).
Battle Trait for the Jade Obelisk Warband
Blessings of the Speaker: The first time a Priestess uses the ability Bloody Tribute, heal completely the targeted Obelisk Bearer.

Pros and Cons of the Jade Obelisk Warband
Pros:
+ Complete warband with elite and basic fighters, ranged potential and healing
+ Highly synergetic warband
+ Good damage potential
Cons:
– Half abilities depend on a single profile staying alive
Claws of Karanak
The Claws of Karanak answer the question “can Khorne followers be even more savage and deranged?”. All those Bloodbound that create a special link with Khorne’s favourite pets, the Flesh Hounds, have a chance to belong to this cult.
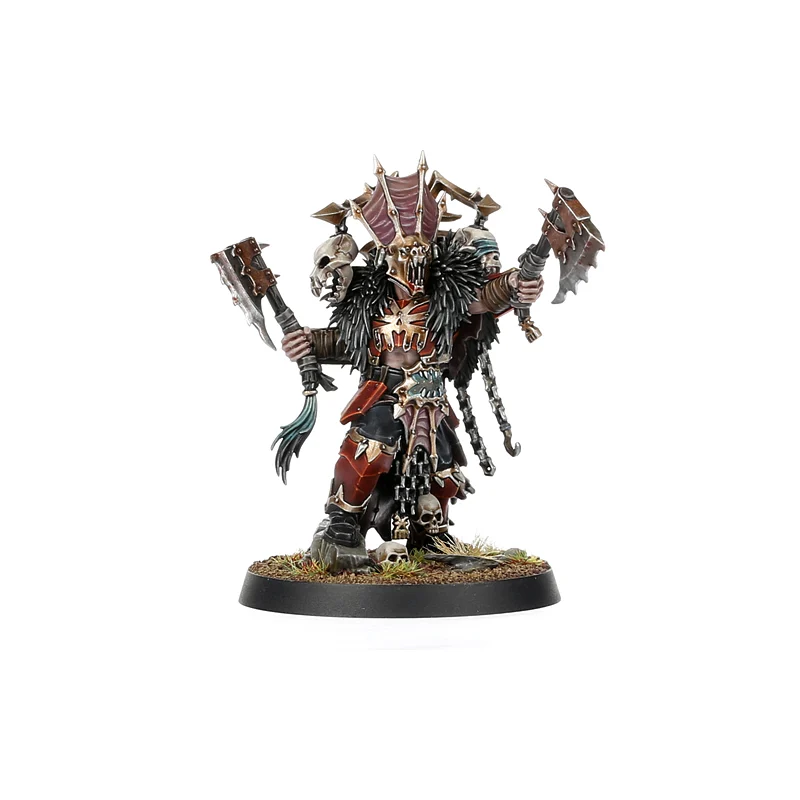
The Packlord is a veritable beast, with 5 attacks at Strength 5 for 2/5 damage and a decent resistance with 20 wounds and Toughness 4. To add to his arsenal, his signature ability costs a Triple and allows every friendly fighter within 8″ to benefit from 1 more melee attack per action after he takes down an enemy. To provide even more attacks to these ravening lunatics can only end in a deluge of blood spilt.
The Hound of Wrath is rightfully considered a Beast, meaning it can’t open doors or carry treasures, but aside from that we have the fastest unit in the warband (7″), the second more resilient after the Packlord (18 wounds on Toughness 4), and the second highest damage potential (5 attacks at Strength 4, for 2/4 damage). It has access to two extra abilities: the first one being an area damage, the second one allowing for concatenating activations with the Blood Whelps bypassing your opponent activation.
The Brutalisers have the same movement as most in the warband (5″) but Toughness starts to go down (3) meaning that those 15 wounds are even more precious now. They compensate with really strong melee profiles:
- The Shredder Blades have 4 attacks at Strength 4 for 2/4 damage.
- The Shredder Blade and Meat Hook, lose an attack to add on critical damage (5) and have access to the Triple Horrifying Trophy that can be used only after taking down an enemy but then prevents the use of abilities to all enemy fighters within 6″.
The Blood Whelps have access to the strong ability Pack Hunters that allows them to activate one after the other bypassing your opponent. With Toughness 3 their long-range melee weapons are super useful:
- The Barb-spear has only 2″ range and 2 attacks but is enough to keep the distance and do 2/4 damage per attack.
- The Claw-flail goes to 3″ range, adds 1 more attack (3) but loses in damage (1/3).
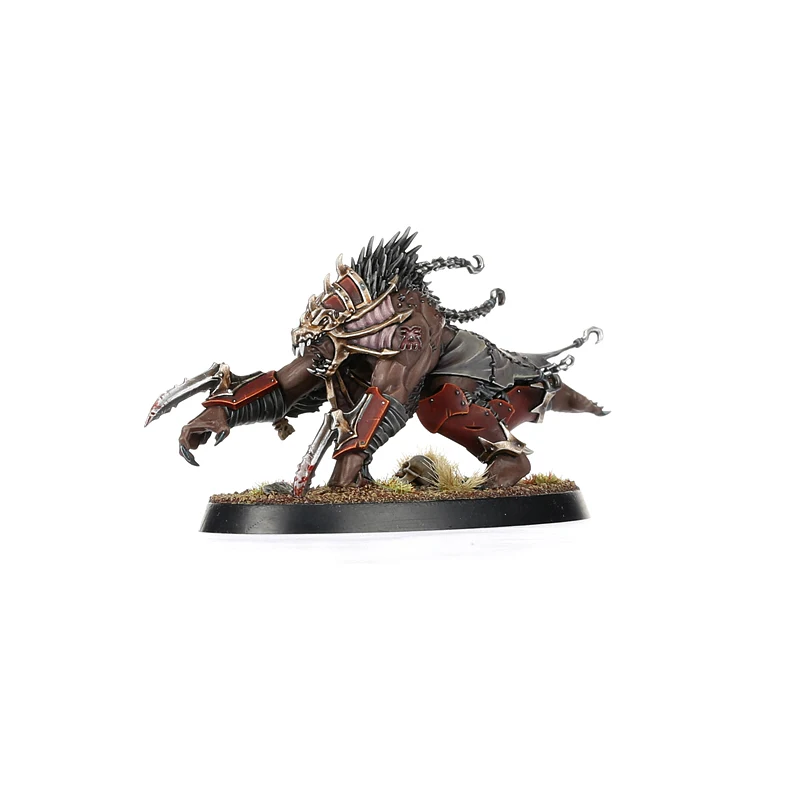
Abilities for the Claws of Karanak Warband
- Blood for the Blood God (Double, Everyone): After taking down an enemy perform a bonus move or bonus attack.
- Flaming Breath (Double, Hound of Wrath): A chance to do 3 damage to all engaged enemies.
- Pack Hunters (Double, Hound of Wrath and both Blood Whelps): Activate another visible friendly fighter with the same runemarks in range immediately after this one.
- Horrifying Trophies (Triple, Brutaliser with Shredder Blade and Meat Hook): After taking down an enemy, enemy fighters in range cannot use abilities.
- Scent of Weakness (Triple, Packlord): After taking down an enemy increase by 1 the melee attacks of friendly fighters within 8″.
- Savage Mauling (Quad, Everyone): Move an engaged enemy around by keeping him within 1″ of this fighter, then perform a bonus attack against him.
Reaction for the Claws of Karanak Warband
Bay for Coward’s Blood (Everyone)
- When: After an enemy fighter makes a disengage action in proximity of this fighter.
- What: Until the end of the round add +1 to the melee attacks against the disengaging fighter.
Battle Trait for the Claws of Karanak Warband
No Claw Unbloodied: Each time an enemy disengages, on a 2+ receives one damage for each Claws of Karanak fighter engaged.
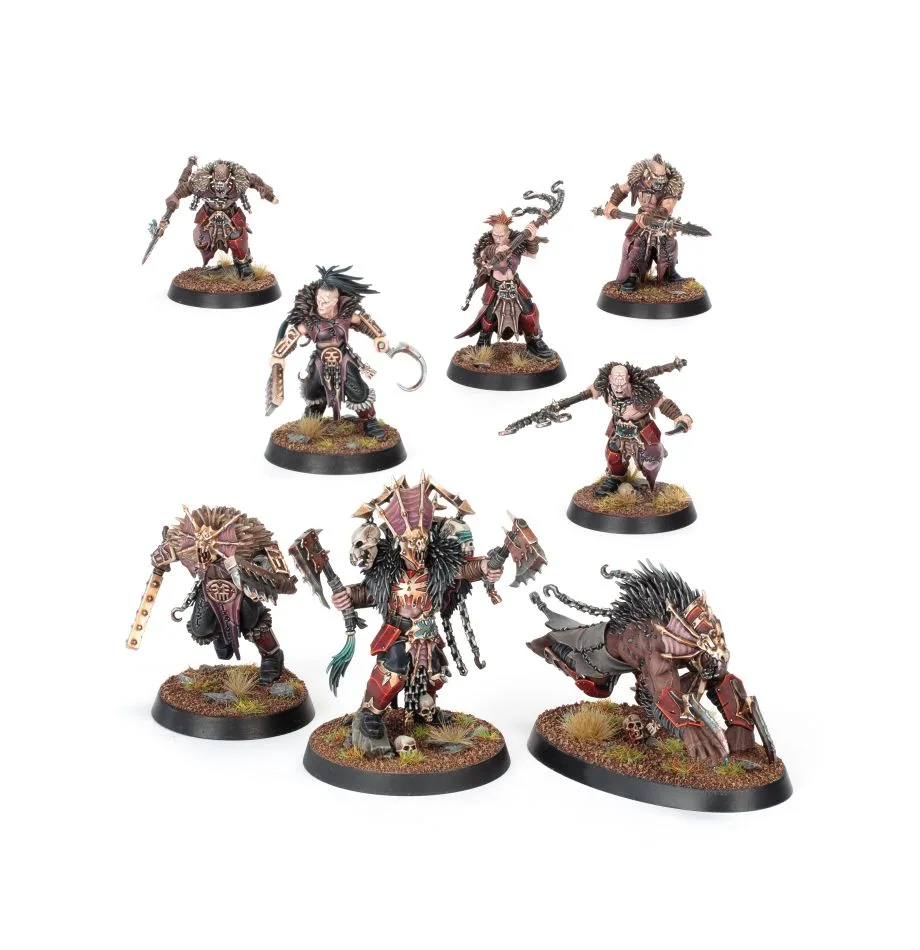
Pros and Cons of the Claws of Karanak Warband
Pros:
+ Lots of attacks with high Strength
+ Good speed
+ Synergistic and lore-matching abilities
Cons:
– Average low Toughness
– No ranged options, excluding the 2″-3″ basic infantry
Guide for the Claws of Karanak.
Claws of Karanak
When Sigmar abandoned the Mortal Realms closing off all paths to Azyr, the Realm of Heavens, the mortals have been offered a simple choice: death or join the Chaos forces. In front of such an offer, many renegaded their previous patron to proclaim their oaths to the Dark Gods.
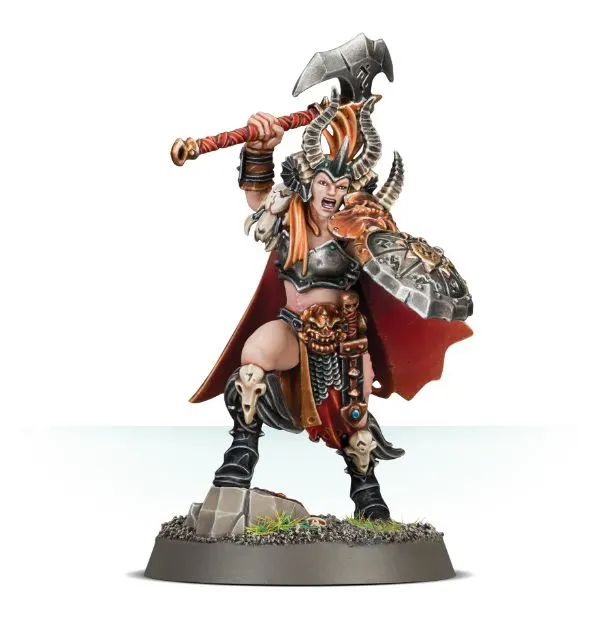
At the top of the Darkoath commanding chain there are the Chieftains, both with the same melee profile: 4 attacks at Strength 4 for 2/5 damage. Where they differentiate is that the Darkoath Chieftain on Warsteed has 10″ movement, Toughness 3 and 28 wounds but is mounted, so restricted in movements in enclosed spaces, like opening doors or climbing. The Darkoath Chieftain has Toughness 4, only 4″ movement and 20 wounds but that bit of Toughness more is actually pretty advantageous.
The Darkoath Warqueen is the main candidate for a role of leader of this warband with her Toughness 5 which is the highest in the warband. Her attacks are also pretty devastating with 1 more attack than a Chieftain (5) losing only 1 point in damage on critical hit (2/4).
The Fellriders represent the light cavalry of the Darkoath and have 2 different weapon layouts, each with their own Leader option:
- The Fellrider Champion with Javelin is the Leader with the ranged attack (10″ for 1/3 damage) while in melee doubles his attacks (4) but loses in Strength (3 instead of 4).
- The Darkoath Fellrider with Javelin has the same profile but the ranged attack drops to Strength 3.
- The other profile does not have a shooting attack, but the Fellrider Champion with Axe increases his attacks to 5.
- While the Darkoath Fellrider is still at 4 attacks, making him identical to the Javelin counterpart but without the ranged attack.
The Darkoath Marauders are the basic infantry. They also have 2 weapon loadouts, each with their own Leader option. They all share 4″ movement, Toughness 4 and the absence of any dedicated ability:
- The Marauder Champion with Spear has the 2″ range useful to attack without being engaged, but drops to 4 attacks at Strength 3.
- While the Marauder Champion has 5 attacks with same Strength and damage (1/3). They are both Leaders.
- The Darkoath Marauder goes down an attack (4).
- Same as the Darkoath Marauder with Spear (3 but same 2″ range).
The Darkoath Wilderfiend is the most expensive fighter in the warband and is indeed a beast (in all senses, as it has the Beast runemark which prevents him from opening doors, etc.). It has 6 attacks at Strength 5 for 3/4 damage, Toughness 5 and a great 6″ movement making it the most deadly fighter in the warband.
Brand’s Oathbound is a group of characters with their own novels and even an appearance in Warhammer TV. The 2 leaders of this group are Gunnar and Tanari.
- Gunnar Brand has the melee profile of a Warqueen but Toughness 4 and 25 wounds. His ability gives more melee attacks.
- Warqueen Tanari has the same profile of a Warqueen but with 5″ movement and Toughness 4. Her ability does damage in an area around her.
- Singri Brand starts as a Fellrider with Javelin, but with some improvement: more wounds, shooting range extended to 18″ with Strength increased to 4 and damage to 2/4, all at the cost of 1 less attack in melee. Her ability gives more ranged attacks.
- Dendrel Direbrand is a decent hitter (1 attack less than Gunnar or a Warqueen) and maintains Toughness 4, and his ability improves his chances to do damage.
- Broken Nadja is the only wizard in the warband with the classic 3″-7″ attack for 3/6 damage but at a poor Strength 2. Her melee attacks are negligible and her ability is a ranged attack.
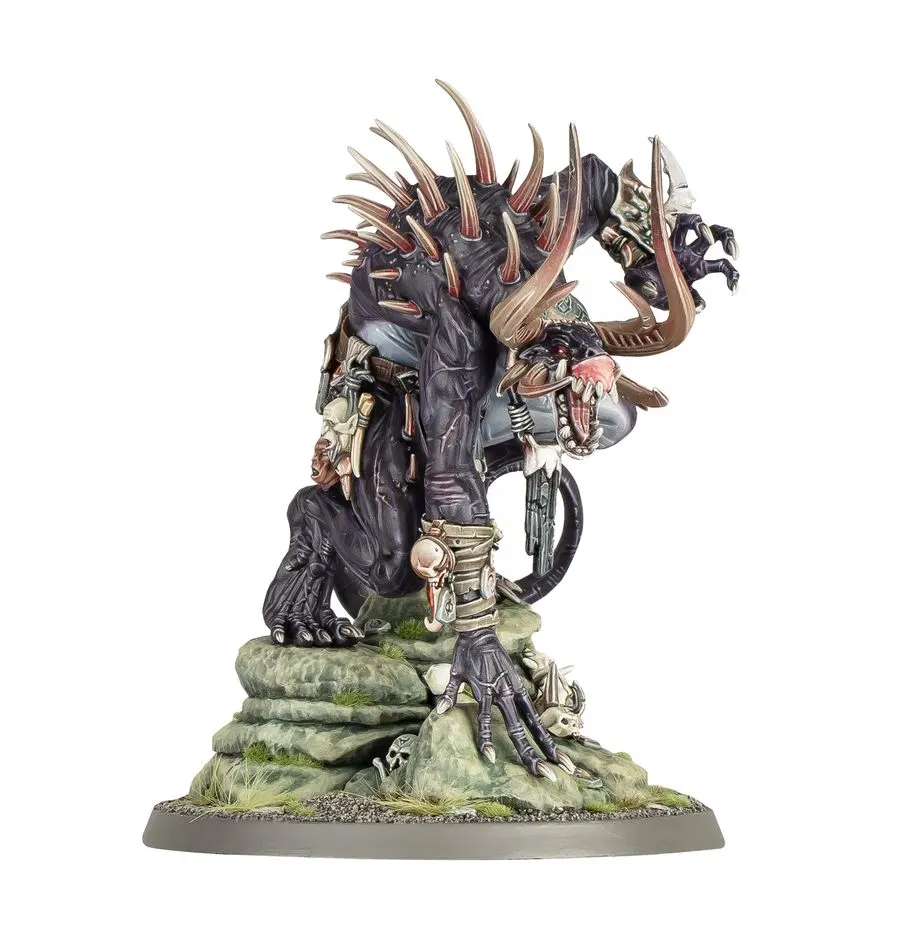
Abilities for the Darkoath Warband
- Oath of Murder (Double, Everyone except Wilderfiend): This fighter becomes oathed until they take down an enemy fighter. Then they become favoured for the rest of the battle and obtain a Double with value 1.
- Swift Attacker (Double, all Fellriders with Javelin): After engaging an enemy, perform a bonus ranged attack against an engaged enemy. If favoured, add up to 6 to the damage allocated by each hit and critical hit of the bonus action.
- Raider’s Tenacity (Double, Fellrider Champion with Axe and Darkoath Fellrider): Heal up to 3 (or 6 if favoured) damage points.
- Warleader (Triple, all Chieftains): Pick a fighter within 6″ that has not activated to activate immediately after. That fighter (and 2 more if the Chieftain was favoured) can activate Inspiring Presence without using any dice in their turn.
- Rally the Tribes (Triple, Warqueen): Each Darkoath Marauder within 6″ makes a bonus move action, and if the Warqueen is favoured, they count +1 when contesting objectives.
- Eye of the Dark Patron (Quad, Wilderfiend): Another Darkoath within 6″ can activate immediately after. An enemy within 6″ receives up to 3 damage for each 4+ on 6 dice rolled. The Wilderfiend obtains +2 attacks on melee actions.
Brand’s Oathbound abilities
- Carve a Path to Glory (Triple, Gunnar Brand): Add up to 3 (or 6 if favoured) to the number of attacks in melee.
- Uncanny Shot (Triple, Singri Brand): Add up to 3 (or 6 if favoured or targeting an enemy engaged with Gunnar) to the number of attacks in ranged actions.
- Warqueen’s Fury (Triple, Warqueen Tanari): Perform a bonus attack action against each enemy within 1″ (or 3″ if favoured, in that case her range is increased to 3″).
- Withering Death (Triple, Broken Nadja): Allocate up to 3 damage for each 4+ rolled against an enemy within 9″ after rolling 6 dice (or 9 if favoured).
- Demolishing Strikes (Triple, Dendrel Direbrand): For this activation he scores hits on a 3+ and, if favoured, critical hits on a 5+.
Reaction for the Darkoath Warband
Glorious Death (Everyone except Wilderfiend)
- When: A melee attack action would do enough damage to take down this fighter.
- What: Obtain a Double with value 1, if they are a Hero obtain a Triple instead or if they are favourite a Quad.
.

Pros and Cons of the Darkoath Warband
Pros:
+ Interesting thematic abilities
+ Easy to collect for a legacy army
Cons:
– Weak ranged attack
– Limited mobility
Other great resources:
- Warband Overview for Death & Destruction
- Warband Overview for Order
- Warcry Bladeborn Warbands Overview
- Warcry Hub
- Warcry Beginner’s Guide


