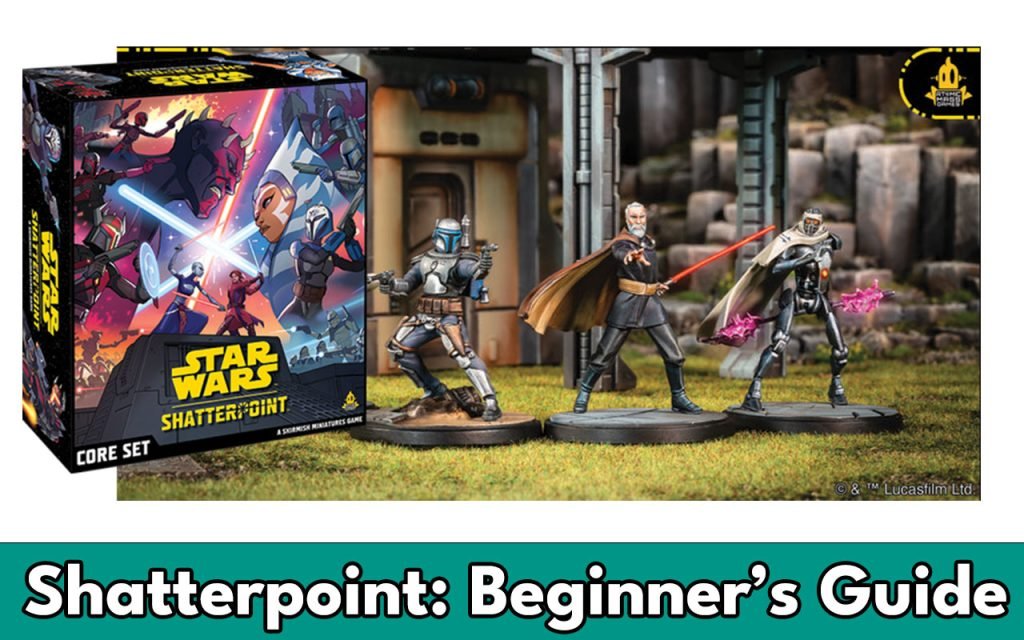
Star Wars: Shatterpoint is a tabletop skirmish game from Atomic Mass Games, based on the Star Wars universe.
It’s a game where heroes and villains fight over battlefield objectives, guided by the cosmic power of The Force, using lightsabers, blasters and mystical abilities. Players battle to win Struggles, and the balance of power shifts back and forth between the players as the game progresses.
In this article, we guide you through what you need in order to play the game, the basic rules for playing the game, the most important Shatterpoint concepts to understand – and all the different packs and accessories released for the game!
You can also check our article with an overview of all Star Wars Shatterpoint miniatures.

Affiliate Link Disclosure
Age of Miniatures is reader-supported. When you buy through links on our site, we may earn an affiliate commission. Learn more about that here.
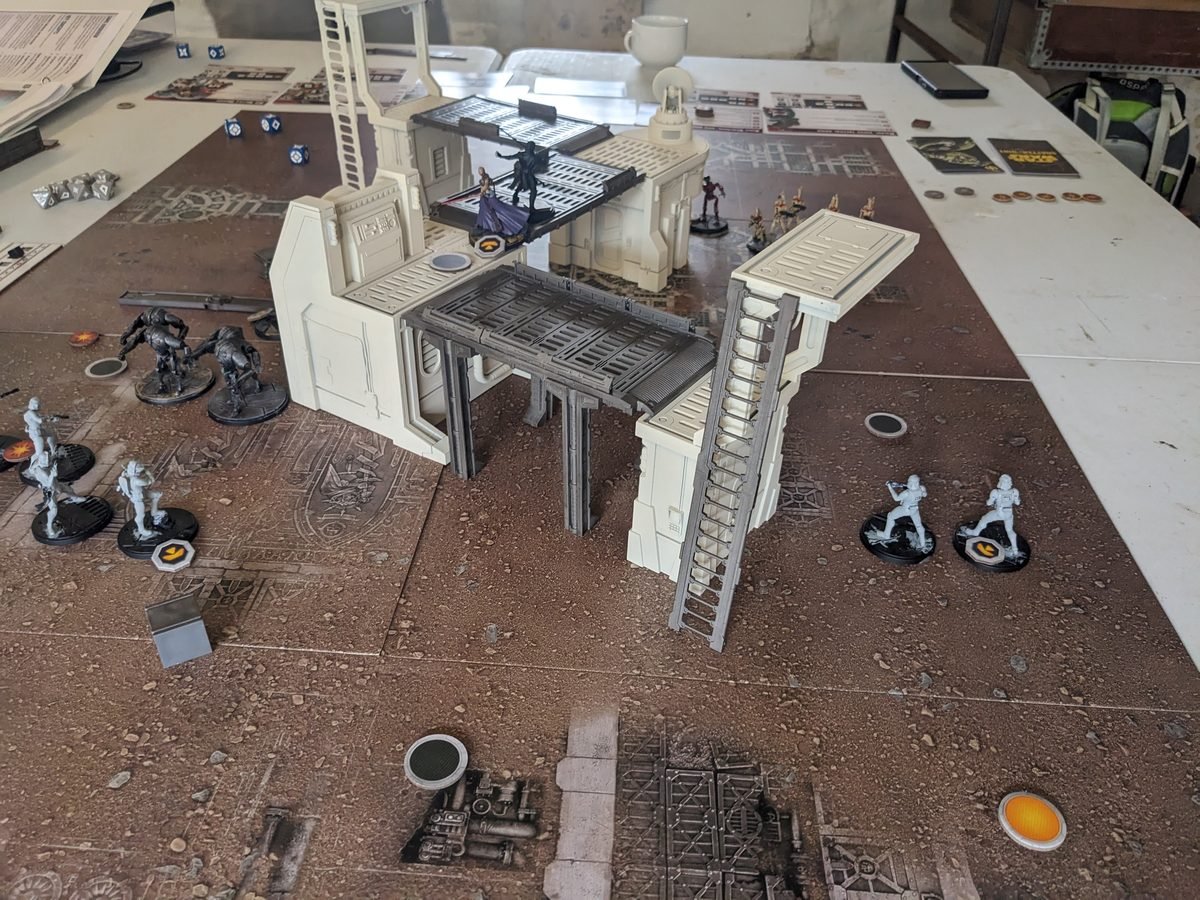
What is Star Wars: Shatterpoint?
So, why should you care about Star Wars: Shatterpoint?
In this section, we’ll try to explain why the game is worth keeping an eye on from two perspectives:
1. I’m a Star Wars fan – why is Shatterpoint a game for me?
If you’re a fan of the Star Wars universe in general, that’s already a good enough reason to get involved with Star Wars: Shatterpoint. The game is all about bringing epic lightsaber duels and tense bounty hunter shootouts to life on the tabletop with beatifully sculpted, paintable miniatures that really capture the flavour of the Star Wars universe.
The game isn’t the first Star Wars miniature game at all – Atomic Mass Games already publishes the army scale wargame Star Wars: Legion and the two space battle games Star Wars: X-Wing and Star Wars: Armada – but the relatively large scale of the miniatures in Shatterpoint and the game’s focus on creating cinematic moments for your characters makes it perfect for imagining you’re controlling the most famous characters of your favorite setting.
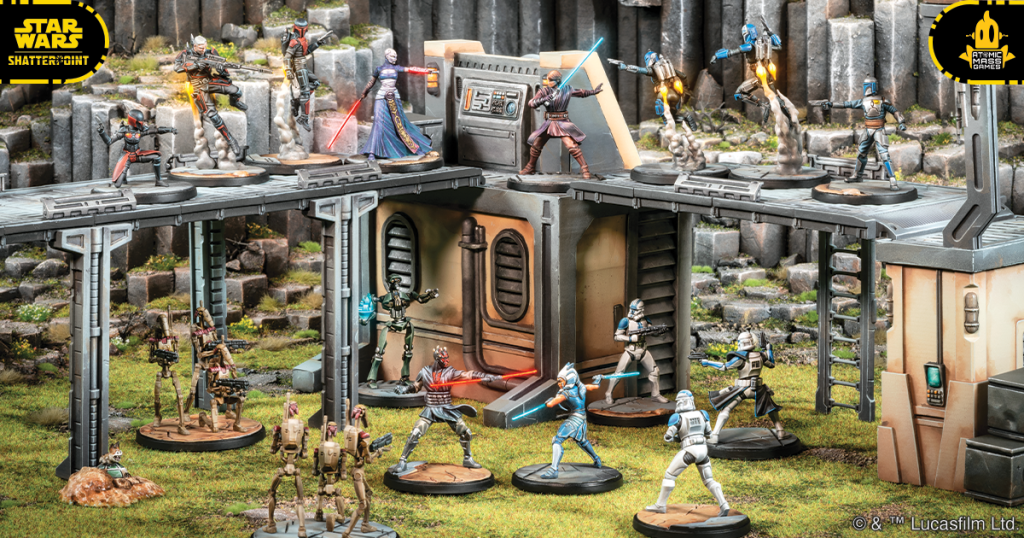
If you’re particularly a fan of the animated Star Wars series such as Clone Wars or Star Wars: Rebels, however, we can recommend Shatterpoint even more: The initial release packs for the game are headlined by fan-favorite characters such as Ahsoka and the not-at-all-dead Darth Maul (sorry for the spoilers, prequel fans!), and the more long term release schedule shows that Atomic Mass Games is committed to bringing all sorts of central and peripheral animated characters to life, to the point of the game’s miniature design even having a bit of a cartoony feel.
The game also features releases from the original trilogy, such as Leia, Luke Skywalker and Darth Vader, but it does have a unique focus on the animated side of the Star Wars Universe.
If you’re a Star Wars fan who’s never tried a skirmish game before, don’t be afraid to dive in! Shatterpoint might seem a little complex at first, but as miniature games go, it’s one of the most approachable ones out there with rules that are written with players in mind and easy access to those rules.
2. I like skirmish games – why is Shatterpoint a game for me?
Miniature skirmish games are having a real moment these days, with Games Workshop focusing heavily on them with Kill Team and Warcry, and many other systems such as Infinity and Frostgrave still going strong, but one of the real breakout successes of recent years has been Marvel Crisis Protocol. Marvel Crisis Protocol is a very modern skirmish game with rules that are well-balanced, easy to use – and completely free to download and access.
This accessibility and transparency combines with a fantastic setting, the Marvel Comics superhero universe, and a breakneck pace of releases of gorgeous miniatures that come from all corners of the setting, into a game that’s won over even many players who wouldn’t normally see themselves as Marvel nerds.
But wait – why are we talking about Marvel Crisis Protocol when this was supposed to be about Shatterpoint? Well, Star Wars: Shatterpoint is being made by the very same team that gave us Marvel Crisis Protocol, and so far, it looks like it’ll feature the same level of accessibility combined with a serious deep dive into its setting that everyone loved about Marvel Crisis Protocol.
If you’re a skirmish gamer who also really loves the hobby side of things with assembling and painting your miniatures, even better: Shatterpoint has relatively large miniatures and only around 3-5 miniatures in most squads for the game, so there’s room and time for you to put lots of energy into painting the best looking miniatures you can!
What do I need in order to play Star Wars Shatterpoint?
If you want to get into Star Wars: Shatterpoint at launch, the first two items to get are:
- The Core Rules. The Core Rules are a “living ruleset”, which means that it’s a downloadable PDF that the designers can balance and adjust on the fly. If you’re used to Kill Team or other book-based skirmish games, this will probably sound like a relief, and it is – in fact, you can already download the full Core Rules for Star Wars: Shatterpoint now, and for free! The rules are available for download from Atomic Mass Games’ website here.
- The Shatterpoint Core Set. This starter set for the game contains everything you need to play the game (and then some):
- Miniatures for 4(!) squads, 16 miniatures in total, including Ahsoka, Anakin, Darth Maul, Asajj Ventress, and more.
- Scenery
- The special dice required to play the game
- The special measurement tools required to play the game
- Mission, Struggle and Unit Cards
If you want a really immersive experience, you’ll also want to buy some sort of game mat that gives your scenery and miniatures something looking like actual ground to stand on, rather than just your dining room table, but it’s entirely optional.
Many other teams and terrain expansions are being released as well (which you can see in the “upcoming releases” section below), but what’s mentioned above will give you the full experience at a very reasonable price, and buying all the dice, scenery and measuring tools separately is pretty pricey.
Related
The Rules of Star Wars: Shatterpoint
Goal of the game
Like many other modern skirmish games, Star Wars: Shatterpoint is much more about completing objectives than just killing off your opponent’s models. To this end, the goal of Shatterpoint is to complete a series of shifting and randomized objectives to achieve goals called Struggles over the course of the game in order to win two of those Struggles before your opponent does. Combat is still a huge part of the game, but Atomic Mass Games consistently promotes the game as being more about objectives than killing stuff.
Squads in Star Wars: Shatterpoint
When you play a game of Star Wars: Shatterpoint, you bring a Strike Team, which is a roster of two Squads. Each Squad is made up of the following:
- a Primary Unit – this is the leader of your squad, such as Anakin Skywalker or General Grievous.
- a Secondary Unit – this is a supporting character for your squad, such as Kraken or Commander Cody.
- a Supporting Unit – unlike the other two, Supporting Units usually aren’t named characters, and a Supporting Unit can consist of multiple models.
The Primary Unit has a set number of Squad Points, and the other two types of units have Points Costs, so that if your Primary unit has 8 Squad Points, the total Points Cost of your Secondary and Supporting Units can’t exceed 8. All the units in your squad have to be from the same era – Clone Wars for the Anakin days or Galactic Civil War for Darth Vader era, basically – but apart from that, those are all the restrictions there are on squad building at launch.
This is a squad building system that is both streamlined and full of depth: All the squad boxes you can buy for the game (see the last section of this article) contain full squads of Primary/Secondary/Supporting Units that match a theme in the narrative of their era, and if you want to play a squad that feels like something from the films or tv shows, that’s definitely the way to go. However, if you’re more interested in making the most of the game’s rules when playing competitively, you can absolutely collect all the teams and figure out what the optimal squad for your playstyle is by mixing and matching units from different sets for the best chance of winning.
When playing a game, you select which of your two squads you want to play as.
Unit Rules
Each unit in the game has two cards that explain what it can do in the game: The Unit Stat Card and the Stance Card. In this section, we go through the layout of both of these and how they influence the game.
A note on units and characters
Before we go into the finer details of Shatterpoint rules, there’s one particular concept of the game’s “language” it’s important to be clear about: Most of the logic of the game’s rules writing is built upon a clear distinction between the term unit and the term character:
- a Unit is the group assigned to a specific set of rules cards, such as those of Ventress pictured below – be it a Primary, Secondary or Support unit. Characteristics such as Stamina and Durability are a collective statistic for the entire unit, even if it consists of more than one fighter. This means that if a Supporting unit of 2 Clone Troopers has a Stamina of 9, that unit can take 9 damage before being wounded – not 9 for each Trooper in the unit. Any Action performed by a unit must be performed by all models in that unit, so if you make an Advance action with a Clone Trooper Support unit with 2 models, they must both Advance, even if they’re far apart.
- a Character is a model in a Unit, even if the unit only consists of 1 model! This means that when the Dathomirian Dexterity ability on Ventress’ says that “Each character in this Unit” may Jump, it doesn’t mean that everyone in your squad can do so – it just means Ventress can Jump. This might seem an unintuitive way to write the rule, and it’s different than other Atomic Mass Games’ writing (Marvel Crisis Protocol would have said “This character may…”), but the great thing about it is that it makes the terminology and rules logic consequent across both single- and multi-character Units. If a rule says “each character in this unit” for a Supporting Unit with multiple characters, it means they all get to do what the ability says.
The Character/Unit distinction in the game’s terminology might seem a little weird at first, but as you get used to it, it makes it much easier to figure out exactly what a rule means in the context of the game. With that out of the way, let’s take a look at how the rules for Units are mapped out on Stat Cards.
Unit Stat Card
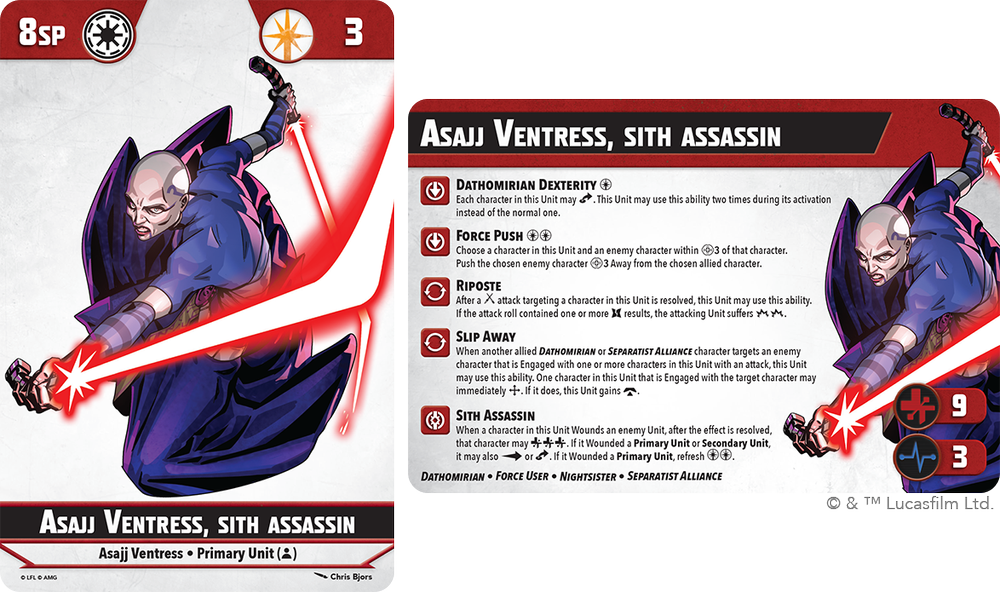
The Unit Stat Card, pictured in Asajj Ventress’ version here, consists of two sides. on the side with the vertical layout (to the left), the following information is shown:
- Name and Unit Type (bottom) – this shows what the character is called, and what role it plays. This section also displays its Unique Name (the name at the very bottom) of which no two can be taken in a game, meaning that you can’t for example, include two different versions of Ahsoka Tano with different unit types in a squad.
- Squad Points/Points Cost and Era symbol (top left) – for a Primary Unit, this shows how many points of “followers” you can take in your squad, and for Secondary/Supporting Units, it shows how much of the Primary Unit’s Squad Points they take up. So far, the two eras available in the game are Clone Wars and Galactic Civil War.
- Force (top right) – This shows how much Force your Unit contributes to your Force Pool, which is the amount of points you have for performing powerful abilities in the game.
The horizontal layout (to the right) shows the following information:
- Name (top) to help you keep track of who’s who even when this side of the card is up.
- Abilities (left) – these are the things your Unit can do apart from moving, attacking and controlling objectives. Some abilities have a Force points cost next to their name, shown by a number of Force symbols, some don’t (note: technically, per the latest FAQ, all. The game has the following ability types (and Marvel Crisis Protocol players will feel right at home here):
- Active abilities have to be selected for use in the Unit’s activation – sometimes the ability states that it takes up one of your two actions by precluding its text with the word “Action”, sometines it doesn’t.
- Reactive abilities can be used when a specific trigger occurs, such as an opponent attacking you.
- Innate abilities are abilities whose effects are always in play, such as a reduction to incoming damage.
- Tactic abilities are Innate abilities that always happen at the start of the Unit’s activation, and which also affect other units. For example, Captain Rex has an ability that lets another Galactic Republic character move when he activates.
- Identity abilities only occur on Primary Units and happen on a triggering condition just like Reactive abilities, such as the Sith Assassin ability on Ventress pictured above
An important element of abilities to note is also that they might bestow certain Keywords onto your unit:
– Immunity [X] makes your unit immune to the Condition (see the combat section of this article) listed within the brackets (such as Immunity [Strained])
– Impact [X] improves the effects of Focus actions on melee attacks (see Focus actions further below)
– Protection lets you remove 1 damage from the enemy’s Damage Pool when you’re being attacked
– Scale lets your unit Climb instead of Advancing or Dashing (see Move actions further below)
– Sharpshooter [X] is just like Impact, but for ranged attacks
– Steadfast lets your unit ignore the first Shove (see the combat section further below) of an enemy attack.
The horizontal side of the Stat Card also shows your Stamina (top of the bottom left pair of symbols) which shows how much damage the unit can take before being Wounded, and Durability (below Stamina) which shows how many times the unit can be Injured before it’s defeated.
Finally, the stat card show any Tags the Unit might have, which are keywords at the bottom of the card which rules in the game can interact with, like Galactic Republic in the Captain Rex ability mentioned above.
Stance Card

A Unit can have different Stance Cards depending on which fighting style they wish to use, such as Ventress’ Form II Makashi Stance and Jar’Kai Stance pictured above, but the layout is the same across all of them. A Stance Card shows how the Unit fights and defends itself, and to understand them properly, you need to know how dice work in Star Wars: Shatterpoint:
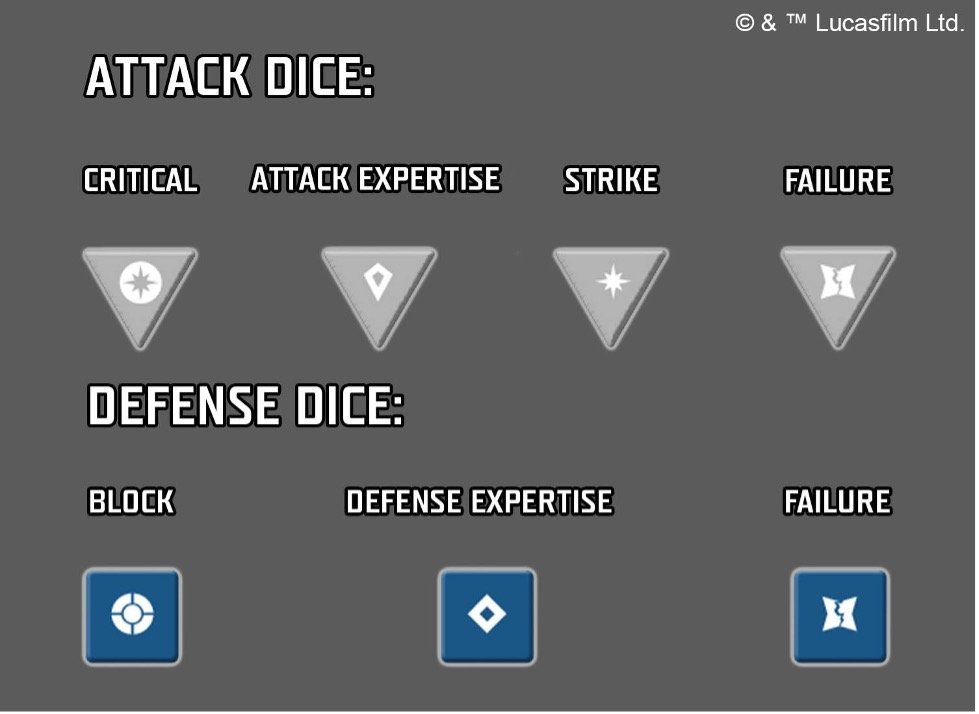
Attack dice (top row above) have 4 different symbols on them, from left to right: Critical, Attack Expertise, Strike, and Failure. Defense dice (bottom row above) have 3 different symbols, from left to right: Block, Defense Expertise and Failure. The Stance Card almost exclusively uses these dice symbols and other icons to explain its rules rather than plain text.
A Stance Card consists of the following sections, apart from the unit name at the bottom:
- Ranged Stats and Melee Stats to the right: These show the amount of dice you can roll in attack and defense with and against either Ranged or Melee weapons.
- Combat Tree to the top left: This is one of the more unique elements of Shatterpoint rules. If, when attacking, you end up with one or more succesful rolls after all modifiers have been applied, you can use each of these successes to advance along the branching Combat Tree to apply effects. For example, Ventress in her Jar’Kai stance can choose between her first success causing two damage (the explosion symbols) or causing one damage and applying the Strained condition, which damages the target if it tries to move. The more successes you roll, the further up the Tree you advance, adding more and more effects.
- Attack and Defense Expertise Charts in the bottom left and center: These charts show what happens if you roll one or more Expertise symbols in your attack or defense rolls, and they use the dice symbols plus a few other symbols. For example, rolling 1 Defense Expertise in Jar’Kai stance with Ventress gives you a Block symbol and allows you to change one of the opponent’s Critical successes into a regular Strike (the yellow symbol with an arrow towards the Strike symbol). The more Expertise symbols you roll, the greater the effect.
The Stance cards add tons of complexity and finesse to combat in Star Wars: Shatterpoint, and it’s completely understandable if players feel overwhelmed at first – this author sure did – but since they use a universal set of symbols, as soon as you crack the code, they’re really easy to read.
There’s a lot to keep track of on the two types of Unit Cards, and it definitely won’t be a system that appeals to everyone. However, if you like having very few units in a skirmish game, but tons of rules for the few you have, this system will definitely be something you’ll want to try out.
Missions in Star Wars: Shatterpoint
In addition to selecting your Strike Team before a game, you also bring a Mission Set, which consists of a Mission Card and the Struggle Cards that come with it (they’re all marked with little symbols that show which set they belong to).
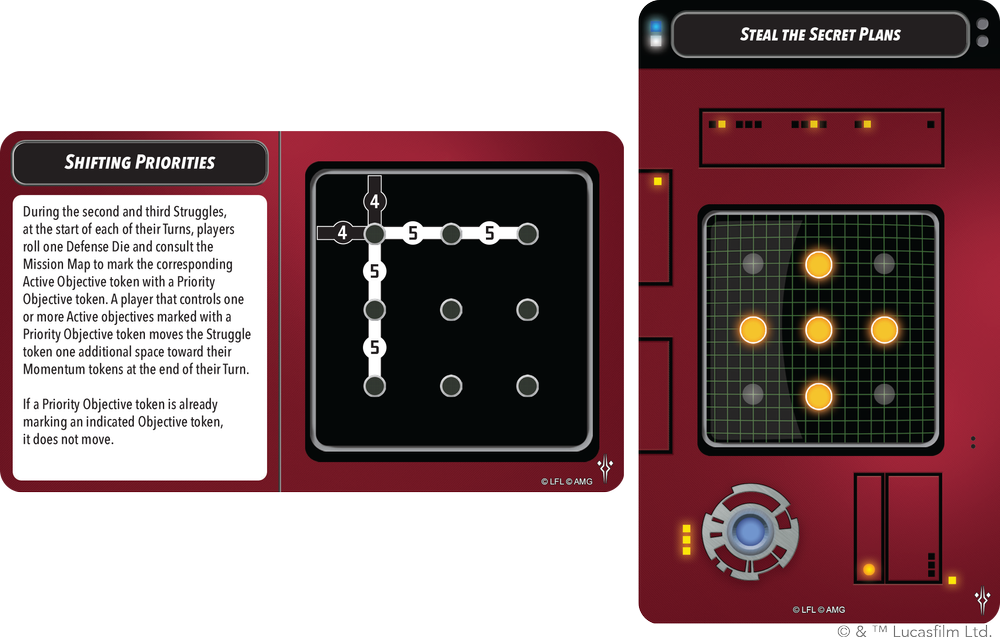
The Mission Card (to the left) shows you how to set up the objectives on the battlefield and how the mission generally works, and then the game starts out with a Phase One Struggle Card active (to the right), which shows which objectives you have to control in that Phase, marked in yellow. Then, players score points by controlling objectives from the Struggle card and completing missions objectives, until one player has scored enough points to move the Struggle Counter all the way to their side on the Struggle Tracker pictured here:

Once a Struggle has been completed in this way, a new Struggle Card is revealed, and so on, until one player has won two struggles, which means that player has won the game.
Winning a Struggle isn’t just a tug of war across the middle on the way to 7 on either side of the Struggle Tracker, however. You can add Momentum tokens (the little black things on each side of the Tracker in the image above) to the Tracker in many circumstances, such as:
- When you Wound an enemy unit, or they succumb to the effects of a Condition, you can add 1 Momentum token to your side of the Tracker.
- If you move the Struggle token (the blank one on the image above) in your turn and it’s still on the opponent’s side of the tracker, you can add 1 Momentum token to your side of the tracker, making a comeback for you a bit easier.
- Apart from in the first turn, the Struggle token being a the centre of the tracker after you’ve moved it gives both players a Momentum token on their side of the Tracker.
This means that as soon as you start playing the game, the amount of steps on the Struggle Tracker each player has to move to win the Struggle is constantly shrinking – and so far, there’s nothing you can do to remove Momentum tokens apart from winning the Struggle, which resets the amount of Momentum tokens you have to just one at the “8” on the Tracker. The Momentum system makes the game go pretty fast, as it doesn’t take long to win a Struggle as soon as you get the upper hand, but it also has a few ways to help the losing player turn the tide and snatch a close victory from the other player, which is a big part of what makes the game so fun to play.
Contesting and Controlling objectives
The way you gain control of an objective in Shatterpoint works as follows: If a character (not a unit) is within Range 2 of an Active Objective (one that is highlighted by the mission you’re playing in a given Struggle), they’re contesting it. The player with the most characters contesting an objective at the end of an activation controls it. When you control an objective, you place your marker (one player has a red one, the other a blue one) next to it, and then you control it until the opponent contests it or the Struggle ends. This means that, if the enemy isn’t threatening you on an objective, you don’t have to have a unit camping around that objective to keep it. This is a pretty huge departure from many other tabletop games, where a large part of the objective game is having designated units sitting around on objectives. If you can keep the opponent from moving past you and onto your controlled objectives, there’s nothing stopping you from pushing forward towards more objectives.
Turn Sequence
Before a game begins, the players roll of to see who goes first, and then they take turns making activations with their units. Each unit has an Order card, which each player shuffles into an Order Deck alongside a Shatterpoint card, and when it’s their turn to activate, they draw an Order card to see which Unit they get to activate. If they draw the Shatterpoint card, they can pick whichever Unit they want to activate. If they draw a Unit they don’t want to activate right away, once per turn they can pay 1 Force point to set them aside, draw a new card and then just pick the card they set aside later. When they run out of cards to draw, they Refresh their deck by shuffling all the cards back into it. When players Refresh their decks, they also Refresh their Force Pool, so they can use all of their abilities igen.
Each activation lets a unit perform two actions. You can choose between one of the following general categories of actions, and you can only do each of them once per activation:
- Move – this lets you make a move action, and you can choose between the following three:
- Advance: This uses the Advance measuring tool and is the move action that takes you the furthest distance in the game. All characters in the game can move this distance, so unlearn what you have learned about different movement stats in other games.
- Dash: This uses the much shorter Dash measuring tool and is mainly used for moving out of Engagement Range of enemy characters, which is a position from which you can’t Advance.
- Climb: Unlike the other two types of movement, Climb lets you end your movement at any elevation higher than your starting position, so it’s great for getting on top of buildings and walkways. It uses the Dash measuring tool.
- Focus – this gives your unit an additional attack dice for their next attack roll. Note if your unit has Sharpshooter [X] it adds extra dice on top of that 1 attack dice equal to the value X in the keyword (so, for example, Sharpshooter [2] would give you 3 dice extra in total) for a ranged attack, and Impact [X] does the same, but for melee attacks. It only affects attacks made in the same activation as the Focus action, so it can’t be used to power up your next activation.
- Combat – this lets you make an attack with your unit, either ranged or melee. Since ranged and melee aren’t split into different actions, as far as we understand it, a 2-character unit can have one character make its attack at range and the other can make it in melee as part of the same action.
- Ability – this simply lets you use Active Abilities precluded by the word “Action”.
- Recover – this lets you heal 1 point of damage or remove a Condition from yourself or a nearby allied unit.
- Take Cover – this lets you Push each character in your unit Range 1 (the short side of each of the measuring tools) and give each of them a Hunker token. Hunker tokens give you an additional Defence dice against ranged attacks, but they’re also required to gain the benefit of cover from terrain features. This is an important change for people who are used to Games Workshop games: You only get the benefit from cover if you’ve actually made an effort to duck or hide from enemy fire in Shatterpoint.
If you score any points for the Struggle Tracker, you score those at the end of the activation. Note that the game doesn’t have rounds per se, but players just keep refreshing their Order Decks until the game is over.
Attacking and taking damage
We’ve explained much of how attacking works in the Unit rules section, but we haven’t looked at how exactly it plays out in the game itself. When you attack, you declare if you’re using your Melee or Ranged profile (if you have one), and then you select a target that’s within range. Then, you check your Stance Card to see how many dice you can roll, and so does the opponent, and you roll your respective dice pools. After modifying your dice results from the effects of Expertise and Abilities, you check if any successes remain in the attack roll after resolving the defense roll, and then apply damage first, and other effects from the Combat Tree second.
The following non-damage effects can be part of your combat tree:
- Movement and Reposition: Various kinds of moves can show up on your combat trees, and when their symbols appear, you can use them. A special one for combat trees that you don’t see anywhere else is Reposition (a cross with arrows at the end of all of its “arms”) which lets the attacker Advance at the end of the combat, even if they’re in Engagement Range of the target, which is a pretty big advantage.
- Heal: This lets you heal as described under the Recover action listed above.
- Active Ability: This lets you perform an Active Ability after applying damage to your target.
- Shove: This lets you Push the target away from you for Range 1 distance (the short side of measuring tools) and then move the same distance in the target’s direction. This is quite a big deal, as some combat trees have several of these icons listed, so you could end up significantly changing the positioning of both yourself and the target. For example, this could help you push the target out of Engagement Range of one of your more important or more vulnerable units while positioning your own character between that unit and the target.
- Apply one of the following conditions:
- Strained: This gives the target a Strained token, which makes the target take 3 damage after taking an action (that’s a lot of damage in this game!), and then lose the token. They can avoid this by spending an action on Recover to remove the condition, of course, but it’s an obstacle to them either way.
- Disarmed: This prevents the target from using Expertise dice in their next attack action.
- Exposed: This prevents the target from using Expertise dice in their next Defence roll.
- Pinned: This prevents the target from moving the next time they take a move action. This means they’ll have to declare a move action and then not move in order to get rid of it (or use the Recover action).
- – Note that each unit in the game can only have 1 of each of these 5 conditions at a time, meaning that it can have the Strained, Disarmed and Exposed condition at the same time, but can’t have two Strained conditions stacked on top of one another. If you were to apply a condition to a target that already has that condition, the target just suffers 1 damage instead of getting that second condition. This prevents condition stacking without making condition entries in your combat tree useless on already affected targets.
When you take damage, you add a damage token to your Stat Card, and when you reach a number of tokens equal to your Stamina stat, you become Wounded. For every Wounded token your Unit has, you have to spend 1 additional Force Point to use an Active or Reactive ability, and when it becomes your next activation, you turn the Wounded token into an Injured token and remove all damage. Your Durability stat determines how many times you can go through this process before being defeated.

