“Smash Da Gitz. Get da Teef.”
-Wise words attributed to an Orruk Shaman known as Snoop O.R.C.
The Bonesplitterz Rangin’ Rukks are a Warcry warband available through the Harbingers of Destruction expansion book.
Most Bonespliterz are available from a single box, making it one of the most economical warbands coming in at about $50 (MSRP), however with the new expansion you have plenty more options available in other boxes/blisters.
If you want a cheap hoard of half naked Orruks chanting savagely and working in unison to wear down your enemies with volleys of arrows and bone swords then this is the faction for you.
What changed in the new edition for the Bonesplitterz Warband?
Overall not sweeping changes for Bonesplitterz: wound characteristic mostly went down and a bit of profile had small changes. The great winner is the Savage Boarboy Maniak that for a small increase in price is now 4 attacks at Strength 4 for 2/4 damage but only 1″ range.
Few abilities had smaller changes, like the maximum move value is now set at 3″ instead of 6″ and their Mighty Waaagh! is now straight up 3″ instead of depending on the Quad value.
Briar and Bone added an optional battle trait.
Background and Lore of the Bonesplitterz Warband
Bonesplitterz are wild frenzied Orruks armed with little more than bone weapons, primitive bows and the protection (or at the very least confidence on) of their warpaint.
Few Orruks join the Bonesplitterz of their own accord. In truth, most seem to be chosen by GorkaMorka.
Particularly violent and superstitious Orruks often find themselves consumed by the Waaagh!, a mystical concept and primal, almost psychedelic state, a focused warlike frenzy that for most Orruks lasts only for the battle.
Orruks often chase after this feeling leading to a great deal of conflict between them and any other living creatures.
In this way, to be a Bonesplitter is to be truly blessed by Gorkamorka because the call of the Waaagh! Is constant.
More than just a state to the Bonesplitterz, Waaagh! is a way of life and they spend all their time venerating it as a living creature composed of the souls of mighty monstrosities and beasts or harnessing it in the form of bone totems and the aforementioned warpaint under the guidance of the great Wurrgog Prophets.
They now believe the Varanspire to be the mightiest predator and they close in ready to slain it and absorb its power.
Beyond this, Bonesplitterz live much like any other Orruk, engaging in wanton butchery and destruction. Indeed, it’s truly a marvellous life.
Overview and Points for the Fighters in the Bonesplitterz Warband
Note: if you haven’t read the basic rules for Warcry before reading this article, it might be helpful to know that the game’s abilities are activated by using 6 dice that you roll at the start of your turn.
If two of the dice show the same value, they can be used to activate a Double ability. If three show the same value, they can be used for a Triple ability, and so on.
So, when this article refers to an ability being a Double, a Triple or a Quad, it refers to this system. It might sound a bit confusing, but takes no time to get used to when you start playing

Maniak Weirdnob: 220 points
A boar-mounted weird wizard throwing squigs, what could be wrong?
He is an expensive leader of the Rangin’ Rukks with an excellent movement of 10″. Attention that being Mounted he cannot climb, pass through doors, etc.
He can resist quite few punches with Toughness 4 and 28 Wounds and can throw some back with his 3/6 damage ranged attack (up to 7″). His ranged attacks can be increased from 2 to 3 at the cost of a Double (Weird-Squig).
Another way to increase his attacks is via the Quad Rampaging Destroyer that allows also a bonus move if a fighter is taken down, but with Strength 3 there are better ways to use this Quad.
In melee he can keep the distance with the 2″ range and Strength 4, but the damage output may be low (4 attacks for 1/4 damage).
Savage Big Boss: 185 points
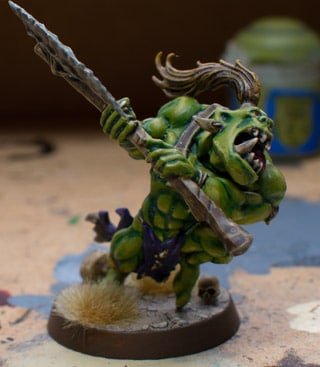
As all Orruks, also the Bonesplitterz have a ferocious Boss leading them.
With 3 Attacks at Strength 5 for 3/6 damage he hits as hard as a Big Stabba, but is smaller, more resistant (Toughness 4) and has access to some interesting Leader abilities.
All Bonesplitterz leaders have access to the Waaagh! that allows them to increase the Move characteristic up to 3″ within 6″ of a leader for a Triple. But the Big Boss can upgrade it to a Mighty Waaagh! that has a range of 9″, is straight up 3″ instead of depending on the ability’s value, but instead costs a Quad.
Apart from that, The Big Boss just hits hard. His attacks can be further increased with Rampaging Destroyer, allowing him also a free move in case he reduces to dust his opponent as an alternative to the universal Rampage.
Wurrgog Prophet: 155 points
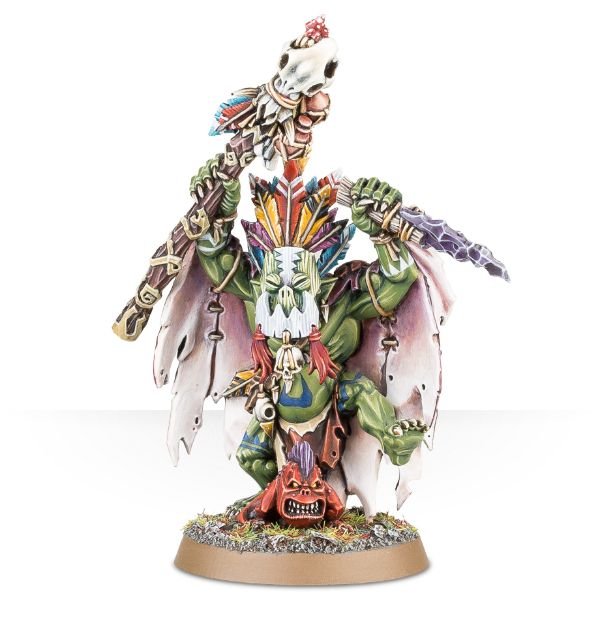
Another supporting wizard, decently priced. He has the same attacks as the Weirdnob (1 attack less in melee) but a little bit less Wounds (22) maintaining same Toughness (4).
Of all area of effect available to the Rangin’ Rukks the Beast-mask Dance for a Triple is one of the most interesting providing -1 Attack (to a minimum of 1) to all enemy fighters within 6″ that can really hurt warbands with fewer but stronger attacks.
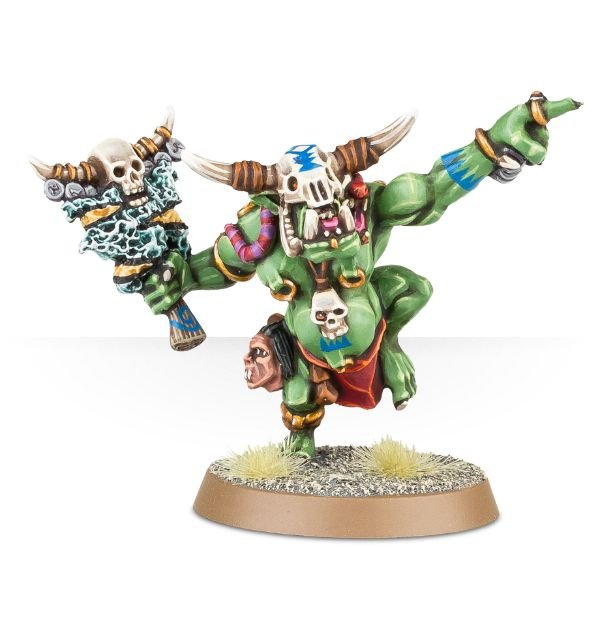
Wardokk: 155 points
The Wardokk healing ability got improved as now it can heal D3 wounds to all friendly fighters within 6″ range. It still costs a Triple and in a warband with minimum Wound characteristic 15, may not be that much, but if you need to keep someone alive, you can heal while in combat and multiple fighters at the same time.
The rest of his profile would be identical to a Wurrgog but he loses 1 damage on critical hit on melee (1/3) and 1 in Strength (3).
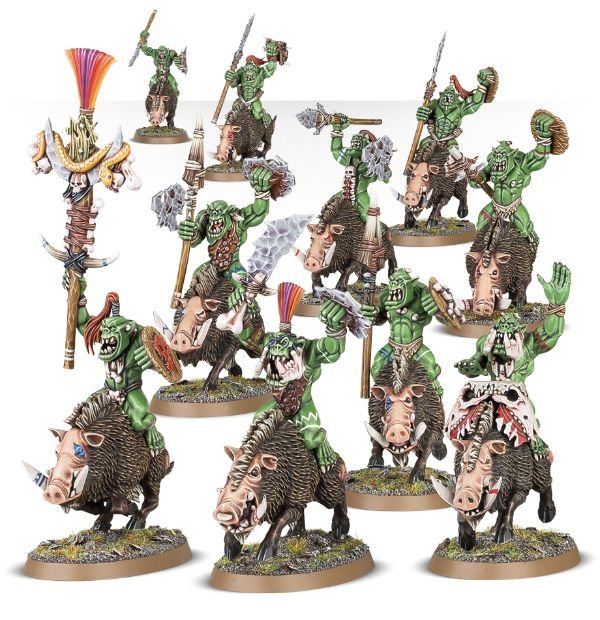
Savage Boarboys
- Savage Boss Maniak: 270 points
- Savage Boarboy Boss: 235 points
- Savage Boarboy Bone Totem Bearer: 195 points
- Savage Boarboy Maniak: 185 points
- Savage Boarboy with Chompa: 140 points
- Savage Boarboy with Savage Stikka: 140 points
The Boarboys are in reality a family of two distinct mad cavalry on top of War Boars.
They all share the same ability, Tusker Charge, that allows up to 6 damage at the end of a Move action. They are also Mounted (with all limitations) but have 10″ Movement.
Good wounds (25 for the Bosses and 20 for the others) and Toughness 4 complete their good profile.
The Maniaks hit harder and cost more, starting from the Savage Boss Maniak with 4 Attacks at Strength 4 for 3/6 damage. The Boarboy Boss does “only” 2/5 damage with the same weapon profile.
Unfortunately they don’t have other abilities apart the one shared with the others (Charge! for a bonus move you may not need, Rampaging Destroyer to increase their attacks and Waaagh! to increase everyone’s Movement, another probably not relevant ability for these units).
Following the Boss, also the Boarboy Maniak hits hard with 4 Attacks at Strength 4 for 2/4 damage, comparable to a Morboy, with the same Toughness 3.
The Boarboy Bone Totem Bearer increases Strength (5) and introduces the ability Beast Spirit Ju-ju, that for a Double increases by 1 the Toughness of all nearby fighters. Going from Toughness 4 to 5 it’s actually quite an improvement and qualifies as one of their best abilities.
Concludes the list of Boarboys the two armed with Chompa or Savage Stikka. They both have Strength 3 but where the Chompa has 4 Attacks and damage 1/3, the Stikka has 3 attacks with 2″ range and extra damage on critical. The range allows to avoid engaging an enemy but still attack it, of course this also means not using the Tusker Charge ability so everything as a downside.
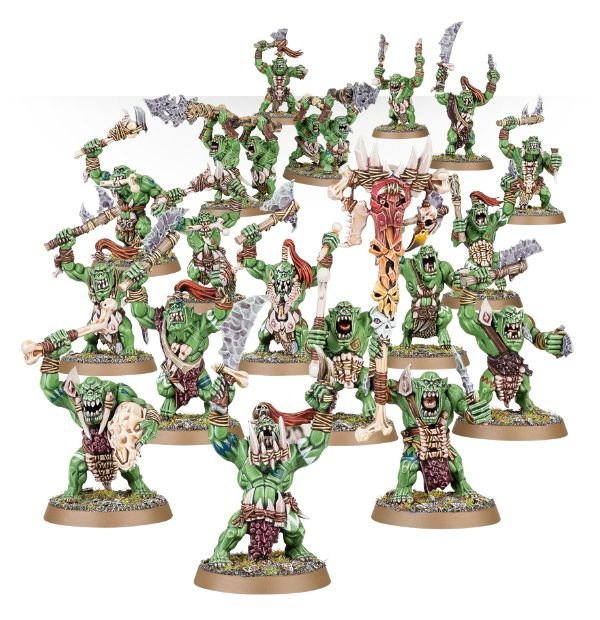
Savage Orruk Morboys
- Savage Orruk Morboy Boss: 175 points
- Savage Orruk Morboy: 95 points
- Savage Orruk Morboy Bone Totem Bearer: 115 points
The Morboy Boss is one of the top choices for a Leader and frankly if you want a melee beast this is your man/Orruk.
While his Strength and Toughness of 4 may seem somewhat underwhelming for his points, where he truly shines is his damage output.
With four attacks per combat action and a 3/6 damage layout, he can easily punch far above his weight class.
In addition Rampaging Destroyer for a Quad gives the Morboy Boss quite a lot of mobility in dealing with hordes of grots and ghouls but I’d caution against its overall use and recommend using the universal Quad Rampage which you’ll often get more mileage out of.
As a Boss, it’s always worth having few underlings around to get advantage of the Waaagh! Ability granting everyone within 6” inches up to 3” Movement to help secure objectives or engage specific characters.
Speaking of underlings, everyone needs a standard bearer and there’s no better battle standard than the bones of something fearsome.
The Morboy Totem Bearer has Strength of 4 and a 2/4 damage spread in 3 attacks at a 3” range. You’d be forgiven for thinking of this amazing support piece as being merely another glass cannon bruiser.
Where he truly excels, however, is his Double ability Beast Ju-Ju, turning a tightly packed group of Orruks into a brick wall of meat or simply just protect your Big Stabbas.
The Savage Orruk Morboy has the same stats as a Morboy Bone Totem Bearer but only 1″ range.
You also lose Beast Ju-Ju and instead gain Toof Shiv that, frankly, isn’t a good trade-off.
Toof Shiv works on the roll a dice, on a 1-2 nothing happens, on a 3+ you do straight up 3 damage, that is better than many other abilities random or based on their value, and it costs only a Double.
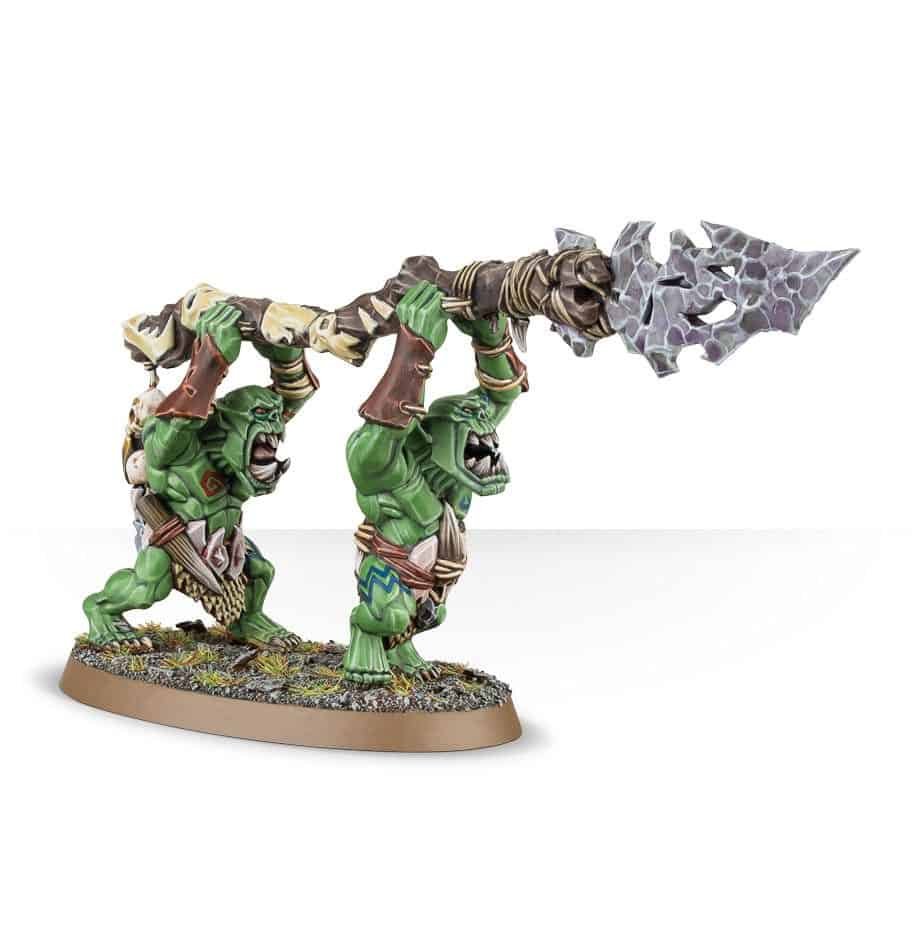
Savage Big Stabbas: 165 points
What’s better than a spear? Two orruks carrying a big enough spear to make Teddy Roosevelt envious. Coming in at 25 wounds and 5 Strength but with a lacklustre 3 Toughness, these two are somewhat of a Glass Cannon, capable of wrecking anything they reach so long as they’re fortunate enough to roll well.
They have the same damage output of a Savage Big Boss, costing less but having also no special ability.
The Savage Big Stabba is incredible on its own and can make great use of Charge in order to maximize it’s combat activations but more often than not you’ll want to pair him with a Bone Totem to ensure he stays alive during tough engagements.
Savage Orruks
- Savage Orruk Boss with Chompa and Bone Shield: 155 points
- Savage Orruk with Savage Stikka and Bone Shield: 80 points
- Savage Orruk with Chompa and Bone Shield: 80 points
The Orruk Boss is the cheapest melee leader but can’t recommend this model unless you need the points. But if you want to save points then it may be better to consider the Savage Orruk Arrowboy Boss that at least can shoot.
The Savage Orruks are the cheapest units in the Rangin’ Rukks, with 15 Wounds and Toughness 4 they are surprisingly resistant for their point cost.
In melee the difference between the Stikka and the Chompa is that the Chompa provides 3 attacks at 1″ range, while the Stikka 2 Attacks at 2″ range with greater critical damage.
The range is useful to hit while avoiding retaliation, but with a damage output of 1/3 or 1/4 you want to do as many attacks as possible to hope in critical hits.
Savage Orruk Arrowboys
- Savage Arrow Boss: 150 points
- Savage Orruk Arrowboy: 110 points
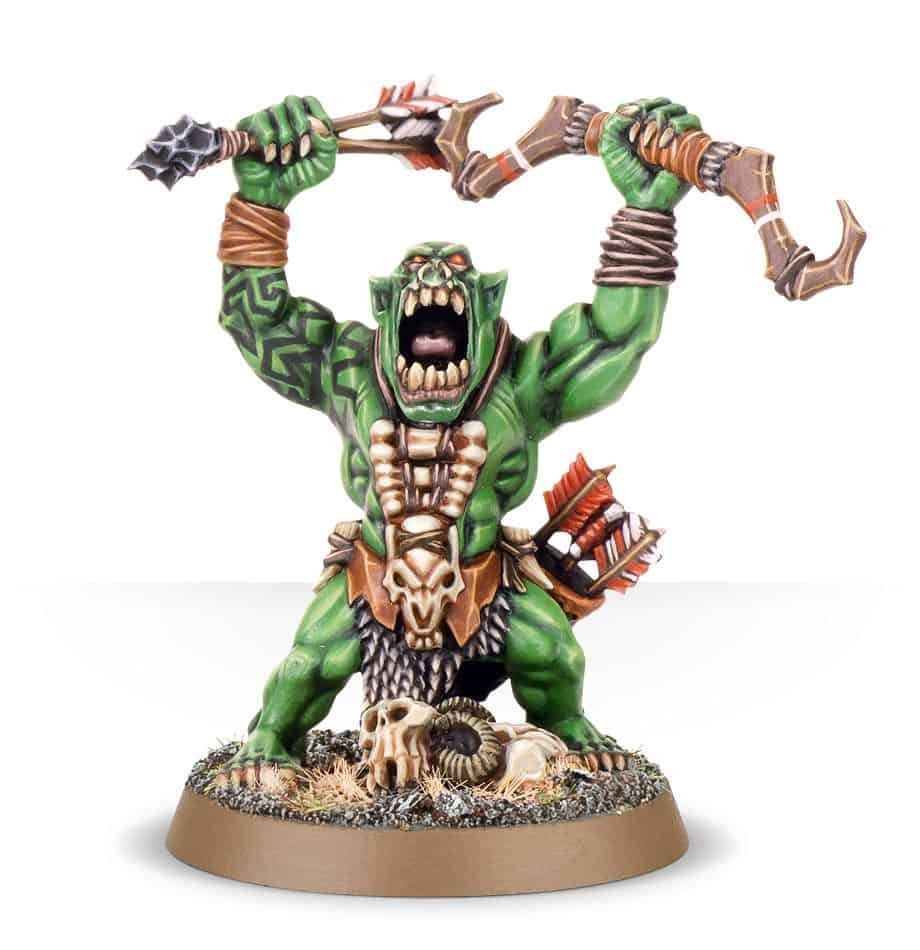
The Arrowboys are the only purely ranged option available for the Bonesplitterz with a range of up to 15″.
They can also increase their attacks thanks to Loadsa Arrow. Despite so, they have only Strength 3 and 1/3 for damage making fishing for critical hits essential. But they are cheap, indeed the Arrow Boss is the cheapest Leader in the warband.
In melee the Arrow Boss can defend himself with 3 Attacks at Strength 3 for 2/4 damage, but the Arrowboys have only 1/2 damage, so better keep them shooting.
Hedkrakka’s Madmob (500 points)
- Hedkrakka, Gob of Gork: 170 points
- Toofdagga: 95 points
- Wollop Da Skull: 120 points
- Dakko Sharp-Stikka: 115 points
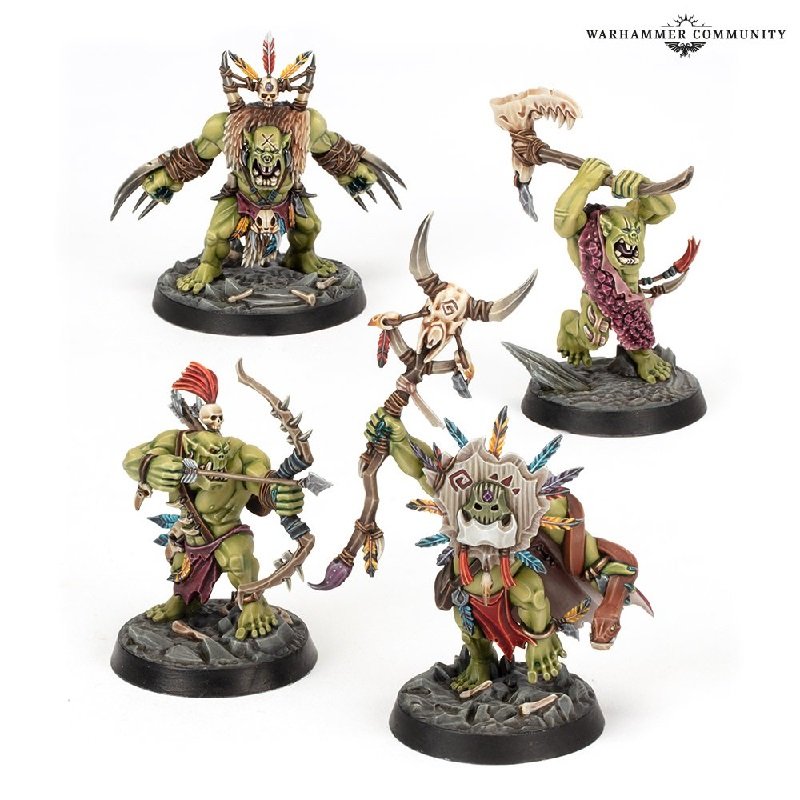
Hedkrakka’s Madmob is a Bonesplitterz Bladeborn warband from Warhammer Underworlds Season 4.
- An Eye For Weakness (Triple, Hedkrakka): increase by 3 the damage on critical hits on a targeted enemy fighter in range.
- Bone Krusha (Triple, Hedkrakka): a reliable chance to damage an enemy within range. Shorter range allocates more damage.
Hedkrakka has an identical profile to a Wurrgog Prophet including the ability to reduce the attack characteristic of enemy fighters around him (Beast-mask Dance). In addition he can target an enemy within 12″ and everyone attacking that target would deal 3 extra damage but only for critical hits.
Or he can allocate 3 damage to an enemy within 12″ on a 2+ (for as many dice as the ability’s value). The damage becomes 5 if the enemy is within 3″ (Bone Krusha), meaning that if you have a Quad, your opponent will stay far away from you to avoid annihilation.
Toofdagga compensates his low Toughness (3, as the rest of the warband) with high attacks (4 at Strength 4 with 1/4 damage), while Wollop prefers brute strength (5 for 2/5 damage), helped also by his 2″ range weapon that allows hitting without retaliation.
Dakko has the same profile as the Savage Orruk Arrowboy with a wound more (16 total) and higher critical damage on melee attacks (1/3). That is not enough to justify his increased price compared to the base Arrowboy. He has also access to Loadsa Arrows that allows his ranged attacks to increase from 2 to a potential 5 (at 15″ range).
Abilities for Bonesplitterz Warband
- Charge! (Double, Everyone): Perform a bonus move towards the closest enemy in range.
- Toof Shiv (Double, Savage Boarboy Maniak, Savage Orruk Morboy): A chance to allocate 3 damage to an engaged enemy.
- Beast Spirit Ju-ju (Double, Savage Boarboy and Morboy Bone Totem Bearers): Increase of 1 the Toughness of nearby friendly fighters.
- Weird Squig (Double, Maniak Weirdnob): Add 1 to the Attack characteristic of ranged attacks.
- Waaagh! (Triple, all Leaders): Add up to 3″ to the Move characteristic of nearby friendly fighters.
- Tusker Charge (Triple, all Boarboys, Savage Maniaks and Maniak Weirdnob): At the end of the next move action allocate up to 6 damage to an engaged enemy fighter.
- Loadsa Arrows (Triple, all Arrowboys): Add up to +3 to the Attack characteristic of the next ranged attack.
- Ritual Dance (Triple, Wardokk): Heal D3 damage to all nearby friendly fighters (roll individually).
- Beast-mask Dance (Triple, Wurrgog Prophet): Reduce of 1 the number of Attacks of nearby enemy fighters.
- Rampaging Destroyer (Quad, Everyone): Add 1 to the Attacks and every time you take down a fighter perform a bonus Move action.
- Mighty Waaagh! (Quad, Savage Big Boss): Add 3″ to the Move characteristic of nearby friendly fighters (9″).
Reaction for the Bonesplitterz Warband
Introduced in the new season of Warcry, Reactions are things that can be done in certain circumstances, but always during the enemy turn. They cost one action, so they can be used only by fighters that have not activated yet or are waiting. There are 3 universal reactions and one specific to each warband:
Get Stuck In (Everyone)
- When: After an enemy finishes a move within 3″.
- What: A bonus move for another friendly fighter within 3″ that needs to end within 1″ of the enemy fighter.
Battle Trait for the Bonesplitterz Warband
The battle trait is an addition introduced in Briar and Bone which adds an extra optional rule that affects all characters with the same runemark, without using any ability dice. Each faction has its own but the Grand Alliance one can be used instead:
- Order – Courageous Defenders: When using Take Cover reaction the critical hit becomes normal hit on a 3+ instead of 4+.
- Chaos – Aspire to Glory: Once per battle round, add 1 to the first critical hit from a melee attack from a fighter whose cost is 125 points or less.
- Death- Deathless Minions: Once per battle round, a critical hit to a Minion from a shooting attack is counted as a normal hit instead.
- Destruction – Relentless Destroyers: During melee attacks the target cannot claim the +1 Toughness bonus from cover.
Primal Belief: During initiative roll but before determining initiative, any roll of 1 can be re-rolled.
Strategy and Tactics for Bonesplitterz
Bonesplitterz don’t have the toughest, most powerful or fastest models.
What they have is a good range of specialized slight above par models that can be combined to utilize their strengths to the fullest.
A lone orruk can kill a grot or ghoul, but will rarely hold their own against truly elite models.
What they excel at is group cohesion and versatility. They can be played in many different ways and are excellent at adapting to whatever comes up.
The most important thing is to build orruks in small groups, ensuring each of your 3 deployments is self-sufficient and working in cohesion – ideally with as many Bone Totems as possible.
Buffs and debuffs makes for interesting options, like a Wurrgog Prophet using Beast-mask Dance to reduce attacks of the toughest opponents, either Bone Totem increasing Toughness for a Double, or Waaagh! or Mighty Waaagh! adding Movement in a radius to get closer to your opponents at the right time.
And don’t forget for a Quad you can either use Rampaging Destroyer or Rampage depending on the situation to maximise your attacks.
Movement bonuses are definitely the main trait for the Bonesplitterz and their reaction, Get Stuck In, works on the same trend: if an enemy ends a move within 3″ of a reacting fighter, another friendly fighter in range can perform a bonus move and engaging the moving enemy. This is perfect to reduce the gap when you have screen units like Savage Orruks or Arrowboys in front of stronger elite units.
Pros and Cons of the Bonesplitterz in Warcry
Pros:
+ Adaptable and easy to play
+ Good selection of models
+ Interesting area effects for buffing and debuffing
+ Access to ranged attacks
Cons:
– Average powered models that don’t excel in any one area
– Losing your Bone Totems or Leaders can be utterly devastating
Some thematic Rangin’ Rukks warbands
Just for fun here we present few thematic warbands, meant more for fun or narrative context than for competitive play. Note that in narrative play you need to complete a quest that allows you to recruit a Hero before being able to add him to your roster.
Flying pigs: Maniak Weirdnob, 3 Savage Boarboy Maniak, Savage Boarboy Bone Totem Bearer. Oink oink.
All in one box (+1): Wurrgog Prophet, Savage Big Stabbas, 1 Morboy Bone Totem Bearer, 1 Savage Orruk Morboy, 3 Orruk with Chompa and Shield, 2 Arrowboys. Ok the Wurrgog is not in the same box, but using Beast-mask Dance is too resisting to use another leader.
Tips on painting and modelling Bonesplitterz

It’s worth mentioning that while Orruks are green there’s no written rule saying you can’t make them any color you want.
There are quite a number of impeccable LOTR inspired models making use of dark earthy skin tones or even pallid vampiric whites.
War paint also gives you a great opportunity to express your model’s individuality, while Duncan from GW has some excellent videos on the subject matter it may be worthwhile to look into making custom Waterslide Decals for very detailed designs that would be difficult to paint by hand.
Orruks give a great excuse to break the rules and frankly, there’s no reason to even make the warband a cohesive style.
Given the lore of disparate Orruks from hundreds of different tribes joining Bonesplitterz Tribes, you can easily paint each model as an individual with different skintones, warpaints etc. and maintain the lore of your warband.
Orruks don’t have any uniforms after all!
Do you have a badass Bonesplitterz warband?
Then I really want to display them here.
You can read more about how to make that happen here.
How to buy a Bonesplitterz Warband
Bonesplitterz have been officially retired by Games Workshop, so if you want to build one warband, you’ll need to kit bash from some Old World models or scour the second-hand market.

