Introduction
One of the best thing about skirmish tabletop games is that the small scale of the games (you play with a handful of models rather than a whole army) allows players the freedom to imagine a really detailed story for each of their warriors when they play the game. The best way of doing this is by playing a campaign, where you play a series of interconnected games with your friends, with consequences from one game carrying over to the next.
For Warhammer 40,000: Kill Team, the campaign system is called Spec Ops campaigns. These campaigns aren’t just a narrative frame for your games. They also come with a host of new systems and rules that make playing the actual games even more fun and rewarding, such as injuries, battle honours and rare equipment, so that the operatives of your kill team will end up as seasoned veterans with tons of personality at the end of a campaign.
The basics of playing a campaign are detailed in the game’s Core Book, but the rest of its rules are spread out across expansion books and rules for the individual kill teams, so in this article, we collect all of it into one handy guide, so you know exactly what you’re getting into before starting your first campaign. We’ll update this article every time a new Spec Ops publication is released, so check back regularly!

Affiliate Link Disclosure
Age of Miniatures is reader-supported. When you buy through links on our site, we may earn an affiliate commission. Learn more about that here.
Getting Started
Before we go into all the specifics of playing a Spec Ops campaign, there are a few things you need to make sure you have ready if you want to play a campaign:
- find a gaming group – this can be a group of your closest friends, or you can look up clubs and gaming stores in your area. Some gaming stores even host campaigns that you can just sign up for. Make sure everyone in your group agree on where and how often you’re going to meet, who’s bringing terrain and game boards, and maybe even who is responsible for keeping track of the campaign in a group chat or a newsletter.
- pick your faction (see below) and get them painted in time for the start of the campaign. Compromising on your plans for a paint job due to time restraints can be really motivating, and if you’re living a busy life (work, family, other interests and so on), there’s always a risk that the campaign won’t even take off because most of you couldn’t find time to prepare your teams.
- make sure you have combat gauges, barricades, dice and your rules prepared. It can be a really good idea to photocopy the pages you need for your faction, or even make a cheat sheet with your most important rules. Having a photocopy of your operative dataslates, or even small homemade cards for each operative can also be really handy for noting down wounds taken, different conditions and so on.
Picking a Kill Team
The first thing you have to do when committing to a Spec Ops campaign is to choose your faction, and a kill team available to that faction.
You can absolutely pick one of the factions in the Kill Team Compendium if you have a cool narrative idea for a squad of Custodes or a small swarm of Tyranids, but if you want the full narrative experience, we recommend you start with one of the factions that have gotten the full new edition treatment. This generally means kill teams that have rules in one of the expansion books for the game, but it can also be one of the teams that has had rules released in a White Dwarf Magazine. You can find them all in our “Products Released For Kill Team” article. Unlike the Compendium teams, these teams have their own bespoke Battle Honours, Rare Equipment, Strategic Assets, Requisitions and Spec Ops (you can read what all of those things are further below), so it will just feel much more thematic than having to twist and bend the generic versions of those from the Core Book to fit your narrative. They’re also great from a beginner’s perspective in the sense that you can go and buy one bespoke box of minis for them, and then you’re good to go (with the Phobos Marines’ option to include Primaris Reivers being the only exception).
Below is a micro-guide to what’s fun about the teams we recommend for the full Spec Ops experience.
Veteran Guardsmen
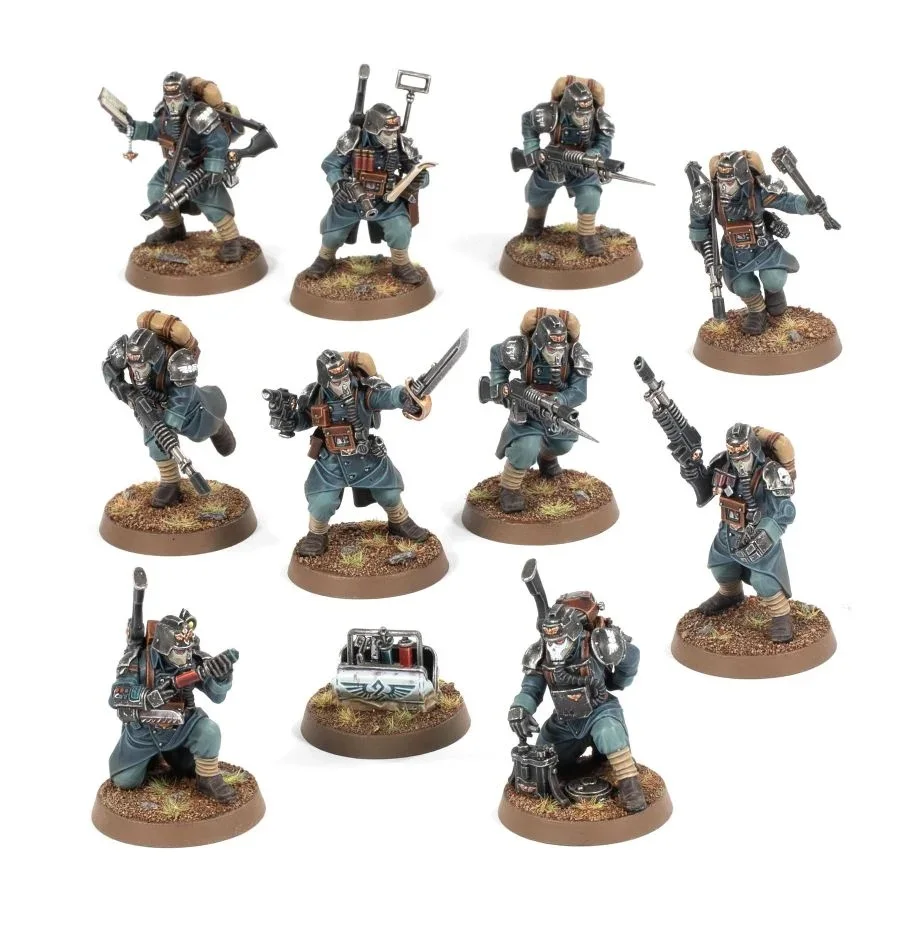
Veteran Guardsmen are ordinary humans of the Imperium of Man who have survived far longer in battle than the expected few hours of the average guardsman, and they’re now deployed as specialists in kill teams whereever they’re needed the most. If you like having an ordinary, everyman point of view in the middle of a campaign setting filled with alien monstrosities and supernatural horrors, look no further!
Their Battle Honour upgrades in Spec Ops campaigns reflect their veterancy and self-sacrificing nature as well as their trench-digging doctrines, so that one Battle Honour will give you better protection against enemy shooting, and another will let you have one final activation when you’re incapacitated (which is a Tactical Ploy they can already use), but for free and with a 2+ in both your Ballistic and Weapon Skill.
Their Rare Equipment also reflect their veteran status with several relics and an heirloom, as well as pieces of tech that make your Comms, Zealot and Medic Veterans much more useful.
The coolest among their Strategic Assets is probably Expanded Engineering Bay which lets your Demolition Veteran (and other operatives if you chose to Fortify in Scouting phase) place barbed wire on the battlefield to hinder the movement of operatives around key points on the battlefield.
Their Requisitions allow them to replace slain operatives with free Trooper operatives after a game (manpower is the only inexhaustible resource of the Astra Militarum, after all), replace a Trooper with a specialist of the same level, or even add to the Action Point Limit of an operative. All of these are great for giving your team the feel of a group of distinguished individuals drawn from the great sea of Humanity.
Finally, their faction-specific Spec Ops are Victory or Death, which tasks you with winning six games while rewarding you in all sorts of ways for getting injured and incapacitated in those games (this mission sounds like suicide, Sir!), and Grand Offensive, which is all about scoring your faction specific Tac Ops.
You can read our guide for playing the Veteran Guardsmen in general here.
Ork Kommandos

The Ork Kommandos may look like hulking brutes dressed up as 80’s action movie heroes, but they are actually really good at sneaking up on enemies as well as tearing them to shreds. They’re a really fun team to play, and if you’re in the mood for a more comedic approach to the story of your campaign, they’re also a great choice from a narrative perspective.
Their Battle Honour upgrades emphasize their chaotic and aggressive nature, making them better in close combat, letting them steal equipment for 1 less requisition point (from your own stash!) or become stronger when wounded with the wonderfully named Irritated Battle Honour.
Their Rare Equipment is both useful and thematic, with one equipment giving a Slugga pistol the Lethal 4+ rule so it scores critical hits on rolls of 4 or more, another giving the bearer a Fungal Brew that removes Battle Scars and protecting them from injuries. The coolest from a narrative perspective, however, is Klever Kap, which gives you a free Command Point, simply because your operative thinks they have a really cool hat – what could be more Orky than that?
Their Assets let them blow up terrain ( to turn Heavy terrain into Light terrain), place reroll-granting Glyph tokens on the battlefield, or let you use grenades twice instead of once, which is great considering the recent restrictions on how many grenades you can take in a kill team.
Their Requisitions are a bit more generic, but allow them to reroll Casualty/Recovery tests, gain extra Requisition points or extra XP.
Their Spec Ops Blitz and Rampant Destruction are both tied to completing a mix of Archetype-specific and faction-specific Tac Ops (which is a great way of really learning to play to your kill team’s strengths), and both of them reward you with extra loot in different ways, which is also pretty on brand for the Kommandos.
You can read our guide to playing the Ork Kommandos here.
Novitiates
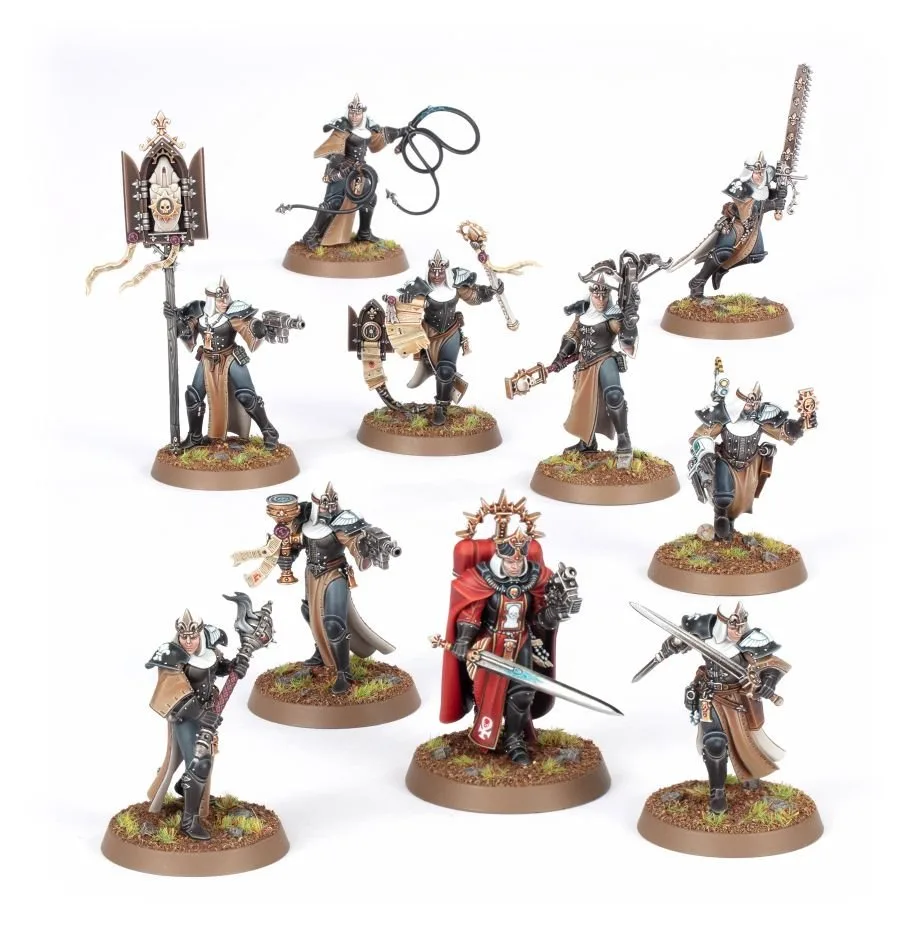
The Novitiate is a team of holy warriors aspiring to one day become Battle Sisters of the Adepta Sororitas, whose strengths lie in their unwavering faith and dedication to eradicating any trace of the unholy within the Imperium of Man. Narratively, they’re perfect for a campaign, since they have the twin goals of carrying out their mission and becoming worthy of donning the power armour of their Order.
Their Battle Honour upgrades embody the way battle experience help the Novitiates grow into the holy battle-saints they will one day become, as they grant them extra Faith points, allow them to Pray for Guidance or be blessed with a higher Action Point Limit when they are close to an objective marker.
As is appropriate for a monastic order, their Rare equipment mostly consists of blessed weapons and sacred artefacts such as the Saint-Touched Cloth, as well as the Inferno Rounds that turn an autogun or autopistol into a mini-flamer, which synergizes very well with the kill team’s flamer-based abilities.
Their Strategic Assets are also all about their combination of fiery destruction and a pious monastic lifestyle, with the option to find relics to display in the Sanctum at your base, a Sanitorium hospital and mortal wound-dealing Incendiary Bombs.
Their Requisitions lean into the darker side of the Novitiate’s traditions, as they let them gain experience points when their sisters die in battle or nominate a Novitiate as a potential saint, but also lets them punish an ineffective operative by turning them into a suicidal Penitent.
Their two Spec Ops highlight the devotion and destructiveness of the Novitiates: Purge the Unclean requires you to win six games whilst burning as many unclean foes as you can, while Reclamation Sweep sends you on a hunt for relics as you take back the Emperor’s lands from the xenos and the heretics.
You can read our guide to playing the Novitiate kill team here.
Pathfinders
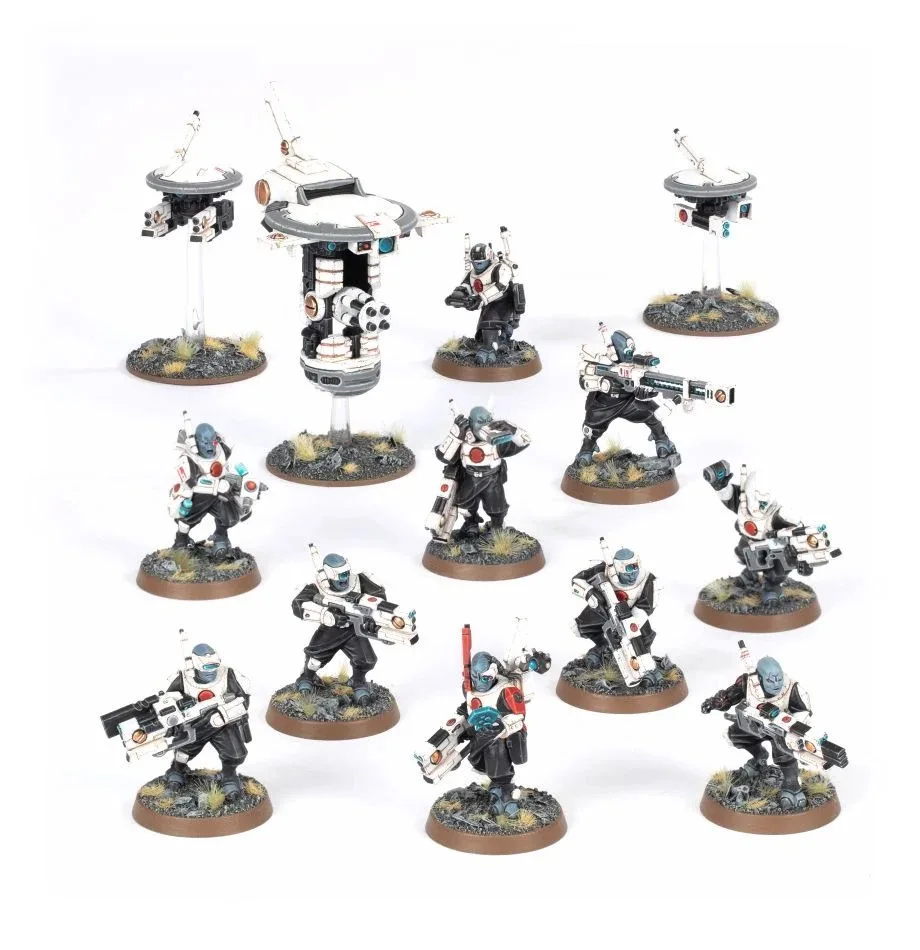
The Pathfinders are the specialist infantry of the T’au Empire, armed to the teeth with advanced ranged weaponry and supported by artificially intelligent drones. They’re the vanguard of the forces of the Greater Good, and in many ways the opposite of all the superstition and oppression in the galaxy (in their own opinion), so if you want to tell your story of a progressive, rational force in a sea of madness, they’re the perfect fit.
Their Battle Honours exemplify their training and military philosophy , improving their shooting, gaining them additional Markerlights for their targeting technology or making them better at avoiding sniper fire.
Their rare equipment consists mostly of technological upgrades such as Experimental Pulse Ammunition which makes Pulse weapons a lot better, or the Advanced Cogitation Chip that lets a drone perform Mission Actions and control objectives better just like a real person, but also the Honour Blade which turns the Bonding Knife of your leader into a proper badass sword.
Their Strategic Assets are all about technology as well, with Aerial Surveillance Drones giving you Markerlights and the iconic Tidewall Barricade that gives your operatives invulnerable 4+ saves when they’re behind one of your barricades.
Their Requisitions let you Repair Damaged Drones, grant extra XP to operatives with Battle Scars, and upgrade your Shas’ui Leader to a Shas’vre, which is an even more experienced Leader who can use one of your Art of War effects for an entire battle.
Their two Spec Ops, Mark for Strike and Philosophy of War are both about scoring specific Tac Ops across a series of games, but the first rewards a good chunk of XP to one operatives, whereas the latter lets you distribute that XP between all your operatives.
You can read our guide to playing the Pathfinder Kill Team here.
Legionaries

The Legionary Kill Team is an elite kill team of Space Marines, each on their own Path to Glory, hoping to gain the favour of the Chaos Gods. They’re very fun to play, and there’s great variety to be found in the way different operatives can take different Marks of Chaos to gain diverse bonuses. If you want to play an old school quest for the glory of the Dark Gods, they’re perfect for that.
Their Battle Honours all just empower your operatives and make them more fierce combatants with everything from free Tactical Ploys and better Saves to improved weapons. Servant of the Gods is especially great, allowing you to change a critical hit made against your operative into a normal hit once per action, which is huge against things with nasty critical hit rules such as meltaguns and sniper rifles.
Their Rare Equipment are of course various Chaos relics, with standouts being Icon of Chaos which prevents all your operatives from getting injured, and Brands of the Damned which grants even more free Tactical Ploys.
Their Strategic Assets are shrines, altars and relics dedicated to the Ruinous Powers, granting extra XP and rare equipment, as well as the ability to ignore the damage of one attack dice once per battle.
Among their Requisitions, one is especially cool as a narrative development for one of your operatives: Cast Aside, which lets one of your operatives avoid a roll for a Battle Scar by instead removing the ability granted to it by its Mark of Chaos, as its patron god turns its gaze away from the devoted warrior. Pure tragedy for a Chaos Space Marine.
Their two Spec Ops are quite different, as Send a Message is all about taking out an enemy Leader, and Tainted Journey concentrates on controlling the battlefield for the glory of the gods.
You can read our guide to playing the Legionary kill team here.
Voidscarred
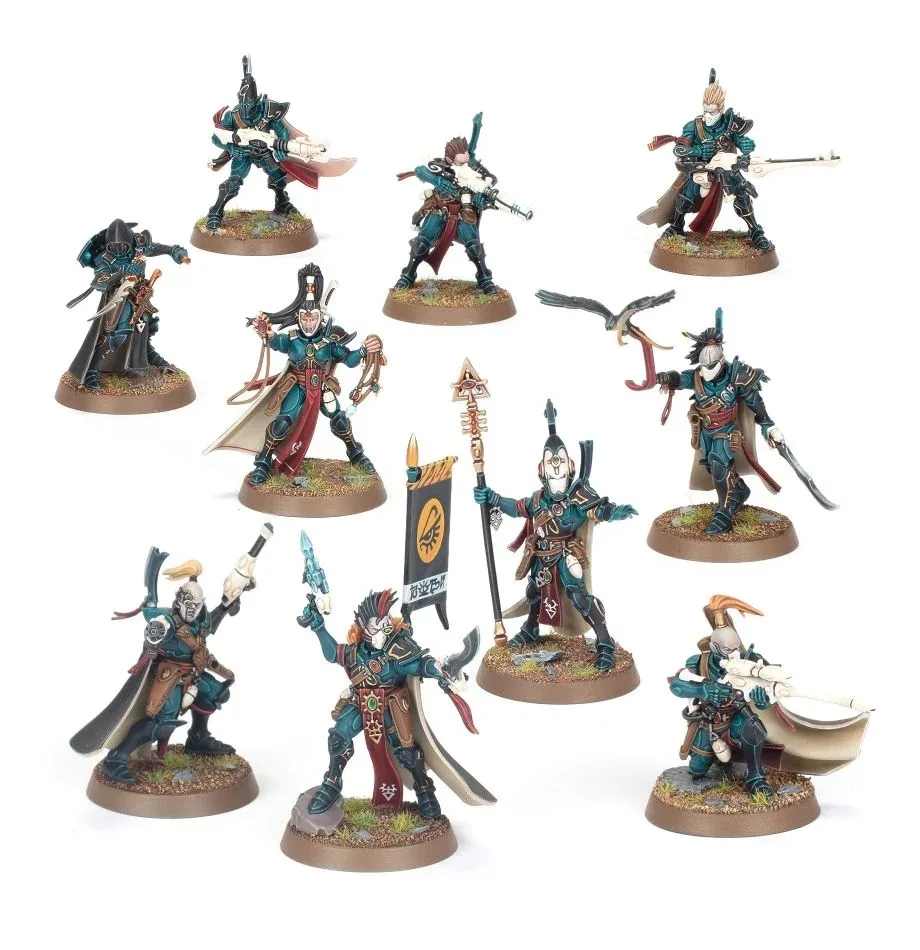
Like all Aeldari, the Voidscarred are ancient, expert practitioners of their craft – but unlike the noble Asuriyani, their craft is raiding and piracy. They come from all parts of Aeldari culture, but have converged around their leader in pursuit of plunder and a fate in which their own freedom and agency is the centre of their existence. If you want to craft a story of amazingly skilled space pirates that have come together from across all walks of life, you’re looking for this merry band.
Their Battle Honours exemplify the diversity of your vrew, with one benefitting snipers, another buffing close combat duellist, another making a Master of Concealment out of your operative, and so on, and like the one mentioned here, they’re nearly all named as gloriously arrogant titles your operative can assume (Pirate Lord, anyone?).
Their Rare Equipment improves weapons and buffs abilities in very useful ways, but the real highlight is Flip Belt, which simply and awesomely lets the bearer fly.
Their Strategic Assets are pretty perfect for imagining that your team has a cool pirate ship hovering in the sky above you, with a Hoard of Spoils giving you an extra Command Point, and Aerial Support letting you fire an are damage attack into the kill zone once per battle.
Among their Requisitions are Bounty, of course, but also Soul Memories which emulate your warband’s use of Aeldari spirit stones to commune with their dead kin, granting you XP based on the rank of a dead friendly operative from your campaign.
Their Path of the Reaver Spec Op is a pirate raid for plunder, while the Aggressive Raid Spec Op is more about gaining extra XP by playing the mission objectives better than your opponent, among other things.
You can read our guide to playing the Corsair Voidscarred kill team here.
Phobos Space Marines

The Phobos Space Marines are the specialist Vanguard of the Space Marines, clad in versatile Phobos Armour and carrying all sorts of high tech equipment helping them spread terror behind enemy lines. If you want to play a campaign that’s all about the “spec ops” Navy Seal-esque side of Spec Ops, they’re a great candidate for that.
Their Battle Honours are centered around what makes the Phobos team great: good mobility, ability to control the game in various ways, and using guerilla tactics to swoop in and out of combat. Ghost even lets an operative change it Order for free.
Their Rare Equipment is generally very good, but due to the way the team incorporates very different types of Phobos Marines, only two of them are available to all types of operatives, specifically the powerful Umbra Shroud that forces opponents to reroll their critical hits against you when they shoot (huge!) and Enhanced Optic which changes a ranged weapon to Ballistic Skill 2+.
One of their best Strategic Assets is Enhanced Surveillance System, which lets you reroll the dice you roll to determine who is Attacker and Defender in a game, which is a cool way of bringing the Phobos team’s board control playstyle into that phase of the game as well.
Their Requisitions are mostly about adaptability as well, with Adaptation in the Field allowing you to switch an operative for another on your dataslate, and Rapid Resupply letting you swap equipment for other kinds of equipment.
Their Tormentus Doctrine Spec Op tasks you with completing a wide array of Tac Ops across several games to gain XP you can distribute across your team as well as gaining some Requisition and Rare Equipment, while Scout and Sabotage gives you a different set of Tac Ops to complete to gain similar resources but also a larger pool of XP awarded to just one operative.
You can read our guide to playing the Phobos Strike Team kill team here.
Blooded Traitor Guard
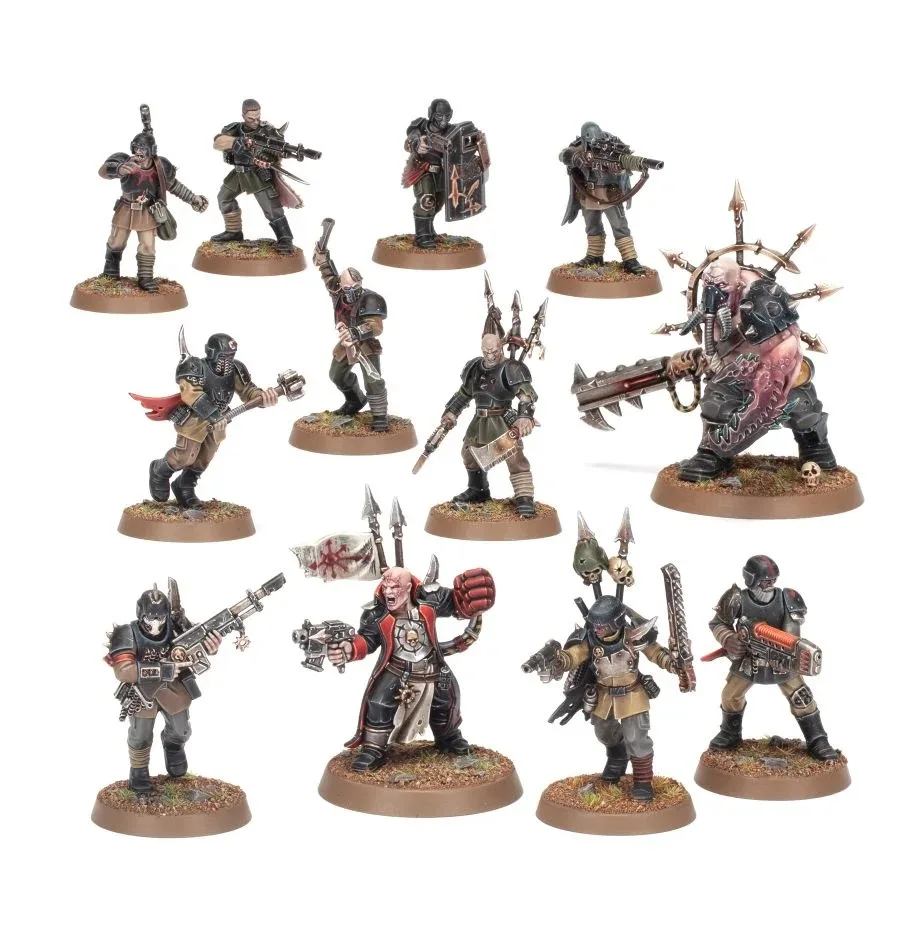
The Blooded Kill Team are Traitor Guardsmen who have defected from the Astra Militarum to lead a new life in the service of the Ruinous Powers. If ever there was a kill team fit for telling a story of a group having to start from scratch and make a name for themselves, it’s these guys. Their playstyle also suits narrative play well as they gain bonuses from performing glorious deeds within the battles themselves, not just in the sequences between them (and would you look at that Ogryn!?).
Their Battle Honours are very thematic, and two of them interact with the team’s Blooded token system. Another highlight is Ardent of the Trigger, which lets you reroll attack dice of one result (so 1s or 2s, for example) when shooting at nearby enemy operatives.
Their Rare Equipment represents how the favour of the Chaos Gods interacts with their Imperial equipment and training, such as Baleflame which makes their flamers far more dangerous, or Dark Orator which lets you pick any friendly target rather than nearby ones for the abilities and Unique Actions of your Commsman or Chieftain.
Their Strategic Assets are as you would expect from Chaos followers, with an Unholy Altar and Defiled Trophies, but there’s also Malign Influence which makes it more likely that an operative under the gaze of the gods comes out on top in a Casualty or Recovery test.
A narrative highlight of their Requisitions is Rival Aspirants which adds up to three Traitor Troopers to your dataslate, representing the prospects and newly arrived followers of your small squadron-turned-cult.
Their Spec Op Turncoats enact how your soldiers are former Imperial soldiers by letting you perform raids into your former territories for plunder, while the Draw the Gaze of the Gods grants a big pool of XP from completing Tac Ops.
Read our guide to playing the Blooded Kill Team here.
Filling out your Dataslate
When you have picked your faction and kill team, it’s time to fill out your Narrative Dataslate (page 86 in the Core Book). This is a chart used mostly for tracking all the various rewards and resources described in this guide, but it’s also the place where you write the name and history of your team, so it’s very much like a character sheet in a role-playing game.
You also have to fill out a Narrative Datacard for each of the operatives in your roster (page 144 in the Core Book).These also track the rewards and injuries of your operatives within the campaign, but note that they don’t contain the rules for your operative, so they’re an addition to your regular dataslate (unlike, say, the fighter cards in Necromunda).
Campaign Mechanics
This section gives you an overview of the additional systems, resources and mechanics that are in play in a Spec Ops campaign that you won’t recognize from having played ordinary matched play games.
Experience and Battle Honours
In campaign play, your operatives can gain experience, called XP, in various ways, ranging from incapacitating enemy operatives to completing mission actions and Tac Ops, but you can also gain amounts of XP from other resources in your campaign. This XP lets your operatives rise in rank (there are 5 ranks in total, gained at 0, 5, 15, 30, and 51 XP).
When you gain a rank, you can choose a specialism from which you gain a Battle Honour, which is a bonus to your operatives statistics or abilities.
You can choose between four specialisms, and you have to stick with one of them for subsequent gained ranks:
- Combat improves how you fight in close combat
- Staunch improves your survivability
- Marksman improves your shooting
- Scout improves your maneuverability
In addition to these, your kill team might also have access to faction-specific Battle Honours they can choose instead of a bonus from their specialism when they rank up.
You note your XP and specialism progression on your narrative datacards.
Casualties, Battle Scars and Recovery Tests
When an operative in a Spec Ops campaign is incapacitated in a battle, it has to roll for a Casualty test after the battle. If you roll a 2 or more, you pass the test, but there’s a limit to how much XP you can gain from the battle you just played for that operative. On a roll of 1, things are looking pretty bad, and you move on to rolling for a Battle Scar. Battle Scar rolls of 2-5 give you various debuffs such as being unable to perform Dash actions being treated as injured in one way or another, while a roll of 6 lets you avoid getting a debuff in return for not getting any XP from the battle just played. A roll of 1, however, kills off your operative so that it’s no longer in your roster, and for every Battle Scar you gain, you have to subtract 1 from your Battle Scar roll the next time you fail an Injury test. It sounds a bit complex, but it’s just two rolls for each incapacitated operative after each battle – it isn’t happening all the time.
After each battle, operatives with Battle Scars also roll for a Recovery Test, adding 1 to the roll for every battle they didn’t participate in (so giving a wounded soldier some time off can help getting them back into shape), and if they roll a 5 or more, they can remove a Battle Scar – so the debuffs aren’t neccessarily permanent.
These mechanics are really great for making each battle matter, and receiving a disadvantage for a few games can be just as narratively rewarding as gaining buffs and loot.
Base of Operations
Your Base of Operations is where you store everything between battles, but also a home base that can be expanded in various ways. Below are some of the additions you can gain for your base during a campaign.
Equipment and Rare Equipment
You can purchase the regular equipment available to your kill team and store it in your base via Requisitions (see below), so they aren’t just readily available to you like in other game modes.
Rare Equipment is an equipment type exclusive to campaign play, and they’re usually rewarded to you through the completion of Spec Ops. There are two tables of Rare Equipment in the Core Book – one for ranged and one for melee weapons – and they both improve weapons your operative is already equipped with. If your Kill Team has rules outside of the Compendium, such as in expansion books or White Dwarf Magazine, it also has its own list of Rare Equipment which is much more tailored to the playstyle of your kill team.
Note any kind of equipment you gain in the Stash section of your Narrative Dataslate.
Strategic Assets
Strategic Assets are expansions to your Base of Operations, such as hospitals, defenses or shrines that improve your capabilities in the campaign. They can be acquired through requisitions and by completing Spec Ops. The Core Book has 9 Assets for your to choose from, and if your kill team has Spec Ops rules (see above), they also have 3 faction-specific Strategic Assets you can requisition.
Note your Assets on you Narrative Dataslate as you acquire them.
Requisitions
Requisitions are rewards bought with Requisition Points that you gain through completing Missions and Spec Ops. Requisitions are completely essential to your campaign, since they generic versions of them in the Core Book are the main way for you to gain new operatives, equipment and Strategic Assets. If your kill team has Spec Ops rules, they also have a list of faction-specific Requisitions they can buy. Note that some Requisitions are upgrades to specific operatives, and that these must be noted on narrative datacards rather than your narrative dataslate.
Spec Ops
Spec Ops are larger quests that your Kill Team undertake as part of a campaign. They consist of two operations which have to be completed in sequence, with the first consisting of an objective you have to achieve across multiple games, such as “Complete five games where you score Victory Points from completing X, Y and Z Tac Ops”, and the second consisting of an objective you can achieve in a single game. When you fully complete a Spec Op, you gain a large amount of bonuses such as Requisition Points, Rare Equipment or XP. You can then take on another Spec Ops, and when you’ve completed two other Spec Ops, you can even choose the first one a second time.
There are 10 Spec Ops in the Core Book, and if your kill team has Spec Ops rules, it also has two faction-specific Spec Ops available.
One of the great things about Spec Ops is that the operations are specific to your kill team, so you can complete them playing against any player, even someone who is not part of your campaign. This makes it much easier to progress in your campaign without having to synchronize the schedules of too many individual players.
Playing a Narrative Game
Killzones
When setting up your battle, you need to pick a Killzone. If you’re playing a campaign based around one of the settings in the official expansions, you will have picked this already, but for variety’s sake it can be good to switch killzones as the campaign progresses. a Killzone determines which terrain you’re going to use. The following killzones are available:
- Octarius: This is a killzone of debris, ruins and Ork fortifications with plenty of different types of terrain, Vantage Points and even light terrain with special rules for how to scramble or charge over piles of rubble.
- Chalnath: This killzone consists of tall Imperial ruins with doors and hatches to move through, as well as a special Punishing Vantage Point that grants you snipers even more bonuses than a regular one. It’s full of Line of Sight-blocking terrain, which is great for making games with shooting-based teams more fun.
- Nachmund: This is a killzone of industrial Sector Mechanicus terrain of generators, pipes and machinery, with several special rules. It has a good variety of Light Terrain with a few really tall structures for contrast, which is something that both looks and plays really well.
- Moroch: The Moroch killzone is notable for its two very large blocks of Vantage Point terrain (and a tiny one), as well as the towering Auspex Shrine which serves as an objective in some of the missions in the Moroch book.
Missions
A mission is a battlefield setup and a set of objectives that determine how you win a specific battle within your campaign. A mission always consists of Mission Rules, which are special conditions or abilities that take effect during that battle, a Mission Objective that determines how you score Victory Points in the mission, and a map of how you set up drop zones and objectives for the game. Usually, mission do not determine how you set up terrain for the battle.
There are 10 missions in the Core Book, and each expansion book also contains an additional 9 missions. The expansion missions also contain special bonuses for completing Tac Ops and Spec Ops as part of the mission.
Setup
Then, the Setup of the game proceeds much like the mission sequence of a regular game, but with the added phase of updating your Narrative Dataslate with the results of the game. See our game guide for details on the mission sequence here.
Story Background – a Guide to the lore of the Killzones
Octarius
The Octarius Killzone takes place within the apocalyptic Octarius war, specifically in or around the Ork Empire in the sector. In this sector, the Imperial Inquisitor Kryptman razed scores of Imperial Worlds to deny the Tyranid Hive Fleet Leviathan biomass to feed on, and then he captured a pack of Tyranid Genestealers and plunged them into the Octarius Ork worlds in the hope of the two xenos armies eradicating each other. This insane plan cost untold millions of human lives, and Kryptman was excommunicated for his crimes against the Imperium, even though he might have saved even more lives by carrying it out. Now, the Orks and Tyranids are locked in savage battle across worlds, while the Imperial worlds still standing are preparing for whoever comes out on top to emerge from the carnage and spill out into the rest of the sector.
Octarius is a great background for Orks, Tyranids and Imperial forces, and everyone else trying to carry out secret missions under the fog of war.
Chalnath
Killzone Chalnath takes place in the Vedik system in the Imperium Nihilus, ie. the part of the human-controlled galaxy that has been cut off from any connection to the Sol system and the Emperor’s light when the Great Rift opened and unleashed the horrors of the Warp on the galaxy.
Since the system is cut off from the rest of the Imperium, it’s suffering horribly from supply problems and is immensely vulnerable to uprisings from within as well as invasion from the outside. The T’au Empire in particular, with their message of prosperity and the Greater Good, is expanding their influence in the system, with many humans sympathetic to their cause. At the same time, Chaos worshippers and Genestealer Cults are rising up to overthrow their masters, but in the midst of all this, a fleet of Adepta Sororitas forces have shown up by chance due to a twist in the Warp during their travels, and they have sworn to bring the system back into the Imperial fold.
Chalnath is the perfect background for T’au and Imperial forces, of course, but also for anything with an axe to grind with the Imperium, such as Heretic Astartes and Genestealer Cults. It’s a setting mostly based on recent developments in the grand narrative of current Warhammer 40,000 lore, so if you’re following that, it’s a perfect setting for your campaign.
Nachmund
Killzone Nachmund takes place in the Nachmund Gauntlet, a narrow (by galactic standards) passageway through the Great Rift that has torn the galaxy in two. It’s one of the only lifelines between the Segmentum Solar and the Imperium Nihilus, so it’s essential to the survival of Mankind, but at the same time, it’s narrow and vulnerable enough to be the perfect spot for raiders and pirates of all sorts. Chaos forces abound, of course, due to the proximity to the Great Rift, but Aeldari Corsairs, Kroot and other opportunists also prey upon the vast amount of ships passing through the Gauntlet. The Vigilus System on the Nihilus side of the Gauntlet is the main foothold of Mankind in that end of the galaxy, and as such it is also a battlefield for all kinds of factions.
If you want to play in one of the most contested zones of the galaxy, or run a campaign that takes place on ships and along trade routes being raided by smaller factions such as Corsairs or Kroot, Nachmund is perfect for that.
Moroch
Killzone Moroch takes place in much the same area of the Galaxy as Killzone Nachmund, but its specific location on Moroch is a lot different than the pirate-stricken Nachmund Gauntlet. Moroch used to be a bountiful Imperial world, but during the long night of Chaos incursions after the appearance of the Great Rift, it was devastated by the terrifying Night Lords Chaos Space Marines among many other horrors. It got so bad that, when the Noctis Aeterna era passed, the Imperium designated the planet for recolonisation rather than simple rescue. It is now an overgrown frontier world where Imperial settlers try to gain a foothold among jungles full of Chaos cults, and even though the settlers gained a foothold as time went by, troubles have now returned in the form of a large scale Chaos rebellion among the garrisons who were supposed to protect them.
If you want to play a frontier campaign of settlers and border conflicts set in the deep wilderness, Killzone Moroch and its Imperial outpost terrain is great for it.
How Do You Win a Spec Ops Campaign?
If you’ve gotten this far in this guide, you probably have the same burning question I had when learning how to play campaigns in Kill Team: How do you win?
The short answer is: you don’t, really. Like other recent campaign systems for Games Workshop games, the Spec Ops campaign system is designed so it can be the framework of your personal Kill Team story, rather than part of a larger campaign with other people. This makes finding opponents a lot easier, but if you’re playing a regular campaign with friends, it might be a good idea to make some house rules for when your campaign ends.
The easiest way to do this is to set a specific amount of Spec Ops each player has to complete, and then whoever gets there first, wins.
If you’re up for making a bit more of a homebrew campaign, you can also arrange for some pivotal games to be played at certain dates that are independent of the Spec Ops you’re trying to complete, and then have the outcomes of those games determine how the story of your campaign progresses. While the Spec Ops campaign system is really elegant and flexible, a campaign with friends or members of a game club just becomes that much more rewarding if there’s an overarching narrative that your games can influence. Discuss with your gaming group how you want to do this, and enjoy that the Kill Team rules impose no restrictions on how to do this!

